The Ultimate Bakery-Size Orange Scone Cookies
There’s something utterly enchanting about baking that transcends mere nourishment; it’s a soulful experience, a heartfelt embrace wrapped in the tantalizing aroma of freshly baked goods. As I stand in my kitchen, measuring flour and zesting an orange for my Ultimate Bakery-Size Orange Scone Cookies, I am reminded of the joy these delightful treats bring to those who share them. The scent of citrus mingling with sweet sugar creates a symphony of flavors that dances through the air, invoking memories of family gatherings and cozy afternoons spent with loved ones. This recipe is not just about cookies; it’s about creating moments, sharing warmth, and indulging in the simple pleasure of home-baked goodness.
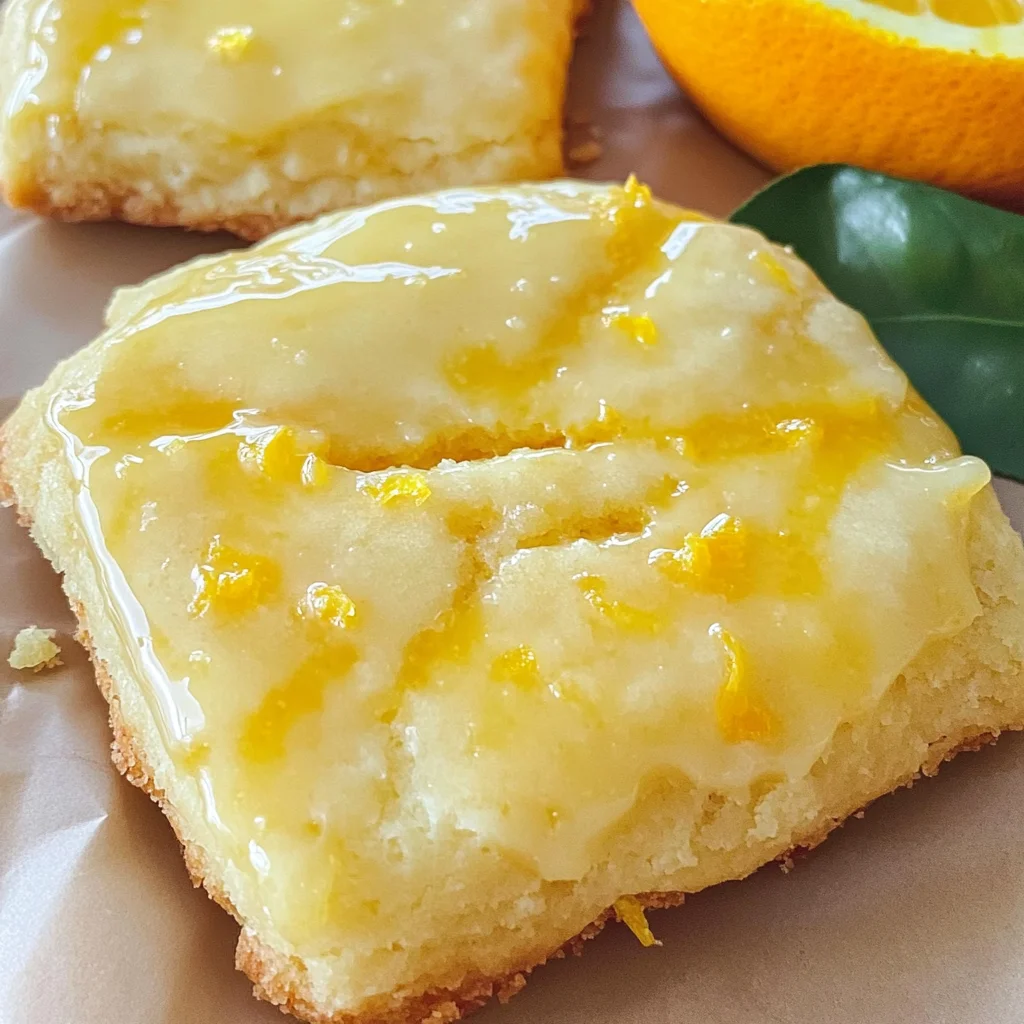
Every bite of these scone cookies offers a taste of sunshine, with their buttery texture complemented by the vibrant essence of orange. They manage to strike that perfect balance between soft and crumbly—ideal for dunking in tea or simply enjoying on their own. What makes this recipe stand out is its versatility; whether it’s a casual weekend brunch or a festive holiday gathering, these cookies are always a crowd-pleaser. So grab your apron and let’s embark on this delicious journey together!
The Ultimate Bakery-Size Orange Scone Cookies: A Citrus Dream Come True
Welcome to the world of baking where every cookie tells a story! These Ultimate Bakery-Size Orange Scone Cookies are not just any ordinary treat; they are fluffy morsels that transport you to a sun-drenched orchard with every bite. Bursting with bright citrus notes and enveloped in a creamy glaze, these cookies are sure to become your new go-to for any occasion.

Ingredients:
As we dive into our baking adventure, let’s take a moment to appreciate each ingredient that plays a pivotal role in crafting our delectable cookies. Each component contributes its unique character, ensuring our Ultimate Bakery-Size Orange Scone Cookies are as extraordinary as they are comforting.
- ½ cup vegetable shortening. This ingredient serves as our secret weapon for achieving that tender texture we all crave in baked goods. It helps create a lighter cookie while providing moisture without overpowering flavors. If you’re looking for alternatives, you can use coconut oil or even more unsalted butter; just remember that each substitution will slightly alter the final result!
- ½ cup unsalted butter, softened. Butter is the heart of any cookie recipe! Its rich flavor and creamy consistency help create that melt-in-your-mouth quality we adore. Make sure it’s at room temperature—this step is crucial as cold butter won’t cream properly with sugar, leading to denser cookies than intended.
- 3 ounces cream cheese, softened. Here’s where things get interesting! Cream cheese adds an incredible depth of flavor while enhancing the moistness of our cookies. It also contributes to that delightful chewiness that keeps folks coming back for seconds (or thirds!). Ensure it’s softened so it blends seamlessly into our batter.
- 2 cups granulated sugar. Sugar does more than just sweeten our cookies—it plays an integral role in creating structure and promoting browning during baking. I love using granulated sugar here because it dissolves beautifully into the batter, ensuring even sweetness throughout.
- Zest from one large orange. Zest is like nature’s confetti; it infuses our dough with vibrant citrus aroma and flavor without adding moisture! Always use fresh zest for the best impact—just be sure to avoid grating down to the bitter white pith beneath.
- 2 large eggs. Eggs act as binders and leaveners in our cookie dough, helping everything come together beautifully while adding richness to each bite. When using eggs in baking, always opt for room temperature; this helps with emulsification which leads to a smoother batter.
- 1 tablespoon vanilla extract or vanilla paste (I used vanilla paste). Vanilla extract brings warmth and depth to our cookies—a non-negotiable addition! Vanilla paste elevates this by adding flecks of real vanilla bean, making every bite visually appealing as well as delicious.
- 2 teaspoons orange extract. For those moments when you want an extra punch of citrus goodness, orange extract steps up beautifully! It enhances the natural flavors without overpowering them—just remember that a little goes a long way!
- 3 ½ cups all-purpose flour. Flour is foundational in baking; it provides structure and stability to our cookies while allowing them to rise perfectly during baking time. Be sure not to scoop directly from the bag—spoon it into your measuring cup instead for accuracy!
- ½ teaspoon salt. Salt may seem small but trust me: it’s absolutely paramount! It balances sweetness and enhances all other flavors present within your cookies.
- 1 ½ teaspoons baking powder. This leavening agent works wonders by creating bubbles during mixing and baking which help give these scone cookies their characteristic lift and lightness.
- 2 cups powdered sugar. Powdered sugar is essential for making our decadent glaze—a silky finish that adds sweetness without being cloying! Also known as confectioner’s sugar, it dissolves easily which makes for effortless blending into any glaze or frosting.
- 4 tablespoons orange juice. Freshly squeezed orange juice ties everything together harmoniously—it adds both moisture and brightness which enhances the overall flavor profile dramatically!
- 1 teaspoon orange extract (again!). You’ll notice I love layering flavors! This second addition reinforces those bright notes we cherish so much while keeping everything balanced.
- Orange zest from one large orange (again!). Let’s not forget—we’re zesting twice because more citrus equals more joy!
Equipment You’ll Need:
Before we start mixing up magic in the kitchen, let’s gather our trusty tools! Having the right equipment on hand not only makes your culinary journey smoother but also ensures you can focus solely on what really matters—the joy of baking!
- Mixing bowls (various sizes) – A good set will accommodate everything from combining dry ingredients to creaming butter and sugars together without spilling over! Look for sturdy materials like glass or stainless steel for durability—they’ll last you many batches ahead.
- Electric mixer (stand or hand) – While you can absolutely mix by hand if you’re feeling adventurous (and have some arm strength!), an electric mixer saves time and delivers consistent results—especially important when creaming butter with sugar until light and fluffy!
- Parchment paper – This simple tool is invaluable when lining cookie sheets because it prevents sticking while ensuring even cooking across all your treats! Plus cleanup becomes a breeze since nothing sticks!
- Cookie scoop (or ice cream scoop) – Using one allows you to portion out uniform balls effortlessly—resulting in evenly baked cookies every time! Aim for about 2 ounces per scoop so they maintain their bakery-size glory.
Now that we’ve gathered all necessary ingredients along with trusty tools at hand let’s dive into creating these remarkable scone cookies!
Preparing the The Ultimate Bakery-Size Orange Scone Cookies
Step 1: Setting Up Your Space
Before anything else happens in this magical process of creation—which is truly what baking feels like—let’s prepare ourselves by preheating our oven to 350°F while also lining two cookie sheets with parchment paper (trust me; this part will save you hassle later). The warm-up period allows us enough time for dough preparation before entering those delightful treats into their hot home where they’ll start rising beautifully!
Step 2: Creaming Together Our Base
In a large mixing bowl (the kind where dreams come true!), add together your vegetable shortening along with softened unsalted butter alongside cream cheese—a trio meant for greatness! Together they form an incredibly creamy base once beaten at medium speed until lightened significantly in color & texture—that airy fluffiness signifies success here so take note!
This process known as creaming incorporates air into fats giving life & lift during baking—it’s quite literally what transforms basic mixtures into airy delights worthy enough of sharing amongst friends & family alike! Don’t rush this step; allow ample time (about five minutes) ensuring proper incorporation—if overlooked it could lead us down paths toward dense & sad outcomes instead…no one wants dry scones now do they?
Step 3: Sweetening Things Up
Once you’ve achieved that perfect airy texture from Step One add granulated sugar next—this guarantees sweetness throughout whilst continuing along those lovely lines created earlier during creaming phase! Beat briefly till fully mixed again before introducing those two beautiful large eggs one at a time after first cracking them open separately just-in-case something unexpected slips through…we’ve all been there right? Mixing again until well incorporated works wonders here too ensuring smooth consistency throughout.
Step 4: Zestful Whisking
Now comes my favorite part—the zesting extravaganza! Grab your freshly zested orange showcasing its glistening peel atop table ready-to-go alongside fragrant extracts begging attention too…combine them right now within bowl mixture stirring gently using wooden spoon thus releasing aromatic oils mingling amongst sweet batter surrounding us like sunshine itself warming hearts everywhere nearby—it feels divine doesn’t it?
Afterwards turn focus towards another bowl whisking dry ingredients such as flour combined with salt & baking powder together thoroughly; this avoids lumps later being introduced ruining textures we’ve worked hard so far achieving…keep whisking till blended entirely before folding carefully back into wet mixture slowly letting them unite harmoniously over next few minutes unfolding glorious textures emerging from depths below—it bears repeating don’t rush through anything here either please folks!!
With patience comes perfection…Trust me when I say once combined you’ll be rewarded handsomely upon tasting final creations later down line…and remember: quality always triumphs over speed when crafting beautiful indulgent pastries like these Ultimate Bakery Size Orange Scone Cookies!!
Step 5: Dividing the Dough for Perfection
After your dough is well combined and has reached a lovely, smooth consistency, it’s time to divide it into equal portions. This step is crucial because uniformity in size ensures that all your cookies bake evenly, which is absolutely paramount for achieving that perfect golden-brown exterior and tender interior. I recommend using a kitchen scale if you have one; it can make this process so much simpler and more precise. Each ball should weigh about 3.6 ounces, so you’ll end up with 14 delightful cookie balls. If you don’t have a scale handy, just eyeball it—trust me, they’ll still taste amazing!
Once you’ve portioned out your dough, gently roll each piece into a ball between your palms. This simple action helps to create a smooth surface that will bake beautifully. As you roll the dough, take a moment to appreciate its texture—the slight stickiness from the cream cheese and shortening makes it incredibly satisfying to work with. After forming the balls, place them on your prepared cookie sheets with enough space in between to allow for spreading during baking; about two inches apart should do the trick. You want these magnificent cookies to have room to breathe and expand without merging into one another.
Step 6: The Art of Chilling
Now comes one of the most critical steps in making The Ultimate Bakery-Size Orange Scone Cookies—the chilling phase! After your dough balls are arranged on the cookie sheets, they need to spend a minimum of 2½ hours in the refrigerator. Why chill? Well, this step serves multiple purposes that are essential for achieving the perfect cookie texture and flavor profile. First and foremost, cooling the dough helps solidify the fats (like your shortening and butter), which means when they hit that hot oven later on, they’ll melt at just the right pace. This results in cookies that are crispy on the outside yet soft and chewy on the inside—an absolute dream!
Additionally, chilling enhances the flavors while allowing time for the gluten in the flour to relax. By doing so, you prevent overly tough cookies that could arise from overworking the dough or baking too quickly without adequate rest time. If you’re pressed for time or just too excited to bake them right away (I totally get it!), aim for at least an hour of chilling—but I promise you won’t regret giving them those full 2½ hours! Your patience will reward you with cookies that boast vibrant orange notes alongside a lovely buttery richness.
Step 7: Prepping for Baking Bliss
Once your waiting game is over and you’ve allowed those deliciously chilled cookie dough balls to rest in their cool haven, it’s time to preheat your oven to a cozy 350°F (175°C). Now here’s where things get fun—and let me tell you why this step is essential: an adequately preheated oven ensures even baking right from the start. If you throw those beauties into an oven that isn’t hot enough yet, they might spread too much before setting up properly, resulting in cookies that lose their enchanting shape and texture. So trust me on this; patience pays off!
When your oven reaches temperature, carefully place one tray at a time in that warm embrace of heat for about 14 minutes initially. Since I baked these cookies in a convection oven—which circulates hot air for even cooking—you might find yourself needing to adjust baking times if you’re using a traditional electric or gas oven; keep an eye out after around 11 minutes as every oven can be slightly different! As they begin to bake, you’ll notice their edges turning golden brown while their centers look soft but not shiny—this is exactly what we want!
But don’t stop there—using the back of a wide wooden spoon (or any spatula on hand), gently press down on each cookie while they’re still warm but not overly soft. This step creates a flatter surface which is ideal for holding onto that luscious glaze we’ll be adding later while also ensuring an even bake throughout.
Step 8: Cooling Down Before Glazing
Once those beautiful cookies have completed their first round of baking (and been lovingly pressed down), it’s time for them to cool down completely before moving on to our next thrilling step—the glaze! Carefully slide your parchment paper with cookies directly onto your counter; letting them cool fully here allows air circulation underneath so they won’t steam themselves soggy—a fate no cookie deserves!
As they cool down—this typically takes about 10-15 minutes—you might notice how lovely they smell wafting through your kitchen like rays of sunshine; it’s truly intoxicating! In this moment of contemplation, take pride in what you’ve created thus far—the vibrant orange color peeking through those golden edges is already promising something profoundly satisfying ahead.
While cooling might seem like just waiting around, it’s actually vital because glazing warm cookies can lead to drippy disasters instead of those perfectly coated masterpieces we envision! After they’ve cooled completely (which means no residual warmth when touched), transfer them onto wire racks set over wax or parchment paper beneath. This little setup catches any drips from our upcoming orange glaze—think of it as setting up an art studio where each cookie will soon become its own masterpiece!
Final Touches: Glazing Your Cookies
Now we arrive at one of my favorite moments—the glorious glazing process! In a medium bowl, combine powdered sugar with freshly squeezed orange juice (the zest adds another layer of flavor) along with extra orange extract and some more zest—it’s pure magic when mixed together! Whisk until everything melds into a delightfully smooth consistency reminiscent of liquid gold; this glaze will coat each cookie beautifully while infusing them with even more citrusy goodness.
The key here is patience once again—don’t rush as you dip each cooled scone cookie into this sweet elixir; let it sit briefly before placing back onto the wire rack for any excess glaze to drip off effortlessly below. It’s crucial not only for aesthetics but also prevents overly soggy bottoms which none of us want! As you watch each cookie transform under its shiny coat, take heart knowing you’re creating something truly extraordinary.
And there you have it—the final flourish that brings The Ultimate Bakery-Size Orange Scone Cookies together! Allow these glazed beauties some time again—maybe another hour—to set before serving up these treats full of love and flavor at gatherings or simply enjoying them yourself with coffee or tea as an afternoon indulgence.
I promise you’ll find yourself reaching for seconds…and thirds…because once you’ve tasted these scones turned cookies bursting with bright citrus notes alongside creamy richness from cream cheese—you may never look at ordinary cookies quite the same way again!
Storage and Enjoyment Tips for Your The Ultimate Bakery-Size Orange Scone Cookies
Now that you’ve crafted these delightful orange scone cookies, it’s time to revel in the joy of enjoying them! With their golden edges and soft, melt-in-your-mouth centers, these treats are bound to become a favorite in your kitchen. I can already imagine the aroma wafting through your home, tantalizing everyone around. But what about those moments when you have a few left after indulging? Let’s talk preservation so you can savor every last crumb.
Storing Leftover The Ultimate Bakery-Size Orange Scone Cookies
To keep your The Ultimate Bakery-Size Orange Scone Cookies fresh and delicious, store them in an airtight container at room temperature. This method will help maintain their soft texture for up to five days. If you want to go the extra mile for freshness, consider placing a slice of bread in the container with them; this clever trick helps retain moisture and keeps the cookies from drying out. Trust me, they’ll still taste heavenly even after a few days! When you’re ready to enjoy one again, simply take it out and let it sit for a moment—perhaps with a warm cup of tea or coffee beside it—allowing that sweet aroma to fill the air once more.
Freezing The Ultimate Bakery-Size Orange Scone Cookies for Later
If you find yourself with an abundance of these irresistible cookies (or if you want to prepare ahead), freezing is a fantastic option! To freeze properly, simply place the cooled cookies on a baking sheet in a single layer and pop them into the freezer until they’re solid—about an hour should do it. Once frozen, transfer them to a freezer-safe bag or container, where they’ll keep well for up to three months. When you’re ready for a treat, just take out as many as you’d like and let them thaw at room temperature or gently warm them in the oven for that freshly-baked experience. This method not only saves time but also gives you that little taste of sunshine whenever you need it!
So there you have it—whether enjoyed fresh from the oven or perfectly preserved for later, these The Ultimate Bakery-Size Orange Scone Cookies are sure to brighten your day!
The Ultimate Bakery-Size Orange Scone Cookies

There’s something magical about baking that brings warmth and joy to our lives, especially when it involves the delightful aroma of The Ultimate Bakery-Size Orange Scone Cookies. These fluffy, vibrant treats are a perfect blend of zesty orange flavors and creamy goodness, making them ideal for any occasion. Whether you enjoy them with a hot cup of tea or at festive gatherings, each bite promises a burst of sunshine that brightens your day. With their soft yet crumbly texture, these cookies strike the right balance between indulgence and comfort.
- Prep Time: 30 minutes
- Cook Time: 14 minutes
- Total Time: 44 minutes
- Yield: Approximately 14 servings 1x
- Category: Dessert
- Method: Baking
- Cuisine: Baked Goods
Ingredients
- ½ cup vegetable shortening
- ½ cup unsalted butter
- 3 ounces cream cheese
- 2 cups granulated sugar
- Zest from one large orange
- 2 large eggs
- 3 ½ cups all-purpose flour
- 1 ½ teaspoons baking powder
- 4 tablespoons orange juice
- 2 cups powdered sugar (for glaze)
Instructions
- Preheat your oven to 350°F (175°C) and line two cookie sheets with parchment paper.
- In a large mixing bowl, cream together vegetable shortening, unsalted butter, and cream cheese until light and fluffy.
- Add granulated sugar and mix well, then incorporate eggs one at a time.
- Stir in orange zest, orange juice, vanilla extract, and orange extract until well blended.
- In another bowl, whisk together flour, salt, and baking powder; gradually fold into the wet mixture until combined.
- Divide dough into equal portions (about 3.6 ounces each) and roll into balls; place on prepared sheets.
- Chill the dough balls in the refrigerator for at least 2½ hours before baking.
- Bake for about 14 minutes or until golden edges form; press down gently on warm cookies for even shape.
- Allow cookies to cool completely before glazing with a mixture of powdered sugar and additional orange juice.
Nutrition
- Serving Size: 1 cookie (50g)
- Calories: 210
- Sugar: 15g
- Sodium: 130mg
- Fat: 9g
- Saturated Fat: 4g
- Unsaturated Fat: 4g
- Trans Fat: 0g
- Carbohydrates: 31g
- Fiber: 1g
- Protein: 2g
- Cholesterol: 20mg