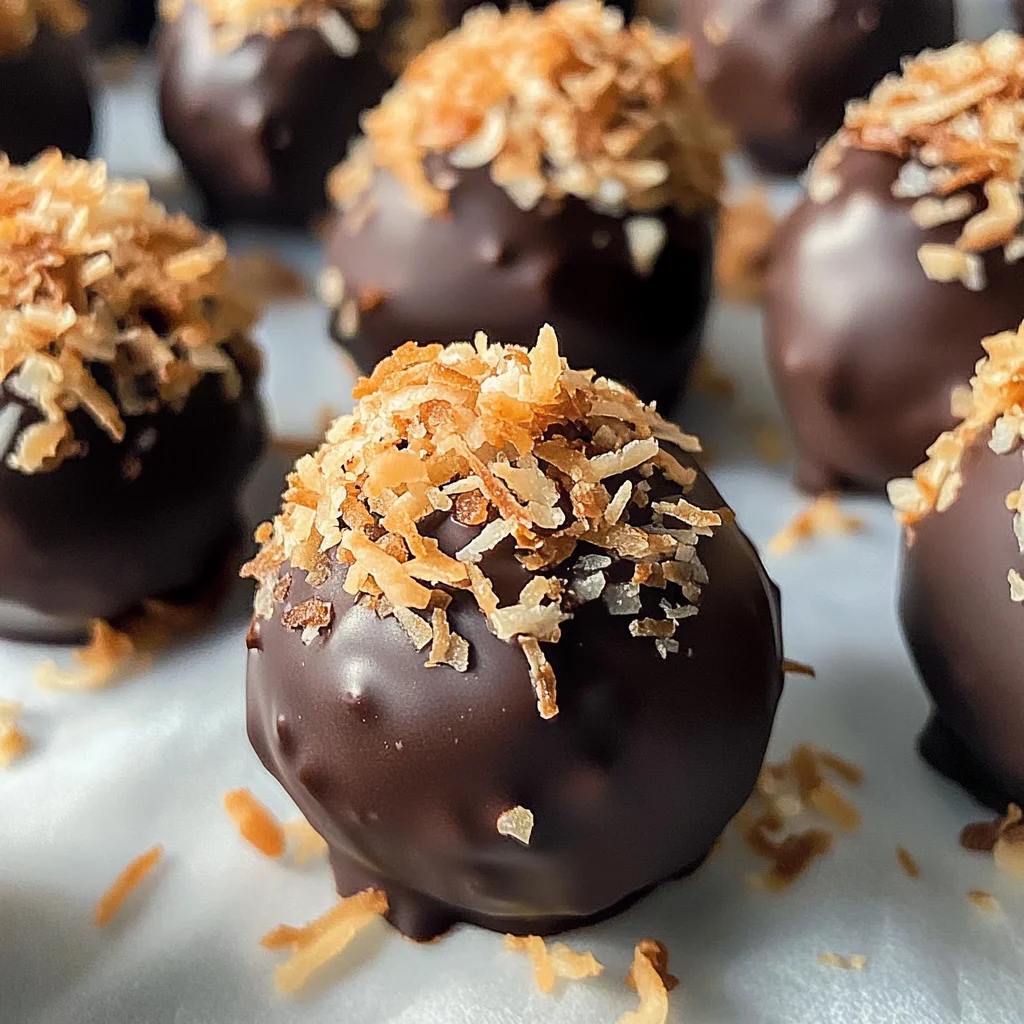
Samoa Truffles
There’s something undeniably enchanting about the way certain recipes can evoke memories and emotions, isn’t there? As I sit down to share my beloved Samoa Truffles with you, I can’t help but recall the joy of childhood, when warm cookies would emerge from the oven, filling the air with sweet, intoxicating aromas. These little bites are not just a treat; they are a heartfelt nod to those cherished moments, a brilliant fusion of nostalgia and health. With every scrumptious morsel, you’re reminded that indulgence doesn’t have to come at the cost of well-being. Trust me when I say that you’re in for an extraordinary experience with these Samoa Truffles—each one is a delightful reminder that we can enjoy our favorites without compromising on health.
You may wonder what makes these truffles so special. Well, let me tell you—they capture all the lush flavors of the classic Girl Scout cookie we adore while being refined sugar-free, gluten-free, and paleo-friendly! The combination of Medjool dates and unsweetened coconut comes together in a symphony of flavors that’s rich yet wholesome. So whether you’re preparing for a cozy night in or looking for a delightful snack to share at gatherings, these truffles are adaptable enough for any occasion. They embody comfort food redefined; a sweet escape that feels indulgent yet nourishing.
Samoa Truffles: A Healthy Bite of Nostalgia
I’m thrilled to guide you through making these delectable Samoa Truffles. Each step is infused with love and care, ensuring that you not only create something delicious but also experience the joy of cooking! So gather your ingredients and let’s embark on this culinary adventure together!
Ingredients:
Embarking on this journey means gathering some truly wonderful ingredients that will work harmoniously to create these delightful truffles. Let’s dive into each component because understanding their importance will elevate your cooking experience!
- 1 cup Medjool dates. These luscious fruits are more than just nature’s candy; they provide natural sweetness along with a chewy texture that binds our truffles beautifully. When selecting Medjool dates, look for ones that are plump and soft—this ensures maximum flavor and moisture in your truffles. If you’re in a pinch or can’t find Medjool dates, you could substitute them with another variety like Deglet Noor, though they may be less sweet.
- 1 cup unsweetened coconut. This ingredient brings both texture and flavor to our truffles, contributing that signature coconut taste reminiscent of tropical bliss. Opting for unsweetened coconut is essential as it allows us to control the sugar content while still enjoying the natural richness of coconut. Toasting it before mixing adds an extra layer of depth; it transforms into golden strands infused with nutty aromas that will tantalize your senses.
- 1 cup nut flour (of choice). Nut flour adds not only structure but also healthy fats and protein to our treats. You could use almond flour for its subtle sweetness or hazelnut flour for an earthy twist—the choice is yours! When purchasing nut flour, make sure it’s finely ground as this ensures even blending into our mixture without any graininess.
- 1 tbsp melted coconut oil plus ½ tsp. Coconut oil is like liquid gold in this recipe—it enhances the creamy mouthfeel while helping to bind everything together beautifully. The added bonus? It contributes healthy fats that keep you satisfied longer! Be mindful when melting it; too much heat can lead to losing its beneficial properties, so gently warm it until just melted.
- 1 tbsp pure maple syrup. Pure maple syrup serves as an additional touch of sweetness while offering an elegant depth of flavor that elevates our truffles beyond ordinary sweets. Always choose pure maple syrup over imitation versions; you’ll appreciate the richer taste and complexity it brings forth!
- ½ cup dark chocolate chips. The crowning glory of these Samoa Truffles! Dark chocolate brings richness and decadence while balancing out the sweetness from the dates and maple syrup perfectly. Look for high-quality dark chocolate with at least 70% cocoa content—this ensures you’re getting both flavor and health benefits in every bite.
Equipment You’ll Need:
Having the right tools makes all the difference when creating something magical in your kitchen! While these items may not be ingredients themselves, they play crucial roles as your partners in this culinary endeavor.
- Food processor – This little powerhouse is essential for blending all our ingredients into a cohesive mixture without leaving any chunks behind. If you don’t have one on hand, a high-quality blender can work too—just be cautious about overloading it as we want everything well combined.
- Baking sheet – A good quality baking sheet lined with parchment paper will ensure our toasted coconut doesn’t stick during baking—and let’s be honest: who wants to scrub sticky pans? Plus, parchment paper makes cleanup so much easier!
- Parchment paper – Not just for lining baking sheets! We’ll use it again later when setting up our finished truffles; it prevents them from sticking together as they chill in the fridge.
- Microwave-safe bowl – This handy tool is where we’ll melt our dark chocolate chips alongside coconut oil—no need for fancy double boilers here! Just ensure it’s sturdy enough to withstand heating without warping or cracking.
Now that we’ve gathered all we need let’s turn our attention to preparing those scrumptious Samoa Truffles!
Step 1: Preheat Your Oven & Soak Those Dates
First things first: preheat your oven to 350 degrees F (175 degrees C). This step is absolutely paramount because having a hot oven ready allows us to toast our coconut perfectly without losing any flavor or moisture during preparation! While that’s warming up, take your Medjool dates and soak them in warm water for about 10 minutes—this helps soften them even further, making them easier to blend later on into a smooth paste full of caramel-like sweetness.
Step 2: Toasting Coconut Heaven
Once your oven has reached temperature, grab your parchment-lined baking sheet and spread out the unsweetened coconut evenly across its surface. Pop it onto the middle rack for about 3-5 minutes—keep an eye on it because you want just enough time for those shreds to turn golden brown without burning! It’s during this brief time that your kitchen will fill with heavenly nutty aromas—trust me; nothing compares! The slight crispness achieved through this process creates delightful texture contrasts within each bite of truffle.
Step 3: Blending Bliss
Now it’s time to bring everything together! Remove those softened dates from their bath (draining off excess water) and toss them into your food processor along with all our toasted coconut goodness (don’t forget about saving some aside for garnish!), nut flour, melted coconut oil, and maple syrup. Blend until everything is well incorporated—a sticky dough-like consistency should form after 30 seconds or so (you might have to scrape down sides occasionally!). This step is crucial; it ensures each ingredient melds together harmoniously so you get flavors bursting through every single bite!
Step 4: Chill Out
Once blended perfectly into a heavenly mixture reminiscent of raw cookie dough (seriously—you might be tempted!), transfer it into a bowl or container suitable for refrigeration; then cover tightly before placing inside your fridge for at least 20 minutes—this chilling phase solidifies those flavors while allowing us easier handling during shaping later on! Patience pays off here; don’t rush through this step if you want perfectly formed balls bursting with irresistible taste!
Stay tuned as we continue crafting these delightful morsels!
Step 5: Forming the Perfect Truffle Balls
Now that your mixture has chilled and thickened beautifully, it’s time to unleash your inner artisan by forming those irresistible Samoa Truffles! This step is where the magic begins to take shape, quite literally. With your hands slightly dampened—this keeps the mixture from sticking too much—take a scoop of that luscious, coconut-infused goodness. Aim for about a tablespoon-sized portion; this should yield around twelve delightful bites. Gently roll the mixture between your palms until you achieve a smooth, round ball.
Why is this rolling process so important, you ask? Well, it’s not just about aesthetics; creating these little spheres helps to compact the ingredients together, ensuring that each truffle holds its shape while also contributing to that delightful mouthfeel we all crave. Trust me on this: if you skip out on this step or rush through it, you might end up with truffles that crumble instead of hold together. So take your time and enjoy the process; after all, good things come to those who wait! Once they’re all formed, it’s time to move on to dipping them in chocolate.
Step 6: Melting Chocolate Like a Pro
Now for one of my favorite parts: melting the dark chocolate! Chocolate has this magical ability to transform any dessert into something utterly intoxicating, and these Samoa Truffles are no exception. In a small microwave-safe bowl, combine your dark chocolate chips with half a teaspoon of coconut oil—this addition will help give the chocolate a lovely sheen and make it smoother for dipping. Microwave the mixture in short bursts of about 20-30 seconds at a time, stirring in between each interval until everything is gloriously melted and silky.
Keep an eye on your chocolate during this process; burnt chocolate is not your friend! It can seize up and become grainy if overheated, which is why using shorter intervals allows you to control the heat precisely. The goal here is to achieve a glossy consistency that will coat your truffles perfectly while retaining that rich flavor we adore. Remember, patience is key! As soon as everything melts together into what resembles liquid gold, you’re ready for the next step.
Step 7: Dipping and Decorating
Let’s dip those deliciously formed truffles into that luscious melted chocolate! Place each truffle onto a fork and gently lower it into the warm chocolate bath. Use a spoon to drizzle more chocolate over the top while ensuring every inch gets coated evenly—this creates that beautiful outer layer we associate with gourmet treats. Once coated, let any excess chocolate drip off before placing them back onto parchment paper—a non-stick surface is crucial here!
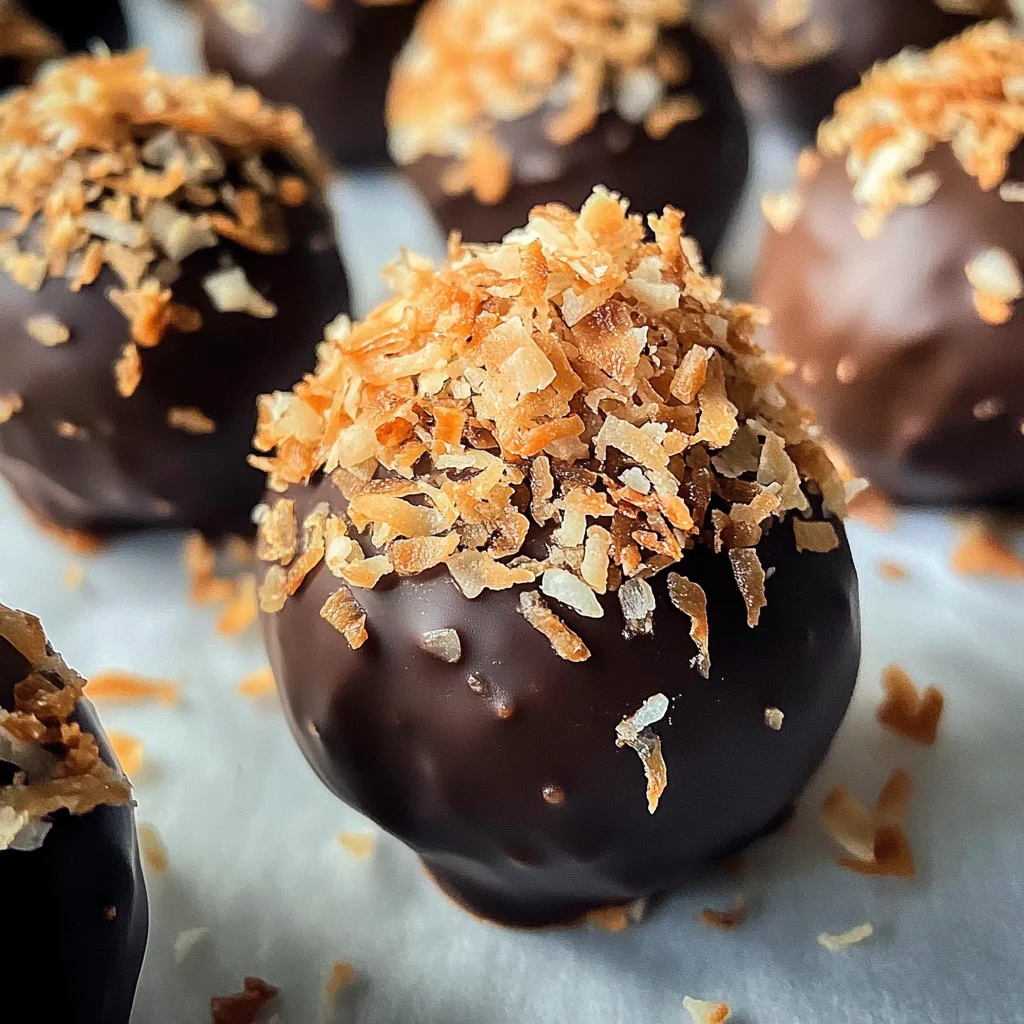
Don’t rush this step; allowing them to cool slightly before sprinkling on additional toasted coconut makes for an even more stunning presentation—and who doesn’t want their desserts looking like they belong in a magazine? Sprinkle generously but don’t be afraid to let some of that gorgeous coconut fall overboard; it adds character and makes each treat look unique! Trust me when I say these decorative touches elevate not just the visual appeal but also enhance flavor by introducing more texture with every bite.
Step 8: The Waiting Game: Chilling Time
Ahh, now comes one of those moments where patience truly pays off—the chilling phase! Place your beautifully dipped truffles into the refrigerator for about 20 minutes. This step is absolutely paramount because it allows the chocolate coating to set firmly around those delectable coconut centers while enhancing their flavors as they meld together in harmony. During this cooling period, you’ll notice how the initial warmth of both chocolate and filling gives way to a satisfying firmness that makes each bite feel indulgent yet light.
While you wait—perhaps brew yourself a cup of tea or coffee—take a moment to appreciate how this transformative experience unfolds in your kitchen. What makes these Samoa Truffles so special isn’t just their taste but also how they encapsulate love and care through each meticulous step you’ve taken thus far. When they emerge from the fridge looking like little treasure troves of goodness ready to be devoured, I promise you’ll feel an overwhelming sense of pride knowing you created something truly extraordinary.
Final Touches: Presenting Your Beautiful Creations
After patiently waiting through those twenty glorious minutes, behold—the moment of truth has arrived! Carefully remove your Samoa Truffles from their chilling spot; notice how they glisten invitingly under soft lighting as if calling out for someone (perhaps you!) to indulge them. Now comes my favorite part—serving them up! Arrange your delightful creations on a beautiful plate or platter; perhaps garnishing with additional toasted coconut or even drizzles of extra melted chocolate for flair adds an elegant touch that elevates their presentation further.
These truffles are perfect for sharing at gatherings or simply enjoying as an afternoon snack when cravings hit (and trust me—they will!). And remember: storing them correctly is essential! Keep them in an airtight container either in the fridge or freezer if you’d like them available for future indulgence—they’ll stay fresh longer this way while retaining their divine texture and flavor integrity.
So there you have it—a comprehensive guide filled with love and passion for crafting these Samoa Truffles! Each bite embodies not just taste but also stories waiting to be shared among friends and family alike. I can’t wait for you to try making these; I promise you’ll fall head over heels just like I did!
Storage and Enjoyment Tips for Your Samoa Truffles
Now that your Samoa Truffles have transformed from a simple mixture into delectable, bite-sized pieces of joy, it’s time to revel in their deliciousness! I can already imagine you savoring the delightful blend of chocolate and coconut, feeling the smooth texture melt on your tongue. But what happens if you find yourself with leftovers? Fear not, my friend! These little gems are just as delightful when stored properly, ensuring that each bite remains as heavenly as the first.
Storing Leftover Samoa Truffles
To keep your Samoa Truffles fresh and full of flavor, store them in an airtight container. This is absolutely paramount because it prevents moisture from sneaking in and ruining their lovely texture. You can either place them in the refrigerator or opt for a cool, dry pantry if you prefer them at room temperature—just remember they won’t last as long outside the fridge! When stored correctly, these truffles will maintain their deliciousness for about a week in the fridge. For those who want to keep things extra fresh, consider adding a piece of parchment paper between layers of truffles; this helps maintain their shape while preventing them from sticking together. After storage, the flavors meld even more profoundly, creating an utterly intoxicating taste experience. If they happen to harden a bit after being chilled, simply let them sit at room temperature for a few minutes before indulging. Trust me on this; it’s worth the wait!
Freezing Samoa Truffles for Later
If you want to savor the delight of Samoa Truffles well beyond that week, freezing them is an excellent option! To freeze your truffles properly, start by laying them out on a baking sheet in a single layer and pop them into the freezer until they are solid. Once frozen, transfer them into a labeled zip-top bag or airtight container—this step keeps them protected from freezer burn while ensuring they stay deliciously sweet. You can expect them to retain their quality for about three months; pretty fantastic if you ask me! When you’re ready to enjoy one (or two… or three), simply take out however many you desire and let them thaw at room temperature for about 15-20 minutes. The beauty of having these truffles on hand is that they make last-minute snacking effortless! Imagine reaching into your freezer and pulling out these delightful bites whenever a craving strikes—it’s pure convenience wrapped in love.
Samoa Truffles
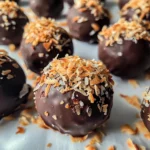
Indulge in the delightful world of Samoa Truffles, where nostalgia meets health in a scrumptious bite! These no-bake treats capture the essence of the beloved Girl Scout cookie with a nutritious twist. Made with natural sweetness from Medjool dates and rich coconut, these truffles are refined sugar-free, gluten-free, and paleo-friendly. Perfect for satisfying your sweet cravings without compromising on well-being, each bite delivers a luscious combination of chocolate and coconut flavors. Whether you’re treating yourself or sharing with friends, these Samoa Truffles promise to be a hit at any gathering or cozy night in. Join me in creating this simple yet extraordinary dessert that embodies both indulgence and care!
- Prep Time: 15 minutes
- Cook Time: 5 minutes
- Total Time: 20 minutes
- Yield: Approximately 12 servings 1x
- Category: Dessert
- Method: No-bake
- Cuisine: American
Ingredients
- 1 cup Medjool dates
- 1 cup unsweetened coconut
- 1 cup nut flour (of choice)
- 1 tbsp melted coconut oil
- 1 tbsp pure maple syrup
- ½ cup dark chocolate chips
Instructions
- Preheat your oven to 350°F (175°C). Soak the Medjool dates in warm water for about 10 minutes to soften.
- Spread the unsweetened coconut on a parchment-lined baking sheet and toast for about 3-5 minutes until golden brown.
- In a food processor, blend softened dates, toasted coconut (reserve some for garnish), nut flour, melted coconut oil, and maple syrup until well combined into a sticky mixture.
- Chill the mixture in the fridge for at least 20 minutes to firm up.
- Once chilled, roll tablespoon-sized portions into smooth balls.
- Melt dark chocolate with a bit of coconut oil in short intervals in the microwave until smooth.
- Dip each truffle into the melted chocolate and place on parchment paper. Sprinkle with reserved toasted coconut before the chocolate sets.
- Refrigerate for another 20 minutes to allow chocolate coating to set.
Nutrition
- Serving Size: 1 serving
- Calories: 120
- Sugar: 10g
- Sodium: 5mg
- Fat: 7g
- Saturated Fat: 5g
- Unsaturated Fat: 2g
- Trans Fat: 0g
- Carbohydrates: 14g
- Fiber: 2g
- Protein: 2g
- Cholesterol: 0mg