Mrs. Rabbit’s Hot Cross Buns Recipe
There’s something truly magical about the way aromas fill the kitchen when baking bread, especially when it comes to a beloved recipe like Mrs. Rabbit’s Hot Cross Buns. The moment you mix warm milk and butter, a comforting warmth envelops you, as if you’re being hugged by memories of family gatherings and festive celebrations. These hot cross buns are not just a treat for the taste buds; they are an experience—a blend of sweet spices, soft dough, and a lovely golden glaze that beckons you to indulge. Each bite is like a little piece of joy, whispering stories from generations past while inviting new ones to unfold.
As we embark on this culinary journey together, let me share with you the secrets behind these delightful buns that have made their way into my heart, just as they did for Peter Rabbit and his friends. The beauty of Mrs. Rabbit’s Hot Cross Buns lies not only in their flavor but also in the traditions they carry—baking hot cross buns has been a cherished activity during springtime for countless families across Britain. With each ingredient carefully chosen and every step lovingly executed, you’ll understand why this recipe has stood the test of time. So grab your apron and let’s dive into the world of baking where every moment spent is a treasure.
Mrs. Rabbit’s Hot Cross Buns Recipe: A Sweet Tradition
Welcome to the delightful world of baking Mrs. Rabbit’s Hot Cross Buns! This recipe is a warm embrace wrapped in sweet, spiced goodness that’s perfect for any occasion but especially delightful around Easter or any cozy gathering with loved ones. With its fragrant mix of spices and the soft texture of freshly baked buns, this recipe is sure to become a favorite in your home too.
Ingredients:
As we prepare to create these scrumptious buns together, let’s take a moment to appreciate each ingredient’s role in making our culinary adventure not just successful but profoundly satisfying.
- 10 oz milk. Milk is one of those foundational ingredients that brings moisture and richness to our hot cross buns. When warmed slightly before mixing, it activates the yeast more effectively, ensuring our dough rises beautifully—imagine that fluffy texture waiting for you at the end! I always opt for whole milk for its creaminess; however, if you’re looking for lighter alternatives, almond or oat milk can work wonders too.
- ¼ cup butter (softened or melted). Butter is liquid gold in baking—it adds richness and flavor that simply cannot be replicated by anything else. Softened butter will help incorporate air into your dough when using a bread machine while melted butter gives it an even richer flavor profile and makes it easier to mix in when you’re short on time. Just be cautious about using overly hot butter; it should be warm but not boiling—think just melted enough to feel luxurious without cooking your yeast.
- ¼ cup sugar. Sugar isn’t just about sweetness; it’s essential for feeding our yeast during fermentation—this process enables our dough to rise splendidly! The subtle sweetness complements the spices perfectly and enhances that golden crust we’re after when baked. Feel free to swap granulated sugar with brown sugar for deeper caramel notes or even coconut sugar if you’re looking for something less refined.
- 2 ½ cups all-purpose flour (or bread flour). Flour is the backbone of any bread recipe! I adore using all-purpose flour for its versatility; however, bread flour can offer higher gluten content leading to an even chewier texture—perfectly delightful! If your dough feels sticky as you begin mixing, don’t hesitate to add more flour gradually; trust your instincts here—dough should be soft but not gloppy!
- 2 tsp mixed spice. Ahh! Mixed spice—the secret behind that signature aroma that draws everyone closer to the kitchen! This blend typically includes cinnamon, nutmeg, and allspice; however, feel free to customize it according to your taste preferences! A little more cinnamon? Yes, please! These spices create an utterly intoxicating fragrance while baking that makes your home feel like a warm hug on a chilly day.
- 1 tsp salt. Salt might seem simple but don’t overlook its importance! It enhances flavors dramatically while also controlling yeast activity—not too much salt or we’ll slow things down too much! It balances sweetness and rounds out flavors beautifully; after all, every great dish deserves just a sprinkle of love!
- 1 tsp dried yeast. Yeast is our magical little organism here—our leavening agent responsible for transforming our dough from flat blobs into airy clouds of deliciousness! Using dried yeast simplifies things greatly since it’s readily available and easy to handle—just ensure it’s fresh so it works efficiently!
- ¾ cup currants. Currants add bursts of chewy sweetness throughout these buns—they’re small but mighty! Their slightly tangy profile pairs beautifully with mixed spices creating depth in every bite while adding natural sweetness without being overwhelming.
- 2 Tbsp water (more or less as needed). Water might seem trivial here but trust me—it plays an important role in achieving that perfect glaze consistency later on when combined with flour!
- 2 Tbsp flour & 2 Tbsp sugar & 2 Tbsp water (for glaze). This trio creates the beautiful piping we see atop traditional hot cross buns—it’s non-negotiable if we want those classic lines that make them instantly recognizable!
Now that we’ve gathered our ingredients with care and intention let’s move forward with this delightful process!
Equipment You’ll Need:
Having the right tools makes all the difference in creating something wonderful from scratch; think of them as trusty companions on this flavorful adventure we’re embarking upon together!
- Bread machine – If you’re looking for efficient kneading without much effort (who doesn’t love that?), then a bread machine becomes your best friend here—the cycle takes care of mixing and kneading like magic so you can sit back while aromas waft through your kitchen!
- Measuring cups & spoons – Precision is key in baking! Having reliable measuring tools ensures success every time—you want those perfect ratios where science meets artistry!
- Mixing bowls – A set of sturdy mixing bowls provides ample space whether mixing ingredients or letting dough rise—it’s essential as there will be some serious fluffiness happening soon!
- Piping bag or condiment bottle – For piping our glaze onto hot cross buns elegantly—a must-have tool if you want those classic crosses without fussing over messy designs!
- 9×13 baking pan – This size allows us enough room for twelve beautiful buns rising side by side as they gently touch each other while baking resulting in ever-so-soft sides—a beautiful sight indeed!
With all our tools gathered around us like eager companions ready for action let’s dive headfirst into preparing Mrs. Rabbit’s Hot Cross Buns Recipe!
Step 1: Mix Your Base
Start by adding the warm milk along with softened (or melted) butter into your bread machine bowl—this step sets up such comforting flavors right from the get-go! Following this liquid base, you’ll layer on top some lovely all-purpose flour along with sugar, salt, and mixed spice carefully placed around it like cozy blankets hugging each other tight before creating a well at its center where we’ll nestle our dried yeast later on—this isn’t just arbitrary placement; this technique ensures proper activation without drowning out precious yeast cells initially before they have time to work their magic!
Step 2: Let It Knead
Once everything’s cozily settled inside that bowl—and trust me when I say watching it all come together feels like witnessing an art form—you’ll select dough setting on your bread machine which allows mixing at appropriate speeds until everything harmonizes beautifully into one cohesive ball dancing happily against its walls until smooth yet pliable forms arise within minutes—this process known as kneading develops gluten strength crucial for creating airy structures later on once baked.
Step 3: Add Those Currants!
When your machine beeps indicating it’s time to add ingredients—that’s when those luscious currants come into play! Gently fold them into your dough until evenly distributed throughout ensuring pockets bursting forth upon biting down make each mouthful extraordinarily memorable—a magical surprise hidden away waiting patiently beneath golden exteriors!
Step 4: First Rise
After kneading completes marvel at how much volume you’ve created within such humble components—the gluten developed supports our lofty ambitions now as we prepare them for their first rise—we’ll shape this lively mass into twelve equal pieces rolling them gently between palms before placing them snugly within buttered baking pan side by side so they can rise together forming those delightful edges known only among best friends sharing warmth during chilly seasons ahead…
As we continue through subsequent steps together remember patience yields rewards beyond imagination—the journey unfolds gracefully leading us toward freshly baked dreams awaiting discovery soon enough…
Step 5: The Art of Rising – A Flourishing Transformation
Now, while our buns are nestled in their cozy buttered pan, we need to let them rise and awaken into their full potential—a process known as fermentation. This is where the magic truly happens! By allowing the dough to rise until almost doubled in size, you’re giving those little yeast organisms time to work their wonders, creating bubbles of carbon dioxide that will make your hot cross buns wonderfully light and airy. I can’t stress enough how crucial this step is; it’s the heart and soul of any bread-making adventure.
To achieve this, I like to place my rising buns in a warm environment—my secret? A simple jug of boiling water left in the oven alongside the dough. This creates a humid atmosphere that helps prevent the formation of a crust on the surface, allowing the dough to expand without any hindrance. You should aim for a duration of about 30 to 45 minutes, but keep an eye on them! If they start looking like fluffy clouds, they’re ready to go! Don’t rush this step; trust me, you want every last bit of fluffiness before you move on.
Step 6: Crafting Your Signature Cross – The Visual Appeal
As your buns rise beautifully, it’s time to prepare for one of my favorite parts—the iconic cross that makes these hot cross buns instantly recognizable. This isn’t just for show; it serves as a visual cue that these treats are special and also helps with even cooking. To create this mixture, combine 2 tablespoons of flour with 2 tablespoons of water until you achieve a thick, glue-like consistency—just think of it as crafting your edible art supplies!
Once your mixture is ready, you’ll want to transfer it into a piping bag or even a sandwich bag with the corner trimmed off. This will allow for precision when applying the cross—no one wants a messy bun! When you’re ready to pipe, imagine each line as adding personality to your creations. It’s not just about aesthetics; these lines help release steam during baking and contribute to that delightful crunch when biting into your warm bun.
Step 7: The Oven’s Warm Embrace – Baking Time!
With our buns beautifully risen and adorned with their crosses, it’s time for them to meet their destiny—the oven! Preheat your oven to 400°F (200°C), letting it warm up thoroughly before placing your precious dough inside. This initial blast of heat is essential; it helps set the structure of the buns while ensuring they rise even more—this phenomenon is known as oven spring.
When placing the buns in the center of the oven, ensure there’s enough space around them for air circulation; nobody likes crowded neighbors! Bake them for about 15 to 18 minutes or until they turn an irresistible golden brown—this is where scents will begin wafting through your home like an inviting hug. Check for doneness by gently tapping the bottom of a bun; if it sounds hollow, congratulations—you’ve achieved perfection! Remember that oven temperatures can vary wildly depending on your appliance; if they’re browning too quickly, don’t hesitate to lower the temperature slightly.
Step 8: The Sweet Finishing Touch – Glazing Magic
As soon as those glorious buns emerge from their hot haven in the oven, we need to give them a finishing touch that elevates them from delicious to utterly extraordinary: glazing! In a small pot over low heat, melt together sugar and water until you achieve a syrupy consistency—this glaze not only adds sweetness but also gives your buns that glossy look that makes them irresistible.
Brush this warm glaze gently over each bun while they’re still warm from baking; doing so allows it to seep into every nook and cranny. The transformation is remarkable—the glaze creates a lovely sheen and enhances the warmth already bursting from within each bun. Allow them to cool slightly before diving in because trust me—you don’t want to burn your tongue on all that flavor!
Final Thoughts: Savoring Each Moment
After all this love and patience put into making Mrs. Rabbit’s Hot Cross Buns Recipe, serve them warm alongside your favorite cup of tea for a truly cozy experience. And if you happen to have leftovers (which I highly doubt!), slicing them in half and giving them a quick toast takes everything up another notch! Just imagine spreading some creamy butter onto those perfectly crisped edges while sipping tea—the ultimate comfort food moment awaits you!
I promise you—these hot cross buns are not just pastries; they are heartfelt gifts baked with joy and shared among friends and family. As you gather around with loved ones, sharing stories over these delightful treats, remember that food has an incredible ability to bring us together—it’s profoundly satisfying. So go ahead and indulge in this tradition steeped in warmth and love—you’ve earned it!
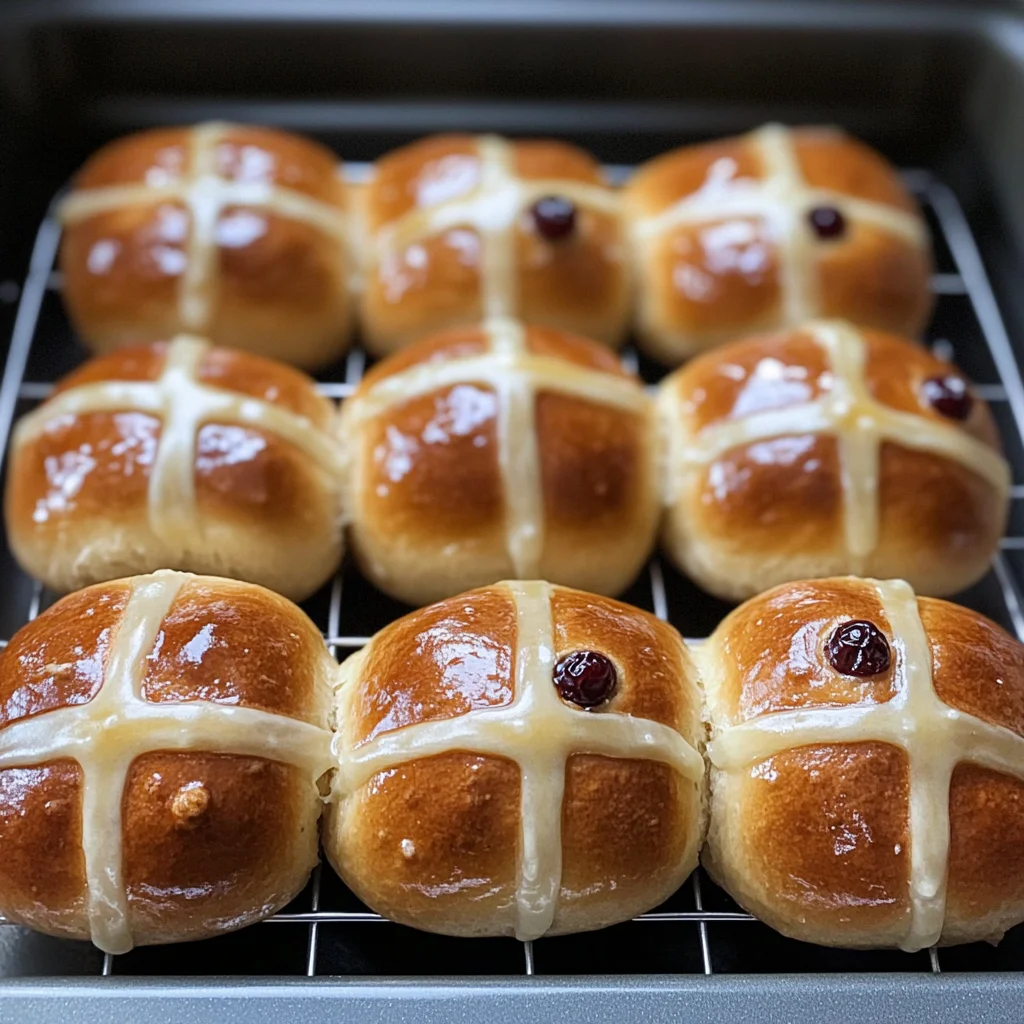
Storage and Enjoyment Tips for Your Mrs. Rabbit’s Hot Cross Buns Recipe
Now that you’ve crafted these delightful, golden-brown buns, it’s time to enjoy the fruits of your labor! The aroma wafting through your kitchen is nothing short of intoxicating, and the soft, pillowy texture is simply irresistible. Whether you’re indulging in one warm from the oven or saving a few for later, this recipe is sure to become a cherished tradition in your home. But what to do with any leftovers? Let’s dive into how to keep this deliciousness around just a little longer!
Storing Leftover Mrs. Rabbit’s Hot Cross Buns Recipe
To preserve the freshness of your leftover hot cross buns, I recommend placing them in an airtight container at room temperature. This keeps them soft and prevents them from drying out. Generally, they will stay fresh for about three days when stored this way; however, I assure you that they won’t last long with all the scrumptiousness they have to offer! For those extra special buns that you want to keep even longer, consider placing a slice of bread inside the container—this little trick can help maintain moisture and keep your buns feeling fresh as ever. I promise you they’ll still taste wonderful even after a couple of days; simply warm them up in the oven for a few minutes before serving. The warmth will bring back their delightful aroma and texture—trust me on this!
Freezing Components for Later
If you find yourself with more hot cross buns than you can handle (a delightful problem!), freezing them is a fantastic option! To freeze properly, just wrap each bun individually in plastic wrap and then place them in a resealable freezer bag or airtight container. This way, they’ll be safe from freezer burn and can last up to three months without losing their charm. When you’re ready to enjoy one again, simply take it out of the freezer and let it thaw at room temperature for about 30 minutes before reheating it in the oven until warm. The convenience factor here is absolutely paramount—you’ll have homemade goodness ready whenever you need it! Imagine pulling out a bun from the freezer on a chilly morning; it’s like having a taste of comfort right at your fingertips!
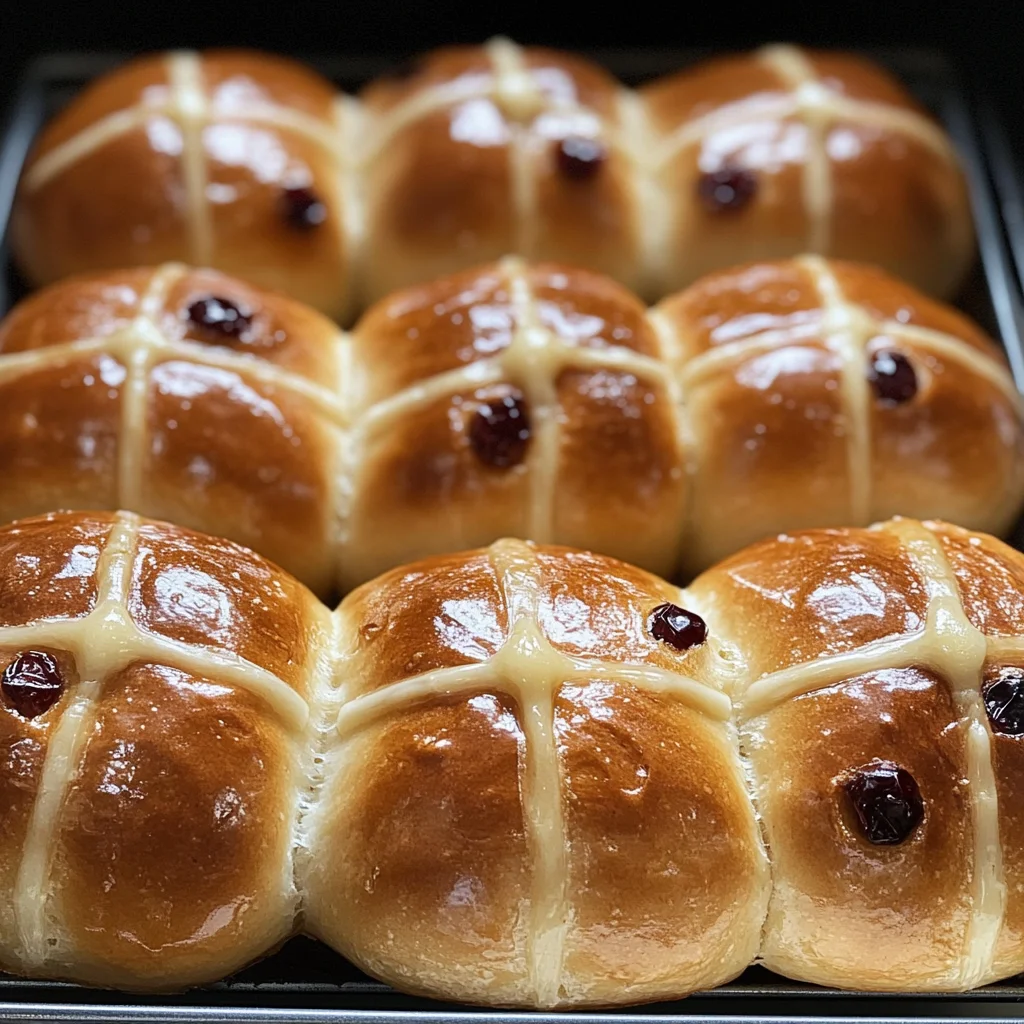
Mrs. Rabbit’s Hot Cross Buns
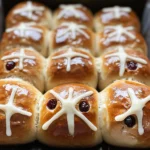
Indulge in the comforting aroma of freshly baked Mrs. Rabbit’s Hot Cross Buns, a timeless recipe that brings warmth and joy to any occasion. These delightful buns are characterized by their soft, fluffy texture, a fragrant blend of spices, and sweet currants that create a perfect balance of flavors. Ideal for family gatherings or cozy mornings with tea, these hot cross buns not only tantalize your taste buds but also evoke cherished memories. With easy-to-follow instructions, you can create these festive treats right in your kitchen, adding a touch of magic to your baking experience.
- Prep Time: 20 minutes
- Cook Time: 18 minutes
- Total Time: 38 minutes
- Yield: Approximately 12 servings 1x
- Category: Breakfast
- Method: Baking
- Cuisine: British
Ingredients
- 10 oz milk (whole, almond, or oat)
- ¼ cup butter (softened or melted)
- ¼ cup sugar
- 2 ½ cups all-purpose flour (or bread flour)
- 2 tsp mixed spice (cinnamon, nutmeg, allspice)
- 1 tsp salt
- 1 tsp dried yeast
- ¾ cup currants
- 2 Tbsp water (for glaze)
- 2 Tbsp flour
- 2 Tbsp sugar (for piping)
Instructions
- Warm the milk and mix it with softened or melted butter in a bowl.
- In your bread machine bowl, add the warm milk mixture followed by flour, sugar, salt, and mixed spices. Create a well in the center and add the dried yeast.
- Select the 'dough setting' on your bread machine and allow it to knead until smooth.
- Once kneaded, fold in the currants until evenly distributed.
- Shape into twelve equal pieces and place them in a buttered baking pan for their first rise (30-45 minutes) until doubled in size.
- Preheat the oven to 400°F (200°C). Pipe crosses with a mixture of flour and water on top of risen buns.
- Bake for 15 to 18 minutes until golden brown.
- Brush warm glaze over buns as soon as they come out of the oven.
Nutrition
- Serving Size: 1 serving
- Calories: 210
- Sugar: 8g
- Sodium: 180mg
- Fat: 5g
- Saturated Fat: 3g
- Unsaturated Fat: 1g
- Trans Fat: 0g
- Carbohydrates: 38g
- Fiber: 1g
- Protein: 5g
- Cholesterol: 15mg