No Knead Rye Bread
The process of baking bread is more than just a culinary task; it’s a heartfelt journey that connects us to our roots and the warm embrace of home. There’s something utterly intoxicating about the aroma of freshly baked bread wafting through your kitchen, wrapping around you like a cozy blanket on a chilly day. As you embark on this adventure to create the most delightful No Knead Rye Bread, you’re not just preparing a meal; you’re crafting a profound experience that brings joy and comfort to every bite. This recipe, which harmoniously blends the hearty flavors of rye with the warm essence of caraway seeds, promises to be a revelation. Trust me when I say that each slice will bring with it a symphony of flavors that dance on your palate and evoke memories of simpler times.
Baking this No Knead Rye Bread isn’t merely about following a set of instructions; it’s about embracing the art of patience and love infused into each step. Picture yourself in your kitchen, flour dusting your countertops, as you mix together ingredients that have been cherished in baking traditions for generations. The long fermentation process allows the dough to develop its character and depth, resulting in a loaf that’s not only crusty on the outside but also soft and flavorful within. This is truly extraordinary! Whether you’re sharing it during a family gathering or savoring it alone with a good book—each bite is an invitation to slow down and appreciate life’s simple pleasures.
No Knead Rye Bread: A Journey into Heartfelt Baking
Let’s dive into this beautiful recipe together! The beauty of no-knead bread lies in its simplicity—minimal effort yields maximum flavor and satisfaction. You’ll find that this method not only requires little actual hands-on time but also allows for deep development of flavor through long fermentation. So grab your apron, roll up your sleeves, and let’s create something delicious!

Ingredients:
As we embark on this culinary journey together, let’s take a moment to appreciate each ingredient we’ll be using in our No Knead Rye Bread. Each one plays an essential role, contributing not just flavor but also texture and character to our final masterpiece.
- 2 ¼ cups bread flour. This flour is vital for creating that chewy texture we all adore in bread. It has higher protein content compared to all-purpose flour, which means more gluten formation during fermentation—a crucial element for achieving that classic bread structure. When selecting bread flour, look for brands labeled ‘high-protein’ or those specifically meant for artisan breads; they will give you the best results.
- 1 cup dark rye flour. Dark rye flour is where the magic starts! Its rich, earthy flavor adds depth and complexity to your loaf while providing that signature dense texture associated with rye breads. It contains more nutrients than lighter flours due to its bran content. When purchasing dark rye flour, opt for organic whenever possible; it amplifies both taste and quality.
- 1 tbsp caraway seeds. These tiny seeds pack quite a punch! Caraway offers an aromatic profile that’s slightly sweet and peppery, creating an irresistible contrast with the earthy rye flavor. They evoke memories of traditional European rye breads and are absolutely paramount in enhancing your bread’s flavor profile. If you’re not fond of caraway seeds or want to experiment, try substituting with fennel seeds or even dill for a unique twist.
- 1 ½ tsp kosher salt. Salt isn’t just there for seasoning; it plays several roles in baking! It strengthens gluten structure, balances flavors, and controls yeast activity during fermentation—ensuring your dough rises beautifully without over-proofing. Always opt for kosher salt since its larger grains dissolve slower than table salt, giving you better control over seasoning.
- 1 tsp active dry yeast. Yeast is what breathes life into our dough! It ferments sugars present in the flour, producing carbon dioxide which causes the dough to rise—a truly magical transformation if you ask me! Be sure to check expiration dates when buying yeast; fresh yeast ensures robust fermentation.
- 1 ½ cups warm water (between 105°F and 115°F). Water acts as the solvent that binds everything together but remember: temperature matters! Too hot can kill yeast; too cold slows fermentation significantly. Perfectly warm water creates an inviting environment for yeast activation—think of it as giving them their delicious spa treatment before they work their magic!
- 1 tbsp molasses. This liquid gold doesn’t just add sweetness—it brings moisture and contributes beautiful color to our crust when baked! Molasses also contains minerals like iron and calcium—an added health bonus! If you don’t have molasses on hand, honey or maple syrup can be substituted for similar results but expect slight changes in flavor.
Equipment You’ll Need:
Before we jump into making our No Knead Rye Bread, let’s talk about some essential tools you’ll need along the way—these trusty partners will make your baking experience smoother and far more enjoyable!
- Mixing bowl – A sturdy mixing bowl is crucial for combining your ingredients without any spillage chaos! Opt for glass or stainless steel bowls which are non-reactive—that means no unwanted flavors getting into your dough as it ferments.
- Spatula – A flexible spatula will help gently scrape down sticky dough from sides without damaging its delicate structure while folding it over during shaping.
- Parchment paper – This is indispensable when transferring dough into the preheated Dutch oven! Not only does it prevent sticking but also makes handling easier—you’ll thank yourself later when you’re removing that gorgeous loaf from the pot!
- Dutch oven or clay baking dish with lid – If there’s one piece of equipment I can’t emphasize enough—the Dutch oven is essential! Its heavy lid traps steam effectively while baking—a key factor in achieving that crusty exterior we crave while maintaining soft interiors!
Now that we’ve got our ingredients and tools ready let’s get started on preparing our delicious No Knead Rye Bread!
Step 1: Mixing Magic
In a large mixing bowl (the bigger, the better!), combine 2 ¼ cups of bread flour with 1 cup of dark rye flour along with 1 tablespoon of caraway seeds, 1½ teaspoons kosher salt, and 1 teaspoon active dry yeast. Stir these dry ingredients together until well mixed—this ensures an even distribution of flavors throughout our loaf later on! Remember how important it is to blend these elements thoroughly? It sets us up beautifully for success as we introduce moisture next.
Once combined, take your warm water (make sure it’s between 105°F – 115°F) and stir in 1 tablespoon of molasses until dissolved completely—it should look like liquid brown sugar bliss at this point! Pour this molasses water into your dry mixture gradually while stirring with a spatula until everything comes together into what may seem like an impossibly soft (and extremely sticky) dough at first glance—but trust me here! Cover this bowl tightly with cling film followed by placing a tea towel over top—it likes warmth just like us—and let it rest in a cozy spot for at least eight hours (or up to twelve!).
Why such patience? This slow fermentation process allows natural flavors to develop fully while letting gluten form effortlessly without any kneading required! You’ll wake up or come back home to find bubbly dough peeking through its covering—what joy awaits!
Step 2: Shaping Your Dough
After allowing ample time for fermentation magic to happen overnight or throughout the day—it’s time to tackle shaping our sticky friend! Dust your clean countertop generously with flour—not too shy here—and carefully scrape out that sticky dough onto its new stage using your spatula (it might feel like wrestling sometimes!). Sprinkle more flour atop this gooey mass liberally so you can handle it comfortably without getting too messy (well…too much!).
With hands dusted lightly too now comes the fun part: fold that beautiful mass over itself by picking one edge up toward the center continuously until you’ve formed something resembling rough ball shape after several turns around its circumference—this helps strengthen gluten further while bringing everything together cohesively without being aggressive about it.
Now flip this ball over so its smooth side faces upward before tucking edges underneath gently if needed—creating tension across surface area helps promote optimal rise during final proofing stage later on too—so don’t rush this step!
Step 3: Final Rise
Take a piece of parchment paper (remember how handy we said it’d be?) lining inside another clean mixing bowl before placing your shaped dough ball gently upon it as if cradling something precious—you are after all nurturing soon-to-be bread magic here folks! Lightly brush oil atop dome surface using either fingers or pastry brush ensuring it’s well coated—the oil prevents crust forming prematurely during rising phase plus gives extra flavor boost too!
Cover again with tea towel allowing it rise once more but just this time aim specifically at one hour’s mark—you’ll see visible expansion taking place underneath cloth which adds excitement don’t you think? Keep peeking cautiously because exposing air can hinder progress!
Step 4: Preheating & Baking
While waiting patiently (I know it’s hard!), preheat oven up high—to around 450°F so things get sizzling hot inside once we’re ready—with half-hour left after shaping dough place Dutch oven inside allowing both pot & lid warming up equally alongside oven heat itself—that’s key here folks; hot pot = amazing crust formation later!
When rising hour concludes reveal lid from Dutch oven whilst carefully lifting parchment paper holding risen dough & lowering straight down gently—it’ll feel like placing treasure safely within confines readying itself now…
Use sharp knife scoring slash across top surface marking artistry whilst lightly dusting top once more adding flair before replacing lid securely back again onto pot prior sending off into hot depths below where it’ll bake away merrily becoming golden-brown wonderland filled aroma floating throughout home inviting everyone nearby closer towards magic happening inside oven…
Stay tuned as we conclude last steps soon filled excitement surrounding baked wonders emerging shortly thereafter as time ticks onwards watching closely till hollowed sounding bliss reveals done status soon follows…
These first few steps are just bursting with excitement already—I promise you won’t regret diving deeper into crafting such delightful No Knead Rye Bread alongside me today filled warmth love shared between friends celebrating simple joys found within cooking adventures ahead…
Step 5: Preheat and Prepare for Baking
Now that your dough has risen beautifully, it’s time to bring the heat! Preheating your oven to a scorching 450°F (about 232°C) is crucial because we want to create a crust that’s both crispy and golden brown, while keeping the inside tender and soft. While your oven heats up, you’ll also want to place your Dutch oven or a clay baking dish—ideally one with a lid—inside the oven. This step is non-negotiable because it allows the pot to absorb heat, creating an environment akin to a traditional wood-fired oven. The intense heat will give your bread that lovely rise we all adore, ensuring each loaf emerges with a stunning, rustic crust that sings of home.
As you wait for the oven to preheat, take a moment to reflect on the transformative journey of your dough. After resting for an hour, it will have expanded and developed a rich flavor profile thanks to fermentation. When you’re ready, carefully remove the hot Dutch oven from the oven using thick kitchen towels or oven mitts—safety first! Now, gently lift your dough using the parchment paper as handles and lower it into the pot. Don’t worry if it looks a little ragged; this rustic charm is what makes homemade bread so special. Use a sharp knife or a bread lame to score the top of your dough with a gentle slash—this technique not only allows steam to escape but also adds visual appeal.
Step 6: Bake It Like You Mean It!
Once your dough is nestled in its hot ceramic embrace, cover it with the lid and return it to the oven without hesitation. You’re going to bake this masterpiece for about 30 minutes with the lid on. Why cover it? Well, this creates steam inside the pot which is absolutely paramount for achieving that perfect crust while keeping the inside moist and fluffy. As you bake, take in the intoxicating aroma wafting through your kitchen; it’s like wrapping yourself in a warm hug! Keep an eye on the clock but don’t rush this step; patience truly pays off here.
After those initial 30 minutes are up, carefully remove the lid—watch out for steam escaping—and behold! Your loaf should be puffed up and starting to take on color. At this point, you’ll want to continue baking for another 10 to 15 minutes without the lid. This additional time allows for that glorious browning effect we all crave in our bread. You’ll know it’s done when you give it a gentle tap on the bottom, and it sounds hollow—a satisfying sound that tells you you’ve created something utterly extraordinary. I promise you; this moment will fill you with pride!
Step 7: Cooling – The Moment of Truth
Once your No Knead Rye Bread has reached its glorious golden hue and passes that crucial hollow sound test, it’s time for one more essential step: cooling! Carefully transfer your baked loaf onto a wire rack to cool completely before slicing into it; I know it’s tempting—your kitchen smells divine—but trust me on this one! Cooling allows steam to escape from within, preventing sogginess in your beautiful bread. If you slice into it too soon, you risk losing that incredible texture you’ve worked so hard to achieve.
Letting your bread cool also enhances its flavor as various compounds settle into perfect harmony during this resting phase. Aim for at least 30 minutes of cooling before cutting; I know patience can be tough when delicious smells dance around you like old friends at a reunion, but every minute counts here! Plus, giving it time ensures easier slicing—nobody wants their loaf crumbling apart when they’re trying to enjoy a piece of homemade goodness.
Step 8: Slicing – A Slice of Heaven
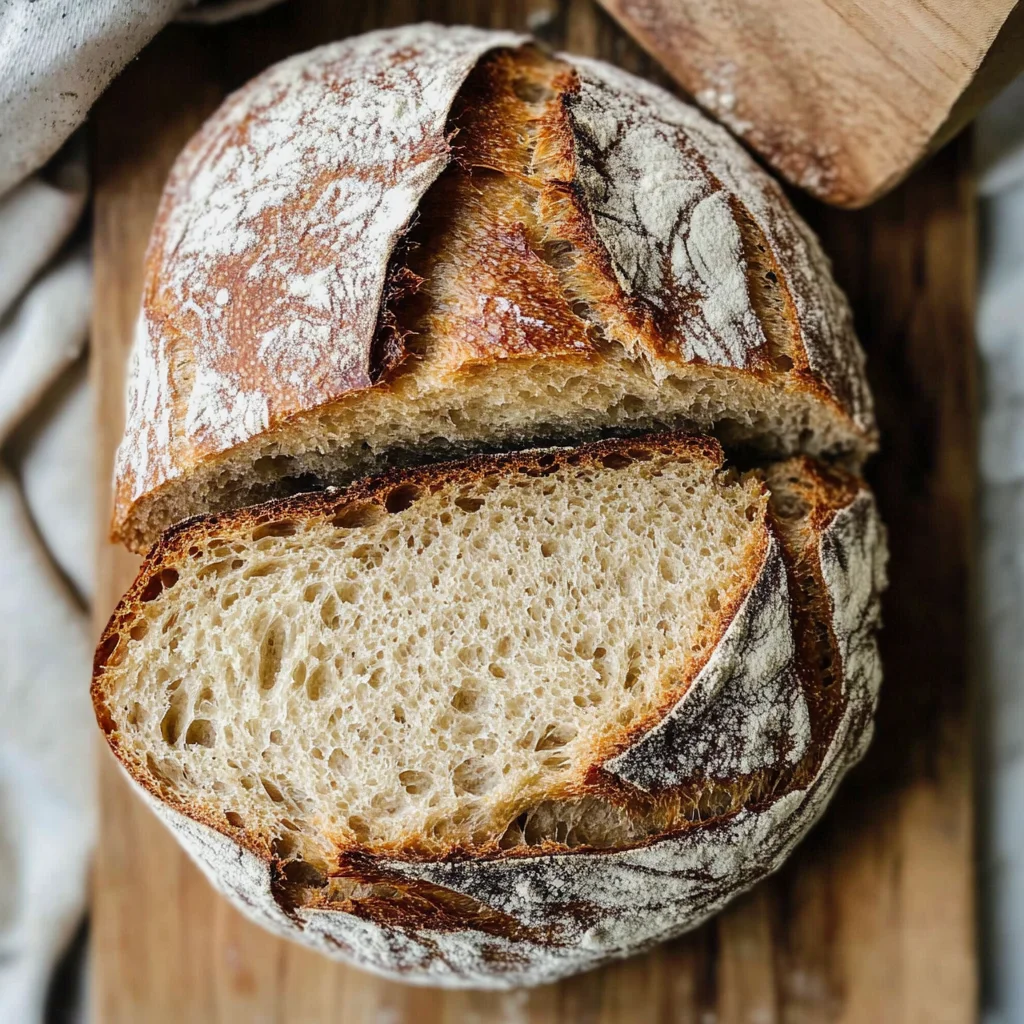
Now comes perhaps my favorite part—the grand reveal! After waiting patiently (or as patiently as possible), grab yourself a serrated knife—a straight-edged knife won’t do justice to our crusty creation—and slice into that loaf with care. You’ll notice how effortlessly it cuts through that crunchy exterior into soft, pillowy interiors flecked with those delightful caraway seeds—their fragrant essence is simply irresistible! Each slice reveals layers of texture and flavor just waiting for butter or spreads to bring them even closer to perfection.
As you savor each bite, remember that this No Knead Rye Bread isn’t just food; it’s love crafted by your own hands—an expression of warmth meant for sharing with family and friends during cozy gatherings or quiet mornings over coffee. And don’t forget: this bread pairs wonderfully with soups or stews too; its hearty nature holds up beautifully against robust flavors.
Conclusion:
As we wrap up this heartwarming journey through the art of making No Knead Rye Bread, I can’t help but feel a surge of excitement bubbling inside me! It’s more than just a recipe; it’s an experience filled with delightful aromas and flavors that come together in perfect harmony. The combination of robust rye flour intertwined with caraway seeds creates a symphony of flavors that dances across your taste buds while the crust remains beautifully crisp—a truly extraordinary treat that elevates any meal.
Now let’s talk about why this recipe should be on everyone’s must-try list: not only is it incredibly easy to make—trust me when I say kneading is non-negotiable here—but it’s also wonderfully versatile. Whether you’re serving it at a cozy family dinner or sharing slices with friends over wine and cheese (sans alcohol), this bread brings people together. Just imagine pulling that golden-brown loaf from the oven and letting the intoxicating aroma fill your kitchen—it’s bound to draw everyone in like moths to a flame!
When it comes to serving suggestions, the possibilities are endless! Picture enjoying a slice smeared with creamy avocado for breakfast; oh, what an indulgent way to start your day! Or perhaps savoring one alongside hearty soups or stews during chilly evenings—the pairing is downright divine. For an afternoon pick-me-up with friends, why not transform some slices into exquisite bruschetta topped with vibrant tomatoes and fresh herbs? Each bite will transport you straight to culinary heaven!
Feeling adventurous? This recipe is wonderfully adaptable. You could experiment by adding sunflower seeds or even swapping out caraway seeds for fennel if that’s more up your alley. Or how about infusing some roasted garlic into the dough? The options are limitless! So I invite you to embark on this baking adventure and share your experiences along the way—after all, cooking is best enjoyed together! Happy baking!
No Knead Rye Bread
No Knead Rye Bread is a delightful and comforting recipe that brings the warm, inviting aromas of freshly baked bread into your home without the hassle of kneading. This rustic loaf combines the rich flavors of dark rye flour with aromatic caraway seeds, resulting in a crusty exterior and a soft, flavorful interior. Perfect for sharing at family gatherings or enjoying solo with your favorite spread, this simple recipe requires minimal effort and time but yields maximum satisfaction. With a long fermentation process, you’ll unlock deep flavors that will transport you to simpler times with every bite.
- Prep Time: 15 minutes
- Cook Time: 45 minutes
- Total Time: 1 hour
- Yield: Approximately 12 servings 1x
- Category: Bread
- Method: Baking
- Cuisine: Rustic
Ingredients
- 2 ¼ cups bread flour
- 1 cup dark rye flour
- 1 tbsp caraway seeds
- 1½ tsp kosher salt
- 1 tsp active dry yeast
- 1½ cups warm water (between 105°F and 115°F)
- 1 tbsp molasses
Instructions
- In a large mixing bowl, combine bread flour, dark rye flour, caraway seeds, salt, and yeast.
- Stir in warm water mixed with molasses until a soft dough forms. Cover tightly and let rest for 8 to 12 hours.
- After fermentation, dust a clean surface with flour and scrape out the sticky dough. Shape into a rough ball.
- Place the dough on parchment paper inside a bowl, cover with oil, and let rise for another hour.
- Preheat your oven to 450°F with a Dutch oven inside for heat absorption.
- Carefully transfer the risen dough into the hot pot using the parchment paper as handles. Score the top with a sharp knife.
- Cover and bake for 30 minutes; remove the lid and bake for another 10 to 15 minutes until golden brown.
- Cool on a wire rack before slicing.
Nutrition
- Serving Size: 1 slice (60g)
- Calories: 150
- Sugar: 0g
- Sodium: 210mg
- Fat: 0.5g
- Saturated Fat: 0g
- Unsaturated Fat: 0g
- Trans Fat: 0g
- Carbohydrates: 32g
- Fiber: 3g
- Protein: 5g
- Cholesterol: 0mg