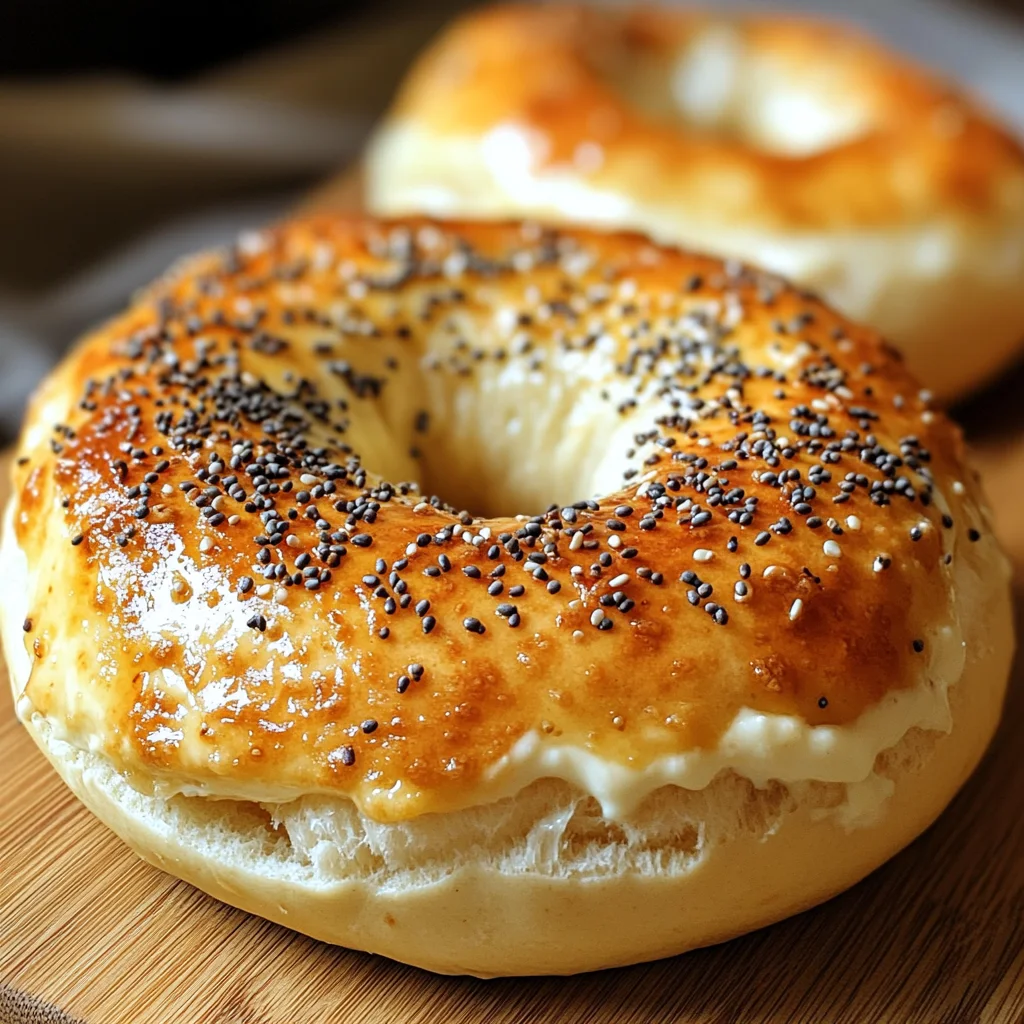
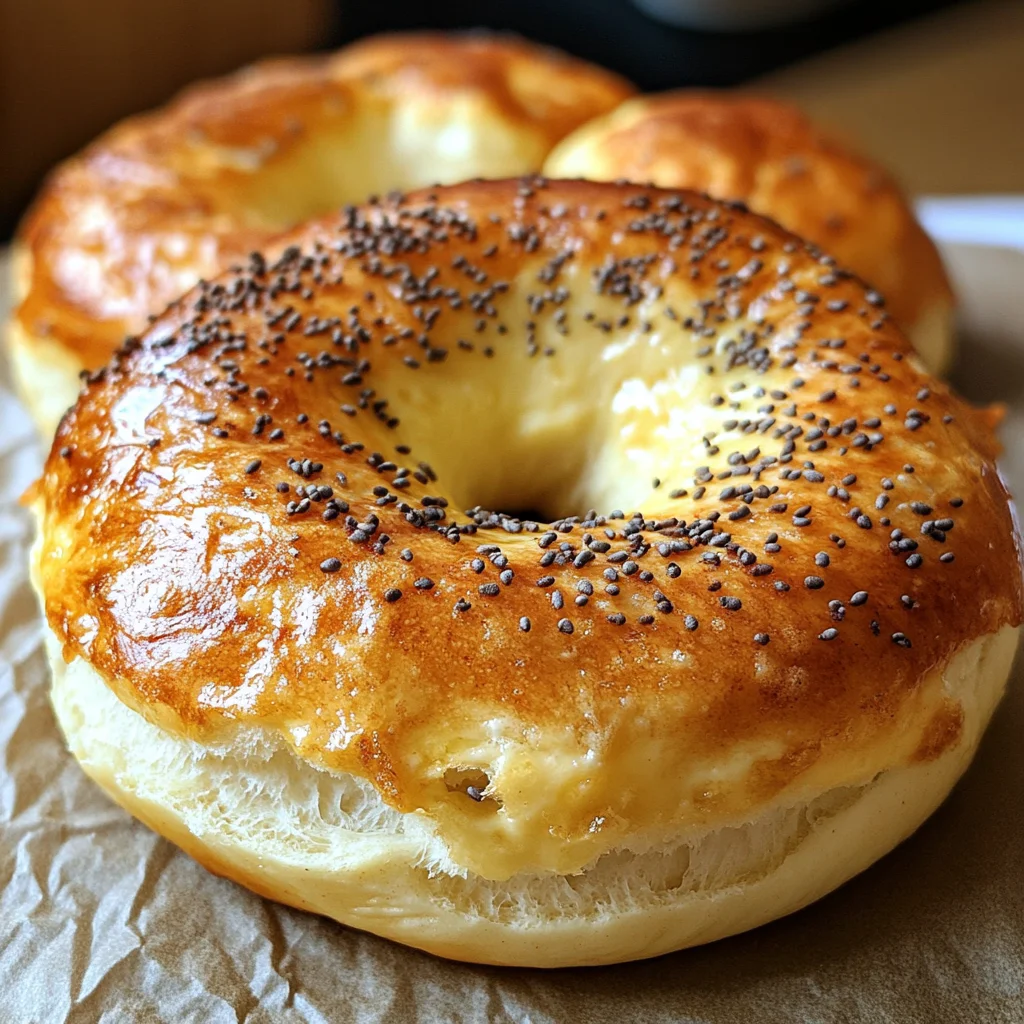
3 ingredient high protein greek yogurt bagels
There’s something profoundly satisfying about transforming just a few simple ingredients into something that feels both comforting and innovative. These 3 ingredient high protein Greek yogurt bagels are not just your average baked good; they are a testament to the beautiful alchemy of cooking, where tradition meets modern dietary needs. Imagine pulling a warm bagel from the oven, its golden crust crackling ever so slightly as you slice into it, revealing a soft, chewy interior that’s ready to be slathered in your favorite spread. With only three ingredients, this recipe is an invitation to explore the wonderful world of baking without the fuss. I promise you, the moment you bite into one of these delightful creations, you’ll understand why they’ve become a viral sensation.
The beauty of these bagels lies not only in their simplicity but also in their nutritional profile. Packed with protein from Greek yogurt and devoid of any complicated additives or preservatives, these bagels make for an ideal quick breakfast option that supports your health goals without sacrificing taste. Whether you’re rushing out the door or enjoying a leisurely morning at home, they serve as the perfect canvas for toppings—think delectable cream cheese, fresh avocado, or even a sweet smear of almond butter. This recipe captures the essence of what I love about cooking: it bridges cultures and traditions while also adapting to our modern lifestyles.
3 Ingredient High Protein Greek Yogurt Bagels: A Healthy Twist on a Classic Favorite
Let’s dive into this delightful recipe that showcases how simple ingredients can lead to extraordinary flavors! The process is straightforward yet rewarding, allowing even novice bakers to shine in their kitchens. I can almost feel your excitement building as we embark on this culinary journey together.
Ingredients:
As we prepare to create our high-protein bagels, let’s talk about each ingredient and why it matters so much in crafting these little rings of goodness.
- 1 cup self-rising flour. This magical ingredient is essential because it contains both flour and leavening agents—typically baking powder and salt—all mixed together for convenience. The beauty of using self-rising flour is that it eliminates the need for additional rising agents and delivers that lovely lift we crave in a bagel. When purchasing self-rising flour, look for brands that have a good reputation for quality; it can make all the difference in achieving that perfect texture. If you find yourself without self-rising flour, no worries! You can easily make your own by combining regular all-purpose flour with baking powder (1 cup flour + 1½ teaspoons baking powder + ¼ teaspoon salt).
- 1 cup Greek yogurt. This ingredient brings not only moisture but also a rich creaminess that enhances the overall flavor and texture of our bagels. Greek yogurt is packed with protein, making these bagels an excellent choice for anyone looking to up their intake while enjoying a delicious treat! When selecting Greek yogurt, opt for plain varieties without added sugars or flavors; this way, you’ll have complete control over your ingredients and can truly savor the natural tanginess that complements the dough beautifully. Plus, it interacts wonderfully with self-rising flour during mixing—it’s like magic as they come together into a cohesive dough!
- 1 egg (for egg wash). While technically optional for making the dough itself, brushing on an egg wash before baking is absolutely paramount if you desire that stunning golden finish that’s both inviting and visually appealing. The egg wash creates an attractive sheen on top of each bagel while helping any toppings adhere better if you decide to sprinkle on seeds or herbs before baking—like poppy seeds or everything seasoning! If you happen to be looking for alternatives due to dietary preferences or restrictions, feel free to substitute with plant-based milk or aquafaba (the liquid from canned chickpeas) which will still give you some color without compromising too much on appearance.
Equipment You’ll Need:
Now that we have our ingredients lined up like loyal soldiers ready to do battle in the kitchen, let’s gather our trusty tools! Having the right equipment makes all the difference between a stress-free baking experience and one filled with unnecessary frustration.
- Mixing bowl – A sturdy mixing bowl is essential for bringing together our dry and wet ingredients without any mess flying about. Look for bowls made from durable materials such as glass or stainless steel—they’re not only versatile but also easy to clean!
- Measuring cups – Precision is key when it comes to baking; therefore, having reliable measuring cups ensures consistency across batches. I recommend investing in nested measuring cups so they take up less space in your kitchen while providing accurate measurements every time.
- Baking tray – A good quality baking tray will help create even heat distribution as our bagels bake away in the oven. Choose one with low sides if possible; this allows air circulation which contributes to achieving that perfect golden-brown crust.
- Parchment paper (optional) – While not strictly necessary, lining your baking tray with parchment paper can help prevent sticking and make cleanup easier afterwards—because who wants extra dishes after enjoying delicious bagels?
- Pastry brush – If you’re opting for an egg wash (which I highly encourage!), having a pastry brush on hand will allow you to apply it evenly across each bagel surface without creating drips or messes.
Step 1: Preheat Your Oven To Perfection
Before diving into mixing our dough—a crucial step—is ensuring our oven is preheated to 180°C (350°F). This initial heat setting allows us to achieve consistent cooking throughout our entire batch once we place those darling little bagels inside. Trust me on this: waiting until later means risking unevenly baked goods which could lead to disappointment when what you want is perfection!
Step 2: Combine Flour And Yogurt Into A Beautiful Dough
In your mixing bowl, combine that lovely self-rising flour with Greek yogurt until they form a cohesive dough—this part feels magical! Start by gently folding them together using either a spatula or wooden spoon until no dry bits remain visible; it should feel slightly sticky yet manageable when touched lightly with floured hands. Kneading lightly (just enough so everything comes together), divide your dough into four equal pieces—these will soon transform into warm circles of joy!
Step 3: Shape Your Bagels With Love
Now comes one of my favorite parts—shaping those delightful dough pieces into beautiful bagels! Take each piece and gently roll it between your palms before forming them into ring shapes by connecting ends together firmly yet carefully—it’s important not to squeeze too hard here; otherwise they might lose some fluffiness during baking! Place them onto your prepared baking tray while ensuring there’s enough space between each ring for expansion—the transformation during baking is quite impressive!
Step 4: Brush With Egg Wash For That Golden Finish
With your shaped beauties resting comfortably on their tray awaiting their warm embrace from the oven, grab your pastry brush and prepare an egg wash using beaten egg (or alternative). Gently paint each surface with this glorious mixture—it serves two purposes: adding an enticing shine while ensuring any toppings stick beautifully if sprinkled at this stage! Remember not rush here; taking time ensures every nook gets coated evenly—a non-negotiable step if you want picture-perfect results!
Stay tuned as we continue through these steps until those aromatic high-protein Greek yogurt bagels are ready for devouring—they’re sure to become a beloved staple in your kitchen repertoire!
Step 5: Kneading the Dough to Perfection
Now that you’ve mixed your self-rising flour and Greek yogurt into a sticky yet cohesive dough, it’s time to get your hands involved! This step of kneading is essential not just for combining the ingredients but for developing a texture that’s both chewy and soft. What you want here is a light touch—don’t overdo it! Just a few gentle kneads will suffice. You’ll notice the dough becoming smoother and more elastic as you work with it. This transformation is crucial because it allows gluten strands to form, which will give your bagels that characteristic chewiness we all crave.
As you knead, keep an eye on the moisture content. If the dough feels too sticky, sprinkle a tiny bit more flour on your surface or on your hands—just enough to keep things manageable but not so much that it alters the balance of ingredients. As you fold and press the dough, think about how satisfying it will be to bite into these bagels once they’re baked. Once you have a nice, smooth ball of dough, divide it gently into four equal pieces. It’s important that each piece is uniform in size so that they bake evenly—a little attention to detail goes a long way!
Step 6: Shaping Your Bagels
With your dough pieces ready, let’s move on to shaping them into bagels. This part is where creativity can shine; envisioning how delightful these will look once they’re out of the oven should inspire you! Take one piece of dough and roll it into a ball between your palms—this helps create an even surface. Then, using your fingers, poke a hole right through the center of that ball. The key here is to make sure the hole is wide enough; if it’s too small, it’ll close up while baking and you’ll lose that iconic bagel shape. Aim for about an inch in diameter for the hole—this ensures a perfect bagel with plenty of room for toppings later.
As you shape each bagel, place them carefully on your baking tray lined with parchment paper or a silicone mat (which makes cleanup a breeze!). Arrange them with some space in between since they will puff up slightly during baking. Watching these little beauties transform in the oven is part of the magic! Don’t rush this step; take your time to ensure each one has its unique character and charm. The anticipation builds as you imagine how wonderful they’ll taste when they come out all golden and fragrant.
Step 7: The Egg Wash Enchantment
Ah, the egg wash—this magical step elevates our 3 ingredient high protein Greek yogurt bagels from simple breakfast fare to something truly extraordinary! In a small bowl, crack open an egg and whisk it until it’s beautifully combined into a golden mixture full of promise. Using a pastry brush (or even your fingers if you’re feeling adventurous), generously brush this egg wash over each shaped bagel before they go into the oven. This isn’t merely for aesthetics; this process helps create that gorgeous golden crust we all love while also adding richness and flavor to every bite.
As these bagels bake, keep an eye on their transformation—the egg wash will turn glossy and deep in color, providing not just visual appeal but also enhancing their overall texture. Remember: patience is key! Allowing them to develop this lovely crust means you’ll experience that satisfying crunch as you bite in—a contrast to the fluffy interior that’s simply divine. So trust me on this one: don’t skip or rush this step; it’s absolutely paramount for achieving bagel perfection!
Step 8: Baking Your Perfect Bagels
Finally, we arrive at one of my favorite moments—the actual baking! Preheat your oven to 180°C (350°F) if you haven’t done so already; this temperature allows for even cooking while developing those delightful flavors we’re after without burning anything away too quickly. Once preheated, slide your tray of bagels into the oven with confidence! Bake them for about 20–25 minutes, but I encourage you not to set a timer just yet—this part requires some attentive observation.
As they bake, you’ll start to notice an intoxicating aroma wafting through your kitchen—a sweet promise of what’s to come! Keep watch around the 20-minute mark; you’re looking for that beautiful golden-brown hue which indicates they are nearly done. Every oven behaves differently; if yours runs hot or cool, adjust accordingly by checking earlier or letting them go longer if needed. Once they look like little rounds of sunshine peeking out from inside your oven door, pull them out with care and let them cool slightly on a wire rack before digging in.
Final Touches: Serving Up Your 3 Ingredient High Protein Greek Yogurt Bagels
At last! The moment we’ve all been waiting for has arrived—the glorious unveiling of your freshly baked bagels! Letting them cool just enough so they don’t scald your fingertips is crucial—you want them warm but not too hot when taking that first heavenly bite. This cooling time also allows their texture to settle perfectly; once cooled slightly, they’ll be soft yet sturdy enough to hold up against any toppings you desire.
Now comes the fun part: serving these beauties! These bagels are incredibly versatile—whether slathered with rich cream cheese (or vegan alternatives), topped with avocado slices drizzled in olive oil, or even enjoyed plain with just a hint of sea salt sprinkled on top—each option provides its own unique experience bursting with flavors. Don’t forget about adding fresh herbs or vegetables as well—the symphony of flavors can be downright enchanting!
With only three ingredients and minimal effort required from start to finish, these bagels are not just easy recipes—they’re destined to become household favorites for quick breakfasts or snacks throughout busy weeks ahead! So gather around the table with loved ones or enjoy one quietly alone with coffee in hand—you’ve earned this moment of joy over something utterly satisfying and deliciously homemade!
And there you have it—your very own batch of homemade 3 ingredient high protein Greek yogurt bagels! I hope you savor every moment spent creating these delights just as much as I do every time I whip up my own batch at home! Happy baking!
Storage and Enjoyment Tips for Your 3 ingredient high protein greek yogurt bagels
Now that you’ve crafted these utterly delightful 3 ingredient high protein Greek yogurt bagels, it’s time to savor every last bite! But what if you find yourself with a few extras? Don’t fret; I promise you that there are fantastic ways to preserve their deliciousness for future enjoyment. The key is in proper storage techniques, ensuring that each bagel remains as soft and chewy as the moment they came out of the oven.
Storing Leftover 3 ingredient high protein greek yogurt bagels
To keep your bagels at their best, place them in an airtight container or a resealable plastic bag at room temperature. This method allows them to breathe while maintaining just the right amount of moisture, keeping them soft and enjoyable. Generally, they’ll stay fresh for about two days on your kitchen counter. If you’re like me and want to prolong that silky-smooth texture, consider wrapping each bagel individually in plastic wrap before placing them in the container. This little trick is absolutely paramount in retaining freshness and preventing any pesky staleness from creeping in. When you take a bite after storage, you’ll notice they might lose some of their initial warmth but still possess that delightful chewy texture with a hint of tang from the Greek yogurt—a truly extraordinary experience! When you’re ready to enjoy them again, simply pop them in a toaster or oven for a few minutes to revive that fresh-out-of-the-oven charm.
Freezing for Later
If you find yourself with too many bagels (which is hard to imagine because they’re so good!), freezing is an excellent option. Just let them cool completely before wrapping each one tightly in plastic wrap or aluminum foil—this helps protect against freezer burn, which can dull their flavor and texture. In the freezer, your bagels will maintain their quality for about three months! When the craving strikes, pull out however many you desire and let them thaw at room temperature or warm them directly from frozen in your toaster or oven. Trust me on this: having these nutritious gems ready to go whenever hunger hits is a game-changer when life gets busy. You’ll feel like a culinary magician every time you pull out a bagel, ready to slice and slather with your favorite toppings!
3 Ingredient High Protein Greek Yogurt Bagels

Discover the joy of baking with these 3 ingredient high protein Greek yogurt bagels! Soft, chewy, and incredibly satisfying, these bagels are a healthier twist on a classic favorite. Made with just self-rising flour, Greek yogurt, and an optional egg wash for that gorgeous golden finish, they are the perfect quick breakfast or snack option for busy mornings. Whether you enjoy them plain, topped with cream cheese, or smeared with almond butter, these bagels are sure to impress your taste buds. With minimal ingredients and effort required, you’ll find yourself reaching for this recipe time and again. Get ready to indulge in a deliciously nutritious treat that’s as easy to make as it is delightful to eat!
- Prep Time: 10 minutes
- Cook Time: 25 minutes
- Total Time: 35 minutes
- Yield: Makes 4 bagels 1x
- Category: Breakfast
- Method: Baking
- Cuisine: American
Ingredients
- 1 cup self-rising flour
- 1 cup plain Greek yogurt
- 1 egg (optional for egg wash)
Instructions
- Preheat your oven to 180°C (350°F).
- In a mixing bowl, combine self-rising flour and Greek yogurt until a cohesive dough forms.
- Knead lightly until smooth and divide into four equal pieces.
- Shape each piece into a bagel by rolling it into a ring with a hole in the center.
- Place on a baking tray lined with parchment paper; brush with egg wash if desired.
- Bake for 20-25 minutes until golden brown.
Nutrition
- Serving Size: 1 serving
- Calories: 180
- Sugar: 2g
- Sodium: 160mg
- Fat: 2g
- Saturated Fat: 1g
- Unsaturated Fat: 1g
- Trans Fat: 0g
- Carbohydrates: 29g
- Fiber: 1g
- Protein: 10g
- Cholesterol: 30mg