Hawaiian Rice Pudding
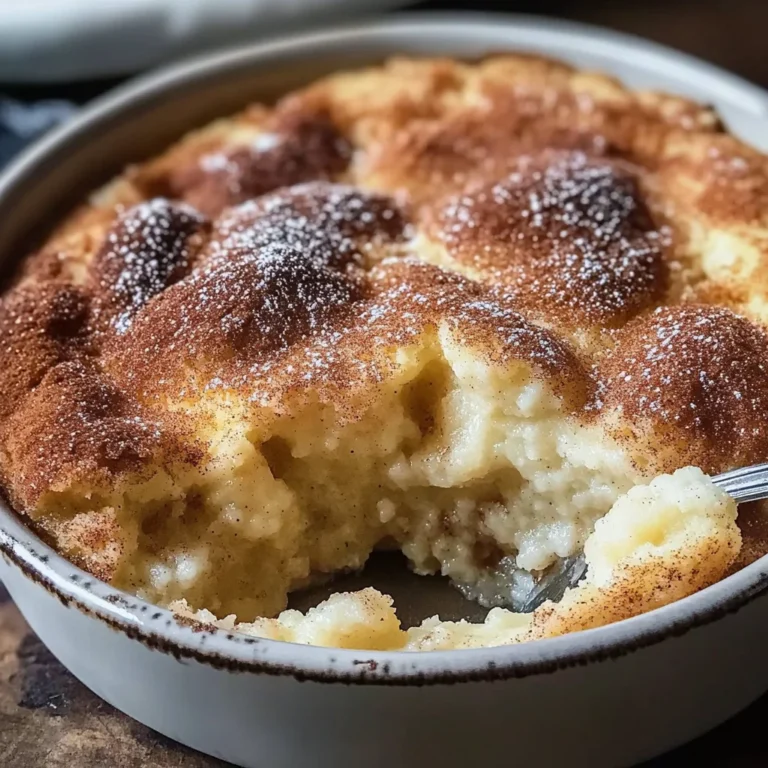
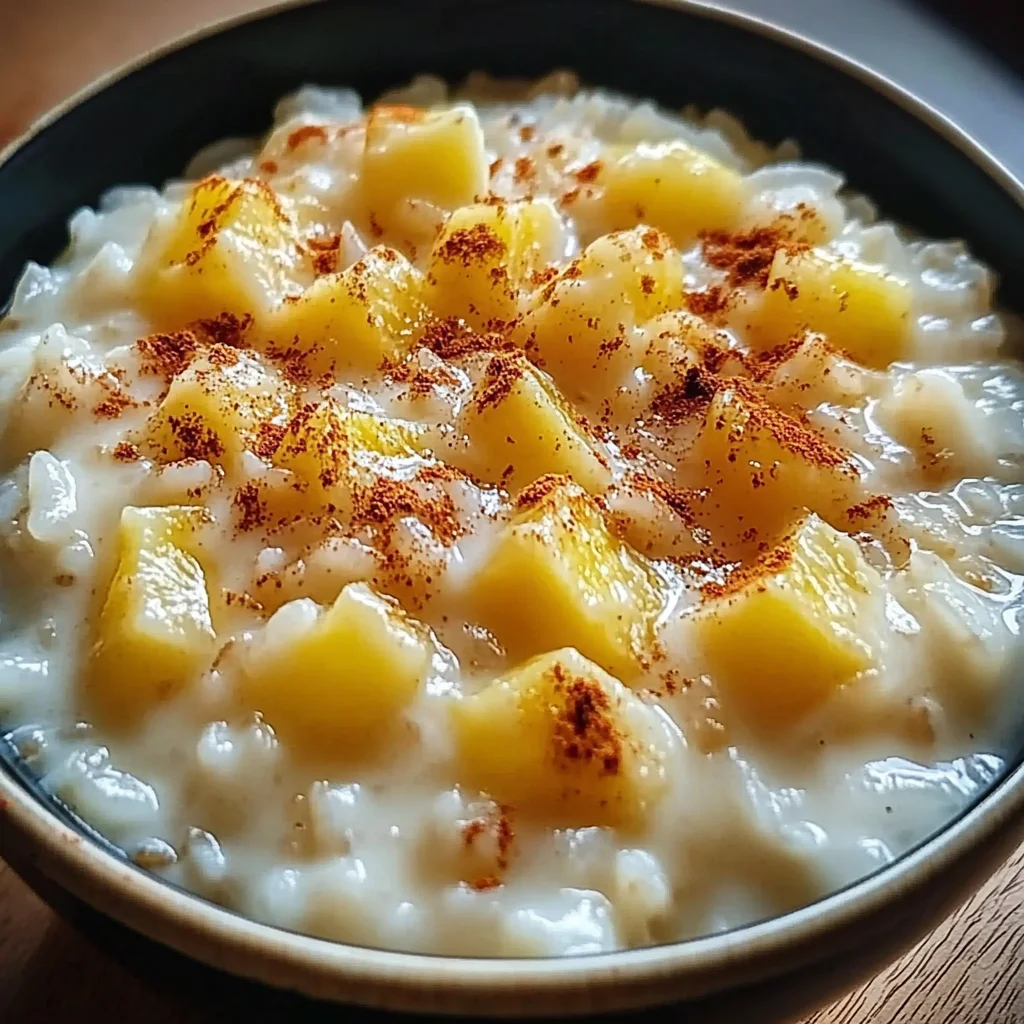
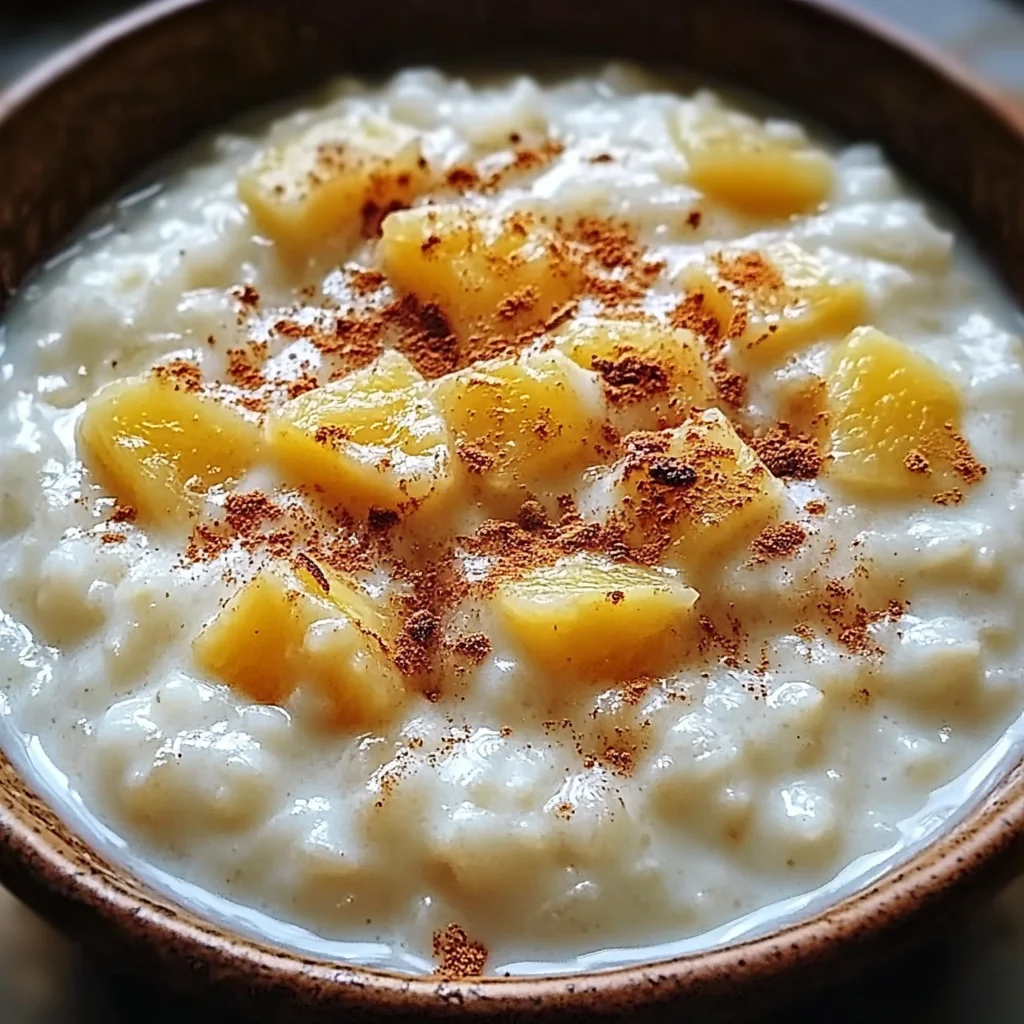
There’s something undeniably enchanting about dessert recipes that transport you to another world, and that’s exactly what Hawaiian Rice Pudding does. As you prepare this creamy delight, the rich aroma of coconut mingles with the sweet scent of pineapple, creating a sensory experience that feels like a warm embrace from paradise itself. Each spoonful is a journey, where the comforting texture of tender rice meets the luscious creaminess of coconut milk, making every bite a celebration of tropical flavors. It’s more than just food; it’s a moment of joy that you get to share with loved ones, igniting memories and sparking new ones in the process.
I’ve always been captivated by how food connects us—how it weaves stories into the fabric of our lives. This Hawaiian Rice Pudding is no exception; it’s a beautiful blend of tradition and innovation that reflects the vibrant culture of Hawaii. Imagine serving this at a family gathering or simply enjoying it on a cozy evening at home! With each bite, you’ll find yourself savoring not just flavors but also the warmth of togetherness and love—a truly extraordinary way to end any meal or enjoy as an afternoon treat. So grab your ingredients and let’s dive into this delightful culinary journey together!
Hawaiian Rice Pudding: A Tropical Escape in Every Bite
This recipe is perfect for those moments when you crave something both comforting and exotic. The combination of creamy coconut milk and juicy pineapple creates an utterly intoxicating flavor profile that dances on your palate. Whether you serve it warm or chilled, this pudding promises to be a hit at your table!
Ingredients:
Embarking on this culinary adventure requires just a few simple ingredients that come together in harmony to create something special. Let’s explore each one closely so you can truly appreciate their role in crafting this delightful dish.
- 2 cups cooked white rice. Using cooked white rice is essential here—it’s the foundation of our pudding! Choose short-grain rice if possible; it releases starch during cooking, which contributes to the creaminess we’re aiming for. If you have leftover rice from another meal, it works beautifully here too! Just make sure it’s cooled down before using; this helps prevent clumping when combined with the other ingredients.
- 1 can (13.5 oz) coconut milk. This ingredient is like liquid gold for our pudding! Creamy and rich, coconut milk brings that quintessential tropical flavor that makes Hawaiian dishes so beloved. Look for full-fat coconut milk for maximum creaminess—this will give your pudding its signature lush texture. Shake the can well before opening to ensure everything is well mixed!
- 1 cup pineapple chunks, drained. Pineapple adds a burst of sweetness and tanginess that complements the richness of coconut perfectly. Fresh pineapple is wonderful if you’re up for chopping it yourself, but canned works just as well—just be sure to drain it thoroughly so excess liquid doesn’t water down your pudding.
- 1/2 cup heavy cream. This ingredient elevates our pudding to new heights of decadence! Heavy cream adds richness and depth, ensuring every bite feels indulgent and satisfying. If you’re looking for a lighter alternative, consider using full-fat coconut cream instead—it will keep all those tropical vibes intact while still providing that luscious mouthfeel.
- 1/4 cup sugar. Sugar balances out the natural sweetness from our pineapple while enhancing the overall flavor profile of the pudding. Feel free to adjust according to your taste—maybe even try brown sugar for added caramel notes! Just remember not to skip this step; without sugar, our dish would lack that vital sweetness.
- 1/4 teaspoon vanilla extract. This ingredient might seem small but trust me—it’s absolutely paramount! Vanilla enhances all the other flavors in your pudding, rounding them out beautifully without overpowering them. Opt for pure vanilla extract over imitation for richer flavor—your taste buds will thank you!
- 1/4 teaspoon ground cinnamon. A dash of cinnamon warms up our dish with its aromatic spice—a perfect complement to sweet tropical flavors! It adds depth and complexity without needing much; just be careful not to add too much or it could overshadow those lovely coconut and pineapple notes.
- 1/4 teaspoon ground nutmeg. Similar to cinnamon but more subtle, nutmeg lends an earthy warmth that rounds out our pudding’s flavor profile beautifully. It has a hint of sweetness itself and pairs wonderfully with both coconut and pineapple—truly an underrated star in this dish!
- 1/4 teaspoon salt. Salt is crucial in any recipe—it enhances flavors rather than making things taste salty! A small pinch will elevate all our ingredients’ natural sweetness without being noticeable itself.
- 1 tablespoon cornstarch. This thickening agent transforms our mixture into a creamy dessert instead of soup! Mixing cornstarch with water creates what’s called a slurry; adding it gradually ensures there are no lumps in your final product—a silky smooth pudding is what we’re after!
- 1 tablespoon water. Used solely for mixing with cornstarch, this helps create that smooth slurry we talked about earlier—no clumps allowed!
Equipment You’ll Need:
Having the right tools makes all the difference when preparing any recipe—and let me tell you, they become essential partners as you create something wonderful like Hawaiian Rice Pudding! Gather these pieces so you’re ready for success.
- Medium saucepan – A sturdy medium saucepan allows for even heat distribution as we cook our mixture gently on the stovetop. It’s important because uneven heat may cause sticking or scorching; you’ll want every component warmed through harmoniously while achieving that perfect creamy texture.
- Wooden spoon or silicone spatula – These utensils are non-reactive options ideal for stirring delicate mixtures like ours without scratching your pan’s surface or altering flavors (think metallic tastes!). Plus, their flexible nature helps scrape down sides while preventing any stubborn clumps from forming as we combine everything together.
- Small bowl – You’ll need one to mix together cornstarch and water into a smooth slurry before incorporating it into our main mixture—a crucial step I assure you won’t want to skip!
Now that we’ve set up our kitchen space with all these essentials ready at hand let’s dive into preparing this delightful Hawaiian Rice Pudding!
Step 1: Combine Your Ingredients
Start by gathering all your beautiful ingredients into your medium saucepan: cooked white rice, coconut milk, pineapple chunks, heavy cream, sugar, vanilla extract, ground cinnamon, ground nutmeg—and don’t forget that pinch of salt! Gently stir everything together until it’s well combined—the goal here is harmony among these diverse flavors before we begin cooking them down together into something magical.
Step 2: Heat It Up
Place your saucepan over medium heat—this gentle approach allows those ingredients time to mingle while preventing anything from burning on the bottom (nobody wants scorched rice!). As they start warming up slowly bring attention back towards stirring regularly; keep an eye out until we reach simmering point which should take around five minutes or so depending on how hot your stove runs! The anticipation builds as aromas begin circling around—you might find yourself smiling already at what’s coming next!
Step 3: Reduce & Cook
Once you’ve achieved that simmering magic moment (you’ll know because you’ll see little bubbles forming throughout), reduce heat down low enough where it maintains gentle bubbling without boiling fiercely away—the goal here is slow cooking which allows flavors deepening even further plus gives us chance needed for perfect thickening later on too! Take about five-seven minutes stirring frequently again making sure nothing sticks along sides until everything looks nice n’ cozy together—they’re becoming best friends inside this pot!
Step 4: Create Your Slurry
In a small bowl mix cornstarch alongside water until completely smooth—that slurry will help transform what started off thinly mixed liquids into wonderfully creamy consistency soon enough by acting as natural thickener when added gradually during last stages ahead! Be careful though—not rushing through either step here means avoiding lumps forming later which can spoil lovely texture we’re after altogether…
Stay tuned as we continue unfolding all steps necessary towards achieving ultimate tropical bliss with each scoop served up lovingly onto plates soon enough…
Step 5: Creating the Perfect Slurry
Now we move on to a crucial part of our Hawaiian Rice Pudding—the cornstarch slurry. This step may seem simple, but it’s absolutely paramount to achieving that luxuriously creamy texture we’re after. In a small mixing bowl, combine 1 tablespoon of cornstarch with 1 tablespoon of water. Using a whisk or fork, stir vigorously until the mixture is smooth and free of lumps. The goal here is to create a cohesive blend that will thicken our pudding without clumping. Trust me on this; if the cornstarch isn’t fully dissolved, you might end up with unexpected little bits in your silky dessert.
Why do we need this slurry? Cornstarch is a wonderful thickening agent that works by absorbing moisture and expanding when heated. When you slowly integrate the slurry into our simmering mixture, it transforms the pudding from a lovely soup into an utterly intoxicating custard-like consistency. Be sure to keep an eye on your rice mixture; once it has simmered for about 5-7 minutes, it should be warm enough to allow for proper thickening without any risk of overcooking the rice. This is where patience truly pays off—don’t rush this step! The more time you take to ensure everything is blended flawlessly, the more satisfying your final dish will be.
Step 6: Incorporating the Slurry
With your slurry ready and waiting, it’s time for one of those magical moments in cooking! Slowly drizzle the cornstarch mixture into your simmering rice pudding while stirring constantly with a wooden spoon or silicone spatula. This gentle stirring is crucial; it not only prevents clumping but also ensures that every grain of rice gets coated with that luscious liquid gold we’re creating. As you add the slurry, watch how your mixture begins to transform before your eyes, thickening and becoming more indulgent with each stir.
Keep cooking on low heat for another 3-5 minutes, continuing to stir frequently so nothing sticks to the bottom of the pan—nobody wants burnt bits in their dessert! During this time, you’ll notice how the pudding becomes thicker and creamier; it’ll begin to coat the back of your spoon beautifully. This is where you can really start to appreciate all those tropical flavors melding together—the coconut milk harmonizing with sweet pineapple while hints of cinnamon and nutmeg dance around in your palate. Remember, you want that perfect creamy consistency; if it seems too runny at this point, simply allow it to cook a bit longer while stirring gently.
Step 7: Achieving Ideal Thickness
Once you’ve reached that dreamy thickness—think of it as being just shy of pouring cream—you’ll want to remove the saucepan from heat. Take a moment here to appreciate what you’ve created; it’s truly extraordinary how simple ingredients can evoke such rich complexity in flavor and texture! By letting the pudding rest off heat for just a couple of minutes, you’re allowing it to settle and achieve its final form. This resting period is necessary because as it cools slightly, it will continue thickening ever so gently—a delightful transformation that makes all the difference in presentation and taste.
While it’s tempting to dive right into serving this decadent dessert, I encourage you to let it sit for just a few moments before dishing it out. The flavors will deepen as they meld together even further during this brief respite. Plus, if you’ve been stirring diligently, allowing those sore muscles a moment’s rest will feel like pure bliss!
Step 8: Cooling Down Your Pudding
Now comes one of my favorite parts: deciding how you’d like to serve your Hawaiian Rice Pudding! You have two delightful options here—serve it warm or chill it for later indulgence. If you choose to serve warm (which I often do), simply ladle generous portions into bowls or cups—feel free to garnish them with fresh pineapple chunks or perhaps even a sprinkle of toasted coconut for added texture and visual appeal.
However, if you prefer enjoying your pudding cold (a fantastic choice for hot summer days!), it’s essential to let it cool down completely before transferring it into individual containers or one large serving bowl for chilling in the refrigerator. Covering the pudding with plastic wrap directly against its surface will prevent any skin from forming—a common issue with puddings left uncovered during cooling.
I promise you; chilling enhances not just its creamy consistency but also allows those tropical flavors to bloom even further! Ideally, give it at least 2 hours, but overnight would be even better if you’re planning ahead! Imagine waking up and having luscious Hawaiian Rice Pudding waiting in your fridge—it’s like starting your day with vacation vibes!
Conclusion:
As we wrap up our journey through crafting this enchanting Hawaiian Rice Pudding together, I hope your heart is as full as your bowl! There’s something profoundly satisfying about combining simple ingredients to create such a vibrant dish that transports us straight to a sun-kissed paradise with each spoonful. The rich creaminess of coconut milk paired with sweet pineapple and warm spices creates a symphony of flavors that truly elevates this dessert beyond ordinary fare—it’s comfort food at its finest!
This recipe is not just a must-try because of its irresistible taste; it’s about the experience of making something utterly delightful and sharing it with those we love. Imagine pulling out that creamy bowl from the fridge on a cozy evening or serving it at a gathering where everyone gathers around for seconds (or thirds!). Its versatility shines through whether served warm on a chilly night or chilled during a summer soirée; each bite invites smiles and happy sighs from family and friends alike.
For serving suggestions that’ll make your heart sing: imagine savoring one warm scoop alongside toasted macadamia nuts for that extra crunch or garnishing with shredded coconut and fresh mint leaves for an aromatic touch. For an afternoon pick-me-up, pair it with a steaming cup of chai tea—those spices dance so beautifully together! And if you’re feeling particularly indulgent, try drizzling some honey over each serving; the sweetness complements the tropical flavor beautifully.
Feeling adventurous? This recipe is wonderfully adaptable; why not experiment by adding mango chunks for another layer of fruitiness or folding in some dark chocolate chips when you’re craving something rich? You could even swap out fresh berries for pineapple if you’re looking for something tart and refreshing—let your creativity flow! I invite you to dive into this culinary adventure and make this Hawaiian Rice Pudding your own; I would love to hear how you personalize it! Share your experiences and let’s connect over our shared love for delicious food.
Hawaiian Rice Pudding
Experience bliss with our creamy Hawaiian Rice Pudding—a tropical delight bursting with flavor! Dive in today and savor every spoonful!
- Prep Time: 10 minutes
- Cook Time: 15 minutes
- Total Time: 25 minutes
- Yield: Serves approximately 6 people 1x
- Category: Dessert
- Method: Stovetop
- Cuisine: Hawaiian
Ingredients
- 2 cups cooked white rice
- 1 can (13.5 oz) coconut milk
- 1 cup pineapple chunks, drained
- 1/2 cup heavy cream (or full-fat coconut cream for a lighter option)
- 1/4 cup sugar (adjust according to taste)
- 1/4 teaspoon vanilla extract
- 1/4 teaspoon ground cinnamon
- 1/4 teaspoon ground nutmeg
- 1/4 teaspoon salt
- 1 tablespoon cornstarch mixed with 1 tablespoon water
Instructions
- In a medium saucepan, combine cooked rice, coconut milk, pineapple chunks, heavy cream, sugar, vanilla extract, cinnamon, nutmeg, and salt. Stir until mixed well.
- Heat over medium heat until simmering, stirring regularly for about 5 minutes.
- In a small bowl, mix cornstarch with water to create a slurry.
- Gradually add the slurry to the simmering mixture while stirring constantly for another 3-5 minutes until thickened.
- Remove from heat and let it rest for a few minutes before serving.
Nutrition
- Serving Size: 1 cup (240g)
- Calories: 310
- Sugar: 20g
- Sodium: 90mg
- Fat: 14g
- Saturated Fat: 10g
- Unsaturated Fat: 3g
- Trans Fat: 0g
- Carbohydrates: 42g
- Fiber: 2g
- Protein: 4g
- Cholesterol: 30mg