Gooey Bourbon Browned Butter Chocolate Chip Cookies
There’s something utterly enchanting about the warm, comforting aroma of freshly baked cookies wafting through your home. It’s like a hug in the form of dessert, a blissful experience that transcends mere sustenance, creating memories with every bite. When I think of my cherished moments in the kitchen, one recipe shines brightly: Gooey Bourbon Browned Butter Chocolate Chip Cookies. This isn’t just about baking; it’s a culinary journey where nostalgia meets indulgence, and I can almost hear the soft crackle of cookies emerging from the oven, ready to be devoured. The golden brown edges, the soft and gooey centers—each cookie is an invitation to savor life’s sweetest pleasures. As you embark on this delicious adventure, trust me when I say that these cookies will become a beloved staple in your home.
The magic truly begins with the browned butter—a simple ingredient transformed into something ethereal. When we take that unsalted butter and gently coax it into a rich amber hue, we unlock nutty undertones that elevate our cookies to extraordinary levels. And while bourbon adds an intriguing depth of flavor (don’t worry—I’ll be providing an alternative), it’s all about layering those flavors for a cookie experience that lingers long after the last crumb has disappeared. Whether you’re serving these at a cozy gathering with friends or enjoying them solo with a glass of milk, they promise to deliver pure joy in every bite.
Gooey Bourbon Browned Butter Chocolate Chip Cookies: A Sweet Escape
Let’s get started on crafting these delightful treats! The beauty of baking lies not just in the final product but in the process itself—the way ingredients come together to create something beautiful and delicious. With each step of making these cookies, you’ll find joy in watching what could simply be flour and sugar bloom into something divine. So roll up your sleeves and prepare for some kitchen magic!
Ingredients:
As we gather our ingredients, think of this as assembling a team for an epic adventure! Each component plays its own vital role in creating that perfect cookie experience you’ll cherish.
- 2 sticks (1 cup or 226g) unsalted butter. This is crucial for creaming properly and creating that light, airy texture we’re aiming for in our Gooey Bourbon Browned Butter Chocolate Chip Cookies. Unsalted butter also gives us control over the saltiness of our dough; if you’re feeling adventurous, consider using European-style butter for an even richer flavor profile. Remember to let it soften to room temperature before use—this ensures easy incorporation into your mix.
- 2 shots (or about 1/4 cup) bourbon. While traditional recipes call for bourbon to impart warmth and depth, you can replace this with vanilla extract or even brewed coffee if you’d prefer to avoid alcohol altogether! These alternatives still provide complexity while allowing those delightful chocolate flavors to shine through without overshadowing them.
- 1 cup (packed) brown sugar. This sugar isn’t just sweet; it brings moisture and caramel notes that contribute to that gooey center we all crave. Make sure to pack it tightly into your measuring cup so you get every bit of that luscious flavor!
- 1/4 cup white sugar. White sugar helps create those crispy edges while balancing out the richness from the brown sugar and butter. Using both types creates a beautiful contrast between crispness and chewiness—a non-negotiable aspect for any great cookie!
- 1/4 cup maple syrup. Ahh, nature’s sweet nectar! Maple syrup adds not only sweetness but also complexity with its earthy tones that harmonize beautifully with chocolate chips. Plus, who doesn’t love a hint of maple goodness in their desserts?
- 1 tablespoon vanilla extract. This classic ingredient is like the fairy dust of baking—it enhances all other flavors in your cookies! Look for high-quality pure vanilla extract; trust me—it makes a world of difference.
- 1 large egg and 1 egg yolk. The duo here brings moisture and richness while helping bind everything together beautifully—resulting in cookies that are chewy yet tender at once! The extra yolk is key as it contributes additional fat which enhances texture.
- 2 1/2 cups all-purpose flour. Flour provides structure; however, too much can lead to dry cookies while too little results in flat ones! Measure carefully—spooning flour into your measuring cup rather than scooping directly from the bag will help achieve accuracy.
- 1 teaspoon baking soda. This leavening agent is essential for achieving that perfect rise; it creates air pockets as your cookies bake leading to an ideal texture that’s both soft inside yet slightly crisp outside.
- 1 teaspoon salt. Salt enhances sweetness by balancing flavors—a pinch here transforms our dough from good to extraordinary! Remember that too much can overpower so stick to what’s suggested.
- 2 or 3 cups dark chocolate chips (because more chocolate is always better!). Choose high-quality dark chocolate chips—they’re richer than semi-sweet varieties and will melt beautifully into each cookie providing pockets of gooey goodness that’ll have everyone coming back for seconds!
Equipment You’ll Need:
Before diving into our recipe steps, let’s gather some trusty tools that will make our cookie-making experience smooth sailing! Having the right equipment not only simplifies things but also enhances your enjoyment as you create these delightful treats.
- Large saucepan – Essential for browning butter; choose one with a light-colored bottom so you can easily monitor its progress as it transitions from yellow to golden brown—this visual cue is paramount!
- Stand mixer or large mixing bowl with hand mixer – If using a stand mixer, ensure you have the paddle attachment ready; it does all the heavy lifting when combining wet ingredients smoothly without overmixing!
- Measuring cups & spoons – Precision is key in baking! Invest in good quality stainless steel measuring tools; they will serve you well time after time ensuring consistent results every single time.
- Baking sheets lined with parchment paper or silicone mats – These will prevent sticking while promoting even baking—a must-have for achieving those perfectly round cookies.
- Cooling racks – After baking, allow your cookies to cool on racks so they can set properly without becoming soggy on the bottom—a step often overlooked but absolutely necessary!
Preparing the Gooey Bourbon Browned Butter Chocolate Chip Cookies
Step 1: The Art of Browning Butter
Begin by preheating your oven to 375°F (190°C)—this ensures it’s nice and hot when you’re ready to bake! Now grab those two sticks of unsalted butter and place them in your large saucepan over medium heat—this is where the magic happens! You’ll want to keep an eye on it as it melts—stirring frequently until it turns golden brown and develops nutty aromas that fill your kitchen like an embrace from an old friend. This process typically takes about 5 minutes but watch closely because we want just the right shade—not burnt! Once you see those lovely brown bits forming at the bottom and smell its intoxicating scent wafting through your space—immediately remove from heat; pouring in those two shots (or substitute) will stop cooking right away while adding depth at this moment when cooled down afterwards makes everything gel beautifully together later on.
Step 2: Mixing Wet Ingredients
Once your browned butter has cooled slightly (don’t rush this step!), transfer it into your stand mixer bowl along with brown sugar, white sugar, maple syrup, vanilla extract—and both eggs (whole egg + yolk). Beat them together until smooth—you want everything combined thoroughly which normally takes around 2 minutes on medium speed; this stage is known as creaming since we’re incorporating air bubbles into our mixture which helps lighten up our batter leading us closer towards those chewy cookie dreams we desire! Don’t forget—always scrape down sides periodically during mixing ensuring no lumps remain hidden below surface level—it makes ALL difference towards achieving consistency across dough batches!
Step 3: Incorporating Dry Ingredients
Now comes adding flour slowly but surely—we’re talking about gradually sifting two-and-a-half cups into wet mixture whilst continuing mixing at low speed so overflow doesn’t occur unexpectedly; aim for gentle folding motions until just combined before sprinkling salt plus baking soda evenly across then gently stir until no dry patches visible anymore—you want just enough gluten development happening here without overdoing it leading towards tough results instead fluffy perfection expected later once baked up nicely onto sheets waiting patiently nearby…
Step 4: Add That Decadent Chocolate
At last—but certainly not least—we’re adding those glorious dark chocolate chips! Trust me when I say “the more chocolate=the merrier” so feel free really load up here if desired because who doesn’t love biting into melting pockets? Use spatula gently fold through ensuring even distribution throughout dough pieces rounding off texture nicely before moving onto next crucial step which involves chilling…
As we continue dancing through this recipe together my dear friend—remember each element influences final outcome profoundly shaping experience ahead awaiting eager taste buds craving satisfaction found within deliciousness crafted here today…
Step 5: Chilling – The Secret to Chewy Perfection
Now that you’ve scooped out those luscious mounds of dough, it’s time for the all-important chilling phase. I can already hear you thinking, “Do I really have to wait?” Trust me on this—this step is absolutely paramount for achieving that gooey, chewy texture we’re all dreaming about! By allowing the dough to chill for at least an hour (or even longer if you have the patience), you’re giving the flour a chance to fully hydrate and the flavors to meld together beautifully. This resting period also helps solidify the butter, preventing the cookies from spreading too much during baking. Who wants flat cookies when you can have thick, pillowy goodness?
As you place your cookie dough balls on the lined baking sheet, make sure they’re spaced apart by about two inches; they need room to expand while they bake! If you find yourself caught up in the excitement and want to bake some right away, don’t worry—I’ve been there too! Just keep in mind that if you skip this chilling step, your cookies may end up more like pancakes than the delightful little pillows of chocolatey bliss we envision. So, pop them in the fridge for an hour or stash them in the freezer for later—these dough balls freeze beautifully and can be baked straight from frozen with just a minute or two added to your baking time.
Step 6: Baking – Transforming Dough into Heavenly Cookies
Preheat your oven to a cozy 375 degrees Fahrenheit, inviting that warm air into your kitchen and sending delightful aromas wafting through your home as these cookies bake. Once your oven reaches this temperature, it’s showtime! Placing one tray at a time in the center rack is crucial; this ensures even heat distribution, allowing each cookie to bake perfectly without burning or undercooking. I recommend baking just one tray at a time so that you can monitor progress closely and enjoy that glorious transformation from raw dough into golden-brown masterpieces.
When you first place those delightful mounds of cookie dough into the hot oven, lean close and inhale deeply as fragrant notes of caramelized sugar begin to fill the air. The magic happens within those first few minutes as the butter melts and begins to bubble, creating an intoxicating aroma that will make it nearly impossible to resist peeking! Bake them for about 12 minutes—but here’s a little secret: don’t fret if they look slightly underbaked when you take them out. They’ll continue cooking on the baking tray after removal due to carryover heat. This is where patience truly pays off; allow them to rest on their sheets for five minutes before transferring them to a cooling rack. This gentle cooling allows their structure to firm up while maintaining that utterly gooey interior.
Step 7: Cooling – Allowing Flavor Development
The cooling stage might feel like torture with those tantalizing smells surrounding you, but let me assure you—it’s worth every second! Transferring your cookies from their warm baking sheet onto a wire rack is not just about aesthetics; it’s crucial for achieving that desired texture. While they’re still warm and soft on top, they need space around them to release steam—this prevents sogginess and ensures each bite is not only delicious but also perfectly balanced in texture.
As they cool down, take this moment to savor what you’ve created. Each cookie will firm up slightly as it cools while still being soft in the middle—a balance that’s simply divine. You might be tempted to dive right in, but give them at least 10-15 minutes before indulging! This cooling period allows flavors to deepen; trust me when I say each bite will be more profound and satisfying once they’ve set just a bit longer.
Step 8: The Final Touch – Enjoying Your Masterpiece
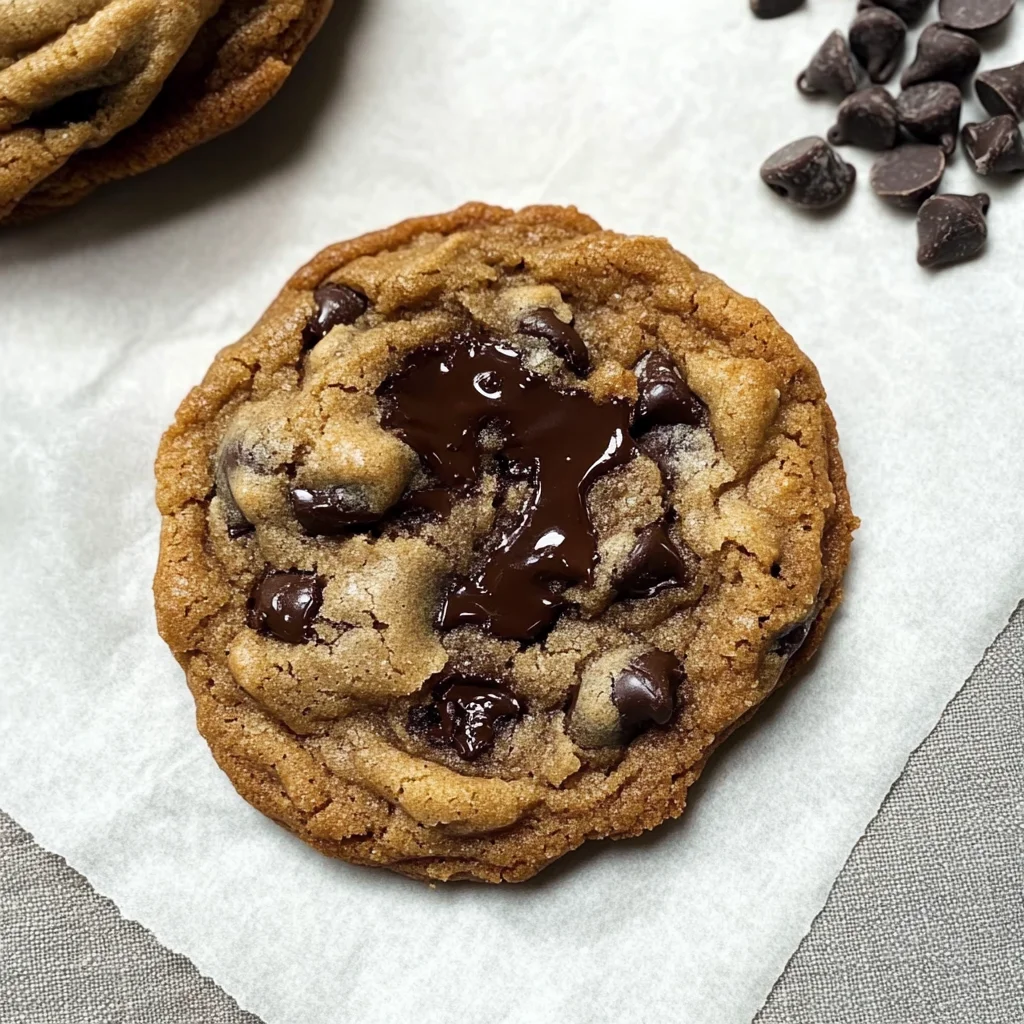
Now comes my favorite part—the moment of truth when we finally get to taste our Gooey Bourbon Browned Butter Chocolate Chip Cookies! But before we dive in headfirst (which I completely understand!), let’s consider how best to savor these beauties. Each cookie should be slightly crisp on the outside yet melt-in-your-mouth tender on the inside with pockets of rich dark chocolate oozing gooeyness with every bite—a true symphony of flavors!
I encourage you not just to grab one but rather take a moment—maybe pair these cookies with a glass of cold milk or even your favorite plant-based alternative if you’re looking for something lighter. Picture yourself sitting back with friends or family as laughter fills the air while sharing stories over these incredible cookies fresh from your oven. There’s something profoundly satisfying about sharing homemade treats; it transforms simple ingredients into cherished moments together.
And remember—these cookies are best enjoyed warm but will keep well in an airtight container for several days (if they last that long!). If you’re feeling adventurous, try warming one up in the microwave for a few seconds before enjoying; it’ll awaken all those decadent flavors once again! So go ahead—make these Gooey Bourbon Browned Butter Chocolate Chip Cookies part of your culinary repertoire, and I promise you’ll find joy in every single crumb!
Storage and Enjoyment Tips for Your Gooey Bourbon Browned Butter Chocolate Chip Cookies
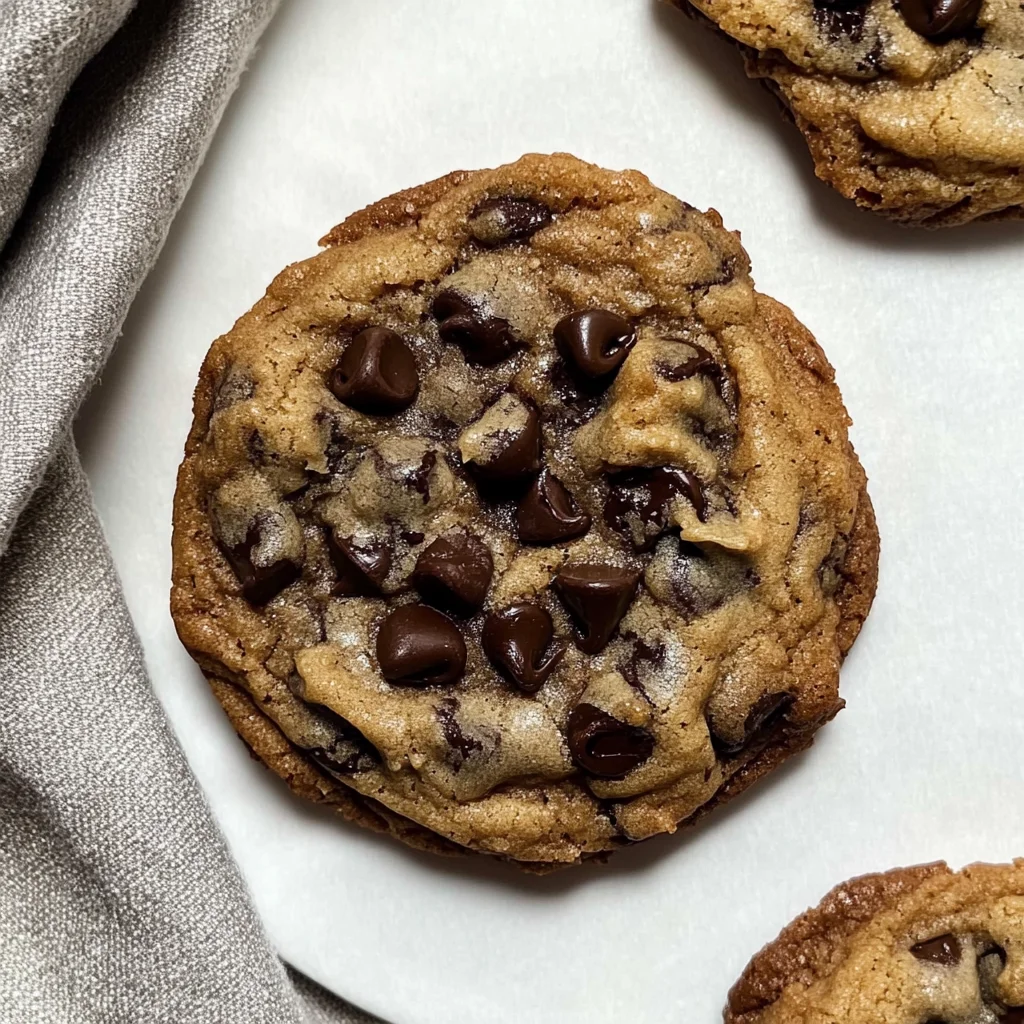
Now that your kitchen is filled with the delightful aroma of freshly baked cookies, it’s time to dive into the sweet joy of enjoying these Gooey Bourbon Browned Butter Chocolate Chip Cookies! I can practically see you pulling them out of the oven, golden edges hugging those luscious, melted chocolate chips. But let’s talk about how to keep that magic alive for future indulgence. Trust me, you’ll want to savor every last crumb, and with a few simple tips, you can enjoy these treats long after the first batch has disappeared.
Storing Leftover Gooey Bourbon Browned Butter Chocolate Chip Cookies
To keep your cookies fresh and utterly delightful, you’ll want to store them in an airtight container—this is absolutely paramount! A glass or plastic container works wonders as it locks in moisture and keeps those gooey centers intact. If you’ve got any leftovers (though I doubt they’ll last long), these cookies will maintain their deliciousness at room temperature for about 4-5 days. Now, here’s a little pro tip: place a slice of bread in the container with your cookies; this simple trick helps maintain softness by keeping the humidity just right! Even after a few days, these cookies still hold a wonderfully rich flavor, but I promise you—they’re best enjoyed fresh out of the oven. If you want to reheat them, just pop them in the microwave for about 10-15 seconds or warm them up in a toaster oven until they’re just soft enough to melt in your mouth.
Freezing for Later
If you’re like me and can’t resist having these cookies on hand at all times, freezing is a fantastic option! To freeze your dough balls before baking, simply scoop them onto a parchment-lined baking sheet and pop this tray into the freezer until they’re solid. Once frozen, transfer the dough balls into a zip-top freezer bag or an airtight container. They’ll keep beautifully for up to three months—just think of all those spontaneous cookie cravings you can satisfy! When you’re ready to enjoy a warm cookie again, there’s no need to defrost—just bake straight from frozen at 350°F for an extra minute or two longer than the original baking time. This convenience factor makes it so easy to whip up fresh cookies anytime you want!
Gooey Browned Butter Chocolate Chip Cookies
Indulge in the warm, comforting goodness of Gooey Browned Butter Chocolate Chip Cookies. These delightful treats are a culinary adventure that combines the nutty aroma of browned butter with rich dark chocolate chips for an irresistible experience. Each cookie features a crispy edge and a soft, gooey center, making them perfect for sharing or enjoying solo. Easy to bake yet sophisticated in flavor, these cookies are sure to become a cherished staple in your home. Get ready to create lasting memories with every bite!
- Prep Time: 15 minutes
- Cook Time: 12 minutes
- Total Time: 27 minutes
- Yield: Approximately 24 cookies 1x
- Category: Dessert
- Method: Baking
- Cuisine: American
Ingredients
- 1 cup (226g) unsalted butter
- 1/4 cup vanilla extract (or brewed coffee)
- 1 cup packed brown sugar
- 1/4 cup white sugar
- 1/4 cup maple syrup
- 1 large egg and 1 egg yolk
- 2 1/2 cups all-purpose flour
- 1 teaspoon baking soda
- 1 teaspoon salt
- 2 or 3 cups dark chocolate chips
Instructions
- Preheat oven to 375°F (190°C).
- In a saucepan over medium heat, melt butter until golden brown and nutty, about 5 minutes. Remove from heat and let cool slightly.
- In a mixing bowl, combine browned butter with sugars, maple syrup, vanilla extract, and eggs; beat until smooth.
- Gradually add flour, baking soda, and salt to the wet mixture; mix until just combined.
- Fold in dark chocolate chips.
- Chill dough for at least one hour.
- Scoop dough onto lined baking sheets, spacing them apart.
- Bake for about 12 minutes or until edges are golden.
Nutrition
- Serving Size: 1 cookie (approx. 40g)
- Calories: 190
- Sugar: 12g
- Sodium: 120mg
- Fat: 9g
- Saturated Fat: 5g
- Unsaturated Fat: 3g
- Trans Fat: 0g
- Carbohydrates: 26g
- Fiber: 1g
- Protein: 2g
- Cholesterol: 20mg