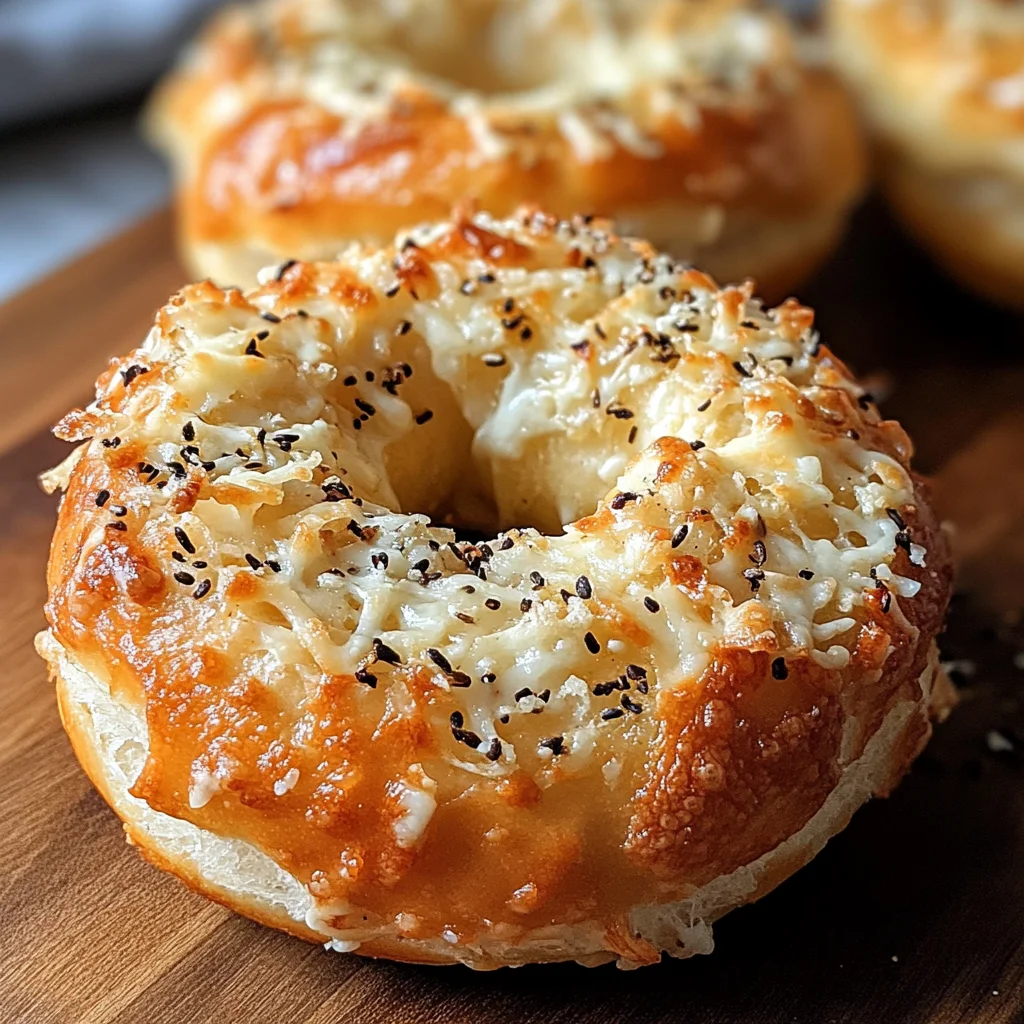
Garlic-Parmesan Cottage Cheese Bagels – Soft, Chewy & High-Protein
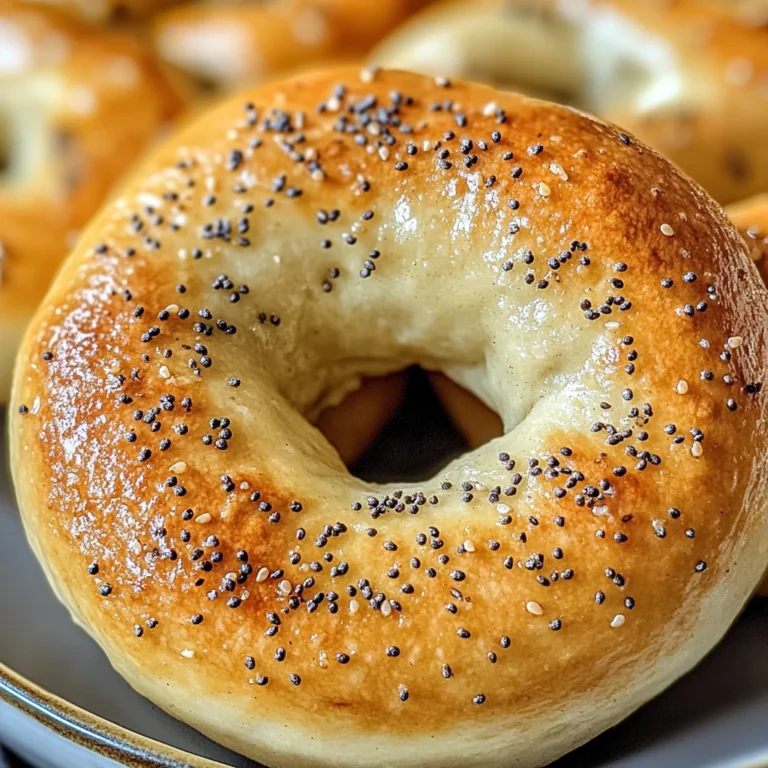
There’s something profoundly satisfying about crafting your own bagels at home, don’t you think? It’s not just about the end product; it’s the entire experience that unfolds in your kitchen. The delightful aroma of garlic wafting through the air, the soft, chewy texture that you can only achieve through a bit of love and patience—these Garlic-Parmesan Cottage Cheese Bagels are more than just a recipe; they’re an invitation to connect with something truly special. Imagine sinking your teeth into a warm bagel, its golden crust giving way to a pillowy interior speckled with savory cheese and garlic. It’s pure comfort food, but also a nourishing choice packed with protein that will make you feel great.
I’ve always been captivated by the versatility of cottage cheese, and once you blend it into this dough, it works wonders! These bagels are incredibly easy to make—perfect for breakfast, lunch, or even a dinner side that will impress anyone fortunate enough to share your table. Trust me when I say that once you take that first bite, you’ll be transported to a cozy café where the warmth of freshly baked bread hugs your senses. These little beauties are not only soft and chewy but also high in protein, making them an excellent addition to any meal or snack time. So grab your apron and let’s embark on this delicious culinary journey together!
Garlic-Parmesan Cottage Cheese Bagels – Soft, Chewy & High-Protein: Your New Favorite Breakfast Treat
Welcome to the world of homemade goodness! With just a handful of simple ingredients, we’re going to whip up some extraordinary Garlic-Parmesan Cottage Cheese Bagels that are sure to become a staple in your kitchen. Picture those moments when you want something comforting yet wholesome—these bagels fit the bill perfectly! They’re incredibly versatile too; enjoy them warm with butter or cream cheese, or use them as sandwich bread for an elevated twist on lunch. Let’s dive in!
Ingredients:
As we gather our ingredients for these delightful bagels, I want you to think of each item as an important player in this culinary symphony. Each one has its role in creating that soft and chewy texture we crave!
- 1 cup cottage cheese (full-fat or low-fat). Cottage cheese is the star ingredient here, bringing moisture and richness while also serving as a fantastic source of protein. Blending it until smooth ensures it integrates beautifully into the dough, giving us that lovely softness we’re after. If you’re aiming for indulgence, full-fat cottage cheese provides extra creaminess; however, low-fat works equally well if you’re looking to lighten things up without sacrificing flavor.
- 1 cup self-rising flour (or 1 cup all-purpose flour + 1½ tsp baking powder + ¼ tsp salt). This flour will provide lift and structure without needing yeast! The self-rising flour already includes baking powder and salt which means less fuss for you—just mix it right in! If using all-purpose flour instead, remember that adding baking powder is essential for achieving those puffy bagels we adore.
- 1 large egg. Eggs play a crucial role in binding our ingredients together while adding moisture and richness to our dough. They help achieve that lovely golden-brown crust on our finished bagels thanks to their natural fats and proteins during baking. Make sure your egg is at room temperature before using it; this helps it incorporate better into the mixture.
- 2 tbsp grated Parmesan cheese. This is where we bring in some savory depth! Grated Parmesan melts beautifully into the dough while adding an irresistible umami flavor profile that pairs perfectly with garlic. Opt for fresh grated Parmesan whenever possible—it has a more vibrant taste compared to pre-packaged varieties.
- 1 tsp garlic powder. Ahh… garlic—the magical ingredient that elevates everything! Garlic powder is perfect here because it disperses evenly throughout the dough, infusing each bite with its unique warmth without overwhelming flavors. If you’re feeling adventurous, consider roasting fresh garlic cloves beforehand for an even richer taste!
- ½ tsp salt. Salt is often called “the flavor enhancer,” and it’s absolutely paramount in this recipe too! It balances sweetness from other ingredients while bringing out flavors we might overlook otherwise—don’t skip this step!
- 1 egg, beaten (for egg wash). Here’s another opportunity for that beautiful golden crust—brushing our formed bagels with egg wash gives them an appealing sheen after baking! Plus, it helps any toppings adhere beautifully.
- Extra grated Parmesan cheese or garlic seasoning (optional). This final touch adds an extra layer of flavor on top of what we’ve already created and makes these bagels visually stunning too! Feel free to sprinkle as much or as little as you’d like according to your taste preferences.
With our ingredients lined up like eager performers ready for their debut on stage, let’s move forward into the heart of this recipe!
Equipment You’ll Need:
Before we dive into making these delicious Garlic-Parmesan Cottage Cheese Bagels, let’s talk about some essential tools you’ll need along the way. Having the right equipment can truly transform your cooking experience from stressful to joyous!
- Blender or food processor – This handy gadget will ensure your cottage cheese becomes creamy perfection before merging with other ingredients. A blender tends to yield smoother results faster due to its high-speed blades but don’t worry if you only have a food processor—it does wonders too!
- Large mixing bowl – You’ll want plenty of room for all those ingredients to come together harmoniously without spilling over! A sturdy bowl helps keep everything contained while making mixing easier.
- Parchment paper – Lining your baking sheet with parchment paper is non-negotiable if you want perfect bagels without sticking disasters later on! It creates an easy cleanup process afterward too—trust me; thank yourself later!
- Rolling pin (optional) – While shaping these bagels doesn’t require fancy techniques or tools per se, having a rolling pin handy can make rolling out ropes easier if desired; however gently shaping by hand works just as well!
Now that we’ve gathered everything we need—from our beloved ingredients down through helpful tools—it’s time to roll up our sleeves and get started making these delightful creations!
Step 1: Blending Blissfully
The first step on our journey towards Garlic-Parmesan Cottage Cheese Bagels begins with blending our cottage cheese until it reaches smoothness—a process lasting about 30 seconds depending on your machine’s power level. Why do we go through this effort? Blending breaks down any clumps present in cottage cheese so it integrates seamlessly into our dough rather than leaving behind unexpected pockets of texture later on during baking—a potentially unpleasant surprise nobody wants when taking their first bite! In a large mixing bowl afterward combine this creamy goodness with one large egg along with either self-rising flour or all-purpose flour mixed with baking powder plus salt before stirring vigorously until everything forms together into a sticky dough ball.
Step 2: Shaping Your Masterpieces
Once you’ve got that sticky dough ready at hand—and trust me it’s quite fun working with—you’ll want lightly floured surfaces nearby so things don’t get too messy as you start dividing this glorious mixture into four equal portions (think pizza slices!). Roll each portion into ropes measuring roughly six-to-seven inches long before bringing both ends together creating circular shapes reminiscent of classic bagels—what could be more satisfying? Placing these formed rings onto parchment-lined baking sheets allows us space needed while maintaining shape before they head off into oven magic soon thereafter.
Step 3: Adding Tantalizing Toppings
Before sending these beauties off to bake away their potential greatness within hot ovens—we’ll brush each ring lovingly using beaten egg wash preparing its surface for golden glory ahead plus sprinkle generously additional grated Parmesan cheese alongside perhaps some garlicky seasoning if desired by personal choice enhancing flavors further still! It’s crucial not skimping here since toppings can elevate presentation significantly transforming simple baked goods into show-stopping delights worthy sharing around family tables—or even brunch gatherings among friends!
Step 4: Baking Time Magic
Now comes my favorite part—the moment we’ve all been waiting for where anticipation fills air surrounding ovens set at preheated temperatures around 375°F (190°C)! Baking should ideally take anywhere between 22-to-25 minutes depending upon individual ovens’ quirks so keep watch closely through glass doors peering inside occasionally witnessing transformation occur right before eyes—those once pale rings now turning rich golden brown hues indicating readiness signaling aroma wafting throughout kitchen elevating hunger levels exponentially higher than ever thought possible previously…
The beauty lies not only within appearance but also how firm they become upon gently pressing down against tops revealed upon completion—that means they’ve reached perfect consistency achieved through heat exposure thus ensuring delightful chewiness hidden beneath surface inviting endless possibilities awaiting exploration once cooled slightly afterwards too…
Now tell me honestly… aren’t you excited about what’s next? I promise once cooled briefly slicing open warm buttery pieces reveals pure magic inside every bite promising unforgettable experiences shared amongst loved ones gathered around tables enjoying homemade goodness crafted straight from heart straight toward plates awaiting indulgence themselves…
Step 5: Crafting the Bagel Shapes – A Touch of Artistry
Now that you have a wonderfully sticky dough that smells divine, it’s time to shape your bagels. This is where your creativity comes into play! Lightly dust your work surface with flour; this will prevent the dough from sticking and make the shaping process much easier. Take a generous handful of dough—about one-quarter of the total—and gently form it into a ball. Don’t rush this step; knead it lightly for just a few moments to bring it together before rolling it out. The goal here is to create a smooth surface, which will help in achieving that lovely bagel shape.
Once you have your ball, roll it out into a rope that’s approximately 6 to 7 inches long. It doesn’t need to be perfect; each bagel can have its unique charm! Just ensure it’s thick enough so that it holds up during baking—around one inch in diameter is ideal. Now, let’s connect those ends! Bring them together to form a circle, pinching the seams firmly so they bond well—the last thing we want is for our creations to unroll in the oven. Place each shaped bagel on a parchment-lined baking sheet, giving them space to breathe because they’ll puff up beautifully as they bake. Visualization is key here: think of each bagel as a cozy little nest waiting for delicious toppings!
Step 6: Topping Time – Elevating Flavor
This moment is what truly transforms our Garlic-Parmesan Cottage Cheese Bagels from good to extraordinary! Preheat your oven to 375°F (190°C) while you prepare for the final touches. Grab that beaten egg you set aside earlier—this egg wash is crucial because it gives our bagels an enticing golden hue and an appealing sheen as they bake. Using a pastry brush or even the back of a spoon, gently coat each bagel with the egg wash, ensuring every nook and cranny gets some love.
Now comes the fun part: sprinkling on additional grated Parmesan cheese or garlic seasoning if you’re feeling adventurous! Trust me when I say these toppings will create an utterly intoxicating aroma while they bake, filling your kitchen with warmth and comfort that reminds me of family gatherings around the dinner table. The Parmesan will melt slightly into the bagel as they bake, creating pockets of flavor that are nothing short of heavenly. Don’t be shy—this is your chance to add extra flavor, so go ahead and be generous!
Step 7: Baking – The Transformation Begins
With your beautifully topped bagels ready for their moment in the spotlight, slide them into your preheated oven and set a timer for about 22 minutes. As they bake, keep an eye on them—the transformation happening inside is genuinely magical! You’ll start to notice them puffing up, turning golden brown at the edges, and oh, that unmistakable aroma wafting through your home—it’s pure bliss!
During this time, it’s essential not to open the oven door too soon; doing so can cause temperature fluctuations that might affect how evenly they bake. Instead, indulge yourself by thinking about how you’ll enjoy these delightful creations once they’re finished. After about 22 minutes, take a peek through the oven window—what you’re looking for are those gorgeous golden-brown tops and firm sides; they should feel sturdy but still slightly soft when gently pressed. If they’re not quite there yet, don’t hesitate to leave them in for another couple of minutes—you want them perfectly baked.
Step 8: Finishing Touches – The Allure of Crispness
As your bagels near completion and begin to fill your kitchen with their warm embrace, I encourage you not to skip this next crucial step if you’re aiming for that extra crispy exterior: broiling! After baking for around 22-25 minutes—or until golden brown—turn on your broiler for just 1-2 minutes at the end. This non-negotiable step provides an irresistible crunch while enhancing those beautiful flavors you’ve built.
Keep a close eye during this broiling phase; things can go from beautifully browned to burnt rather quickly! Rotate the pan if necessary to ensure even browning across all bagels. Once done, carefully remove them from the oven (don’t forget those oven mitts!) and allow them to cool on a wire rack for about five minutes before slicing into them. This cooling period allows steam to escape while ensuring they maintain their delightful texture—a soft center with just enough chewiness!
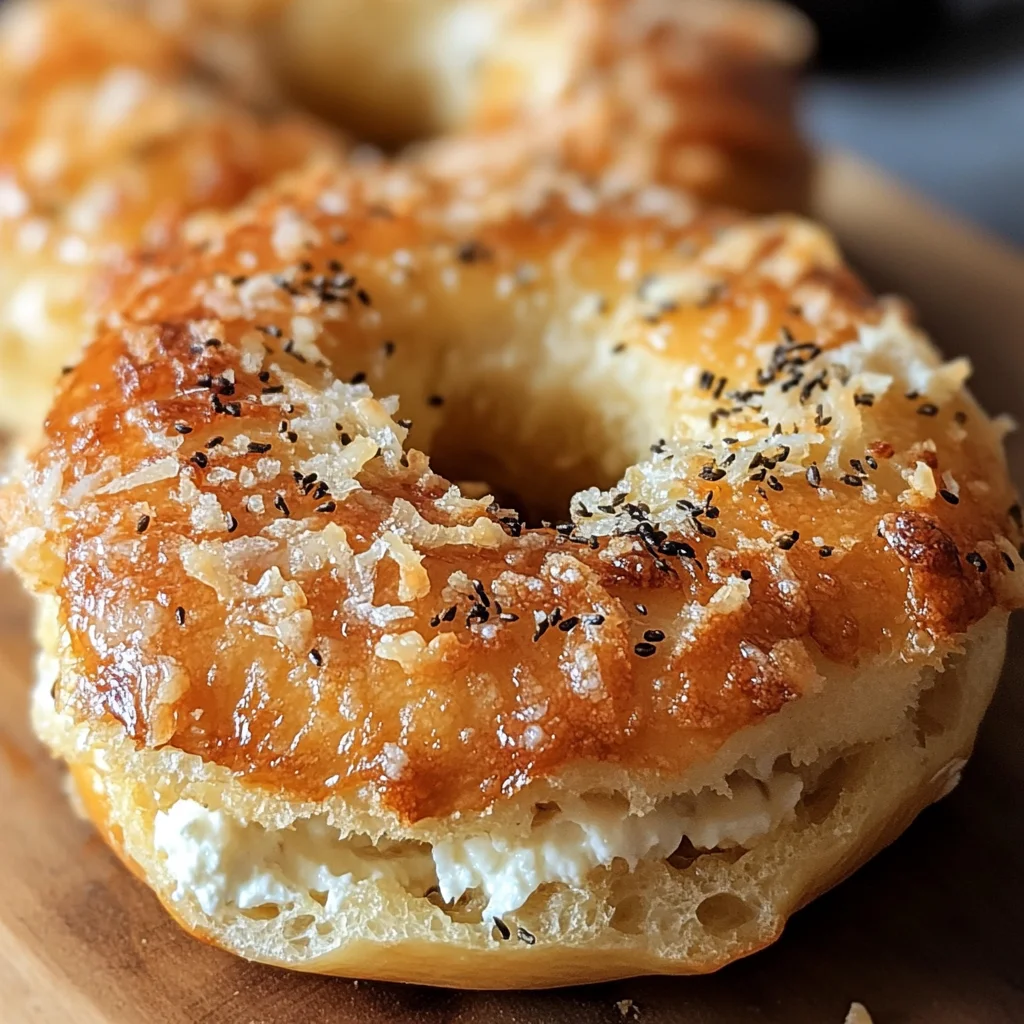
Trust me on this; when you finally slice into one after letting it cool just enough so you don’t burn your fingers but still catch that warmth radiating from within, you’ll understand why these Garlic-Parmesan Cottage Cheese Bagels are truly something special.
Final Touches – Serving Your Masterpiece
Now comes perhaps my favorite part: serving these delightful creations! After those few minutes have passed (which may feel like an eternity!), grab some butter or cream cheese—whatever makes your heart sing—and get ready for an experience that’s nothing short of divine. Picture this: spreading creamy goodness onto warm bagels while savoring their fragrant scent fills the air; it’s profoundly satisfying!
You could even use these beauties as sandwich bread if you’re feeling adventurous—imagine layers of fresh veggies or perhaps some delightful spreads nestled between two tender halves of garlic-parmesan perfection. The options are endless! Whether enjoyed plain or dressed up with toppings galore, I promise you’ll find comfort in every bite.
And there you have it—your journey through making Garlic-Parmesan Cottage Cheese Bagels has come full circle! Not only are these homemade delights soft and chewy with high protein content but also bursting with flavors that’ll have everyone asking for seconds (or thirds!). So gather around the table with family and friends because sharing food made with love creates memories that last forever!
Storage and Enjoyment Tips for Your Garlic-Parmesan Cottage Cheese Bagels – Soft, Chewy & High-Protein
Now that your kitchen is filled with the mouthwatering aroma of freshly baked Garlic-Parmesan Cottage Cheese Bagels, it’s time to relish every soft, chewy bite. I can almost hear the crunch of the crust as you sink your teeth into these protein-packed delights! Whether you’re enjoying them warm out of the oven or saving some for later, knowing how to properly store them ensures that every bagel remains just as delicious. Let’s dive into the best ways to keep your bagels fresh and fabulous!
Storing Leftover Garlic-Parmesan Cottage Cheese Bagels – Soft, Chewy & High-Protein
To keep your leftover bagels in tip-top shape, store them in an airtight container at room temperature. This helps retain their moisture while preventing them from becoming stale too quickly. Generally, these delightful bagels will stay fresh for about 2-3 days when stored correctly. However, if you want to maintain that heavenly texture and flavor longer, I suggest placing a slice of bread inside the container with them. This little trick works wonders by keeping the moisture levels balanced, ensuring each bite remains profoundly satisfying even after a day or two. And trust me on this—when it comes to reheating, a quick blast in the microwave or a few minutes in the toaster will revive that chewy goodness perfectly. You’ll be amazed at how they taste just like they came straight from the oven!
Freezing Garlic-Parmesan Cottage Cheese Bagels for Later
If you find yourself with more bagels than you can eat in a few days (which, let’s be honest, is hard to imagine!), freezing them is an excellent option! Simply wrap each cooled bagel tightly in plastic wrap or aluminum foil before placing them in a resealable freezer bag. They can be kept frozen for up to three months without sacrificing quality or flavor—how convenient is that? When you’re ready to enjoy one again, just pop it directly from the freezer into your toaster or oven; there’s no need to thaw beforehand! The result? A piping hot bagel that tastes freshly baked and bursting with that irresistible garlic and Parmesan flavor. This convenience not only saves time but also allows you to always have a high-protein snack ready at a moment’s notice.
Garlic-Parmesan Cottage Cheese Bagels – Soft, Chewy & High-Protein

Indulge in the delightful experience of homemade Garlic-Parmesan Cottage Cheese Bagels, where comfort meets nutrition! These bagels are not only soft and chewy but also packed with protein, making them the perfect addition to your breakfast or any meal. The rich aroma of garlic combined with savory Parmesan creates a tantalizing treat that elevates your culinary experience. With just a handful of simple ingredients, you can create these satisfying bagels that are versatile enough to enjoy alone or as part of a sandwich. Ideal for meal prep or sharing with loved ones, this recipe invites you to explore the joy of baking while nourishing your body.
- Prep Time: 15 minutes
- Cook Time: 25 minutes
- Total Time: 40 minutes
- Yield: Makes approximately four bagels 1x
- Category: Breakfast
- Method: Baking
- Cuisine: American
Ingredients
- 1 cup cottage cheese (full-fat or low-fat)
- 1 cup self-rising flour (or 1 cup all-purpose flour + 1½ tsp baking powder + ¼ tsp salt)
- 1 large egg
- 2 tbsp grated Parmesan cheese
- 1 tsp garlic powder
- ½ tsp salt
- 1 egg, beaten (for egg wash)
Instructions
- Preheat oven to 375°F (190°C).
- Blend cottage cheese until smooth. In a mixing bowl, combine blended cottage cheese with an egg and flour mixture (self-rising or all-purpose with baking powder and salt). Mix until you form a sticky dough.
- Divide the dough into four equal portions and shape each into a rope about 6-7 inches long. Connect the ends to form bagels and place them on a parchment-lined baking sheet.
- Brush each bagel with beaten egg wash and sprinkle with additional Parmesan cheese or garlic seasoning if desired.
- Bake for 22-25 minutes until golden brown. For extra crispness, broil for an additional 1-2 minutes.
- Cool on a wire rack for five minutes before serving.
Nutrition
- Serving Size: 1 bagel (80g)
- Calories: 170
- Sugar: 2g
- Sodium: 320mg
- Fat: 4g
- Saturated Fat: 2g
- Unsaturated Fat: 2g
- Trans Fat: 0g
- Carbohydrates: 27g
- Fiber: 1g
- Protein: 9g
- Cholesterol: 70mg