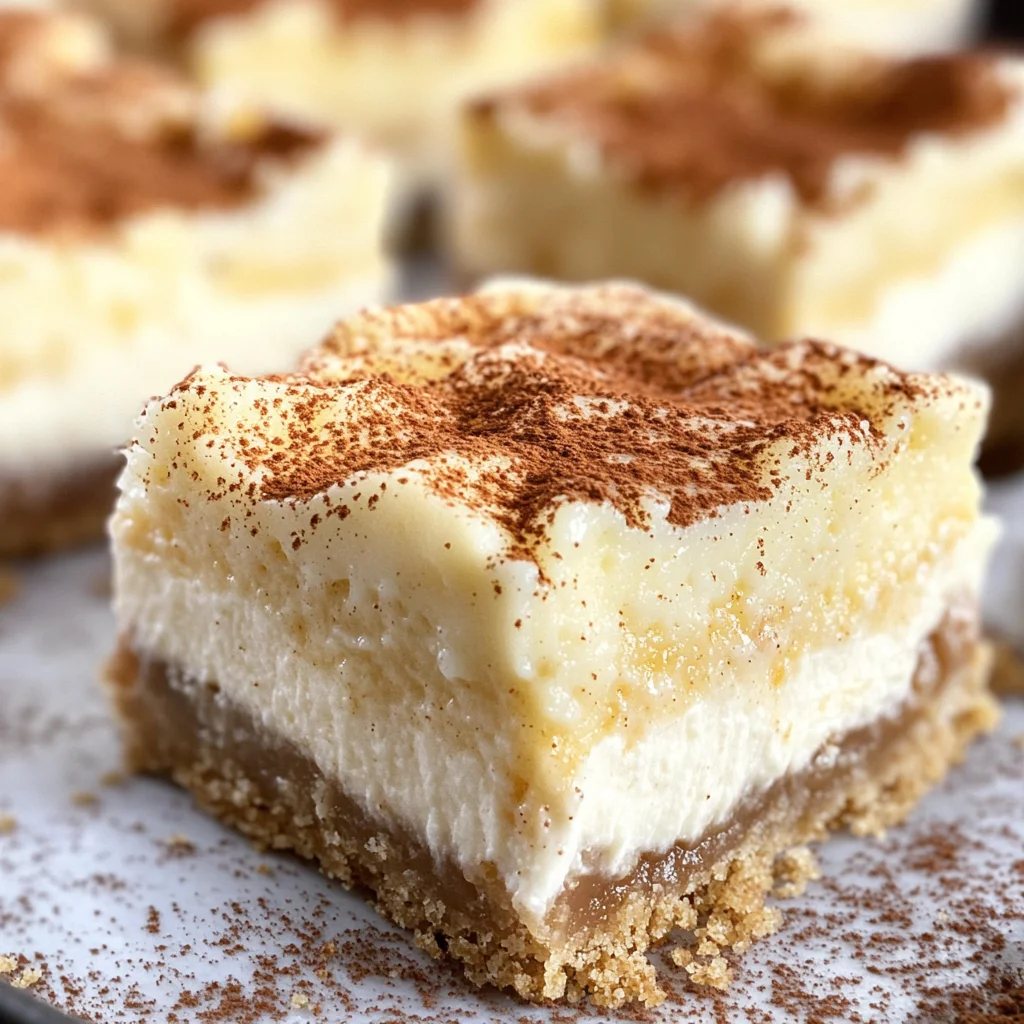
Eggnog Cheesecake Bars
There’s something incredibly magical about the holiday season, isn’t there? The air is filled with the sweet scent of cinnamon and nutmeg, and every corner seems to glisten with twinkling lights. It’s a time for family gatherings, laughter echoing around the dinner table, and of course, indulgent treats that warm your heart. One such treat that has always captured my holiday spirit is none other than Eggnog Cheesecake Bars. Rich and creamy, these delightful bars encapsulate the essence of festive cheer in every bite! With a buttery graham cracker crust and a luscious filling infused with eggnog’s enchanting flavors, they are not just desserts; they are an experience—an embrace of warmth and nostalgia that transports you back to cherished memories and joyful celebrations.
As I take you through this recipe, let me assure you: making Eggnog Cheesecake Bars is not just about following steps; it’s about creating something truly special that you can share with loved ones. The creamy texture of the cheesecake paired with the crumbly crust creates a symphony of flavors that dances on your palate. I promise you, once these bars have cooled and are ready to be sliced, you’ll find yourself standing by the fridge waiting for just one more piece. It’s a little slice of heaven perfect for holiday gatherings or simply to brighten up a chilly winter day.
Eggnog Cheesecake Bars: A Festive Delight You Can’t Resist
These Eggnog Cheesecake Bars are not only easy to make but also an absolute showstopper at any gathering. If you’re wondering how to bring joy to your holiday dessert table without the fuss of traditional baking, then look no further! Packed with the rich flavor of eggnog and topped with a hint of nutmeg, these bars will have everyone asking for seconds—and maybe even thirds! So grab your apron, let’s dive into this delightful recipe together!
Ingredients:
Before we embark on this delicious journey, let’s gather our ingredients. Each one plays an integral role in crafting these decadent Eggnog Cheesecake Bars.
- 1 1/2 cups graham cracker crumbs (about 12 graham crackers). This ingredient forms the base of our bars and provides that beloved buttery crunch which contrasts beautifully with the creamy filling. When choosing graham crackers, aim for those that have minimal added sugars and preservatives; if you’re feeling adventurous, consider smashing some homemade cookies instead! Just remember to ensure they’re finely crushed so they bind well when mixed.
- 3 tablespoons granulated sugar. This bit of sweetness enhances the flavors in our crust while adding just enough balance to the overall richness of the cheesecake filling. It’s important not to skip this as it helps caramelize slightly during baking, giving that crust its golden hue. If you’re looking for alternatives, coconut sugar or maple sugar could work too!
- 4 tablespoons unsalted butter (melted). Butter is crucial here; it acts as the glue that binds our crust together while adding richness and moisture. Ensure your butter is melted but not hot—this helps it mix evenly without cooking any eggs prematurely later on in our mixture.
- 1/8 teaspoon salt. Don’t underestimate salt’s power in sweet recipes! A pinch helps to elevate all other flavors and balances out sweetness beautifully. If you’re using salted butter instead of unsalted, you might want to omit this altogether.
- 2 8 oz packages cream cheese (softened). This is where magic happens! Cream cheese lends its velvety texture to create a luscious filling that’s both rich yet light at the same time. Make sure it’s at room temperature for easy blending; nobody wants lumps in their cheesecake!
- 3/4 cup granulated sugar. This sugar brings sweetness directly into our filling while counteracting any tang from the cream cheese! You can use superfine sugar if you prefer—it dissolves more easily during mixing.
- 2 large eggs + 1 large egg yolk. Eggs provide structure to our cheesecake while adding richness as well. The extra yolk enhances creaminess—trust me on this one! Be careful not to overbeat them; we want a smooth filling without incorporating too much air.
- 2 tablespoons all-purpose flour. This small amount acts as a stabilizer for our cheesecake bar filling—preventing it from cracking during baking while helping maintain its creamy texture.
- 3/4 cup eggnog. Ahh, here comes the star ingredient! Eggnog imparts its signature flavor profile—think nutmeg, vanilla, and hints of cream—all into these bars. Choose high-quality eggnog or even homemade if you can manage it—you’ll be amazed at how much richer your bars will taste!
- 1 teaspoon pure vanilla extract. Pure vanilla is like liquid gold in baking—it adds depth and aromatic notes that complement our eggnog beautifully! Always opt for pure over imitation when possible; it makes all the difference in flavor.
- 1/2 teaspoon nutmeg (plus more for dusting). Nutmeg introduces warmth and spice—perfect for evoking those cozy holiday vibes! Feel free to adjust based on your preference; fresh grated nutmeg can elevate this further if you have some on hand.
- 1 tablespoon bourbon (optional). While this ingredient is optional due to personal preferences or dietary restrictions, when included it adds an intoxicating depth of flavor that harmonizes wonderfully with the eggnog notes—just make sure it’s well blended into your mixture!
- Graham cracker crumbs and/or crystallized ginger (optional). These toppings can add delightful textures or a touch of zing when sprinkled atop your cheesecake bars before serving! Crystallized ginger offers an unexpected twist—a lovely complement to rich flavors.
Equipment You’ll Need:
Having the right tools makes any baking adventure smoother—and trust me, you’ll appreciate each one as we create these delectable Eggnog Cheesecake Bars together!
- 9 x 9 inch baking pan – Ensuring your baking pan is lined properly is key here—a good quality non-stick pan will help prevent sticking but lining it with parchment paper or foil will guarantee easy removal afterward.
- Mixing bowls – Opt for various sizes so you can separate ingredients effortlessly during preparation—from mixing dry ingredients to beating eggs smoothly.
- Electric mixer – An essential partner for achieving perfectly fluffy cream cheese without breaks or lumps—manual mixing would take quite some time!
- Rubber spatula – This handy tool ensures every last bit is incorporated from bowl edges while also being perfect for pressing down crust mixtures evenly into corners—a must-have!
- Wire rack – Cooling your baked creation properly prevents sogginess—don’t skip letting them cool completely before slicing into squares!
With everything gathered and prepped ahead of time, we’re ready to bring some joy into our kitchens by preparing these delightful treats together! Let’s roll up our sleeves and start crafting those irresistible Eggnog Cheesecake Bars!
Step 1: Prepping Your Pan Like a Pro
First things first—we need to preheat that oven up to 350 degrees Fahrenheit because we want everything nice and warm when it hits those delicious batter layers later on! While that’s heating up, grab your trusty 9 x 9 inch baking pan because lining it properly makes all the difference between frustration and success when it’s time for dessert reveal later on! Use heavy-duty foil or parchment paper so there’s an overhang on two sides—this allows easy lifting out once cooled down after baking (and who doesn’t love less mess?). A light spray with nonstick cooking spray keeps everything in check too—trust me on this step; nobody enjoys scraping bits off their favorite pans!
Step 2: Crafting Your Graham Cracker Crust
Now let’s dive into making that delectable crumbly crust—we’re talking about combining graham cracker crumbs with melted butter, sugar, and salt until well united! In a medium bowl (the bigger one), combine those graham cracker crumbs along with melted butter—the warmth helps meld everything together seamlessly while creating irresistible flavors along its journey towards becoming something truly extraordinary upon baking! Stir until combined—feel free to use your hands or spatula here because getting messy means fun sometimes too! Once done pour this mixture directly into prepared baking dish before pressing down firmly across bottom using either fingertips or spatula evenly so each corner gets equal attention—it’ll bake beautifully as one cohesive layer later!
Step 3: Baking That Beautiful Base
Next up comes perhaps one of my favorite moments—the actual baking part where we get instant gratification from aromas wafting through kitchen air like magic spells being cast upon us by deliciousness itself! Place your pressed-down crust into preheated oven allowing those flavors mingling happily away together—for about ten minutes until lightly golden brown emerges from depths inside oven windows revealing what awaits us outside soon enough… patience is key here folks but totally worth every second spent waiting anxiously nearby smelling divine scents escaping onto fingertips tickling noses reminding us why we love food so much!
Step 4: Blending Creamy Goodness
Once crust has been given its moment in spotlight let’s shift gears towards making creamy goodness happen now—the real showstopper here folks—a silky-smooth mixture awaits us next step after allowing baked base cool briefly post-removal from oven heat source inviting excitement building anticipation bubbling underneath surfaces waiting just patiently enough until next action occurs… Using electric mixer beat softened cream cheese within large bowl until fluffy perfection achieved (around two minutes should suffice) followed immediately by sugar joining party where smoothness increases even further when combined thoroughly again via continued beating process another couple minutes long ensuring no lumps remain behind either way possible leaving behind only luxuriously velvety sensations awaiting presence shortly thereafter once eggs & yolks enter mix bringing additional richness alongside beautiful flavors evolving throughout entire experience unfolding right before eyes…
Let’s keep going strong with preparation—you’re doing fantastic already just trust yourself through each step as we savor every moment leading up toward indulgence waiting patiently ahead…
Step 5: Creamy Bliss Awaits
Now that your crust has been lovingly baked to golden perfection, it’s time to turn our attention to the heart of these Eggnog Cheesecake Bars—the creamy filling! In a large mixing bowl, grab your softened cream cheese and, using a mixer set to medium speed, beat it for about two minutes until it transforms into a fluffy wonder. This step is absolutely paramount because aerating the cream cheese creates that luxurious texture we crave in a cheesecake. You want it light and airy—not dense or grainy. Once you see that beautiful fluffiness, add in the ¾ cup of granulated sugar. Continue beating for an additional couple of minutes until everything is thoroughly combined and smooth; think of it as building the foundation for a masterpiece.
Next comes the magic of eggs—two large ones and one yolk—along with ¾ cup of eggnog and a teaspoon of pure vanilla extract. The eggnog not only infuses this filling with its festive flavor but also provides moisture and richness, elevating your cheesecake experience to another level entirely. Mix until everything is completely combined; you should see a unified batter without lumps—a sign that you’re on the right track! Trust me on this; if there are lumps, your bars will have an uneven texture that could detract from their blissful allure. Finally, fold in the all-purpose flour, half a teaspoon of nutmeg (which adds that signature holiday warmth), and a pinch of salt. This little seasoning boost enhances all the flavors while balancing the sweetness, making every bite utterly intoxicating.
Step 6: Pouring Your Dreams into Reality
With your filling perfectly blended, it’s time to pour this luscious mixture over the graham cracker crust you’ve prepped earlier. Gently pour it into the baking dish, using a spatula to ensure every last drop makes it into the pan—don’t waste any of this heavenly concoction! Now, if you’re feeling adventurous and want to ensure ultra-smooth bars reminiscent of bakery masterpieces, consider using a water bath technique. This involves placing your baking pan inside a larger pan filled with hot water halfway up the sides. Why do we do this? It helps regulate temperature while baking and prevents cracks on your cheesecake surface by providing consistent moisture throughout the cooking process.
If you choose to use this method—which I highly recommend—just be careful when handling hot water! While pouring it into the larger pan, aim for gentleness and precision so as not to splash hot water all over yourself or disturb your cheesecake batter. If you decide not to use a water bath (and trust me, they will still turn out wonderfully!), simply place your baking dish directly in the oven. Just remember that with direct baking, you might need to keep an even closer eye on them as they cook.
Step 7: The Art of Baking
Now comes perhaps one of my favorite parts—the baking! Preheat your oven to 350 degrees Fahrenheit if you haven’t done so already—it’s crucial that your oven reaches this temperature before sliding those bars in for their transformation. Bake them for about 40 to 45 minutes if you’re using that lovely water bath method; without it? A slightly shorter time frame of about 30-40 minutes will suffice. During these moments in the oven, you’ll start to notice an enchanting aroma wafting through your kitchen—it’s like Christmas has come early!
When checking for doneness, look for that beautiful jiggle in the center; it should appear almost set but still have a slight wobble—this is exactly what you’re aiming for! Remember, patience is key here; pulling them out too soon can lead to undercooked centers which will affect both texture and flavor. So take a deep breath—you’re almost there! Once they’ve reached that perfect state, carefully remove them from either the water bath or directly from the oven and allow them to cool on a wire rack for at least thirty minutes before refrigerating.
Step 8: Cooling Down—The Transformative Chill
Ahh…the cooling phase! After letting your Eggnog Cheesecake Bars settle on their wire rack for about half an hour post-baking bliss, it’s time for them to take a well-deserved chill in the refrigerator. I can’t stress enough how essential this step is—trust me when I say it’s non-negotiable! The cooling process is where all those magical flavors meld together beautifully while allowing that rich creaminess we adore in cheesecakes to truly shine through.
Plan ahead because these beauties need at least three hours in the fridge—ideally overnight—to achieve optimum firmness and flavor profile enhancement. When they’re chilled just right, cutting into them becomes an absolute delight—they hold their shape beautifully instead of collapsing or oozing everywhere (which can happen if they aren’t chilled long enough). Plus, chilling intensifies those comforting notes from nutmeg and vanilla while letting each bite melt softly onto your tongue—a truly extraordinary experience!
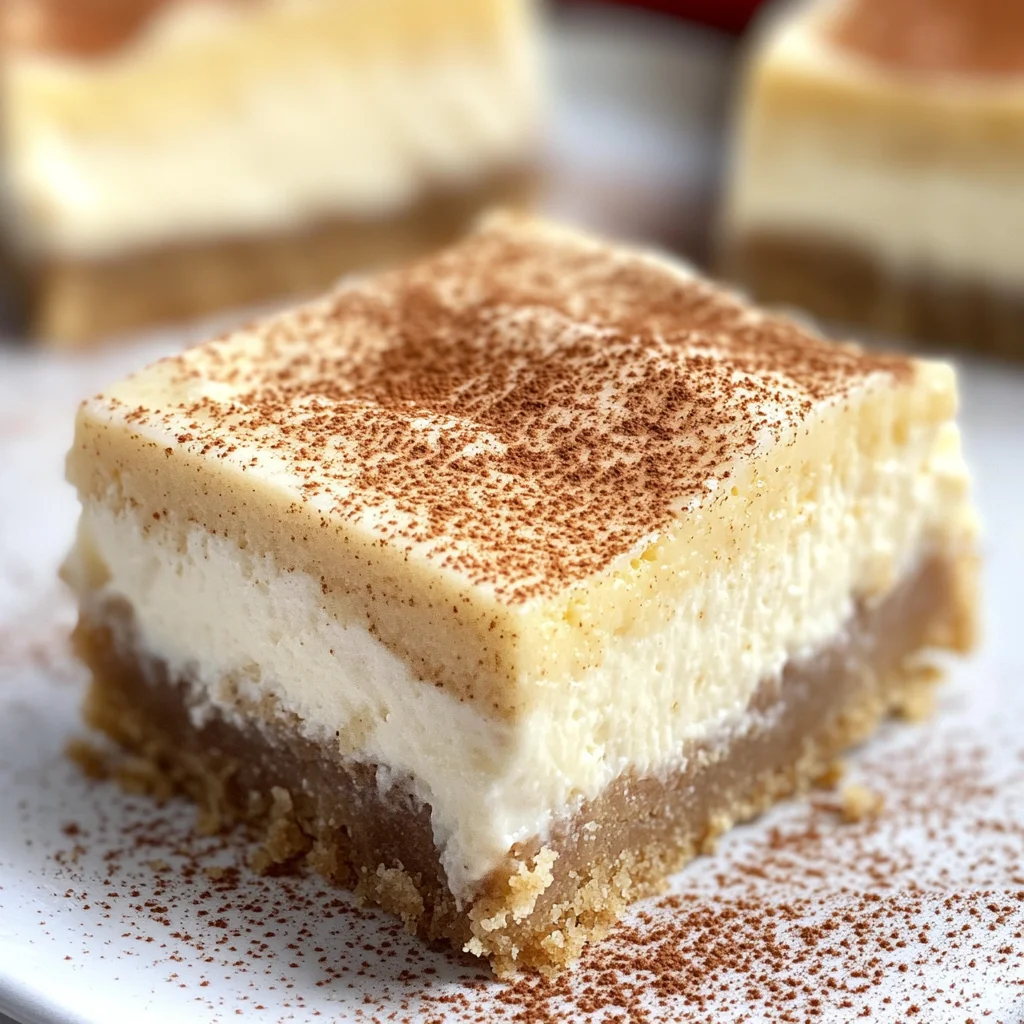
Final Touches: Presenting Your Eggnog Cheesecake Bars
Once sufficiently chilled—and oh-so-hard-to-resist—you can finally unveil these culinary gems! To remove them from their baking dish, gently lift them out using those overhanging foil edges you’ve left earlier; this makes everything so much easier than trying to pry them out with utensils or spatulas which could ruin their shape. Slice them into generous squares—16 bars should do nicely—and here’s where you can get creative with presentation! Dust each bar lightly with additional nutmeg for an extra festive touch or sprinkle some graham cracker crumbs or finely chopped crystallized ginger across each slice for added texture and zing.
As you present these delightful Eggnog Cheesecake Bars at your next gathering—or even just indulge on your own—I promise you they’ll be met with gasps of joy from everyone who gets their hands on one (or two). There’s something profoundly satisfying about watching others enjoy something you’ve poured so much love into creating—a true testament to what food can bring people together during special moments. Whether you’re sharing memories around holiday gatherings or indulging solo while cozying up with a good book by firelight—it doesn’t get much better than this! Enjoy every last crumb; you’ve earned it!
Storage and Enjoyment Tips for Your Eggnog Cheesecake Bars
Now that your Eggnog Cheesecake Bars have cooled and set beautifully in the fridge, it’s time to revel in the delightful experience of enjoying them! The anticipation of cutting into that creamy, spiced goodness is almost as good as the first bite itself. But what happens if you have leftovers (if you can resist devouring them all at once)? Don’t worry; I’ve got you covered with some handy storage tips to keep this holiday treat fresh and delicious for days to come.
Storing Leftover Eggnog Cheesecake Bars
To keep your Eggnog Cheesecake Bars safe and scrumptious, I recommend storing them in an airtight container. This will prevent any pesky odors from your fridge from seeping into those luscious cheesecake layers. If you don’t have a container handy, wrapping them tightly in plastic wrap will do just fine. Ideally, these bars will stay fresh for about 5 to 7 days in the refrigerator. Trust me when I say that they only get better as they sit; the flavors meld together beautifully, creating a symphony of festive spices and creamy richness that is simply irresistible! If you want to maintain that creamy texture, consider placing a slice of bread in the container alongside the bars—it’s a little trick that helps absorb excess moisture without drying out your dessert. When you’re ready for a treat, simply take one out and let it warm slightly at room temperature before digging in; this little step allows those flavors to really shine.
Freezing Eggnog Cheesecake Bars for Later
If you’re faced with the temptation of too many bars (is there such a thing?), freezing them is a fantastic option! To freeze your Eggnog Cheesecake Bars, first cut them into squares and place each piece on a baking sheet lined with parchment paper. Freeze them until solid—this prevents them from sticking together. Once they’re fully frozen, pack them into an airtight freezer bag or container. They can be stored like this for up to three months without losing their incredible flavor or texture! When you’re ready to enjoy one again, simply transfer it to the fridge to thaw overnight or leave it out on the counter for about an hour before serving. There’s something so convenient about having these delightful bars ready at a moment’s notice, perfect for unexpected guests or late-night cravings!
With these storage tips under your belt, you’ll be able to savor every last crumb of your Eggnog Cheesecake Bars long after the holidays are over!
Eggnog Cheesecake Bars
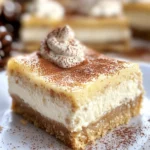
Experience the magic of the holiday season with these irresistible Eggnog Cheesecake Bars. With a buttery graham cracker crust and a creamy filling infused with the rich flavors of eggnog, nutmeg, and vanilla, these delightful treats are perfect for any festive gathering. Simple to prepare yet decadent enough to impress your guests, each bite offers a comforting embrace of seasonal warmth and nostalgia. These bars not only brighten up chilly winter days but also bring loved ones together around the dessert table. The aroma wafting through your kitchen as they bake will have everyone eagerly awaiting their turn to indulge. Try this recipe today, and let the spirit of the holidays shine through in every delicious slice!
- Prep Time: 20 minutes
- Cook Time: 40 minutes
- Total Time: 1 hour
- Yield: Makes approximately 16 servings 1x
- Category: Dessert
- Method: Baking
- Cuisine: American
Ingredients
- 1 1/2 cups graham cracker crumbs
- 3 tablespoons granulated sugar
- 4 tablespoons unsalted butter (melted)
- 2 (8 oz) packages cream cheese (softened)
- 3/4 cup granulated sugar
- 2 large eggs + 1 egg yolk
- 3/4 cup eggnog
- 1 teaspoon pure vanilla extract
- 1/2 teaspoon nutmeg
Instructions
- Preheat your oven to 350°F and line a 9 x 9 inch baking pan with parchment paper.
- In a medium bowl, combine graham cracker crumbs, sugar, melted butter, and salt. Mix until well combined and press into the bottom of the prepared pan.
- Bake the crust for about 10 minutes or until lightly golden.
- In a large mixing bowl, beat softened cream cheese until fluffy. Gradually add in granulated sugar until smooth.
- Mix in eggs one at a time, ensuring no lumps remain, followed by eggnog, vanilla extract, flour, and nutmeg.
- Pour the filling over the baked crust and spread evenly.
- Bake for about 30–40 minutes until the center is set but still slightly jiggly.
- Cool on a wire rack for about half an hour before refrigerating for at least three hours before slicing into squares.
Nutrition
- Serving Size: 1 square (around 60g)
- Calories: 220
- Sugar: 16g
- Sodium: 180mg
- Fat: 15g
- Saturated Fat: 8g
- Unsaturated Fat: 6g
- Trans Fat: 0g
- Carbohydrates: 19g
- Fiber: <1g
- Protein: 3g
- Cholesterol: 50mg