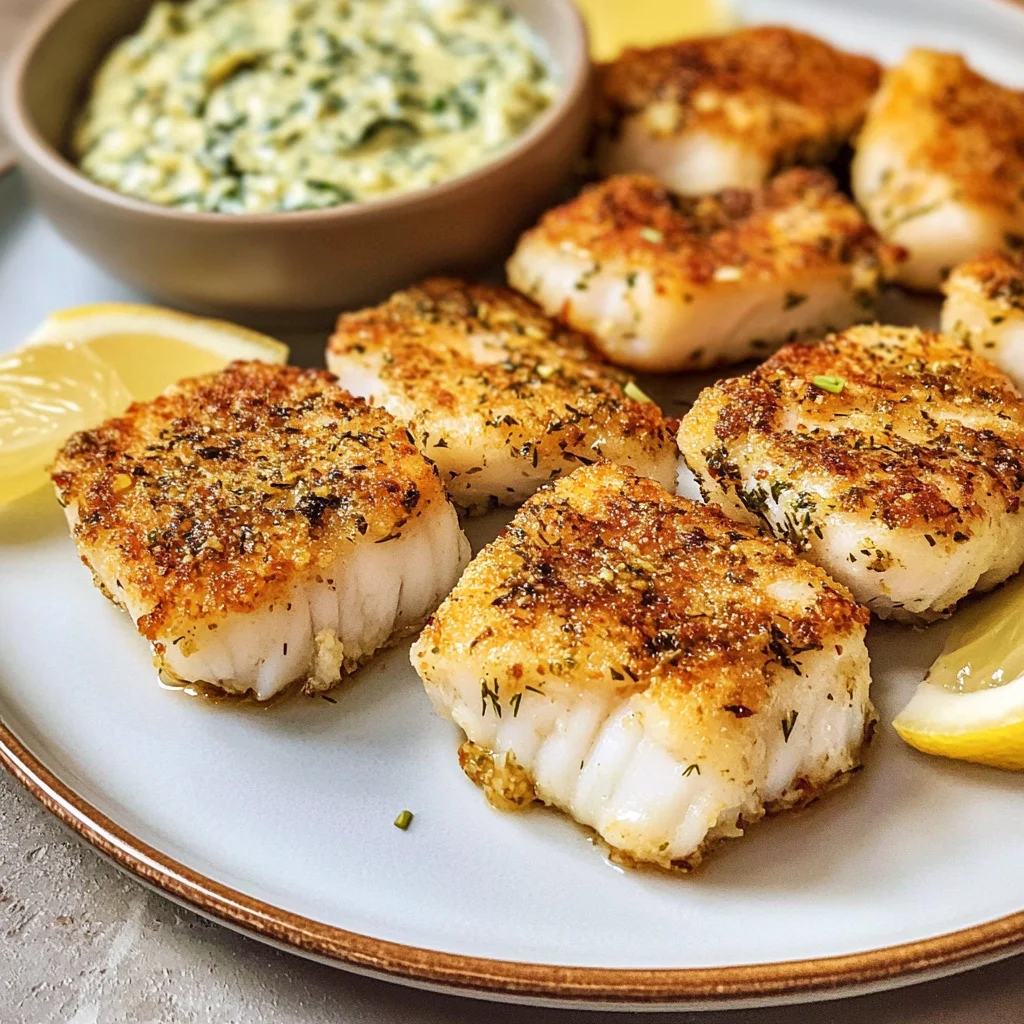
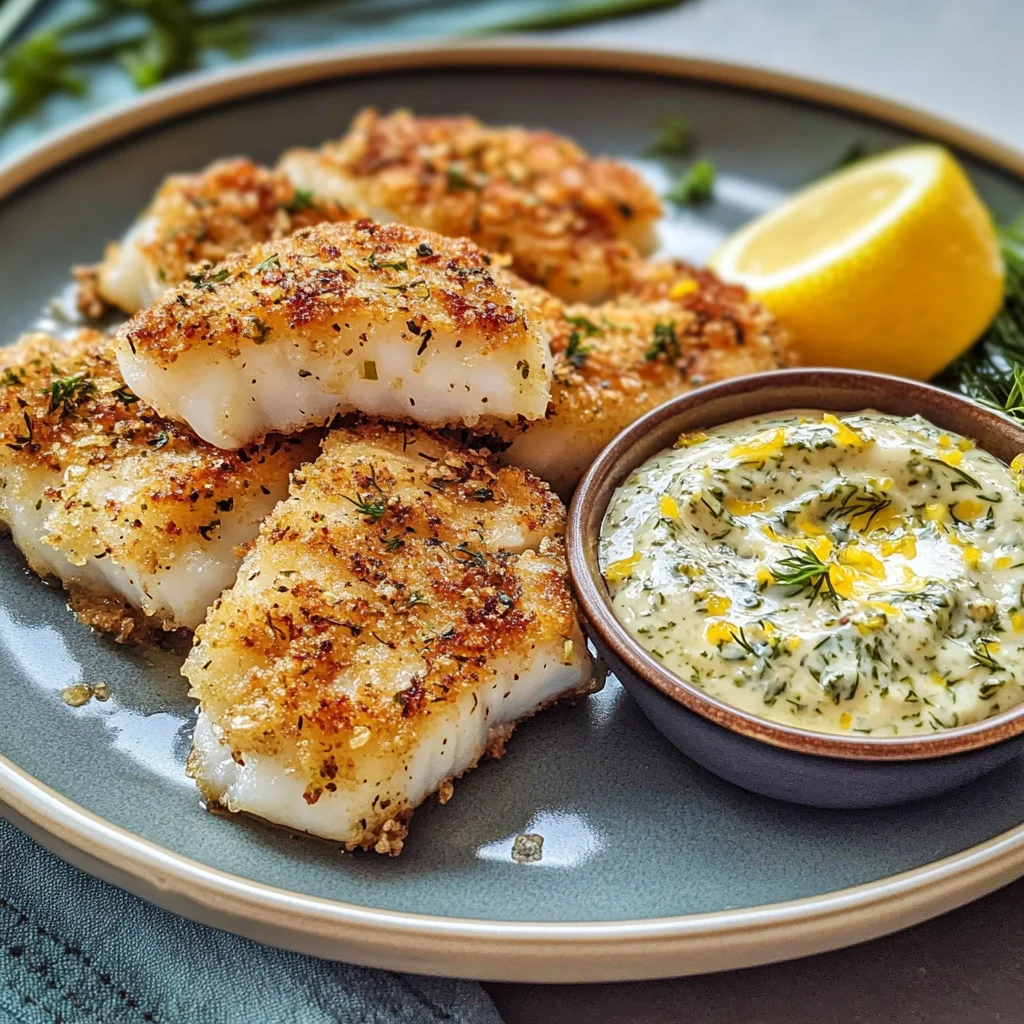
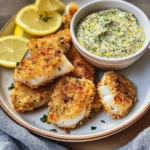
Crispy Garlic Cod Bites with Creamy Lemon Herb Dip
There’s something utterly magical about the way cooking can weave together memories and experiences, isn’t there? Each dish we prepare has its own story, rich with the laughter of shared meals and the warmth of kitchen conversations. When I think of my Crispy Garlic Cod Bites with Creamy Lemon Herb Dip, I don’t just see a recipe; I see gatherings with friends where these delectable bites spark joy and ignite laughter. The satisfying crunch of the cod, kissed by garlic and paired with a zesty herb dip, transcends mere sustenance—it becomes an experience that wraps you in comfort and delight. Every bite is a reminder of the simple pleasures in life: good food, good company, and those cherished moments that linger long after the last plate is cleared.
As we embark on this culinary journey together, let me share a little secret: these crispy cod bites are more than just an appetizer; they’re a celebration of flavor! Infused with garlic and enveloped in a crispy panko coating, they deliver that perfect crunch followed by the tender flaky fish inside. And let’s not forget about the creamy lemon herb dip—a bright and refreshing partner to our delicious cod. This dip is what elevates this dish from delightful to extraordinary, making it perfect for everything from casual weeknight dinners to festive gatherings. Trust me when I say this dish will become a staple in your kitchen!
Crispy Garlic Cod Bites with Creamy Lemon Herb Dip: A Flavorful Delight Awaits
I’m thrilled to share with you how to create these mouthwatering Crispy Garlic Cod Bites with Creamy Lemon Herb Dip. This dish is not only simple but also incredibly rewarding—both to make and to enjoy! It’s an ultimate crowd-pleaser that will have everyone coming back for seconds (and maybe even thirds!). You’ll find that each crunchy bite paired with the creamy dip is a match made in culinary heaven.
Ingredients:
Let’s dive into our ingredient list because every element here plays a crucial role in creating those irresistible bites. By understanding what each ingredient brings to the table, you’ll appreciate your creation even more!
- 1 lb Cod fillets (Cut into bite-sized pieces). Cod is such a fabulous choice for frying because it has a mild flavor and firm texture that holds up beautifully during cooking. When selecting your cod fillets, look for flesh that is bright white and translucent; avoid any fillets that appear discolored or have an overly fishy smell—this freshness makes all the difference! If you prefer, you can substitute cod with other firm white fish like haddock or pollock.
- 1 cup All-purpose flour. This flour serves as the first layer of our breading process, helping to create that beautiful crispy exterior we crave in fried foods. It acts as a binding agent for our seasoning, ensuring each piece of cod is perfectly flavored before it hits the oil. Always sift your flour before measuring—it aerates it and helps achieve an even coating on your fish.
- 1 teaspoon Garlic powder. This ingredient adds depth to our cod bites without overwhelming their delicate flavor. Garlic powder delivers an unmistakable aromatic essence that enhances every bite; plus, it’s convenient! If you’re feeling adventurous, fresh minced garlic could be used instead for an extra punch.
- 1 teaspoon Paprika. I absolutely adore paprika—not only does it impart a beautiful color to our cod bites, but it also introduces a subtle smokiness that contrasts wonderfully with the fresh flavors of our dip. Opt for sweet paprika if you prefer less heat; however, smoked paprika can add an enticing twist if you’re looking for something different!
- ½ teaspoon Salt. Salt is essential here—it brings out all those wonderful flavors hiding within our ingredients! Be cautious not to overdo it since we will also season our dip later on.
- ½ teaspoon Black pepper. A dash of black pepper enhances the overall profile without competing with other flavors; it’s like the quiet friend who knows when to chime in at just the right moment!
- 2 Large eggs (Beaten). These eggs act as our binding agent between the seasoned flour and panko breadcrumbs—crucial for achieving that coveted crunch! They help adhere everything together so your cod stays beautifully coated while frying.
- 1 cup Panko breadcrumbs. Here’s where we really crank up the crunch factor! Panko breadcrumbs are coarser than traditional breadcrumbs which results in an airy texture when fried—trust me; this is non-negotiable if you want truly crispy bites!
- as needed Vegetable oil (For frying). Choosing the right oil is important here: opt for vegetable oil or canola oil due to their high smoke points which make them ideal for frying without burning quickly.
- ½ cup Mayonnaise. This creamy base adds richness and depth to our dip while providing a smooth texture—just what we need alongside our crispy bites! You can use low-fat mayo if you’re looking to lighten things up without sacrificing flavor.
- ¼ cup Greek yogurt. Greek yogurt not only lightens up our dip but also introduces tanginess that perfectly balances against the richness of mayonnaise—creating a beautiful harmony of flavors!
- 2 tablespoons Lemon juice. Freshly squeezed lemon juice brightens up everything it touches! It’s absolutely paramount in bringing out all those savory notes from both our cod bites and dip.
- 1 teaspoon Lemon zest. Zest captures all those aromatic oils from lemons which adds intense citrus flavor without extra acidity—this little detail elevates your dip immensely!
- 1 tablespoon Fresh dill (Chopped) & 1 tablespoon Fresh parsley (Chopped). Fresh herbs are like nature’s confetti—they brighten dishes both visually and aromatically! Dill brings earthy notes reminiscent of summer days while parsley adds freshness—we’ll mix them both into our dip for layers upon layers of flavor.
- 1 clove Garlic (Minced). Finally, just when you thought we couldn’t fit more garlicky goodness into this dish—we’ll add fresh minced garlic into our dip as well! Its pungency pairs perfectly with creamy elements—it’s truly intoxicating!
- to taste Salt and pepper – Remember: always taste as you go! Adjusting seasoning at this stage ensures everything remains balanced—a small step towards greatness!
Equipment You’ll Need:
Now that we’ve gathered all our ingredients, let’s talk about some essential tools you’ll need along this culinary adventure! Having these items on hand will make your cooking process smoother—and who doesn’t love an enjoyable time spent in the kitchen?
- Large mixing bowl – A sturdy bowl makes combining ingredients effortless; it allows ample space for whisking eggs or mixing seasonings together without messes sneaking out onto your countertop!
- Shallow dishes/plates – You’ll need these for dredging—the three-step breading station usually consists of one plate filled with flour mixed with spices, another containing beaten eggs, and lastly another plate filled with panko breadcrumbs ready to coat those tasty morsels.
- Deep skillet or Dutch oven – For frying purposes, choose deep enough cookware so your oil can comfortably submerge those lovely cod bites while ensuring even cooking throughout—the last thing you want is soggy bits due to overcrowding!
- Slotted spoon or spider strainer – These handy tools help lift cooked fish from hot oil easily without losing any precious coating during transfer—who wants sad soggy bits?
Preparing the Crispy Garlic Cod Bites with Creamy Lemon Herb Dip
Let’s get started on creating these delicious Crispy Garlic Cod Bites along with their delightful Creamy Lemon Herb Dip! Just remember: take your time through each step—you’re crafting something special here.
Step 1: Prepare Your Workstation
Before diving into preparation mode, let’s organize ourselves—this step sets us up for success! Begin by gathering all your ingredients upfront so they’re within reach—that way no frantic searches will interrupt your flow later on! Set out three shallow plates side by side: one filled with seasoned flour mixture (make sure it’s well combined!), one holding beaten eggs ready for dipping action—and finally one showcasing panko breadcrumbs waiting excitedly for their turn at transformation!
Step 2: Coat Those Cod Pieces
With everything prepped nicely before us now comes one of my favorite parts: dredging those lovely pieces of cod! Take each piece individually starting from flour—coat thoroughly but shake off excess before moving onto egg wash next—you want them sticky enough for crumbs but not swimming in batter either! Finally transfer these beauties into panko breadcrumb plate gently pressing down slightly so they capture every bit possible; trust me when I say this final coating makes all difference between crunchy bliss vs blandness later on…
Step 3: Heat Up Your Oil
Once you’ve coated all pieces beautifully let’s move onto heating up vegetable oil—instructions vary based upon type chosen but generally speaking aim around medium-high heat until shimmering occurs—this indicates correct temperature achieved before introducing anything fried! An instant-read thermometer works wonders here too if you’d prefer precision measurement; around 350°F should suffice ideally promoting golden crispiness whilst preventing greasy mishaps too…
Step 4: Fry Until Golden Brown
It’s showtime now folks—carefully lower coated pieces into hot oil one by one maintaining space between each morsel allowing them room not only fry uniformly but also avoid cooling down oil unnecessarily—ideally fry batches no larger than four pieces at once depending on skillet size chosen earlier… Monitor closely letting fish cook approximately 3–4 minutes per side until gorgeously golden brown making sure they’re flaking easily when poked gently revealing delicate moist interior beneath crispy exterior…
There you have it—a cozy journey through preparing Crispy Garlic Cod Bites paired perfectly alongside zesty lemon-herb goodness awaits ahead as we move further along exploring assembly details once fried delights cool down enough share amongst loved ones or savor solo-like true champions might do too… Stay tuned friends because trust me these flavors will linger long after everyone’s left table behind!
Step 5: Dredging the Cod Bites to Perfection
Now that your cod is beautifully prepped, it’s time to give those bite-sized pieces a luscious coating that will transform them into crispy bites of heaven. First, you’ll want to take those cut pieces of cod and set them up in a small assembly line with three shallow bowls in front of you. In the first bowl, combine your all-purpose flour with the garlic powder, paprika, salt, and black pepper—this is the dry mixture that will create a fantastic base layer. The reason we season this flour is simple: it not only adds flavor but also creates a barrier that helps retain moisture within the fish during frying. Trust me on this; you want that juicy interior!
In the second bowl, beat your large eggs until they’re frothy and inviting. This egg wash will act as glue for our breadcrumbs, ensuring they stick beautifully to the cod. Now comes the fun part: taking each piece of cod, lightly dredging it in the seasoned flour, then dipping it into the egg wash, allowing any excess to drip off before finally rolling it in panko breadcrumbs. The panko is absolutely crucial here—the larger flakes provide an airy crunch that’s simply irresistible. As you coat each piece, make sure you’re pressing the breadcrumbs onto the fish gently; this will help create an even crust when fried. After all, we’re looking for that perfect golden-brown finish that signifies crispiness!
Step 6: Time to Fry – Getting That Golden Crisp
With your cod bites all dressed up and ready to go, let’s turn our attention to frying—a technique that can seem daunting but is incredibly rewarding when done right! In a large skillet or deep frying pan, pour enough vegetable oil to cover about half an inch of the bottom—this ensures even cooking and allows for that beautiful crisp we’re aiming for. Heat the oil over medium-high heat until it shimmers invitingly; this typically takes about 3-5 minutes. A good test to see if your oil is hot enough is to drop a small piece of bread into it—if it sizzles vigorously and turns golden brown in about 30 seconds, you’re in business!
Once your oil is ready, carefully place a few cod bites in at a time—don’t overcrowd them! This step is paramount because too many pieces can lower the oil temperature and lead to soggy fish rather than perfectly crispy bites. Fry them for about 2-3 minutes on each side or until they reach that glorious golden color you’ve been dreaming about. You’ll know they’re done when they float slightly and have a light crunch upon touching them with tongs or a fork. Remember—patience pays off! If they seem too pale after just one minute on each side, give them another minute or so; cooking times may vary based on your stove’s heat output.
Step 7: Draining and Cooling – The Key to Extra Crispiness
After frying up those delightful cod bites, it’s essential to remove them from the oil properly. Use a slotted spoon or tongs to transfer them onto a plate lined with paper towels. This step might seem trivial, but it’s absolutely crucial—it allows excess oil to drain away while keeping your cod bites incredibly crispy! As tempting as it may be to dive right in after frying (and believe me, I understand!), let them sit for just a couple of minutes before serving. This brief cooling period helps firm up their exterior even more while letting any remaining steam escape—trust me when I say that nobody wants soggy cod bites!
As they’re cooling, take a moment to admire your handiwork—the golden crust glistening under soft kitchen lights is incredibly satisfying! The aroma wafting through your kitchen? Utterly intoxicating! At this stage, it’s also a great idea to sprinkle a pinch of salt over them while they’re still warm; this little touch enhances flavor tremendously and makes each bite unforgettable.
Step 8: Crafting the Creamy Lemon Herb Dip
While your crispy garlic cod bites are cooling down ever so slightly (and trust me—you want them cool enough not to burn anyone’s tongue), let’s whip up that dreamy creamy lemon herb dip we’ve been dreaming about since we started this journey together! In a medium mixing bowl, combine half a cup of mayonnaise with twenty-four tablespoons of Greek yogurt for an incredible base that’s rich yet refreshing at once. The yogurt adds tanginess while maintaining creaminess without overwhelming heaviness—the perfect companion for our crispy bites!
Next up? Add in two tablespoons of freshly squeezed lemon juice along with one teaspoon of lemon zest; this zest brings out vibrant citrus notes that will dance on your palate alongside those crunchy fish morsels. Don’t forget to add one minced clove of garlic and fresh herbs like dill and parsley—these ingredients bring an earthy freshness that’s utterly extraordinary! As you mix everything together until smooth (I often use a whisk for this), taste test as you go! Adjusting salt and pepper at this stage allows you full control over how robust or subtle you’d like those flavors.
Finally—and I cannot emphasize this enough—give this dip some time to chill in the refrigerator for at least ten minutes before serving. This resting period allows all those fabulous flavors to meld together beautifully; believe me when I say you’ll taste the difference! And there you have it—the perfect creamy lemon herb dip awaits your crispy garlic cod bites!
Final Touches: Serving Your Crispy Garlic Cod Bites with Creamy Lemon Herb Dip
Now comes perhaps my favorite part—the grand unveiling where everything you’ve worked so hard on comes together beautifully! Arrange those golden crispy garlic cod bites artfully on a platter; I love using colorful plates as they really make everything pop visually! If you’re entertaining guests—or simply indulging yourself—garnish with extra lemon wedges and sprigs of fresh herbs because presentation matters just as much as flavor.
As you serve these delicious bites alongside their creamy partner-in-crime dip, take momentary pause; soak in not only the delightful aromas but also witness how excited everyone gets as they approach your culinary creation! Watch their eyes light up at first sight—it’s truly heartwarming knowing you’ve prepared something so special from scratch.
And there you have it—a symphony of flavors captured within each crisp bite paired seamlessly with zesty creaminess that’ll leave everyone asking for more! Enjoy every last morsel because these Crispy Garlic Cod Bites with Creamy Lemon Herb Dip aren’t just food—they’re memories waiting to be made around tables filled with laughter and joy. Happy cooking!
Storage and Enjoyment Tips for Your Crispy Garlic Cod Bites with Creamy Lemon Herb Dip
Now that you’ve crafted these delightful Crispy Garlic Cod Bites with Creamy Lemon Herb Dip, it’s time to revel in their deliciousness! But let’s be honest—if you happen to have any leftovers (which is a rarity in my household), you’ll want to know how to preserve this treasure. After all, the joy of indulging in these savory bites can extend beyond just one meal. So, whether you’re preparing for a cozy dinner or a lively gathering, knowing how to store your cod bites properly will ensure that every bite remains tantalizingly fresh and flavorful.
Storing Leftover Crispy Garlic Cod Bites with Creamy Lemon Herb Dip
When it comes to keeping your leftover Crispy Garlic Cod Bites crisper than ever, I recommend using an airtight container. This simple step is crucial; it prevents moisture from seeping in, which can make those glorious bites lose their crunch. Pop them into the fridge, where they’ll stay fresh for about 2-3 days. If you’re determined to maintain that delightful crispiness, consider placing a slice of bread in the container with the cod bites—this little trick absorbs excess moisture and keeps your bites feeling as close as possible to their freshly fried state. I promise you, when you go back for seconds on day two, they’ll still deliver that profoundly satisfying crunch! To reheat them, simply pop them in the oven at 375°F (190°C) for about 10-12 minutes until heated through and crispy again. Trust me on this; the oven works wonders!
Freezing Crispy Garlic Cod Bites for Later
If you want to take your meal prep game up a notch—or simply wish to have these beauties on hand for those unexpected cravings—freezing is an absolutely phenomenal option! To freeze your cod bites properly, lay them out in a single layer on a baking sheet first and freeze them until solid. Then transfer them into an airtight freezer bag or container, ensuring you squeeze out as much air as possible before sealing. They’ll keep beautifully frozen for up to three months! When you’re ready to enjoy them again, there’s no need to thaw—just bake straight from the freezer at 400°F (200°C) for about 15-20 minutes or until golden and piping hot. How convenient is that? Imagine pulling those crispy bites from the oven on a busy weeknight; it transforms an ordinary evening into something truly extraordinary.
CATEGORY_NAME
Crispy Garlic Cod Bites with Creamy Lemon Herb Dip
Crispy Garlic Cod Bites with Creamy Lemon Herb Dip are a delightful blend of flavors and textures that elevate any gathering. Imagine perfectly fried cod pieces, coated in a crunchy panko crust, delivering a satisfying crunch with each bite. Paired with a zesty creamy lemon herb dip, these bites become an irresistible appetizer that will have your guests coming back for more. Simple to make yet impressive enough for special occasions, this recipe is a must-try for seafood lovers and anyone seeking a delicious, crowd-pleasing dish. Whether served at parties or enjoyed during family dinners, these cod bites are sure to create memorable moments around the table.
- Prep Time: 20 minutes
- Cook Time: 15 minutes
- Total Time: 35 minutes
- Yield: Approximately 4 servings 1x
- Category: Appetizer
- Method: Frying
- Cuisine: Seafood
Ingredients
- 1 lb Cod fillets (cut into bite-sized pieces)
- 1 cup All-purpose flour
- 2 Large eggs (beaten)
- 1 cup Panko breadcrumbs
- Vegetable oil (for frying)
- ½ cup Mayonnaise
- ¼ cup Greek yogurt
- 2 tablespoons Lemon juice
- Fresh dill (chopped)
- Fresh parsley (chopped)
Instructions
- Prepare your workstation by setting up three shallow dishes: one with seasoned flour (flour, garlic powder, paprika, salt, and pepper), one with beaten eggs, and one with panko breadcrumbs.
- Dredge each cod piece in the flour mixture, dip it in the egg wash, then coat with panko breadcrumbs, pressing gently to adhere.
- In a deep skillet or Dutch oven, heat vegetable oil over medium-high heat until shimmering.
- Fry the cod bites in batches for about 3–4 minutes per side until golden brown. Transfer to a paper towel-lined plate to drain excess oil.
- For the dip, combine mayonnaise, Greek yogurt, lemon juice, lemon zest, minced garlic, dill, parsley, salt, and pepper in a bowl. Mix well and adjust seasoning to taste.
Nutrition
- Serving Size: 4 bites (85g)
- Calories: 320
- Sugar: 1g
- Sodium: 610mg
- Fat: 17g
- Saturated Fat: 2g
- Unsaturated Fat: 14g
- Trans Fat: 0g
- Carbohydrates: 29g
- Fiber: 1g
- Protein: 17g
- Cholesterol: 100mg