Cauliflower Pickles
The Heartwarming Journey of Cauliflower Pickles
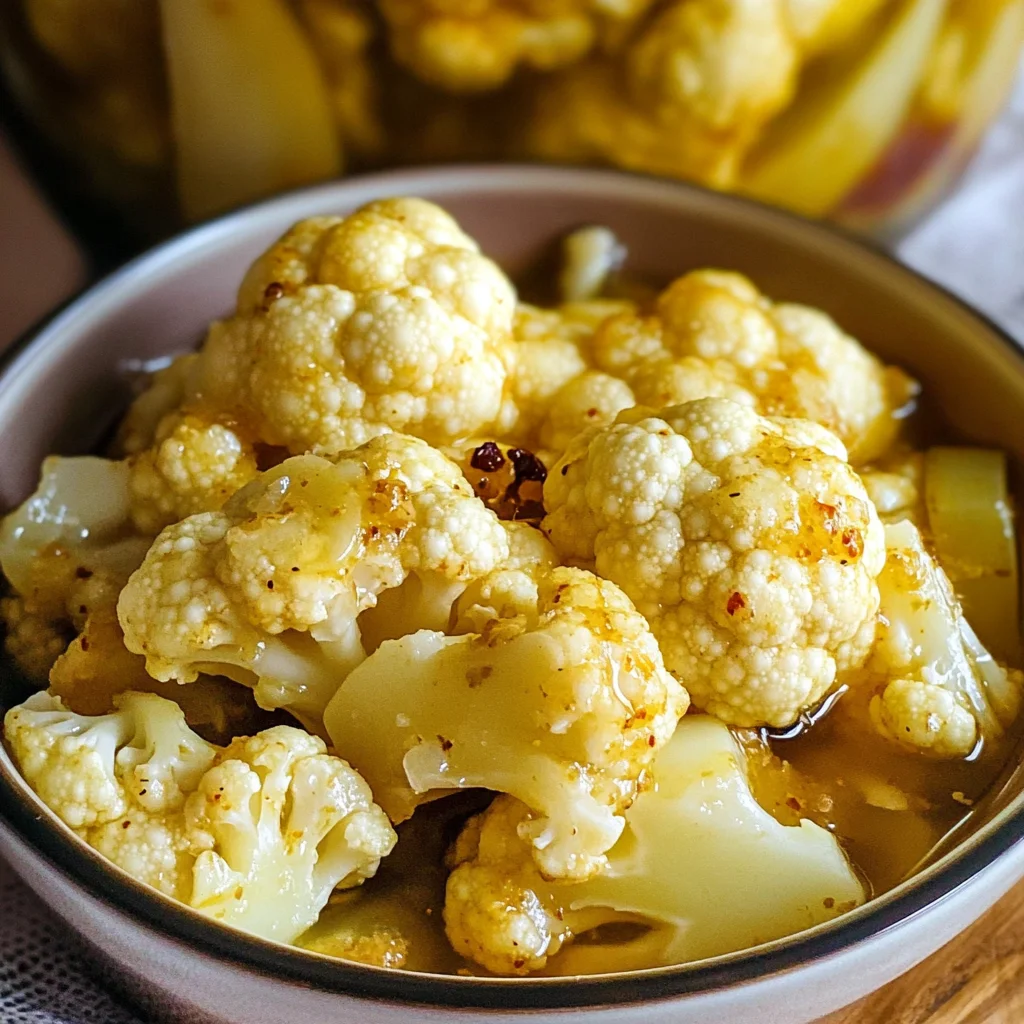
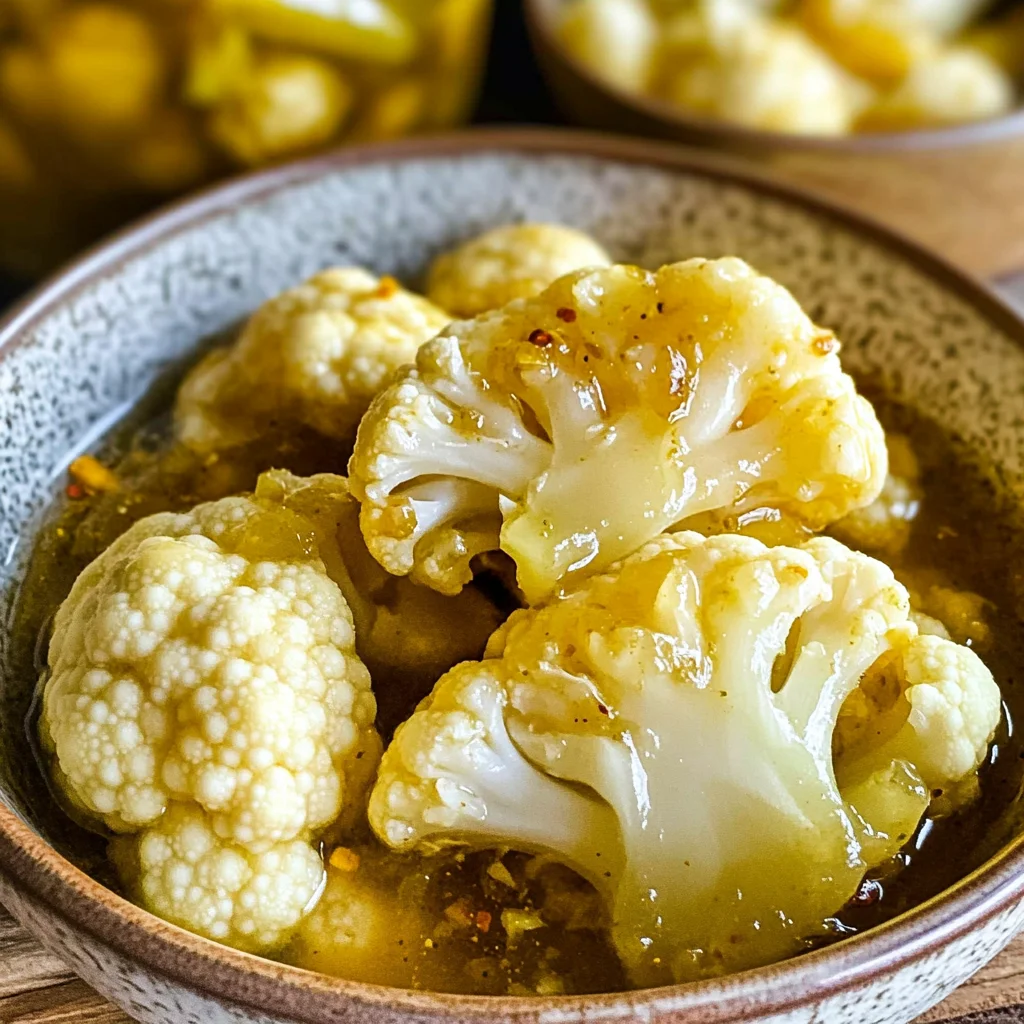
There’s something undeniably magical about transforming a simple vegetable into a tantalizing condiment that brings joy to every bite. Cauliflower, often overlooked, is a delightful canvas just waiting for the right brushstrokes of flavor and texture. When I first made these Cauliflower Pickles, I was captivated by how this humble ingredient could morph into something utterly intoxicating, with layers of flavor that dance on your palate. The crunch, the tanginess from the cider vinegar, and the hint of sweetness from brown sugar create a symphony of flavors that can elevate any meal or even stand alone as a snack. Imagine reaching for a jar and letting the vibrant colors and aromas envelop you like an embrace—this is more than just food; it’s an experience that connects us to our roots while inviting innovation.
What makes these pickles so special is not just their taste but also their versatility. Perfect for gatherings or quiet nights in, they add an unexpected twist to sandwiches or are simply divine enjoyed straight from the jar. This recipe bridges tradition and modernity beautifully, showcasing how we can take age-old techniques like pickling and give them a fresh spin. Whether you’re hosting friends for dinner or looking to spice up your weekly meal prep, these Cauliflower Pickles will undoubtedly be a beloved addition to your culinary repertoire.
Cauliflower Pickles: A Crunchy Delight for Every Occasion
Let’s dive right into this delightful recipe! Making Cauliflower Pickles is an adventure filled with vibrant colors and bold flavors that I promise will brighten up your kitchen and your table. This recipe is straightforward yet rewarding—you’ll be amazed at how easily you can create something so extraordinary from such simple ingredients. Grab your apron, because we’re about to embark on this culinary journey together!
Ingredients:
As we prepare to make these scrumptious Cauliflower Pickles, let’s talk about what you’ll need. Each ingredient plays an important role in creating that perfect balance of flavors, so let’s savor each one.
- 1 cauliflower – Start with a fresh head of cauliflower; this is the star of our show! Look for ones that are firm and compact with vibrant white florets free from blemishes. The crunchiness of cauliflower provides that satisfying bite we crave in pickles, making it a perfect base. You could even experiment by adding other vegetables like carrots or green beans if you’re feeling adventurous!
- 2 onions – Using two medium-sized onions adds depth to our pickling brine with their natural sweetness when cooked down. They become tender and slightly caramelized as they pickle, which contrasts beautifully with the tangy vinegar. Choose onions that are firm with smooth skins—sweet varieties like Vidalia can add an extra layer of flavor if you prefer.
- 1/3 cup salt – Salt is absolutely paramount in preserving our vegetables while enhancing their flavor. It draws out moisture from the cauliflower and onions, creating the ideal environment for pickling. Always opt for non-iodized salt as iodized salt can impart unwanted flavors in your brine.
- 2 cups cider vinegar – This liquid gold is what gives our pickles their zing! Cider vinegar has a lovely fruity acidity that complements the natural sweetness of the vegetables perfectly. When choosing your vinegar, look for organic options without additives—this ensures you’re getting pure flavor without any weird chemicals.
- 1 teaspoon whole cloves – Whole cloves lend an aromatic warmth to our pickling mix—imagine those cozy holiday spices coming through in each bite! They pack quite a punch in terms of flavor, so be sure to crush them slightly before adding them to maximize their essence.
- 1/2 cup brown sugar – Brown sugar not only sweetens but also contributes moisture due to its molasses content, creating that delicious contrast with the acidic vinegar. It helps round out sharp flavors while giving our pickles a beautiful caramel hue.
- 1/4 cup cornflour (cornstarch) – This might seem unusual in pickling but trust me; cornflour helps thicken our brine slightly, providing just enough body without overwhelming the delicate nature of our vegetables. It also aids in achieving that perfect gel-like consistency when combined properly.
- 1 teaspoon turmeric – Known for its vibrant yellow color and earthy flavor, turmeric doesn’t just look beautiful; it also brings anti-inflammatory properties along for the ride! Plus, it pairs wonderfully with curry powder in this recipe.
- 1 teaspoon mustard powder – Mustard powder adds that gentle kick we adore in savory dishes while helping balance out sweetness from sugar and onions alike—it’s truly an unsung hero in this mixture!
- 1 teaspoon curry powder – Adding curry powder introduces an exotic flair full of warm spices like cumin and coriander—the complexity it brings elevates these pickles to another level! Feel free to adjust based on your personal preference—it’s all about finding what tickles your taste buds!
- 1/8 teaspoon cayenne powder – Just a pinch is necessary here to awaken your senses without overwhelming you with heat; it provides depth rather than raw spiciness. Adjust according to how daring you feel!
Equipment You’ll Need:
To make these delicious Cauliflower Pickles come alive, having the right tools at hand makes all the difference! While they may not be ingredients per se, think of them as essential partners working alongside us in crafting something truly wonderful.
- Large pot – A heavy-bottomed pot is crucial for heating up your brining solution uniformly without hot spots or burning anything at the bottom. You want even cooking here—trust me!
- Cutting board & sharp knife – For chopping up our cauliflower and onions smoothly; having good quality knives makes prep work safer and more efficient!
- Measuring cups & spoons – Accurate measurements ensure consistent results each time you whip up these fabulous pickles—precision is key!
- Jar sterilizer (or oven) – If you’re planning on storing these beauties long-term, sterilizing your jars beforehand is non-negotiable! You can use boiling water or pop them into an oven preheated at 350°F (175°C) for about 10 minutes—just make sure they cool before filling!
- Ladle & funnel (optional) – A ladle helps transfer brine easily into jars without spills while using a funnel keeps everything neat—especially helpful if you’re pouring hot liquid!
Now that we’ve gathered everything we’ll need let’s get started on preparing those amazing Cauliflower Pickles!
Step 1: Prepare Your Vegetables
Begin by washing your cauliflower under cool running water—it’s essential to remove any dirt or impurities before diving into this culinary adventure! Once clean, carefully remove the leaves and cut off the stem so you have just the florets remaining; we want those beautiful little bites ready for soaking up all that goodness! Next comes chopping; slice your onions thinly—their natural sweetness will shine through once they mingle with our brine later on. Don’t rush through this step; taking time ensures even distribution throughout each jar later—a crucial factor in achieving harmony between flavors.
Step 2: Create Your Brine
In your large pot over medium heat (not too high!), pour in those two cups of cider vinegar followed by adding 1/3 cup salt along with both sugars—the brown sugar will dissolve slowly into liquid gold as it warms gently alongside spices like mustard powder and turmeric swirling around… Ahh! Let this mixture come together beautifully until it reaches a simmering point where bubbles start appearing on edges—the moment when all those aromas start dancing around invitingly fills me with anticipation! Stir occasionally ensuring everything mingles nicely before proceeding—it takes mere minutes but trust me when I say watching things bubble away creates such joy within me every single time!
Step 3: Combine Everything Together
Now comes one of my favorite parts: combining those freshly chopped veggies back into our bubbling brine! Carefully add cauliflower florets first followed closely by sliced onions—they’ll soften beautifully as they cook slightly within this fragrant potion brewing away right before us! Stir gently allowing all those crunchy pieces get coated evenly while absorbing maximum flavor possible during their brief visit here—this process lasts around 12 minutes max; keep an eye out as they should remain crisp yet tender enough upon finishing cooking phase…
Step 4: Pack Your Jars
Once your veggies have softened perfectly after simmering away under careful watchful eyes (I know—I couldn’t resist peeking!), it’s time for packing everything neatly inside sterilized jars prepared earlier—the anticipation grows stronger now! Using ladle assists greatly making sure no precious liquid slips past boundaries keeping messes minimal… Use funnel if desired ensuring nothing dribbles outside glass surfaces either… Leave some headspace at top though—it’s important since any expansion during cooling period needs room so don’t skip this vital point folks!
Stay tuned as we continue crafting these vibrant Cauliflower Pickles together—each step builds upon previous ones leading us closer toward deliciousness awaiting ahead!!
Transforming Cauliflower into Culinary Gold
Step 5: Blanching the Cauliflower – The Key to Perfect Crunch
Now, let’s dive into the magic of blanching! Begin by bringing a large pot of water to a rolling boil; you want it bubbling joyfully before adding anything. While that’s heating up, take your beautiful cauliflower and carefully remove the leaves, then cut it into bite-sized florets. This is crucial because each piece needs to be uniform in size—not only for cooking but also for pickling, ensuring they absorb that mesmerizing brine beautifully. Once your water is boiling, add in a generous sprinkle of salt—think of it as seasoning the water to enhance the flavor of your cauliflower—and then gently drop those florets into the pot.
Allow them to blanch for about 2-3 minutes; you’re looking for a vibrant green color and a slight tenderness while still retaining that delightful crunch. This step serves a dual purpose: first, it helps maintain their bright color and second, it makes sure they’ll be just right when they mingle with the pickling spices later on. Trust me on this one—don’t rush this step! After the timer goes off, immediately transfer those florets into an ice bath (a bowl filled with cold water and ice) to stop the cooking process. This shocking method locks in that crisp texture and keeps them from wilting away into mushy oblivion. You’ll see how stunningly vibrant they remain—a feast for both the eyes and palate!
Step 6: Crafting Your Pickling Brine – A Symphony of Flavors
With your cauliflower beautifully blanched and resting in its chilly bath, let’s turn our attention to creating that utterly intoxicating pickling brine! In a medium saucepan over medium heat, combine 2 cups of cider vinegar with 1/2 cup brown sugar, 1/3 cup salt, 1 teaspoon whole cloves, 1 teaspoon turmeric, 1 teaspoon mustard powder, 1 teaspoon curry powder, and just a whisper of cayenne powder—this last one is optional but oh-so-wonderful for adding depth! As you stir these ingredients together, let them come to a gentle simmer while keeping an eye on it; you want everything to dissolve thoroughly.
Why is this step so vital? Well, my friends, this brine is where all the flavors will dance together harmoniously! As it heats up and begins to bubble softly, the aromas will waft through your kitchen like an inviting hug. The vinegar provides acidity that balances out the sweetness from the brown sugar perfectly—it’s truly extraordinary how these elements meld together. Allow this fragrant mixture to simmer for about 5 minutes; watch closely as it transforms from mere ingredients into liquid gold! Afterward, remove it from heat and let it cool slightly. This moment allows those spices’ flavors to deepen and intensify—trust me when I say your taste buds will thank you later!
Step 7: Thickening Up That Brine – A Velvety Touch
Next up in our culinary adventure is thickening our brine just enough to create that luscious mouthfeel when we bite into our pickled cauliflower. To do this, we’ll need to mix 1/4 cup cornflour (cornstarch) with an equal amount of cold water in a small bowl until completely smooth—no lumps allowed here! This mixture is known as a slurry and is absolutely paramount for achieving that perfect consistency without any clumping.
Once your cornflour slurry is ready, return your warm brine back onto medium heat. Slowly whisk in that glorious slurry you created earlier while stirring continuously; this action not only incorporates the starch but also prevents lumps from forming—keep that whisk moving! You’ll notice almost instantly how the liquid begins to thicken beautifully; cook it for about another minute until it reaches a light bubbling point—the texture should coat the back of a spoon elegantly. This thickness helps cling onto each cauliflower floret so every bite bursts with flavor! Allow it to cool slightly before moving on; patience here will pay off tenfold.
Step 8: Packing It Up – The Final Assembly
Now comes one of my favorite parts—the assembly! Grab two clean jars (think about how beautiful they’ll look on your kitchen shelf) and start layering those vibrant cauliflower florets along with slices of onion—you can even toss in some extra spices or herbs if you have any favorites lying around. The goal here is not just functionality but also aesthetics; make sure each jar looks inviting because we eat with our eyes first!
Once you’ve packed those jars tightly yet gently with your vegetables (don’t go smashing them in there!), it’s time to pour over that velvety brine we lovingly crafted earlier. Make sure every last piece gets coated—the brine should fill each jar right up until there’s just about half an inch left at the top—this space allows for expansion during storage while preventing any overflow disasters later on. Before sealing them tight with their lids, give each jar a gentle tap against your counter; this helps release any air bubbles trapped within (nobody likes soggy pickles!). And voilà—you’ve successfully prepped your jars for their next big adventure!
Letting Time Work Its Magic
Step 9: Chilling Out – Patience Makes Perfect
Ahh… now we arrive at perhaps one of the most important steps: letting those jars chill out in the fridge! In culinary terms known as pickling, this resting period allows flavors to meld together spectacularly—a true testament to why patience holds such valuable weight in cooking! Ideally, you should allow these beauties to sit for at least 24 hours before diving in—though I recommend waiting at least three days if you’re feeling particularly adventurous.
During this time in cold storage, something wonderful happens—the acidity from the vinegar penetrates deep into every nook and cranny of those cauliflower florets while simultaneously softening their texture ever so slightly without losing that beloved crunchiness we worked so hard to preserve earlier on. Trust me when I say when you finally pop open that lid after waiting patiently—a delightful aroma will greet you like an old friend returning home after far too long apart.
You may wonder why chilling matters so much? It’s all about allowing flavors time to develop harmoniously rather than rushing straight into enjoying them—which can lead to disappointing results if they haven’t had sufficient time together! So please resist temptation; I promise you—it’s worth every second spent waiting as you’ll discover layers upon layers of flavor once they’re ready!
And there you have it—the journey from humble cauliflower florets transformed into effervescent Cauliflower Pickles awaits you! Each crunchy bite promises an explosion of flavors that are not only versatile but also incredibly satisfying as snacks or delightful accompaniments on sandwiches or grazing platters. Enjoy sharing these exquisite treats with loved ones or savoring them solo; either way, I guarantee they’ll bring warmth and joy alongside fond memories shared around tables filled with laughter and love! Happy pickling!
Storage and Enjoyment Tips for Your Cauliflower Pickles
Now that you’ve crafted these absolutely delightful Cauliflower Pickles, it’s time to revel in the joy of preservation! These pickles are not just a snack; they’re a vibrant burst of flavor that can elevate any meal. Imagine having a jar of these tangy, crunchy treasures ready to enhance your cheese boards, sandwiches, or even as a zesty side dish whenever the mood strikes! But how do we ensure that our pickles stay crisp and delicious? Let’s dive into the best practices for storing your precious creation.
Storing Leftover Cauliflower Pickles
When it comes to storage, the right container is crucial. I recommend using glass jars with tight-fitting lids, as they help maintain the pickles’ crispness while keeping them safe from unwanted odors in your refrigerator. Simply pour your lovingly prepared cauli pickles into these jars, ensuring they’re submerged in their delightful brine. Store them in the fridge where they’ll keep for about 2 to 3 weeks—though trust me, once you start nibbling, they might not last that long! If you’re worried about maintaining their crunch, try placing a slice of bread in the jar; it absorbs excess moisture and keeps those pickles crispy. After storage, you’ll find that the flavors only deepen and develop over time. The initial tangy zest evolves into a more complex flavor profile that’s utterly intoxicating! When serving, there’s no need for reheating; simply pop open that jar and enjoy them cold or at room temperature for an instant taste sensation.
Freezing Cauliflower Pickles for Later
If you find yourself with an abundance of these delectable Cauliflower Pickles, freezing is a fantastic option! To freeze them properly, make sure to use airtight freezer bags or containers—this will prevent freezer burn and keep those vibrant flavors intact. You can freeze them for up to three months without losing quality. When you’re ready to enjoy them again, simply thaw them overnight in the refrigerator. Freezing is not just about preserving but also an opportunity to savor these extraordinary flavors at your convenience! Picture this: on a busy weeknight when you’re craving something special but don’t have the time to cook from scratch, reaching into your freezer for a jar of these tangy delights is like unearthing culinary treasure. It’s all about making life easier while still indulging in incredible food!
Cauliflower Pickles
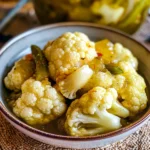
Cauliflower Pickles are a delightful twist on traditional pickling, transforming humble cauliflower into a tangy and crunchy condiment that elevates any meal. With a perfect balance of sweetness, acidity, and spices, these pickles bring vibrant colors and flavors to your table. Whether enjoyed as a snack, added to sandwiches, or served alongside grilled meats, this easy recipe offers versatility and joy in every bite. It’s not just food; it’s an experience that connects us to the art of preserving vegetables while inviting creativity into our kitchens. Dive into this culinary adventure and discover how simple ingredients can create unforgettable flavors!
- Prep Time: 20 minutes
- Cook Time: 15 minutes
- Total Time: 35 minutes
- Yield: Approximately four servings (200g each) 1x
- Category: Condiment
- Method: Pickling
- Cuisine: American
Ingredients
- 1 head of cauliflower
- 2 medium onions
- 1/3 cup salt
- 2 cups cider vinegar
- 1/2 cup brown sugar
- 1 teaspoon whole cloves
- 1/4 cup cornflour (cornstarch)
- 1 teaspoon turmeric
- 1 teaspoon mustard powder
- 1 teaspoon curry powder
- 1/8 teaspoon cayenne powder
Instructions
- Wash the cauliflower thoroughly and cut it into bite-sized florets. Thinly slice the onions.
- In a large pot over medium heat, combine cider vinegar, salt, brown sugar, cloves, turmeric, mustard powder, curry powder, and cayenne. Bring to a simmer until sugars dissolve.
- Blanch the cauliflower in boiling salted water for 2-3 minutes until vibrant green and slightly tender. Transfer to an ice bath.
- Mix cornflour with cold water to create a smooth slurry. Whisk it into the simmering brine until thickened.
- Pack the blanched cauliflower and sliced onions into sterilized jars and pour the brine over them, leaving half an inch of headspace.
- Seal the jars tightly and refrigerate for at least 24 hours before enjoying.
Nutrition
- Serving Size: 1 serving
- Calories: 120
- Sugar: 12g
- Sodium: 800mg
- Fat: 0g
- Saturated Fat: 0g
- Unsaturated Fat: 0g
- Trans Fat: 0g
- Carbohydrates: 30g
- Fiber: 3g
- Protein: 1g
- Cholesterol: 0mg