Butter Bath Corn on the Cob
There’s something truly magical about the humble corn on the cob. It’s not just a side dish; it’s a celebration of summer, a burst of sweetness that evokes laughter and warmth around the dinner table. When I think of those long, sun-soaked days where everything seems to slow down, the thought of Butter Bath Corn on the Cob instantly comes to mind. Imagine sinking your teeth into perfectly tender kernels, each one bursting with a sweetness that dances on your palate, lovingly enveloped in a luscious bath of butter and milk. This is more than cooking; it’s an experience steeped in tradition and comfort that brings friends and family together. I promise you, this recipe will elevate your gatherings, whether they are casual backyard barbecues or cozy family dinners.
What makes this Butter Bath Corn on the Cob so special is not just the method but how it transforms simple ingredients into something profound. The technique of simmering corn in a delightful mixture of milk and butter creates an utterly intoxicating flavor profile that elevates each bite to something extraordinary. It’s reminiscent of childhood summers spent at county fairs, where sweet corn was served slathered in buttery goodness. This recipe captures that essence while being incredibly easy to prepare—perfect for those busy weeknight meals or when you want to impress guests with minimal effort. So grab your favorite apron and get ready for a culinary experience that will leave everyone clamoring for seconds!
Butter Bath Corn on the Cob: A Summertime Delight
Let’s dive into this scrumptious recipe that guarantees sweet joy in every bite! Trust me; once you’ve tasted this Butter Bath Corn on the Cob, you’ll never look at corn the same way again. The combination of creamy milk and rich butter seeps into every kernel, making it not only sweet but also decadently tender. This is comfort food at its finest—a dish that will have you reminiscing about sunny picnics and family feasts.
Ingredients:
Embarking on this culinary journey requires just a few simple ingredients, each playing a vital role in creating that buttery bliss we all crave.
- 5 ears Corn on the Cob (husks and silks removed): Fresh corn is the star here, so selecting the right ears is absolutely paramount. Look for bright green husks tightly wrapped around firm cobs—the kernels should be plump, shiny, and tightly packed together. Nothing compares to fresh corn; frozen or canned varieties simply can’t replicate that sweet crunch! If you’re unable to find fresh corn at your local market, consider choosing frozen corn without added sugars or preservatives as an alternative—though I assure you, fresh is best for this recipe!
- Water: This may seem like a simple ingredient, but it serves as the base for our cooking process. You’ll need enough water to fill your stockpot halfway so that when we add our other ingredients later, everything can simmer evenly. Using hot water helps accelerate reaching a boil—a little tip I learned from my grandmother!
- 1 cup Milk: Whole milk adds not only creaminess but also depth to the flavor profile of our butter bath. It enhances the sweetness of the corn while ensuring each kernel becomes tender and succulent during cooking. If you’re looking for alternatives due to dietary preferences or lactose intolerance, unsweetened almond milk or oat milk work beautifully without compromising flavor.
- 1 stick Butter: Butter is essential here—its richness melds beautifully with our other ingredients to create what can only be described as liquid gold! The quality of butter matters immensely; I recommend using unsalted butter so you can control the saltiness of your final dish more effectively. If you prefer a dairy-free option, coconut oil could be an interesting substitute that still delivers on creaminess.
- 2 tablespoons Sugar: This ingredient amplifies the natural sweetness of our fresh corn; it’s crucial! Some might wonder why sugar is necessary if we’re already using sweet corn, but trust me—it enhances those flavors remarkably well! Adjusting sugar levels can help achieve your preferred level of sweetness.
- Salt & Pepper: These seasoning staples are non-negotiable—they elevate flavors and bring balance to our dish! Use flaky sea salt for its gentle texture or freshly ground black pepper for an aromatic kick. Remember, seasoning is all about balance; taste as you go along!
- Fresh Chives: Chives add a lovely pop of color and freshness—like tiny green confetti sprinkled over your buttery creation! Their mild onion flavor complements both sweet and savory notes beautifully without overpowering them. If chives are hard to come by in your area or if you’re looking for alternatives, finely chopped green onions can serve as an excellent substitute.
Equipment You’ll Need:
Having the right tools makes any cooking experience smoother and more enjoyable—a true partner in crafting something wonderful!
- 8-quart Stockpot: A large stockpot is essential for accommodating all five ears of corn comfortably while allowing them room to cook evenly without crowding. The size ensures even heat distribution during simmering—you want those kernels bathed in deliciousness!
- Measuring Cups: Accurate measurements are critical in achieving perfect results—especially when working with liquids like milk and butter. Invest in quality measuring cups for both dry and wet ingredients; they make cooking feel more precise and rewarding.
- Wooden Spoon or Slotted Spoon: A sturdy wooden spoon will be your best friend for stirring everything together gently without damaging those delicate kernels during cooking. A slotted spoon will also come in handy when it’s time to lift out your beautiful cobs from their luscious bath!
Now that we have all our essentials ready let’s move onto preparing our Butter Bath Corn on the Cob—it’s time for some magic!
Step 1: Prepare Your Pot
Begin by filling your 8-quart stockpot halfway with hot water—just enough so that when we add all our other ingredients later, there will still be ample space for everything to simmer without spilling over! Bringing this water up to a boil first prepares us for what comes next—the exciting part where we infuse all these wonderful flavors together! Keep an eye on it as it heats up; watching those bubbles form feels almost meditative—not to mention you’re one step closer to enjoying that delicious buttery goodness!
Step 2: Create Your Flavorful Bath
Once your water reaches a rolling boil (the kind where big bubbles keep rising vigorously), it’s time to introduce our stars: the fresh corn cobs along with milk, butter, and sugar! Carefully drop each ear into the pot—feel free to use tongs if needed—but don’t rush this step; really take note of how satisfying it is hearing them plop into their flavorful bath! This process allows those cobs to soak up all those glorious flavors while they cook away becoming incredibly tender.
Step 3: Simmer Away
Now reduce your heat so everything transitions into a gentle simmer—this step is crucial because we want those cobs cooked through without becoming mushy or losing their vibrant color! Allow them to simmer away gently for about 10 minutes; during this time they’ll absorb all those milky-buttery flavors while transforming into something utterly intoxicating! Make sure you check occasionally—not just out of curiosity but because stirring lightly helps ensure even cooking throughout each ear too.
Step 4: Keep Warm & Flavor Up
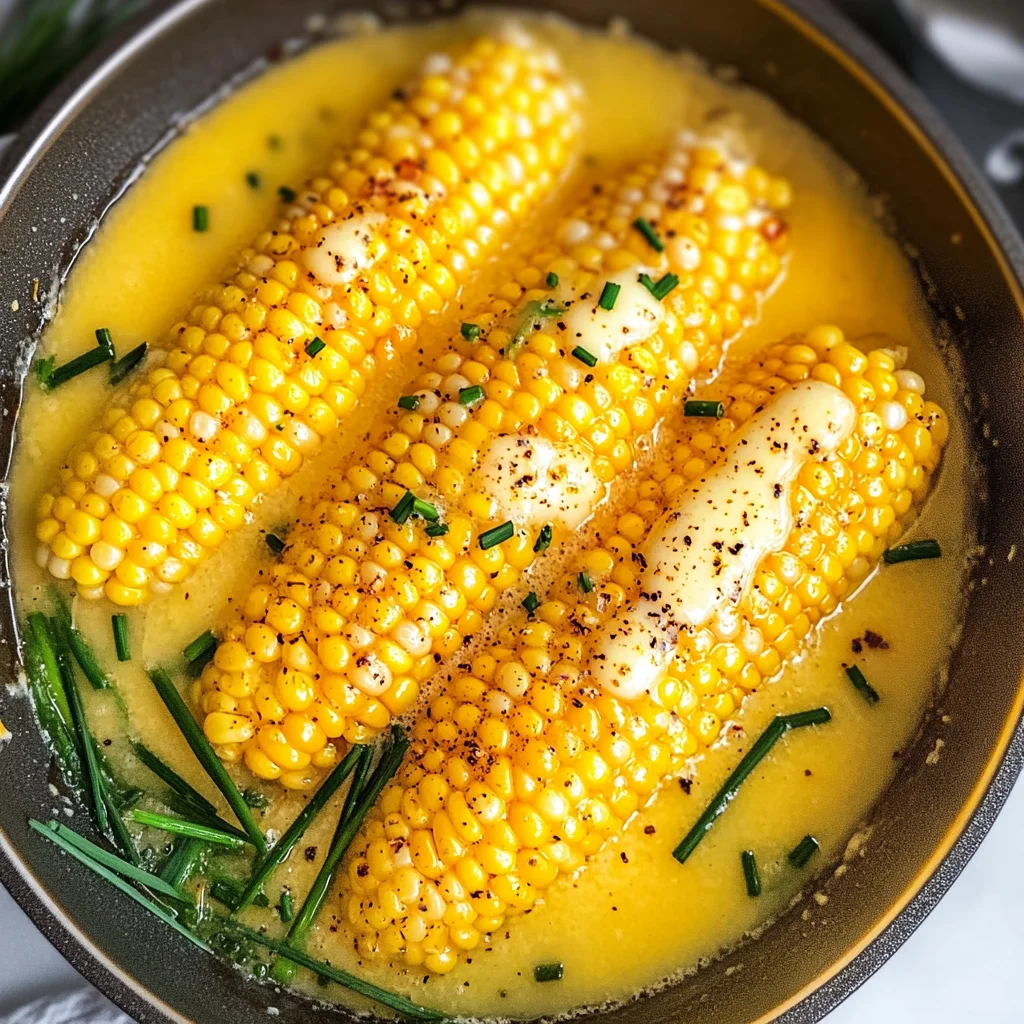
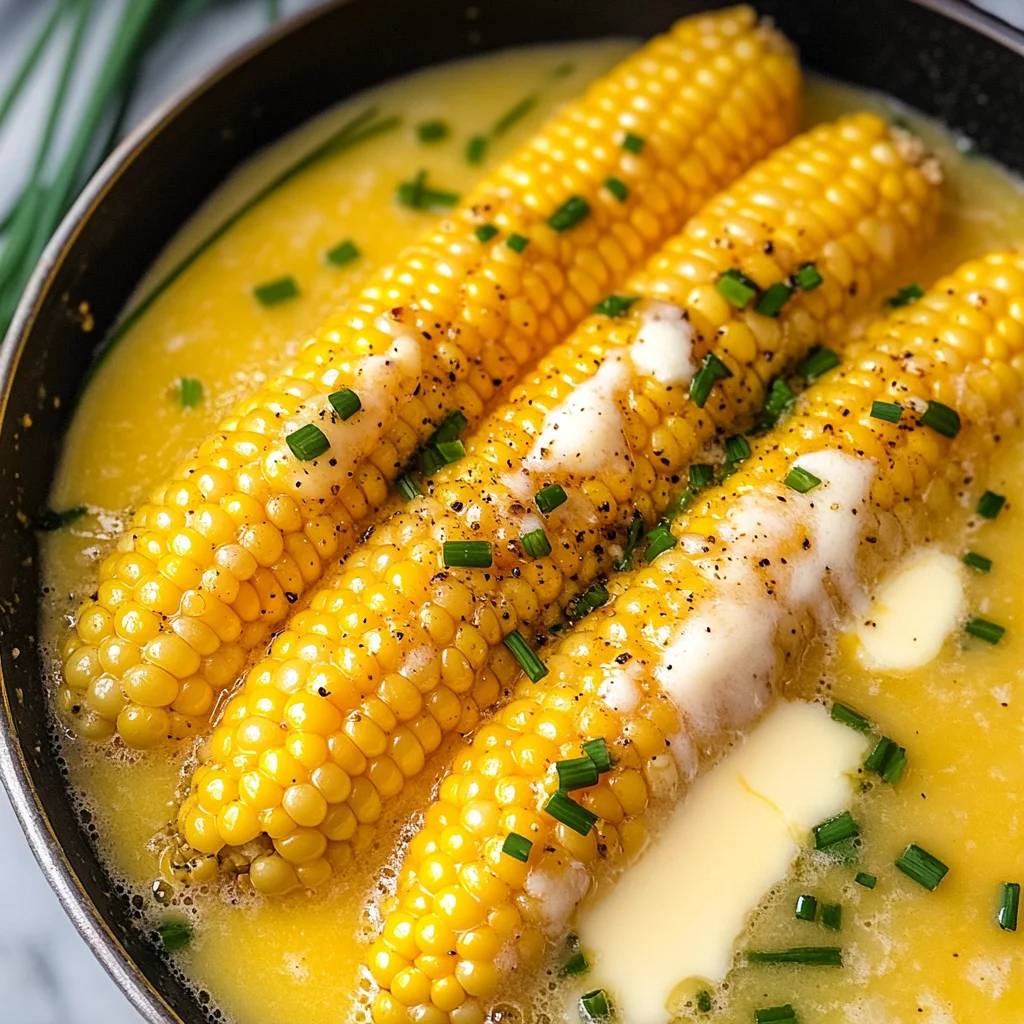
Once they reach tenderness (you’ll know they’re done when they yield slightly under pressure), keep them warm right there in their luxurious butter bath until serving time! Right before serving, season generously with salt and freshly cracked pepper because finishing touches matter immensely here—don’t overlook them! Finally sprinkle with freshly chopped chives for an elegant touch—a burst of color atop this golden delight brings joy before anyone even takes their first bite!
I hope you’re feeling excited about trying out this Butter Bath Corn on the Cob recipe—you’re going to love it! Each kernel is going to transport you straight back to summer days filled with sunshine—and trust me when I say you’ll be tempted not just by its taste but also by its sheer beauty as well!
Cooking Your Butter Bath Corn on the Cob
Let’s dive into the heart of this incredible recipe, where each step unfolds a bit of magic in your kitchen. With every stir and simmer, you’ll be enveloped in the sweet aroma of fresh corn mingling with the rich, creamy butter and milk. This is not just a side dish; it’s an experience that connects us to those summer days when corn was at its peak freshness. Now, let’s get into the nitty-gritty of creating that breathtaking Butter Bath Corn on the Cob.
Step 5: The Perfect Simmer
Once you’ve combined your water, corn, milk, butter, and sugar in that bubbling stockpot, it’s time to turn down the heat and let it work its magic. Reducing that heat to a gentle simmer is absolutely crucial – we want to coax out all those natural sugars from the corn without boiling away its freshness. Think of simmering as giving your corn a warm hug! Letting it languish in this buttery bath for about 10 minutes allows those flavors to meld beautifully. You’ll start to see tiny bubbles forming around the edges of your pot; this is a sign that everything is coming together. As tempting as it may be to rush this step, trust me when I say that patience will reward you with tender kernels bursting with flavor. If you peek into the pot during this time, you should see that golden liquid shimmering around the ears of corn—this is what dreams are made of!
Step 6: Checking for Tenderness
After about ten minutes of simmering bliss, it’s time for one final test before serving up this deliciousness. Grab a pair of tongs and carefully extract an ear of corn from its bath (careful! It’s hot!). Allow it to cool for just a moment so you can safely take a bite—this isn’t just about cooking; it’s about experiencing. The kernels should be tender yet still have a slight bite—a perfect balance between crispness and softness. If they aren’t quite there yet, don’t hesitate to pop them back in for another minute or two; every ear can vary slightly in cooking time based on freshness and size. Remember, good things come to those who wait! The goal here is to achieve that delightful texture where each kernel is juicy and ready to burst with flavor.
Step 7: Keeping Warm and Infusing Flavor
Once you’ve determined that your corn has reached peak tenderness, it’s essential to keep it warm until you’re ready to serve. This is where the magic really happens—by leaving the corn nestled in its butter bath, each cob becomes even more infused with that rich flavor profile we’re after. Not only does this keep the corn warm for your guests or family (because no one likes cold corn!), but it also allows any remaining flavors from the milk and butter to seep deeper into those sweet kernels. If you’re planning on preparing other dishes simultaneously – perhaps grilling some veggies or sautéing greens – use this time wisely! Just keep an eye on your pot; if it’s too hot, reduce your flame further so nothing scorches at the bottom.
Step 8: The Finishing Touches
Now we arrive at the point where all your hard work comes together in one magnificent flourish! When it’s time to serve your Butter Bath Corn on the Cob, it’s essential to dress these beauties up just right. Using your tongs once again (or even a fork if you prefer), gently remove each ear from its buttery bath and let any excess drip off before placing them on a serving platter. This step may seem simple but try not to overlook how impactful it is—the presentation matters! Now sprinkle generously with salt and pepper while they’re still warm; this creates an irresistible contrast against all that sweetness you’ve cultivated through cooking. And don’t forget about those fresh chives—chop them finely and scatter them over your serving dish like confetti at a celebration! This final touch not only adds vibrant color but also brings a fresh herbal note that perfectly complements the richness of our butter bath.
Enjoying Your Creation
Take a moment now as you present this dish—let’s pause and appreciate all that has gone into making such an extraordinary side! Each bite will transport you back to sun-drenched picnics and cozy family gatherings where laughter filled the air along with tantalizing aromas from delicious food being shared around tables filled with love. This Butter Bath Corn on the Cob isn’t just food; it’s nostalgia wrapped up in tender kernels waiting for you to enjoy!
So gather around your loved ones, pass them plates piled high with succulent corn dripping in butter goodness, and prepare for compliments galore as they savor every last bite! Trust me when I say this will become one of those recipes you’ll cherish forever—not just because it’s delicious but because it’s made with love. Happy cooking!
Storage and Enjoyment Tips for Your Butter Bath Corn on the Cob
Now that you’ve experienced the sheer delight of Butter Bath Corn on the Cob, it’s time to think about how to savor every last morsel! I can already hear the echoes of laughter and joy around the table, but let’s face it: sometimes we make a little too much, or we simply want to save some for later. Don’t worry! This glorious corn can be stored thoughtfully, allowing you to enjoy its sweet, tender magic even after your initial feast.
Storing Leftover Butter Bath Corn on the Cob
To keep your leftover Butter Bath Corn on the Cob in peak condition, I highly recommend using an airtight container. This is crucial because you want to trap in all that buttery goodness and prevent any moisture loss. If you have some corn left after your gathering (which is rare, but it happens!), place it in the fridge where it can stay fresh for up to three days. Now, if you’re worried about keeping that delightful texture intact, here’s a nifty pro tip: place a slice of bread in with your corn! This non-negotiable trick helps maintain moisture levels and keeps your corn tasting as fresh as it was the day it was made. When you reheat, just pop it back into a warm butter bath or steam gently until warmed through; this way, you’ll relive that profoundly satisfying experience all over again!
Freezing Butter Bath Corn on the Cob for Later
If you find yourself with an abundance of this delicious corn that you want to save for a rainy day (or just for when the craving strikes), freezing is an excellent option! Simply cut the kernels off the cob once they’ve cooled completely—this makes portioning easier later on. Pack them into freezer-safe bags or containers, squeezing out as much air as possible before sealing. These little nuggets of joy can last in your freezer for up to six months! When you’re ready to use them, just toss them straight into soups or stews without thawing; trust me on this—there’s something magical about watching those bright yellow kernels transform soups into a creamy symphony of flavors. The sheer convenience of having this delightful treat at your fingertips makes freezing an absolute game changer!
Butter Bath Corn on the Cob

Butter Bath Corn on the Cob is a delightful twist on a classic summer side dish, promising juicy kernels soaked in a rich, buttery milk bath. This recipe brings together the sweetness of fresh corn and the creaminess of whole milk and butter, creating a comforting experience that elevates any meal. Perfect for summer barbecues or cozy family dinners, each bite delivers nostalgia and warmth, making it an instant favorite for gatherings. Easy to prepare and sure to impress, Butter Bath Corn on the Cob is more than just food; it’s a celebration of flavor that will keep everyone coming back for seconds!
- Prep Time: 10 minutes
- Cook Time: 10 minutes
- Total Time: 20 minutes
- Yield: Serves 5
- Category: Side Dish
- Method: Simmering
- Cuisine: American
Ingredients
- 5 ears of fresh Corn on the Cob (husks and silks removed)
- Water
- 1 cup Whole Milk (or unsweetened almond/oat milk)
- 1 stick Unsalted Butter (or coconut oil for a dairy-free option)
- 2 tablespoons Sugar
- Salt & Pepper (to taste)
- Fresh Chives (for garnish)
Instructions
- Prepare your pot by filling an 8-quart stockpot halfway with hot water. Bring it to a boil.
- Add the corn, milk, butter, and sugar into the boiling water. Be careful as you add each ear!
- Reduce heat to a simmer and cook for about 10 minutes until kernels are tender.
- Keep warm in the butter bath until ready to serve.
- Before serving, season with salt and pepper, then garnish with freshly chopped chives.
Nutrition
- Serving Size: 1 ear of corn (approximately 90g)
- Calories: 130
- Sugar: 6g
- Sodium: 55mg
- Fat: 7g
- Saturated Fat: 4g
- Unsaturated Fat: 2g
- Trans Fat: 0g
- Carbohydrates: 15g
- Fiber: 2g
- Protein: 3g
- Cholesterol: 15mg