Ditalini Pasta Salad Recipe
There’s something truly enchanting about a well-made pasta salad, isn’t there? It’s more than just a dish; it’s an experience that transports you straight to sun-drenched picnics and delightful family gatherings. The Ditalini Pasta Salad Recipe I’m about to share with you is a vibrant celebration of flavors and textures, bringing together tender little pasta shapes, crisp vegetables, and a luscious dressing that clings beautifully to every bite. Imagine the creamy dressing enveloping the ditalini, while the crunch from fresh peppers and cucumbers dances on your palate. Each forkful feels like a gentle hug, promising comfort and joy. This dish is not only quick to prepare but also incredibly versatile—perfect for summer barbecues or as an easy meal prep option during your busy week.
As I reflect on my own culinary adventures, I can’t help but think about how this pasta salad has been a staple in my kitchen for years. There’s a certain magic that happens when you combine simple ingredients with care and love. You see, cooking is not just about following recipes; it’s about creating memories, forging connections, and sharing those moments with the people we cherish most. This Ditalini Pasta Salad is perfect for any occasion—be it a festive potluck or just a cozy night at home. With its bright colors and delightful crunch, it’s bound to steal the show on your dining table.
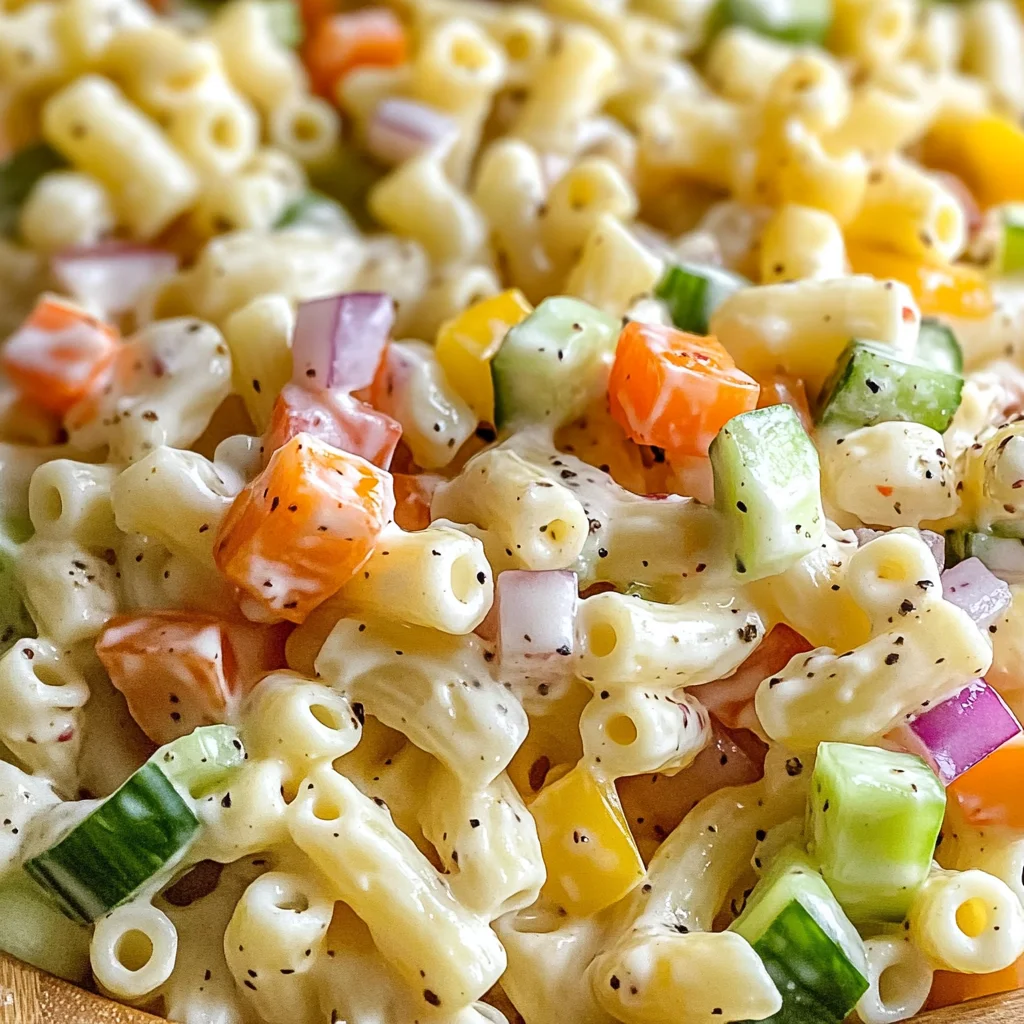
Ditalini Pasta Salad Recipe: A Summer Symphony
This Ditalini Pasta Salad Recipe is bursting with freshness and flavor! It’s an easy-to-make dish that captures the essence of summer with every bite.
Ingredients:
Before we dive into the cooking process, let’s gather our ingredients! Each one plays a vital role in crafting this delicious pasta salad, so let’s take a moment to appreciate them.
- 1 pound ditalini pasta. The star of our salad! Ditalini are small tubular pasta shapes that hold onto sauces beautifully, making each bite satisfying and flavorful. When choosing your pasta, look for high-quality durum wheat varieties; they will have a lovely firm texture when cooked al dente, which is crucial for holding up against the dressing and other ingredients without becoming mushy. You can easily substitute ditalini with other small pasta shapes like elbow macaroni or mini shells if needed!
- 1/2 tablespoon salt (for the pasta water). This step is absolutely non-negotiable! Salting your boiling water before adding the pasta enhances its flavor significantly. Think of it as seasoning your canvas before painting—a simple yet powerful act that elevates the overall taste of your dish. Use coarse sea salt for better dissolving properties in boiling water.
- 1 red or green bell pepper, diced. These colorful gems add a delightful crunch and sweetness to your salad. When selecting bell peppers, look for ones that feel heavy for their size with smooth skin—these indicate freshness and juiciness. Feel free to mix colors for visual appeal; after all, we eat with our eyes first!
- 1/4 cup diced red onion. The sharpness of red onion brings depth to our salad without overpowering it—a beautiful balance! Dice them finely to ensure they blend well into the mixture; soaking them briefly in cold water can also mellow their intensity if you prefer a milder taste.
- 2 stalks celery, diced. Celery offers an irresistible crunch that contrasts wonderfully with the creaminess of our dressing. Always choose firm stalks with vibrant green leaves attached; this means they’re fresher! If you don’t have celery on hand or want to switch things up, diced jicama or even carrots could work as great alternatives.
- 1 cup English cucumber, diced. English cucumbers are known for their thin skin and minimal seeds—perfect for salads! They add refreshing moisture to your dish without making it soggy. When purchasing cucumbers, opt for ones that feel firm to the touch and have no blemishes; these qualities ensure you’ll get all that crispness in your salad.
- 1 cup mayonnaise. Ahh…liquid gold! Mayonnaise acts as the base of our creamy dressing—a rich emulsion that binds everything together seamlessly while providing an incredibly smooth mouthfeel. For lighter options without sacrificing flavor, Greek yogurt can be used instead—trust me on this one!
- 1 tablespoon Dijon mustard. This ingredient adds tanginess and complexity to our dressing—it’s what makes it sing! Look for quality brands that use real ingredients; this subtle difference can transform your salad from ordinary to extraordinary.
- 1 tablespoon apple cider vinegar. A splash of acidity brightens up flavors beautifully while cutting through richness—this step is crucial! Apple cider vinegar lends fruity notes that pair perfectly with creamy elements in our salad; however, white wine vinegar could serve as an excellent substitute if needed.
- 1 tablespoon sugar. This may seem unusual at first glance but trust me—it balances out acidity beautifully! Just a hint of sweetness rounds out the flavors harmoniously without making it overly sweet.
- 1/4 teaspoon salt & 1/4 teaspoon ground black pepper – Standard seasonings that enhance all other flavors present in our dish! Adjust these according to personal preference; I often urge people not to skip them because they amplify everything else so well.
- 1/4 teaspoon garlic powder & 1/4 teaspoon paprika – These two spices add depth and warmth seamlessly—they’re my secret weapons in elevating mundane dishes into something really special!
Now that we’ve gathered all these wonderful ingredients together let us embrace this culinary journey!
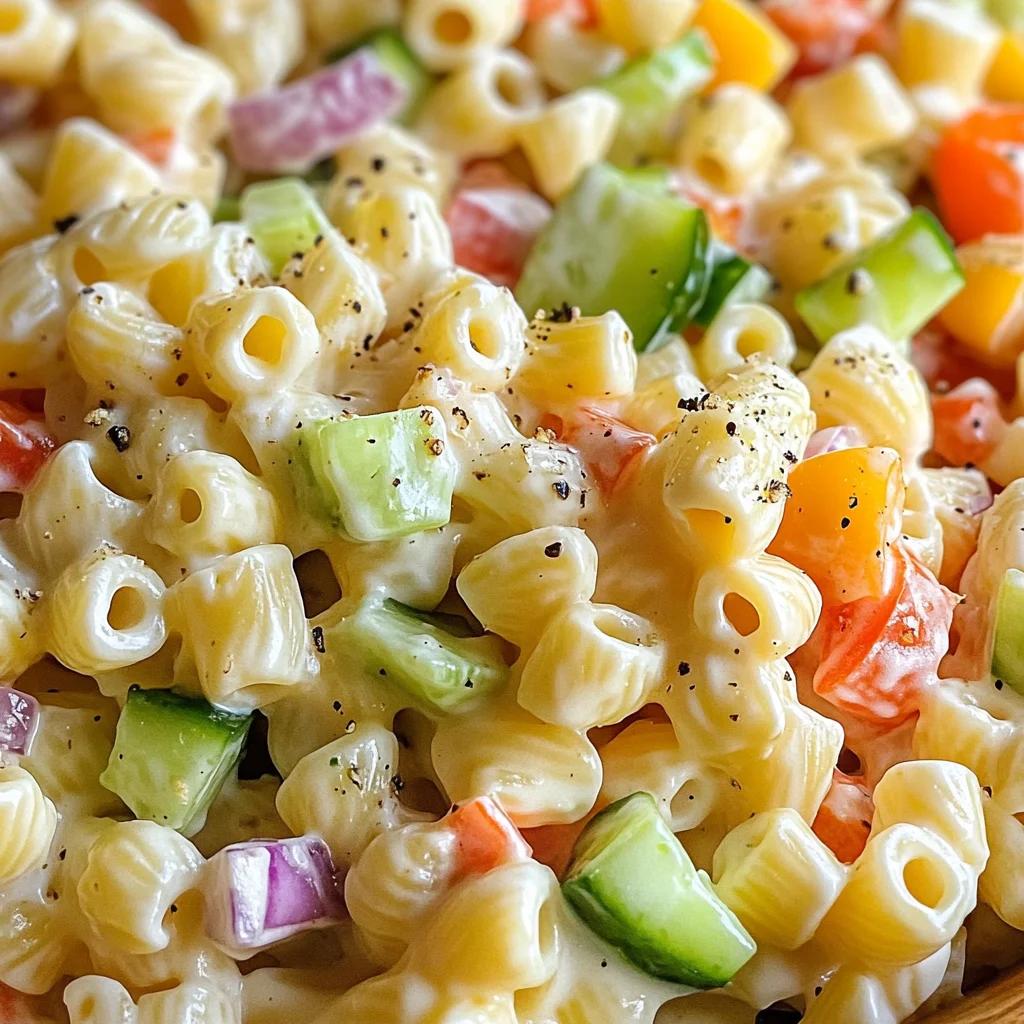
Equipment You’ll Need:
Having the right tools makes all the difference when creating culinary masterpieces! While they may not be ingredients, these essential partners will aid you in crafting something truly wonderful.
- Large pot – Essential for cooking your ditalini pasta evenly without crowding it too much; using ample water ensures proper cooking while preventing sticking together.
- Colander – A must-have tool when draining cooked pasta so excess water doesn’t dilute our delicious dressing later on!
- Mixing bowls (large & small) – A sturdy large bowl allows enough space when tossing together various components while smaller bowls come handy during preparation stages (like whisking up dressings).
- Whisk or fork – To blend together all those luscious dressing ingredients smoothly—it’s therapeutic too!
- Spatula or wooden spoon – Use these tools gently while folding everything together post-dressing application; being careful avoids breaking apart delicate veggies!
Now we’re ready to prepare this delightful Ditalini Pasta Salad Recipe!
Step 1: Cook Your Ditalini Pasta Perfectly
The foundation of any great pasta salad lies in how well you cook your ditalini! Start by bringing a large pot of salted water to a rolling boil—a step that’s absolutely paramount because it helps season our pasta right from within as it cooks! Add 1 pound of ditalini and stir occasionally until they reach al dente perfection as per package instructions (usually around 8–10 minutes). Keep an eye on them; overcooked pasta becomes mushy—definitely not what we want here! Once finished cooking, drain them carefully using a colander before rinsing under cold water for several seconds—this stops further cooking while cooling down those little beauties quickly so they don’t stick together later on.
Step 2: Whisk Up That Creamy Dressing
While waiting patiently for our ditalini to cool down completely (don’t rush this step!), grab yourself another mixing bowl where you’ll create magic by combining flavors through whisking together 1 cup mayonnaise along with 1 tablespoon Dijon mustard & 1 tablespoon apple cider vinegar until smooth—a task filled with anticipation as aromas start wafting around too! You’ll then sprinkle in sugar followed by salt (¼ teaspoon), ground black pepper (¼ teaspoon), garlic powder (¼ teaspoon), and paprika (¼ teaspoon)—each ingredient plays its part beautifully here enhancing depth while creating harmony within this delightful concoction we’re crafting.
Step 3: Assemble Your Colorful Ingredients
With both elements prepped—the cooled ditalini awaiting assembly alongside beautifully diced veggies—it’s time now for some joyful mixing action! In your large mixing bowl from earlier on—combine cooled ditalini along with diced bell pepper (red/green), red onion pieces, celery bits & fresh English cucumber cubes—all colorful additions bursting forth vibrancy reminding us why we love salads so much in sunny weather like today! Ensure each ingredient gets distributed evenly throughout ensuring every forkful contains splashes of color alongside textures melding harmoniously together creating visual appeal when served later on too!
Step 4: Dress Everything Up
Finally comes my favorite part: draping everything generously using that luscious creamy dressing made earlier over top assembled veggie-pasta mixture—you could almost hear giggles erupt from within once coated thoroughly by liquid gold goodness swirling joyfully around each morsel inviting tastebuds eagerly anticipating bites ahead! Be gentle during this process though—as much fun as tossing sounds excitement doesn’t mean we should break apart delicate veggies keep intact while ensuring even coverage occurs across entire surface area allowing everyone involved partake equally deliciously savor moments spent enjoying such wholesome fare shared amongst loved ones gathering around tables filled laughter warmth companionship at heart bringing smiles faces radiating pure bliss after indulging delectable delights prepared lovingly kitchen today…
I can hardly wait until you experience this incredible Ditalini Pasta Salad Recipe firsthand—it promises both comfort & satisfaction wrapped within each bite enjoyed fully alongside friends family creating lasting memories cherished long after plates cleared away… So let’s keep going as there are more steps left unraveling culinary wonders still hidden beneath surface waiting discover just how magical home cooking truly can be…
Crafting the Perfect Ditalini Pasta Salad Recipe
Ah, my dear friend, we are just about to embark on a journey of flavors that will make your taste buds dance with joy! Now that we have tossed our beautiful ditalini pasta in a luscious dressing and mixed in those vibrant veggies, it’s time to let all those delightful ingredients mingle together. This is where the magic truly happens, and trust me, you don’t want to skip this step!
Step 5: Letting the Flavors Marry
After you’ve gently combined your pasta and vegetables with that creamy dressing, it’s crucial to cover the bowl and pop it into the refrigerator for at least one hour. I know waiting can be tough when you’re so excited to dive in, but this chilling phase is absolutely paramount! By allowing the salad to rest, you’re giving those flavors a chance to meld beautifully. Picture it: the crispness of the cucumbers softening just slightly, while the rich mayonnaise and tangy mustard seep into every nook and cranny of the ditalini. This transformation not only enhances the overall taste but also creates a harmonious symphony of flavors that will leave everyone craving more.
While your salad chills, think about how this step allows the ingredients to communicate with one another on a deeper level. It’s like letting them have a little party of their own! You’ll notice that after an hour (or longer if you can resist), each bite will burst with flavor rather than tasting disjointed. If you have time to let it sit longer—say two or three hours—do it! The result will be even more extraordinary as everything gets wonderfully acquainted.
Step 6: A Quick Stir for Good Measure
Once your Ditalini Pasta Salad has chilled for that desired time, it’s time for a quick stir before serving. Grab a large spoon or spatula and gently fold through the salad mixture. This simple yet essential step ensures that every element remains well-coated in that creamy dressing while redistributing any settled ingredients. You might find that some of the veggies have floated to the top or that certain areas are creamier than others—this is completely normal! A gentle stir will bring everything back into balance.
As you mix, take a moment to appreciate how gorgeous it looks—the vibrant colors of bell peppers shining like little jewels against the backdrop of pasta! This visual appeal is important because eating is not just about flavor; it’s also about experience. When food looks delectable, our anticipation grows, making each bite even more satisfying. Remember, presentation matters; serve this dish in a lovely bowl or platter for extra flair!
Step 7: Taste Testing – The Joy of Adjustments
Now comes one of my favorite parts—taste testing! With your Ditalini Pasta Salad at its prime after resting in the fridge, grab a fork and take a small bite. Here’s where you can truly personalize this dish. Maybe you feel it could use a pinch more salt or perhaps an extra dash of paprika for that smoky kick? Trust your palate; it’s your creation after all!
It’s crucial during this step to note how different ingredients shine through as they’ve had their time to marry; perhaps you’ll notice how sweet the bell pepper is now or how refreshing the cucumber tastes after absorbing some dressing. If your salad feels too thick after chilling (sometimes mayo can thicken up), whisk in a splash of cold water or additional apple cider vinegar for brightness without compromising flavor—this is a pro tip I swear by!
Step 8: Serving with Love
Finally, when you’re ready to serve, scoop out generous portions into bowls or onto plates. As you do so, take care to ensure each serving includes an ample amount of those colorful veggies alongside that creamy pasta base—this balance is key for both aesthetic appeal and flavor distribution! If you’re feeling adventurous (and I always encourage culinary adventures), consider garnishing with fresh herbs like parsley or basil at this stage; they add not just color but also aromatic freshness which elevates this simple side dish into something truly special.
Don’t forget about temperature either; while this Ditalini Pasta Salad can be enjoyed chilled straight from the fridge, letting it sit at room temperature for about 15-20 minutes before serving can help bring out its flavors even more powerfully. Just imagine sitting outside on a warm day with friends and family around—a bowl of vibrant pasta salad in hand—it encapsulates everything wonderful about sharing good food together.
Final Touches: Elevating Your Ditalini Pasta Salad Recipe
As we wrap up our journey through this delightful Ditalini Pasta Salad Recipe, let’s talk about some final touches that can transform your creation from wonderful to extraordinary. Consider adding protein options like grilled chicken strips or chickpeas for heartiness—I promise you they complement the creamy dressing beautifully! And if you’re looking for an even lighter version without sacrificing creaminess, swapping out half of your mayonnaise for Greek yogurt works wonders while adding protein too!
Remember as you prepare this salad—it’s not just food; it’s an expression of love shared among friends and family. So go forth with confidence, knowing that each scoop brings joy not only from its delightful flavors but also from memories made around the table! Enjoy your culinary masterpiece!
Storage and Enjoyment Tips for Your Ditalini Pasta Salad Recipe
Now that you’ve crafted this delightful Ditalini Pasta Salad, it’s time to savor every creamy, crunchy bite! This salad is not just a dish; it’s an experience, one that brings friends and family together around the table. But what if you find yourself with some leftovers? Fear not! I’ve got you covered with all the tips you need to keep your pasta salad fresh and delicious.
Storing Leftover Ditalini Pasta Salad Recipe
To ensure your Ditalini Pasta Salad remains as vibrant and flavorful as the moment it was made, store it in an airtight container in the refrigerator. This keeps the dressing from absorbing too much into the pasta, which can sometimes make it soggy. Ideally, you want to enjoy your salad within three to five days for optimal freshness. If you’re looking for a pro tip to maintain its quality, consider placing a slice of bread in the container; it helps absorb excess moisture without compromising the taste. Trust me on this one! After a day or two in the fridge, the flavors meld beautifully, creating a symphony of tastes that can be even more intoxicating than when freshly made. When you’re ready to serve leftovers, there’s no need to reheat; simply give it a gentle toss and enjoy it chilled—perfect for those warm afternoons or as a side dish at any gathering.
Freezing Ditalini Pasta Salad for Later
If you’ve made a generous batch and want to save some for later, freezing is an excellent option! To freeze your Ditalini Pasta Salad properly, transfer portions into freezer-safe containers or resealable bags, ensuring they’re tightly sealed and removing as much air as possible. This will keep them fresh for up to two months. The convenience of having a ready-to-eat meal on hand is truly extraordinary—imagine pulling out a portion on a busy weeknight! When you’re ready to enjoy it again, simply thaw it overnight in the refrigerator before serving; I recommend giving it another light toss with some extra dressing if needed to rejuvenate those flavors. It’s like finding a little taste of summer amidst the chill of winter!
Ditalini Pasta Salad
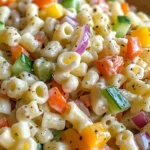
This Ditalini Pasta Salad is a vibrant and flavorful dish that embodies the essence of summer gatherings. With tender ditalini pasta, crisp vegetables, and a creamy dressing, every bite offers a satisfying crunch and a delightful medley of tastes. It’s the perfect companion for picnics, potlucks, or a simple family dinner. Quick to prepare and easy to customize with your favorite seasonal veggies or proteins, this salad not only makes for a refreshing side but also serves as an enjoyable meal prep option for busy weekdays. Let this colorful dish steal the spotlight at your next gathering!
- Prep Time: 15 minutes
- Cook Time: 10 minutes
- Total Time: 25 minutes
- Yield: Serves approximately 6 people 1x
- Category: Salad
- Method: Mixing
- Cuisine: American
Ingredients
- 1 pound ditalini pasta
- 1/2 tablespoon salt (for pasta water)
- 1 red or green bell pepper, diced
- 1/4 cup diced red onion
- 2 stalks celery, diced
- 1 cup English cucumber, diced
- 1 cup mayonnaise
- 1 tablespoon Dijon mustard
- 1 tablespoon apple cider vinegar
- 1 tablespoon sugar
- 1/4 teaspoon salt
- 1/4 teaspoon ground black pepper
- 1/4 teaspoon garlic powder
- 1/4 teaspoon paprika
Instructions
- Cook the ditalini pasta in a large pot of salted boiling water until al dente (8–10 minutes). Drain and rinse under cold water to stop cooking.
- In a mixing bowl, whisk together mayonnaise, Dijon mustard, apple cider vinegar, sugar, salt, pepper, garlic powder, and paprika until smooth.
- In a large bowl, combine cooled pasta with diced bell pepper, red onion, celery, and cucumber.
- Pour the dressing over the salad mixture and gently toss until well combined.
- Cover and refrigerate for at least one hour to allow flavors to meld.
Nutrition
- Serving Size: 1 cup (240g)
- Calories: 390
- Sugar: 5g
- Sodium: 520mg
- Fat: 25g
- Saturated Fat: 4g
- Unsaturated Fat: 20g
- Trans Fat: 0g
- Carbohydrates: 38g
- Fiber: 2g
- Protein: 7g
- Cholesterol: 10mg