Seasoned Corn
There’s something truly magical about the first bite of grilled corn, isn’t there? It’s not just the juicy sweetness that bursts forth with each kernel; it’s the smoky aroma wafting through the air, transporting you to sun-soaked summer days and laughter-filled barbecues. This isn’t merely food—it’s an experience, a celebration of simple ingredients coming together harmoniously. With my recipe for Seasoned Corn, you’ll discover how easy it is to create a dish that dances on your palate with vibrant flavors. Imagine the exciting crunch of perfectly charred corn, seasoned to perfection, and tucked away in a foil packet, making your grilling endeavors not only delightful but also wonderfully uncomplicated. I promise you, once you take that first bite, you’ll understand why this recipe is a cherished go-to for gatherings and quiet evenings alike.
Corn has always held a special place in my heart. Growing up, we would eagerly await the farmers’ markets during summer to get our hands on the freshest ears of corn. Those moments spent selecting just the right cobs were filled with anticipation. When they hit the grill, my family would gather around, sharing stories and laughter as we slathered on butter and seasoned them just right. This Seasoned Corn recipe captures that same spirit of joy and warmth—inviting friends and family to come together over good food. Whether it’s a backyard barbecue or an ordinary weeknight dinner, this dish is versatile enough to accompany just about anything. It’s not merely side dish; it’s a bridge connecting generations through shared tastes and flavors.
Seasoned Corn: A Grilled Delight That Brings Everyone Together
Let’s embark on this culinary journey together! The beauty of this Seasoned Corn recipe lies in its simplicity and how easily it elevates a humble ingredient into something extraordinary. With just a handful of seasonings and some fresh corn, you’ll create a side dish that’s bursting with flavor and sure to impress everyone at your table.
Ingredients:
As we dive into gathering our ingredients, take a moment to appreciate each one’s role in crafting this delightful dish. The combination of seasonings will transform plain corn into a flavorful masterpiece that sings with every bite.
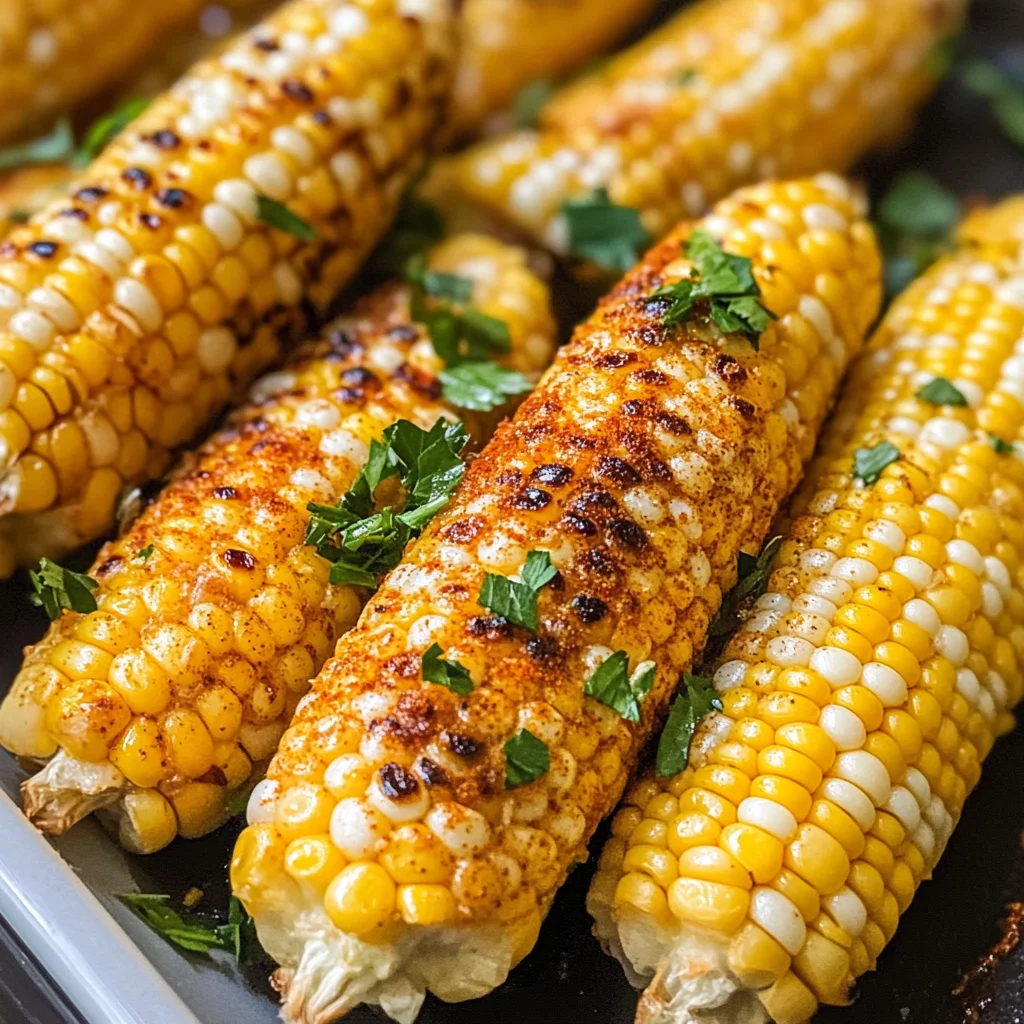
- 4 Corncobs (husks removed and each cut into 4 pieces): Fresh corn is undeniably the star of this recipe! When selecting your ears of corn, look for those with bright green husks that feel firm to touch; this indicates freshness. The sweetness of corn enhances dramatically when grilled—it caramelizes beautifully under high heat, creating those lovely char marks that add depth to flavor. Cutting each cob into smaller pieces makes them easier to handle on the grill while allowing for even seasoning distribution.
- 2 tablespoons Oil (use a neutral oil such as canola oil): This ingredient is absolutely paramount as it helps create that lovely crisp texture on the outside while keeping the inside tender and juicy. Neutral oils like canola won’t overpower the natural sweetness of the corn but will help all those fabulous spices stick beautifully—trust me on this! If you’re looking for alternatives, grapeseed or sunflower oil work wonders too.
- 2 teaspoons Salt: Ahh, salt—the magic ingredient that enhances flavors like nothing else can! It pulls out moisture from within the kernels while amplifying their natural sweetness. Be generous but mindful; too little won’t do much good while too much can overpower our beloved corn’s delicate flavor.
- 1 teaspoon Paprika: This adds not only flavor but also a beautiful hint of color that’ll make your seasoned corn visually appealing! Sweet paprika will give you warmth without heat—if you’re feeling adventurous or want an extra kick, smoked paprika could add an extraordinary layer of complexity.
- ½ teaspoon Garlic Powder: The allure of garlic is timeless; it brings depth and richness to dishes without being overly assertive. Garlic powder evenly disperses throughout our mixture without any chunks left behind—you want every bite infused with its deliciousness!
- ½ teaspoon Onion Powder: Just like garlic powder, onion powder blends seamlessly into our seasoning mix and contributes a savory punch that complements the other flavors beautifully. I can’t stress enough how vital these two powders are for achieving that rounded flavor profile.
- ½ teaspoon Oregano: An herb known for its aromatic qualities; oregano adds earthiness that balances out the sweetness from our corn perfectly! Fresh oregano would be delightful if you have it on hand—just chop it finely before adding!
- ¼ teaspoon Black Pepper: A pinch goes a long way! Black pepper provides gentle heat and enhances all other flavors present in your seasoned corn without stealing the spotlight.
- Pinch of Crushed Red Pepper (leave it out if you don’t like spicy): This optional ingredient can bring life to your dish if you’re looking for some heat! Just remember—a little goes a long way! If spice isn’t your thing or you’re serving kids, feel free to omit it entirely.
- Chopped Parsley for garnish (optional): A sprinkle of fresh herbs at the end brightens up any dish visually while adding freshness—plus it’s so pretty! Feel free to use other herbs like cilantro or chives based on what you enjoy!
- Butter for serving (optional): A pat of butter melting over hot grilled corn creates pure bliss—a luxurious finish that transforms everything into liquid gold! Consider using plant-based butter if you’d prefer keeping things dairy-free!
Equipment You’ll Need:
Cooking becomes such an enjoyable experience when you’re equipped with reliable tools! While these aren’t ingredients, they play essential roles in ensuring your cooking process runs smoothly and efficiently—all helping you achieve great results in no time.
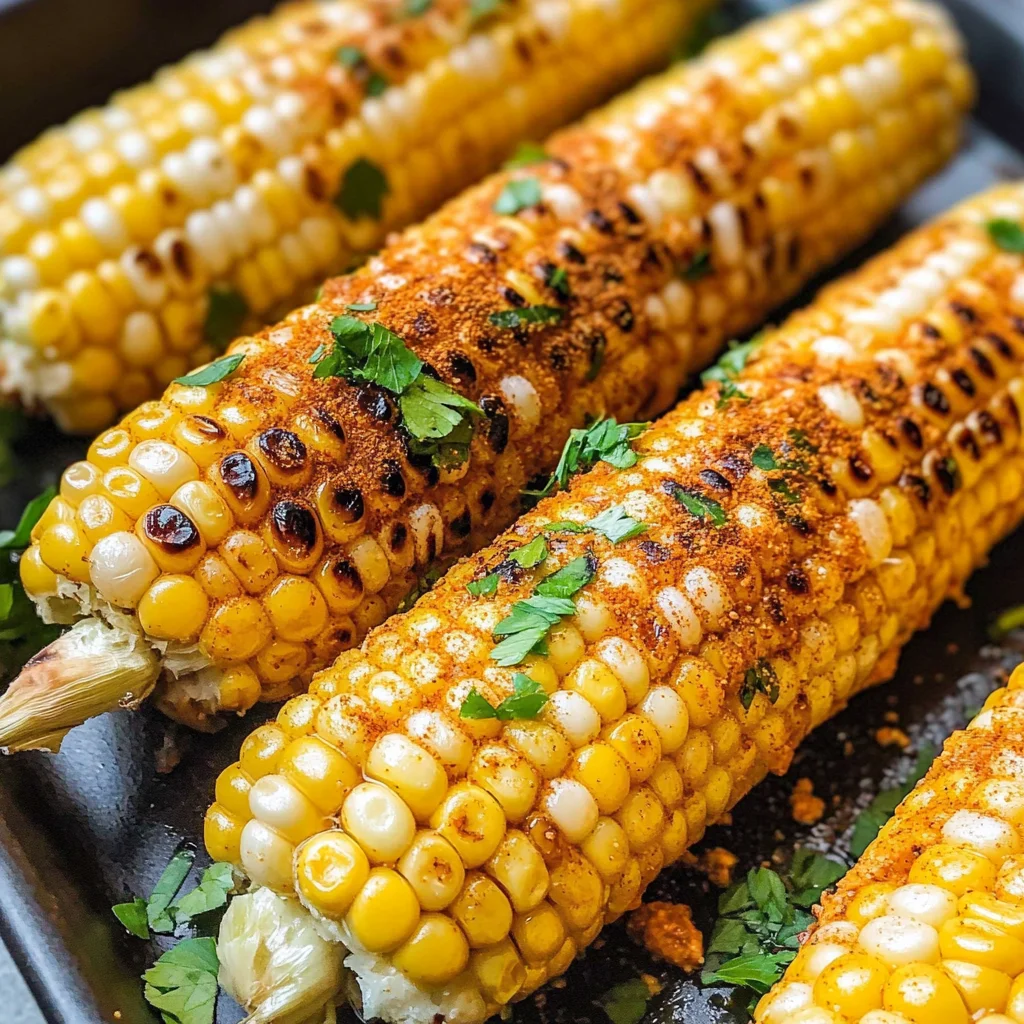
- Grill or Grill Pan: Your primary cooking vessel should be capable of attaining high temperatures needed for perfect grilling. Whether using an outdoor grill or stovetop grill pan, ensure they’re preheated adequately—this allows those gorgeous char marks we all adore!
- Aluminum Foil: This handy kitchen staple serves as our foil packet for cooking those coveted pieces of seasoned corn! It traps moisture while allowing steam to circulate within—perfectly cooking our cobs without losing their natural sweetness.
- Tongs: An absolute must-have when handling hot items off the grill—safety first! Tongs provide excellent grip allowing you easily flip or remove food without risk of burning yourself or dropping any precious morsels!
- Cutting Board & Sharp Knife: For cutting your corncobs down into manageable pieces before seasoning them up nicely; sharp knives make all slicing tasks easier! Choose a sturdy cutting board so everything stays secure while chopping away!
Preparing the Seasoned Corn
Step 1: Preparing Your Corn
Begin by gently removing husks from each corncob until you’re left with those vibrant golden kernels peeking through—the excitement builds here already! Once husked completely clean from silk strands, cut each cob into four equal sections using your sharp knife on your trusty cutting board. Take your time with this step; uniformity ensures even cooking later on! Each piece should fit snugly into your foil packet while still being manageable enough during grilling time—it keeps everything fun yet practical!
Step 2: Creating Your Flavorful Blend
In a mixing bowl large enough to accommodate all those lovely pieces you’ve just sliced up, combine oil along with salt, paprika, garlic powder, onion powder, oregano, black pepper—and if you’re feeling adventurous—the crushed red pepper too! Mix thoroughly until everything is well combined—this seasoning blend is what transforms ordinary sweet corn into something utterly intoxicating—it’s where magic begins! Don’t rush this step; allow those spices time to mingle so they infuse every kernel evenly once applied!
Step 3: Tossing Everything Together
Now comes one of my favorite parts—tossing those freshly cut corncob pieces into our magnificent spice blend until fully coated in deliciousness! Use clean hands or tongs; just make sure every piece gets loving attention from our flavorful mixture—it truly matters here because every bite will benefit from thorough coverage—it elevates everything beyond expectation! Once done coating thoroughly (and trust me—you’ll smell how incredible this already smells!), set aside briefly as we prepare our foil packets next.
Step 4: Wrapping It Up
Grab sheets of aluminum foil large enough for wrapping four sections comfortably inside without tightness—they need room for steam during grilling! Lay out one piece flat then place four seasoned pieces at center before folding edges over carefully sealing tightly but leaving some space above horizontally allowing steam escape—that’s crucial for achieving tenderness throughout cooking process ahead! Repeat until all sections neatly wrapped up snugly within their own shiny parcels ready for grilling action ahead!
I can hardly wait until you taste this fantastic dish—you’re going to love how easy yet incredibly satisfying it turns out to be after following these steps diligently. Remember every layer adds depth here transforming simple ingredients into something profoundly comforting whilst bringing people together around warm flames glowing bright amidst laughter echoing joyfully across evenings spent outdoors together sharing meals made full hearts’ delight!
Step 5: Create Flavor Harmony with Seasoning
Now that your corncobs are prepped and ready, it’s time to shower them with a symphony of flavors that will elevate your dish to extraordinary heights. Grab a mixing bowl and combine the two tablespoons of neutral oil with the salt, paprika, garlic powder, onion powder, oregano, black pepper, and that pinch of crushed red pepper if you’re feeling a little adventurous. Mixing your seasonings into the oil is absolutely paramount; this technique not only ensures every kernel is coated in flavor but also helps the spices adhere beautifully to the corn as it cooks. Imagine how those spices will release their essential oils when heated—creating a tantalizing aroma that will have everyone gathering around the grill!
Once your seasoning mixture is well combined, take each piece of corn and generously brush or toss it in this fragrant blend. I always feel like a painter at this stage, transforming plain cobs into works of art! Make sure to coat every piece evenly; no one wants a bland bite among the beautifully seasoned ones. As you do this, trust me on this—it helps to rub the mixture into each piece gently. This extra layer of love allows the flavors to penetrate deeply as they cook, resulting in an utterly intoxicating taste sensation you simply cannot resist.
Step 6: Wrap It Up for Grilling Perfection
With your corncobs now perfectly seasoned, it’s time to wrap them up for their grilling adventure! Grab some heavy-duty aluminum foil—this will be crucial for creating that steam pocket that keeps the corn tender and juicy while cooking. Lay out four squares of foil, roughly 12 inches long; you want enough space for your corn to breathe while still being enclosed. Place each seasoned corn piece onto its own square and gather the edges of the foil together tightly—like wrapping up a precious gift. This step is not just about aesthetics; it’s about creating a mini-oven effect inside each packet where moisture can circulate and steam those cobs until they’re sweetly succulent.
Once wrapped securely, give each packet a gentle squeeze to ensure there are no leaks; this is key because any escape route means losing all that glorious steam! At this stage, I often find myself daydreaming about those first bites—just imagining how flavorful they will be tantalizes my taste buds. Once wrapped up tight and looking delightful, set these packets aside while you prepare your grill.
Step 7: Getting Your Grill Ready for Action
Now let’s turn our attention to preparing the grill! If you’re using a charcoal grill, light those coals and let them burn down until they’re covered in white ash—a sign they’re at their hottest. For gas grills, heat it on medium-high for about 10-15 minutes until it reaches around 400°F (204°C). This temperature is crucial because it allows for perfect caramelization on your corn while ensuring it cooks through without drying out. You’ll know when it’s ready because you should hear a lovely sizzle when you place something on it; trust me on this sound—it’s music to any cook’s ears!
As your grill heats up, position the racks so that there’s enough space for your foil packets but also close enough to impart those gorgeous char marks we all adore. When everything’s ready and hot like summer sunshine, carefully place your foiled corncobs directly onto the grill grates. It’s important here not to overcrowd; give each packet room to breathe again so they can create steam unhindered by their neighbors.
Step 8: The Art of Timing – Grill Like a Pro
With everything nestled safely on the grill, it’s time for patience—something my friends often say I’m not great at! But truly resting in anticipation adds depth to this experience. Allow those packets to grill undisturbed for about 20 minutes; during this time, resist the urge to peek too frequently! Why? Because opening those packets interrupts the cooking process and lets precious steam escape—resulting in less tender kernels than we desire.
After about 10 minutes have passed, consider flipping them over gently with tongs if you’re comfortable doing so; this ensures even cooking throughout. You’ll want them to be sizzling softly inside their cozy wraps during this whole process—the sound alone will make your mouth water! When your timer goes off after what feels like both an eternity and just a moment (isn’t food magic amazing?), carefully remove them from the grill using tongs or heat-resistant gloves. They’ll be hot as molten lava inside those packets!
Conclusion:
As we wrap up our journey through this recipe for seasoned corn, I can’t help but feel excited about all the flavors and memories we’ve created together. Cooking should be an adventure filled with love and joy, and this simple yet profoundly satisfying recipe encapsulates all of that magic! The combination of spices dances beautifully with the sweetness of fresh corn, creating a symphony of flavors that is anything but ordinary. Every bite offers that intoxicating smokiness from grilling combined with warmth from spices—this is what makes it truly special!
Why should you consider making this recipe? Well beyond just its delightful taste lies the sheer joy of preparing something so accessible yet impressive. Whether it’s for a casual family dinner or a lively summer barbecue with friends, this seasoned corn elevates each occasion into something memorable. Picture yourself serving it hot off the grill—smoky aromas wafting through the air—and see how everyone gathers around eagerly anticipating their first bite.
Imagine savoring one with grilled veggies and crusty bread for an afternoon picnic or pairing it with zesty tacos for a vibrant fiesta night at home. The versatility is endless; for an even more indulgent experience, slather some creamy avocado spread on top or pair it with tangy lime to brighten those rich flavors. You could also serve it alongside refreshing salads or hearty bean dishes—each combination promising to enhance your dining experience.
Feeling adventurous? This recipe is wonderfully adaptable; consider adding different herbs like cilantro or dill to bring new dimensions of flavor into play! Or perhaps sprinkle some cheese alternatives over the top before serving—it brings an utterly decadent twist that’s simply divine! I encourage you to make this recipe your own; try various seasonings or toppings that speak to your palate! And when you do create your version, please share your experience; I’d love nothing more than to hear how this seasoned corn has graced your table and warmed hearts just like it does mine!
Seasoned Corn
There’s a certain joy in biting into grilled corn, where the sweet kernels burst with flavor and the smoky aroma fills the air. This Seasoned Corn recipe transforms fresh corn into a delightful side dish, perfect for summer barbecues or cozy family dinners. Each piece of corn is charred to perfection and seasoned with a blend of spices that enhance its natural sweetness, creating an experience that brings friends and family together around the grill. With minimal effort, this dish delivers maximum flavor, making it a go-to recipe for any occasion.
- Prep Time: 15 minutes
- Cook Time: 20 minutes
- Total Time: 35 minutes
- Yield: Serves 4
- Category: Side Dish
- Method: Grilling
- Cuisine: American
Ingredients
- 4 Corncobs (cut into 4 pieces each)
- 2 tablespoons Neutral Oil (canola, grapeseed, or sunflower)
- 2 teaspoons Salt
- 1 teaspoon Paprika
- ½ teaspoon Garlic Powder
- ½ teaspoon Onion Powder
- ½ teaspoon Oregano
- ¼ teaspoon Black Pepper
- Pinch of Crushed Red Pepper (optional)
- Chopped Parsley for garnish (optional)
- Plant-based Butter for serving (optional)
Instructions
- Prepare the Corn: Remove husks from corncobs and cut each cob into four equal sections.
- Create the Seasoning Blend: In a mixing bowl, combine oil, salt, paprika, garlic powder, onion powder, oregano, black pepper, and crushed red pepper. Mix well.
- Toss the Corn: Coat each piece of corn evenly with the seasoning mixture using your hands or tongs.
- Wrap for Grilling: Place seasoned corn pieces on aluminum foil squares and wrap tightly to create packets.
- Grill: Preheat your grill to medium-high heat and cook wrapped corn on the grill for about 20 minutes, flipping halfway through.
- Serve: Carefully unwrap the packets to reveal tender corn and garnish with parsley or plant-based butter before serving.
Nutrition
- Serving Size: 1 piece (70g)
- Calories: 100
- Sugar: 5g
- Sodium: 300mg
- Fat: 4g
- Saturated Fat: 0.5g
- Unsaturated Fat: 3g
- Trans Fat: 0g
- Carbohydrates: 17g
- Fiber: 2g
- Protein: 3g
- Cholesterol: 0mg