Pumpkin Cheese Pie with Gingersnap Crust
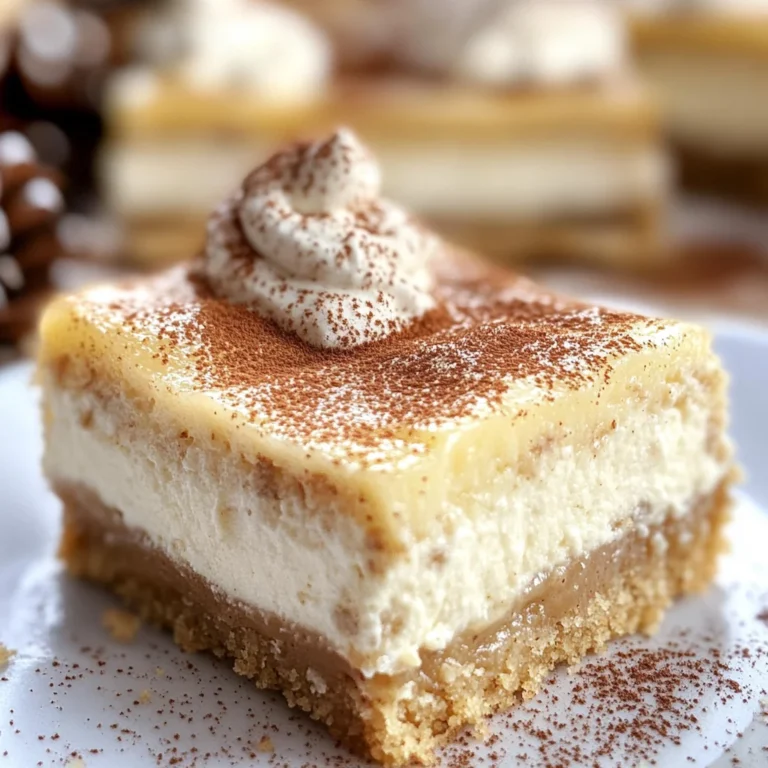
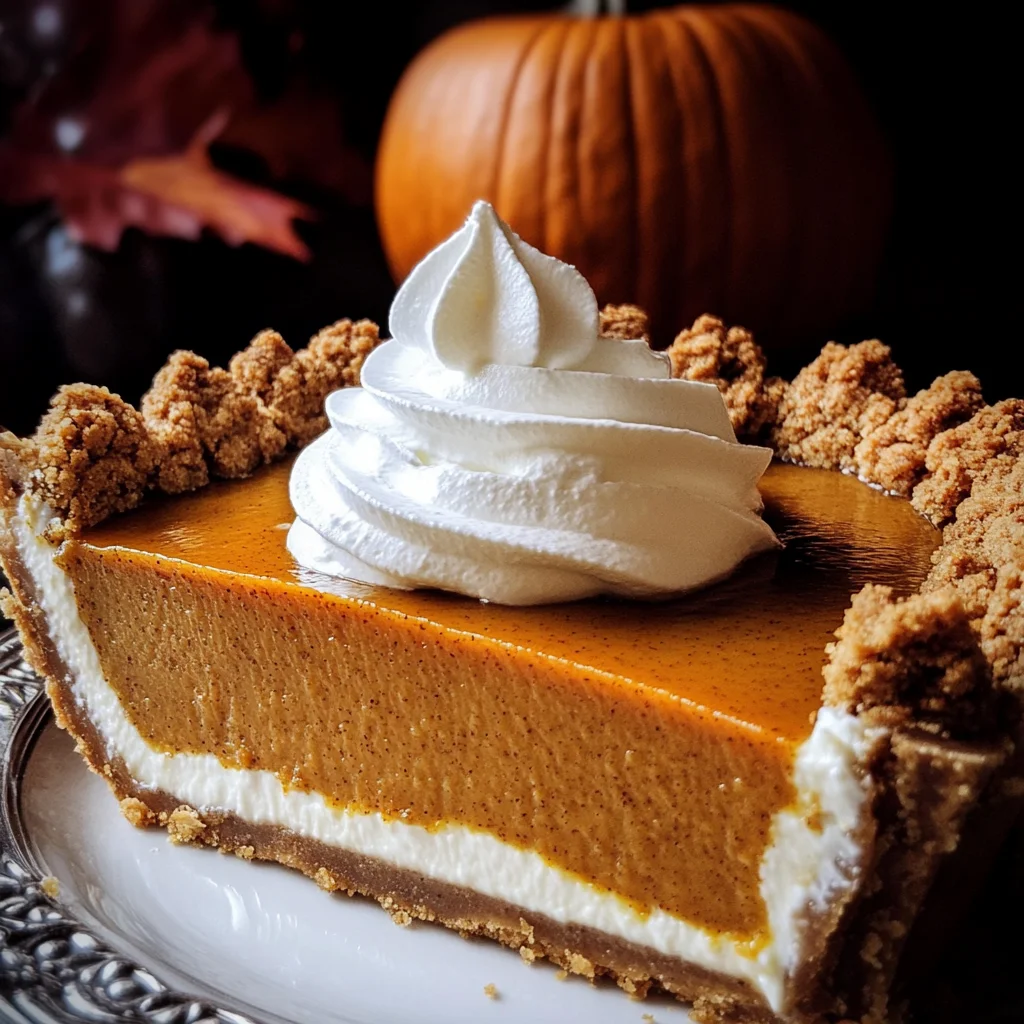
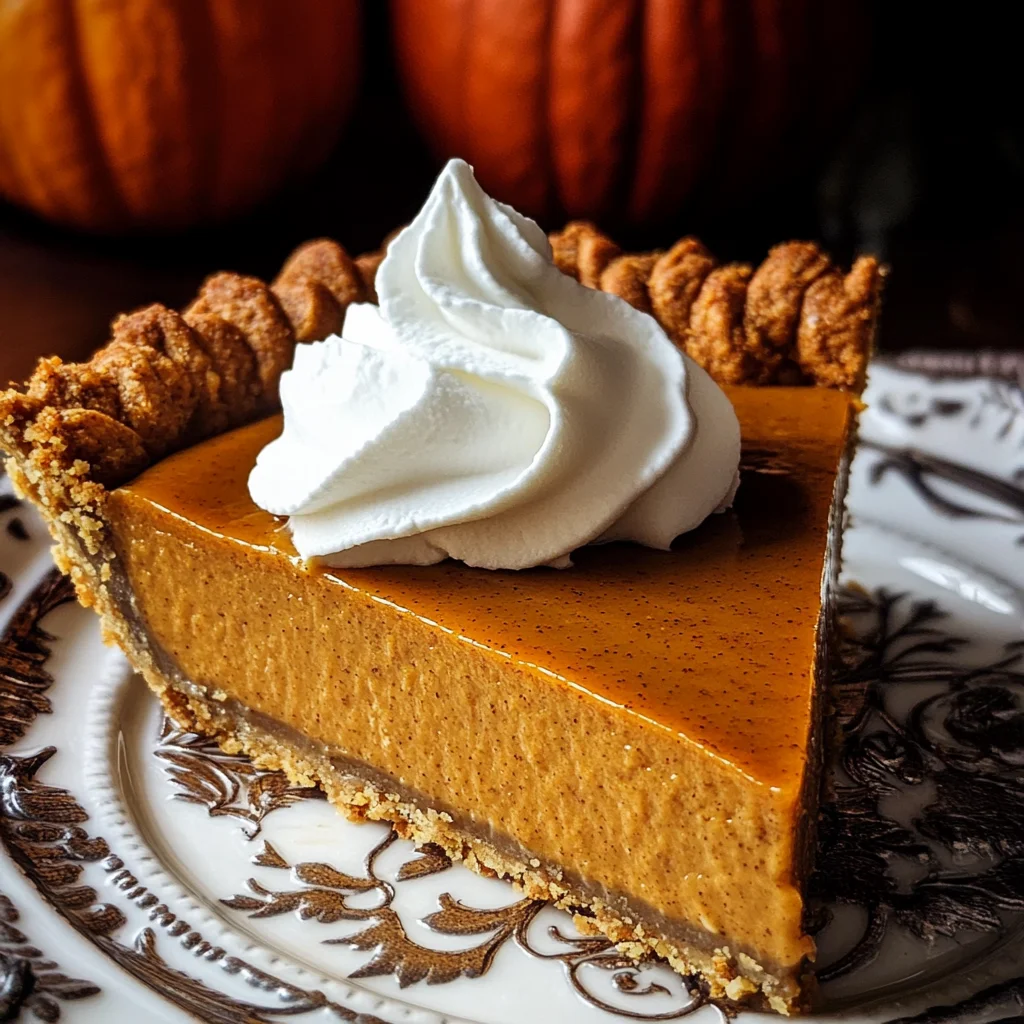
There’s something undeniably magical about the combination of creamy pumpkin and the warm, spicy notes of autumn that makes my heart sing. When I think of fall gatherings, cozy evenings by the fireplace, or even just a simple family dinner, this Pumpkin Cheese Pie with Gingersnap Crust always comes to mind. It’s more than just a dessert; it’s a celebration of flavors and memories wrapped in a slice, inviting everyone to gather around and share stories. The way the rich cream cheese marries with the velvety pumpkin puree creates a symphony of flavors that is both indulgent and comforting. And let’s not forget that gingersnap crust! It adds a delightful crunch and a hint of spice that perfectly complements the creamy filling. Trust me when I say, once you serve this pie, it will be an instant favorite at your table.
What truly captivates me about this recipe is how it bridges tradition with a touch of innovation. While pumpkin pie has long been a cherished staple during harvest festivals and holiday feasts, this version takes that classic comfort food to new heights. The gingersnap crust brings in an unexpected twist that tantalizes the taste buds and elevates the entire experience. Each bite feels like a warm hug on a cool evening, transporting you to crisp autumn days filled with laughter and love. So whether you’re preparing for Thanksgiving dinner or simply looking for an excuse to indulge in something scrumptious, this Pumpkin Cheese Pie will surely become your go-to dessert.
Pumpkin Cheese Pie with Gingersnap Crust: A Cozy Fall Delight
Welcome to this culinary adventure where we’ll embark on making one of my all-time favorite desserts: Pumpkin Cheese Pie with Gingersnap Crust! This recipe is not only easy to follow but also guarantees smiles all around when served. You’ll find that each component contributes beautifully to the final creation, providing a comforting balance of flavors and textures that are downright irresistible.
Ingredients:
Let’s gather our ingredients! Each one plays an essential role in crafting this delicious pie, so let’s dive into what makes them so special.
- 175 g gingersnap cookies (to make 1¾ cups). These delightful little cookies are packed with flavor—think cinnamon, ginger, and sometimes even molasses—which create the perfect foundation for our pie crust. When blended into fine crumbs and combined with melted butter, they transform into a crunchy base that’s utterly irresistible. Look for high-quality gingersnaps without artificial additives; they’ll provide the best flavor and texture. If you can’t find gingersnaps, consider using speculoos or any other spiced cookie as an alternative for that warm flavor profile.
- 5 tbsp butter (melted). Butter is truly magical in baking; it enriches our crust while helping it hold together beautifully. For this recipe, melting the butter ensures that it mixes seamlessly with the gingersnap crumbs, creating a cohesive mixture that will form our lovely crust. Make sure your butter isn’t too hot; if it is, it could lead to a greasy texture instead of that delightful crunch we’re aiming for.
- 1¼ cups pumpkin puree. This ingredient is the star of our show! Rich in flavor and nutrients, pumpkin puree lends its natural sweetness while contributing to the creamy texture we crave in pies. Look for pure pumpkin puree rather than pumpkin pie filling to avoid unwanted spices or sugars—this allows us to control our flavors better. Canned varieties are convenient, but fresh roasted pumpkin can add an extra layer of depth if you have the time!
- 12 oz cream cheese (or 1½ pkgs.). Cream cheese brings richness and creaminess to our filling; it’s absolutely crucial for achieving that luxurious mouthfeel we want in every bite of our Pumpkin Cheese Pie. Make sure your cream cheese is softened at room temperature before mixing; this helps create a smooth filling without any lumps—nobody wants chunks in their pie!
- 1 cup brown sugar. Brown sugar adds not only sweetness but also moisture due to its molasses content; this helps keep our filling luscious and tender. The deeper flavors from brown sugar complement the spices beautifully and enhance the overall richness of our pie—it’s essential for achieving that perfect balance between sweet and savory.
- 3 eggs. Eggs act as binding agents here while also adding structure; they help set the filling as it bakes so we don’t end up with soup! Using three large eggs ensures we have enough protein content for stability without compromising creaminess—a true balancing act!
- 2 tbsp flour. Just a small amount of flour works wonders by slightly thickening our filling while also helping maintain its smooth texture during baking. It’s important not to skip this step because too much liquid can lead to cracks in your finished pie.
- 2 tsp orange zest. This is where things get exciting! Orange zest brightens up our filling by introducing fresh citrus notes that cut through some of the richness from the cream cheese—creating harmony among all flavors involved.
- 1 tsp ginger. Ground ginger enhances those warm notes within both our crust and filling; plus, it gives us that cozy fall vibe we all adore so much! Freshly grated ginger can work as an alternative if you prefer something more aromatic—the choice is yours!
- 1 tsp cinnamon. Cinnamon adds warmth and depth—a quintessential spice for any pumpkin dish! It rounds out all other flavors perfectly while tying everything together into one harmonious bite.
- ½ tsp allspice. This spice adds another layer of complexity to our filling with hints reminiscent of nutmeg and cloves; just imagine how these aromatic spices will envelop you as they bake together! It’s non-negotiable if you want that signature taste found in many beloved autumn desserts.
- 1½ cups heavy cream. Heavy cream brings decadence beyond measure—it provides richness while creating fluffy whipped toppings when needed later on! Look for ultra-pasteurized versions so you can achieve those stiff peaks without worry when whipping later on!
- 2 tbsp sugar. A bit more sugar added here will help sweeten up our whipped cream perfectly without overshadowing its natural flavor—think balanced sweetness rather than cloying!
Now that we’ve gathered everything necessary for creating this luscious Pumpkin Cheese Pie with Gingersnap Crust let’s talk about what tools you’ll need…
Equipment You’ll Need:
Having the right tools makes cooking much smoother—and trust me on this one—it can turn what might feel daunting into an enjoyable experience! Let’s explore what you’ll need:
- Food processor: This handy kitchen companion will make quick work of blending your gingersnap cookies into fine crumbs effortlessly—saving time while ensuring uniformity throughout your crust mixture! If you don’t have one handy though? A resealable bag along with a rolling pin works just as well!
- 9 pie plate: A sturdy pie plate allows even heat distribution while baking ensuring your delicious creation cooks consistently throughout—not too dry nor undercooked in certain spots! Opt for glass or ceramic varieties over metal which may conduct heat differently affecting results.
- Medium saucepan: You’ll need this trusty pot while cooking down your pumpkin filling before pouring into your prepared crust—that heat helps thicken things up nicely leading towards perfection!
- Whisk or stand mixer: Whisking vigorously by hand can be therapeutic but if whipped cream isn’t your forte? Grab a stand mixer fitted with whisk attachment—it’ll save time & energy allowing you more moments enjoying life outside kitchen chaos!
Now we’re ready to prepare our enchanting Pumpkin Cheese Pie with Gingersnap Crust…
Step 1: Preheat Your Oven & Prepare Your Pie Plate
Before we dive into mixing ingredients together, let’s set ourselves up for success by preheating your oven at 350°F (175°C) first thing! Preheating ensures even baking throughout which prevents uneven textures from forming during those crucial minutes spent inside hot boxes known as ovens—we want each slice heavenly every single time after all! As it warms up nicely take some time lightly spray down your 9 pie plate using non-stick spray—this step prevents sticking later allowing easy release come serving time!
Step 2: Create Your Gingersnap Crust
With your oven heating steadily away let’s get started on crafting that delightful gingersnap crust! Break apart those crispy cookies into manageable pieces before tossing them into your food processor—the goal here is transforming them into fine crumbs resembling sand-like textures which will easily mold together once mixed with melted butter next step provides binding agent essential holding shape upon baking time arrives ahead soon thereafter… Once crumbly perfection achieved transfer crumbs over into large mixing bowl where melted butter awaits patiently having been warmed prior—you’ll want everything coated uniformly ensuring moisture retention whilst achieving golden brown color atop baked goodness later down road ahead…
Step 3: Blend Your Filling Ingredients
Now comes perhaps my favorite part—combining all those delicious elements together until smooth perfection emerges from chaos around us! Toss pumpkin puree alongside softened cream cheese made room temperature prior so blending happens effortlessly right along side brown sugar followed closely by eggs flour orange zest ground ginger cinnamon & last but certainly not least allspice—they each play pivotal roles harmonizing flavors together creating something utterly intoxicating once complete… Blend until silky smooth consistency forms taking care scraping sides occasionally making sure no lumps remain lurking about waiting surprise guests appearing uninvited upon tasting party time arrives soon after mixture transition awaiting further instructions next stage journey unfolds beautifully leading onward toward greatness achieved soon thereafter…
Step 4: Cook Your Filling Mixture
Next up? We’re going cook down mixture placing saucepan over medium-low heat stirring constantly watching closely until thickened desired consistency reached roughly five-seven minutes elapsed passing away gently bringing forth beautiful transformations happening right before eyes… As mixture begins clumping together remove quickly off heat preventing overcooking mishap occurring leaving behind unappetizing results once cooled completely afterwards letting cool rack ready transfer fridge chill momentarily resting quietly awaiting introduction future whipped toppings blissfully awaiting arrival shortly following cooling period enjoyed immensely together…
And there we have it—the beginning steps toward crafting this delightful Pumpkin Cheese Pie with Gingersnap Crust! Stay tuned as we finish assembling everything beautifully culminating into glorious creation ready serve friends family alike sharing heartfelt moments joyously indulge together celebrating warmth coziness surrounds us warmly embracing holiday spirit ever-present throughout year-round—even evenings spent quietly savoring bites alone reflectively enjoying life simpler pleasures found within kitchen walls sharing loved ones near…and far alike too!
Step 5: Letting the Magic Happen in the Oven
Now that our luscious pumpkin cheese filling is ready, it’s time to transfer this delightful mixture into our gingersnap crust. Carefully pour the filling into the baked crust, ensuring it spreads evenly across the surface. This step is crucial because it allows the filling to settle into every nook and cranny of that crunchy base, creating a beautiful marriage of textures that will leave you breathless with every bite. Now, slip the pie into your preheated oven at 350°F (175°C). Bake it for about 20 minutes, but don’t just set a timer and walk away—keep an eye on that pie!
What you’re looking for is subtle; the pie should jiggle slightly in the center when you gently shake the pan. If it wobbles too much like a bowl of jelly, fear not; just give it a few more minutes in the oven until you see that perfect jiggle—a sign that it’s almost ready. Baking at this temperature helps solidify your filling while allowing those warm spices to envelop your kitchen in an utterly intoxicating aroma. It’s like a warm hug on a chilly day! Once done, remove it from the oven and let it cool on a rack. This cooling stage is essential as it allows the pie to set properly before heading to its next destination: chilling in the fridge.
Step 6: The Importance of Chilling – Patience is Key
After letting your pumpkin cheese pie cool at room temperature, it’s time for one of my favorite steps: chilling! Transferring your pie to the fridge is non-negotiable if you want that creamy filling to reach its full potential. Why chill? Cooling allows all those incredible flavors to meld together beautifully, creating what I can only describe as a symphony of flavors in every slice. You see, when something cools down, its texture changes; we are transforming our filling from merely delicious to profoundly satisfying with this simple act.
Let your pie chill for at least 2-4 hours—yes, I know waiting can be tough when you’re so excited about indulging in this creamy masterpiece! But trust me on this one; patience pays off. During these hours, you’ll notice how each bite becomes richer and more decadent as all those flavors harmonize together. And if you can manage to wait overnight? Oh my goodness, you’ll be rewarded with an even deeper flavor experience! So relax, maybe put on your favorite show or dive into a good book because soon enough, you’ll be savoring each luscious bite.
Step 7: Whipping Up Something Extraordinary
Now comes the moment where we elevate our pumpkin cheese pie beyond its already delicious state—whipped cream! In a stand mixer fitted with a whip attachment (or using an electric hand mixer), pour in 1½ cups of heavy cream. Turn that mixer up to high speed and watch as liquid gold transforms into fluffy clouds of whipped cream right before your eyes! This process typically takes about 3-5 minutes. Keep an ear out for that delightful sound—the whirring of the mixer working its magic—and stay vigilant so you don’t over-whip and end up with butter!
Once your cream starts thickening nicely—look for soft peaks forming—you’ll want to add in 2 tablespoons of sugar. This step not only sweetens your whipped cream but also helps stabilize it so that it holds its shape beautifully when served on top of your pie or alongside each slice. Continue whipping until stiff peaks form; this means when you lift out the whisk or beaters, peaks should stand upright without drooping over—a clear sign you’ve achieved whipped cream perfection! The airy texture complements our rich pumpkin cheese pie just perfectly; it’s like adding fairy dust to an already magical dessert.
Step 8: The Finishing Touches – Serving Your Creation
The moment has arrived! Your pumpkin cheese pie with gingersnap crust has chilled beautifully and is ready for its crowning glory—whipped cream! At this point, you have two choices for serving: either pipe that dreamy whipped cream onto each slice or simply spoon generous dollops on top as you serve each piece individually—both methods are equally charming and utterly delicious! If you’re feeling artistic (and let’s be honest, who doesn’t love making food look pretty?), grab a piping bag fitted with a star tip and pipe beautiful swirls or rosettes atop each slice.
If you’ve opted for extra whipped cream on the side—as I often do because who can resist?—make sure to have some available at serving time so everyone can indulge as they please. Each bite should bring together that creamy pumpkin blend with the sweet crunchiness of gingersnap crust topped off by billowy whipped cream—it’s nothing short of extraordinary! Make sure everyone gets their share of this delightful experience because sharing food is one of life’s great joys. Now take a moment to admire your creation before diving in; you’ve earned every bit of appreciation for crafting such an incredible dessert!
Final Thoughts
As you gather around with friends or family to indulge in your creation, take pride in knowing you’ve made something truly special—a Pumpkin Cheese Pie with Gingersnap Crust that’s not just a dessert but a celebration of flavors and textures that will leave everyone craving more. Enjoy every slice seasoned with laughter and joy—because ultimately, that’s what cooking is all about!
Storage and Enjoyment Tips for Your Pumpkin Cheese Pie with Gingersnap Crust
Now that your Pumpkin Cheese Pie with Gingersnap Crust is beautifully baked, cooled, and adorned with luscious whipped cream, it’s time to savor every bite! But what if there are leftovers? As much as I adore the thought of devouring the entire pie in one sitting, life sometimes calls for a little restraint. Thankfully, this delightful dessert holds its charm even after a day or two—if you can resist the temptation!
Storing Leftover Pumpkin Cheese Pie with Gingersnap Crust
To keep your pie fresh and delicious, store any leftovers in an airtight container in the refrigerator. It should hold up well for about 3 to 5 days—though I doubt it will last that long! For optimal freshness, I highly recommend placing a piece of parchment paper between the pie and the lid of the container; this simple trick helps absorb excess moisture and keeps that beautiful gingersnap crust from becoming soggy. The flavors intensify after a night in the fridge, making each slice even more delightful when you indulge in it later. When you’re ready to serve it again, simply let it sit at room temperature for about 15 to 20 minutes before diving back in; trust me, those flavors will sing like a beautiful symphony!
Freezing Pumpkin Cheese Pie with Gingersnap Crust for Later
If you find yourself with extra pie (or if you’re being proactive about future cravings), freezing is an excellent option! To freeze your Pumpkin Cheese Pie with Gingersnap Crust properly, wrap individual slices tightly in plastic wrap and then place them in a freezer-safe container or zip-top bag. This process helps prevent freezer burn and retains that creamy filling’s divine texture. You can store it frozen for up to 2 months—just be sure to label it so you know what delicious treasure awaits! When you’re ready to enjoy a slice from frozen, let it thaw overnight in the refrigerator or on the counter for a couple of hours; then pair it with freshly whipped cream for an experience that feels just like day one! Isn’t it comforting to know that this sweet indulgence is always just a thaw away?
Pumpkin Cheese Pie with Gingersnap Crust
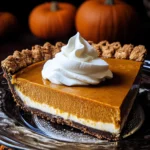
Indulge in the comforting flavors of autumn with this delightful Pumpkin Cheese Pie with Gingersnap Crust. This creamy dessert combines rich pumpkin puree and velvety cream cheese for a luscious filling, all nestled in a crunchy gingersnap crust that adds the perfect spice and texture. Ideal for fall gatherings, Thanksgiving, or simply a cozy evening at home, this pie beautifully marries tradition with innovation, making it an instant favorite. Each slice is a warm embrace that invites you to savor the season’s best flavors, ensuring every gathering feels special and memorable.
- Prep Time: 20 minutes
- Cook Time: 25 minutes
- Total Time: 45 minutes
- Yield: Serves approximately 8 slices 1x
- Category: Dessert
- Method: Baking
- Cuisine: American
Ingredients
- 175g gingersnap cookies
- 5 tbsp melted butter
- 1¼ cups pumpkin puree
- 12 oz cream cheese
- 1 cup brown sugar
- 3 eggs
- 2 tbsp flour
- 2 tsp orange zest
- 1 tsp ground ginger
- 1 tsp cinnamon
- ½ tsp allspice
- 1½ cups heavy cream
- 2 tbsp sugar
Instructions
- Preheat your oven to 350°F (175°C) and lightly spray a 9" pie plate.
- Crush gingersnap cookies in a food processor until fine crumbs form. Mix with melted butter, then press into the bottom of the pie plate to form the crust.
- In a saucepan over medium-low heat, combine pumpkin puree, cream cheese, brown sugar, eggs, flour, orange zest, ginger, cinnamon, and allspice. Cook while stirring until thickened (about 5 minutes).
- Pour the filling into the prepared crust and bake for approximately 20 minutes until it jiggles slightly in the center.
- Allow cooling at room temperature before refrigerating for at least 2 hours to set.
- Whip heavy cream with sugar until soft peaks form and serve atop each slice.
Nutrition
- Serving Size: 1 slice (approximately 120g)
- Calories: 320
- Sugar: 24g
- Sodium: 190mg
- Fat: 20g
- Saturated Fat: 10g
- Unsaturated Fat: 8g
- Trans Fat: 0g
- Carbohydrates: 30g
- Fiber: 2g
- Protein: 5g
- Cholesterol: 80mg