Patriotic Muddy Buddies
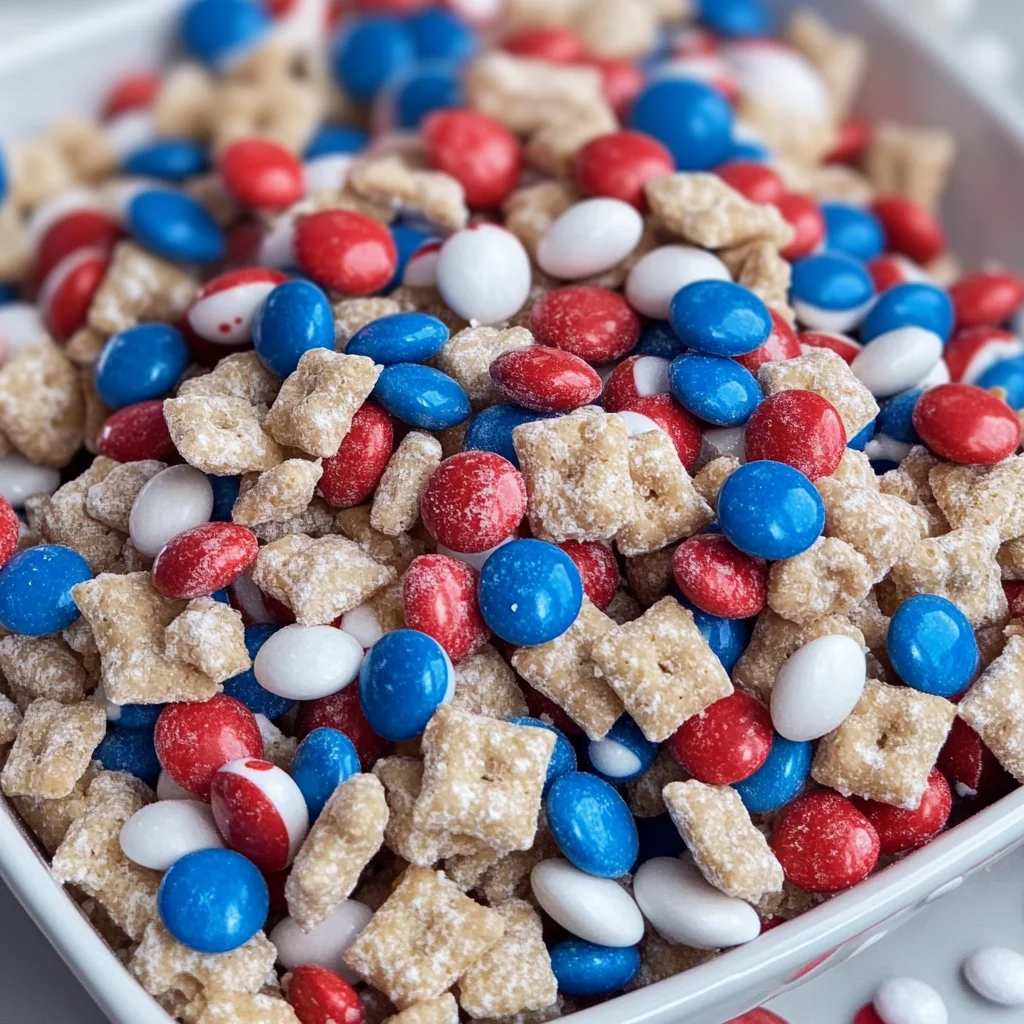
There’s something truly magical about creating a dish that not only tastes delightful but also captures the essence of celebration and community. I can hardly contain my excitement as I share this recipe for Patriotic Muddy Buddies with you! Inspired by the vibrant colors of our nation’s flag, these charming treats are a feast for the eyes and an explosion of flavor in every bite. Just imagine a crunchy mix of Chex cereal enveloped in creamy peanut butter and sweet candy melts, adorned with bursts of colorful M&M’s. Each handful is like a little celebration, perfect for gathering friends and family around during summer festivities, especially on the 4th of July. This isn’t just food; it’s an experience, a bridge between tradition and innovation that beckons you to indulge.
As we embark on this culinary journey together, I want you to know that making Patriotic Muddy Buddies is as much about the process as it is about the end result. These treats carry with them a sense of joy and nostalgia—think backyard barbecues, laughter echoing under the sun, and sparklers lighting up the night sky. The contrasting textures—the crunchiness of Chex cereal against the smoothness of melted chocolate—create a symphony of flavors that’s simply irresistible. And let me tell you, once you start munching on these, it’s nearly impossible to stop! Trust me on this; your guests will be raving about them long after your gathering has ended.
Ingredients:
Now that you’re feeling inspired, let’s talk about what you’ll need to create these delightful Patriotic Muddy Buddies. Each ingredient plays a key role in bringing this treat to life, so let’s dive into their importance!
- 9 cups Corn or Rice Chex. This cereal serves as the backbone of our muddy buddies. Its distinctive texture provides the perfect crunch that contrasts beautifully with the creamy coating we’re going to create. You can choose between Corn or Rice Chex based on your preference; both will work splendidly! When buying, look for fresh boxes—check those expiration dates because freshness ensures maximum crunchiness!
- 1 & 1/4 cups white candy melts (vanilla). These candy melts act as our canvas for sweetness! They melt down beautifully and create a smooth coating that clings to each piece of cereal like magic. When choosing candy melts, opt for high-quality brands; they melt evenly without seizing up, making sure your muddy buddies are perfectly coated. If you find yourself without white melts, feel free to substitute with white chocolate chips—just remember to add a teaspoon of coconut oil to help them melt smoothly!
- 1 & 1/4 cups red candy melts (vanilla). This ingredient adds vibrancy and a hint of sweetness that harmonizes with our vanilla base while ensuring our treats look festive. The bright red hue is particularly striking against the creamy coating and crunchy cereal. Again, quality matters here; ensure they are made specifically for melting so they don’t clump or burn during the process.
- 1 & 1/4 cups blue candy melts (vanilla). Just like their red counterparts, these blue beauties bring a pop of color that’s not only visually appealing but also adds a touch of sweet flavor to your muddy buddies. When shopping for blue melts, check if they are labeled as melting wafers; those will provide the best results without any grainy texture ruining the fun!
- 1 cup creamy peanut butter. Ahh, peanut butter—the liquid gold in this recipe! It binds everything together with its rich creaminess while adding layers of flavor that contrast beautifully with the sweet candy coating. For best results, choose a natural brand that’s free from added sugars so you get that authentic nutty taste without overpowering sweetness.
- 1 tablespoon Paramount crystals. Now here’s where things get interesting! Paramount crystals are used to thin out your melting chocolate or candy melts so they glide over each Chex piece effortlessly. This step is absolutely paramount! Without these crystals (or an alternative like coconut oil), your coating might turn out thick and hard instead of silky smooth.
- 3 cups powdered sugar. This ingredient adds just the right amount of sweetness while helping form that signature sugary coating around your cereal mix. Make sure you sift your powdered sugar before using it; trust me when I say it makes all the difference in achieving an even distribution without any lumps hiding in your tasty treat!
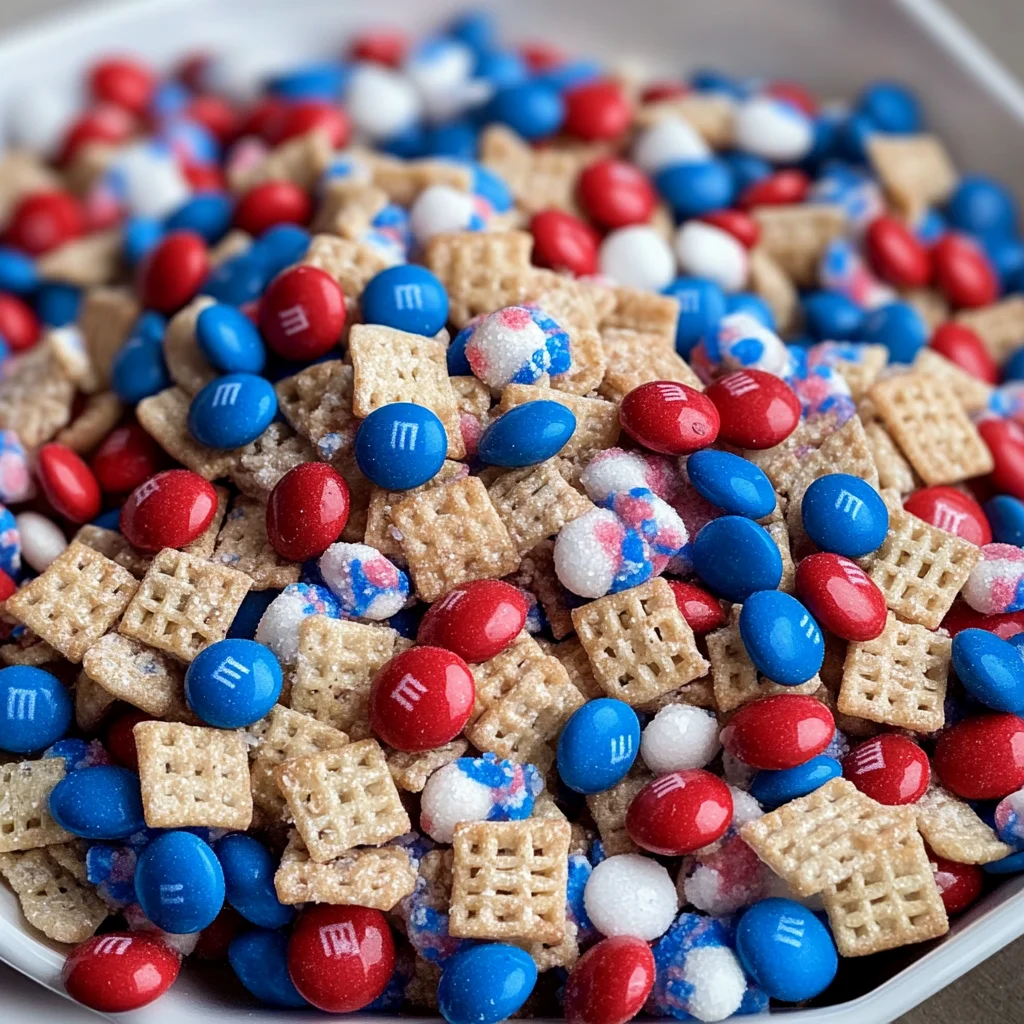
- 1 cup Red, white, & blue M&M’s. These colorful candies not only elevate your muddy buddies in style but also add delightful little pops of chocolatey goodness throughout each handful! When selecting M&M’s for this recipe, consider using mini versions if you prefer smaller bites—they provide just as much fun without overwhelming the other flavors.
- Pop Rocks (optional). If you’re feeling adventurous (and who wouldn’t be?), adding Pop Rocks brings an exciting textural surprise to each bite! As they dissolve in your mouth, they create an exhilarating fizzing sensation that’ll make everyone smile! Feel free to skip them if you’re looking for simplicity or if you’re serving younger guests who might not appreciate such playful surprises.
Equipment You’ll Need:
As we gear up for making our Patriotic Muddy Buddies, it’s important to have all our tools ready at hand—think of them as trusty partners on this delicious adventure! While they may not be ingredients themselves, having the right equipment makes everything smoother and more enjoyable.
- Large mixing bowls: You’ll need three sizable mixing bowls for dividing up your Chex cereal evenly before beginning the coating process. Choosing bowls made from glass or stainless steel is ideal since they’re durable and won’t retain odors or stains from previous uses.
- Microwave-safe bowl: This will be essential for melting those luscious candy melts! A bowl labeled microwave-safe ensures it can withstand heat without warping or leaching chemicals into our sweet creation—safety first!
- Spatula: A sturdy spatula is perfect for combining all ingredients without breaking apart those precious Chex pieces during mixing. Opt for one made from silicone so it can handle high temperatures when stirring melted chocolate too!
- Parchment paper or wax paper: Lining your baking sheets with parchment paper prevents sticky messes while allowing easy removal once everything has cooled down—a total win-win situation!
Now that we’re all geared up with ingredients and equipment let’s jump right into preparing these stunning Patriotic Muddy Buddies!
Step 1: Divide Your Chex Cereal
The first step involves separating your Corn or Rice Chex into three equal portions across three different bowls—this ensures we can coat each batch separately with different colors later on. Don’t rush through this part; take time to measure carefully so each bowl contains exactly 3 cups worth! This precision matters because it allows us consistent ratios when mixing later on—too much Chex in one batch could lead to uneven coatings down the line.
Step 2: Melt Your Candy Coatings
Next up is melting those vibrant candy melts! Begin by placing one type into your microwave-safe bowl along with one tablespoon of Paramount crystals (if using) and heating them at half-power in 30-second intervals until smooth—this usually takes about 90 seconds total but keep an eye on them closely because overheating can lead to disaster! Stir gently between each interval until you see no lumps left behind; remember: patience pays off here since rushed melting can result in unpleasant clumps instead of silky goodness.
Step 3: Coat Your Cereal
Once melted blissfully awaits us—I promise you’ll love how aromatic it becomes—grab one bowl filled with Chex cereal and pour half of your melted mixture over top while gently folding everything together using either your spatula or clean hands (I prefer hands—it feels more personal!). Ensure every piece gets lovingly coated; this step creates that divine texture contrast we crave between creamy sweetness versus crunchy goodness!
Step 4: Add Powdered Sugar
The final touch before letting these beauties cool down involves sprinkling powdered sugar over our freshly coated cereal mixture directly within its bowl while still warm—this allows better adherence so every piece becomes delightfully dusted! Use about half the amount at first then toss gently until fully covered before adding more until reaching desired sweetness level—you really can’t go wrong here since it’s adjustable based on personal preference!
Stay tuned as we prepare to assemble these festive treats further along in our journey together—I assure you there’s plenty more magic awaiting ahead!
Creating Your Deliciously Colorful Patriotic Muddy Buddies
Ah, the thrill of crafting a treat that not only tastes divine but also radiates the spirit of celebration! With our Patriotic Muddy Buddies, you’re not just making a snack; you’re creating a festive masterpiece that brings joy and togetherness to any gathering, especially as we celebrate the 4th of July. Each bite offers a delightful crunch paired with the creamy sweetness of candy melts and peanut butter, and let me tell you, the vibrant red, white, and blue colors evoke such an exhilarating feeling of pride and happiness. Ready to dive in? Let’s continue this delicious adventure!
Step 5: Melting Your Candy Coating
Now that we’ve divided our Corn Chex into three bowls, it’s time for that utterly intoxicating step: melting those candy melts! Start by taking your white candy melts (1 & 1/4 cups) and placing them in a microwave-safe bowl. Microwave them on high for about 30 seconds initially—this is crucial because we want to keep an eye on them. After 30 seconds, give them a gentle stir; this helps distribute the heat evenly. Trust me on this: if you rush to melt them all at once without stirring, you might end up with clumpy candy rather than that silky smooth texture we crave.
Continue microwaving in 15-second bursts until they’re fully melted. You’ll know they’re ready when they resemble a glossy pool of liquid gold—almost like honey! This step is essential because melted candy coating will cling beautifully to your Chex mix, ensuring every piece gets coated in sweet goodness. Once your white candy melts are perfectly melted and smooth, add in that delightful cup of creamy peanut butter (yup, that’s right!) and stir vigorously until combined; this combination is what makes our treats so profoundly satisfying. Now set this aside while we tackle our red and blue melts!
Step 6: Channeling Your Inner Artist
With your white candy mixture set aside, it’s time to repeat the melting process with the red and blue candy melts! In two separate microwave-safe bowls, place your 1 & 1/4 cups each of red and blue candy melts. Once again, start with 30 seconds in the microwave followed by stirring—this technique will ensure they melt evenly without burning. As they melt away into vibrant colors reminiscent of fireworks lighting up the night sky, it’s hard not to get excited about how beautiful our final creation will be.
Once both colors are melted to a smooth consistency just like your white coating, take a moment to admire those luscious hues before mixing each color with individual bowls of Corn Chex. Remember that patience is key here; allowing the melts to cool slightly before pouring ensures that they don’t clump together too much when combined with the cereal. This step is vital because it enhances not only taste but also texture—creating that satisfying crunch we crave!
Step 7: The Art of Coating
Now comes one of my favorite parts—the coating! Grab your first bowl filled with Corn Chex along with your melted white chocolate-peanut butter mixture. Pour half of this divine liquid over the cereals while gently folding everything together using a spatula or wooden spoon. It’s important to fold rather than stir vigorously; this helps maintain the integrity of each Chex piece while ensuring they are evenly coated without breaking apart.
Once every piece has been fully enveloped in that velvety mixture, it’s time to sprinkle in powdered sugar—3 cups should do the trick. Pour it over your coated Chex mix while continuing to fold gently until all pieces are dusted lightly with snow-white sweetness. This step is absolutely paramount because powdered sugar prevents sticking and adds an additional layer of sweetness that transforms each bite into something truly extraordinary! You should see those little squares glistening as if they’re ready for their grand debut.
Step 8: Chilling Time—A Crucial Moment
After lovingly coating our first batch, it’s now time for some well-deserved chilling! Spread out your newly created muddy buddies onto a baking sheet lined with parchment paper or wax paper for easy cleanup (trust me—you’ll thank me later!). This step isn’t just about letting them cool down; it’s about giving those flavors time to meld together beautifully and allowing the coating to set perfectly so that each bite is as crisp as can be.
Pop these beauties into your refrigerator for about 30 minutes; I promise you this little bit of patience leads to wonderfully transformative results! As they chill out—think ‘spa day’ for your muddy buddies—they’ll solidify into crunchy bites full of flavor. While you’re waiting (imagine the sweet aroma wafting through your kitchen!), feel free to clean up your workspace or prepare for the next exciting steps ahead.
Final Touches to Make Them Shine
With our muddy buddies chilled and ready for action, let’s dive into adding those dazzling finishing touches that’ll leave everyone in awe at their brilliance!
Step 9: The Grand Finale—Red, White & Blue Explosion
It’s time for some fun! In this final step, take out those delightful red, white, and blue M&M’s (1 cup) and gently fold them into your chilled mixture. Picture this: bright pops of color against that creamy backdrop creating a visual feast that’ll have everyone reaching for more! Not only do these candies add a burst of sweetness but also provide an irresistible crunch that contrasts beautifully with our chewy cereal base.
Now let’s sprinkle some Pop Rocks if you’re feeling adventurous—it’s completely optional but oh-so-fun! Imagine their crackling surprise as they burst in your mouth along with each delicious bite—it adds an exhilarating twist that’s sure to spark conversations at any gathering! Once everything is mixed thoroughly one last time, pour everything back onto parchment paper and allow it another quick chill for about five more minutes so all elements can adhere beautifully together.
And there you have it—the most scrumptious Patriotic Muddy Buddies ready for serving! Don’t forget to serve these colorful treats in festive bowls or individual bags tied with ribbons for extra flair. Enjoy sharing these delightful bites filled with love during celebrations while basking in compliments from friends and family alike—because trust me; they won’t be able to resist going back for seconds!
Storage and Enjoyment Tips for Your Patriotic Muddy Buddies
Now that you’ve created your dazzling Patriotic Muddy Buddies, it’s time to dive into the delightful world of enjoying and preserving them! Imagine setting out a beautiful bowl full of these vibrant treats for your friends and family during a festive gathering. The way they glisten with color makes them not just a snack, but truly a centerpiece that brings joy to any occasion. However, if you happen to have leftovers (which can be hard to believe!), I promise you they can be stored beautifully to maintain their deliciousness for days to come.
Storing Leftover Patriotic Muddy Buddies
To keep your Patriotic Muddy Buddies fresh and flavorful, store them in an airtight container at room temperature. This prevents moisture from seeping in and ruining that perfect crunch we’ve all come to love. They will maintain their delightful texture for about 4-5 days, so feel free to indulge without worry! For an extra tip, placing a slice of bread in the container can help absorb any excess moisture, keeping your muddy buddies crispy. Trust me on this one; it works like a charm! As they sit, the flavors meld together beautifully, creating an even more profound taste experience when you dive back into the container. When you’re ready to enjoy them again, there’s no need to reheat—just grab a handful and relish that sweet, peanut-buttery goodness!
Freezing Patriotic Muddy Buddies for Later
If you want to extend the life of your Patriotic Muddy Buddies even further, consider freezing them! Simply spread them out on a baking sheet lined with parchment paper and freeze until solid before transferring them into a freezer-safe bag or container. This method prevents clumping and ensures each bite remains as delightful as the first. They can be frozen for up to three months—perfect for those spontaneous gatherings or late-night cravings! Whenever you’re ready for a treat, just take out what you need and let them thaw at room temperature for about 30 minutes. The convenience factor is fantastic; you’ll have party-ready snacks at your fingertips without any fuss!
Embrace these storage tips with excitement—they’ll help keep your Patriotic Muddy Buddies just as enjoyable as when you first made them!
Patriotic Muddy Buddies
Celebrate with deliciously colorful Patriotic Muddy Buddies that delight every taste bud—make them today and share joy with family and friends!
- Prep Time: 20 minutes
- Cook Time: 10 minutes
- Total Time: 30 minutes
- Yield: Approximately 12 servings 1x
- Category: Dessert
- Method: No-bake
- Cuisine: American
Ingredients
- 9 cups Corn or Rice Chex
- 1 & 1/4 cups white candy melts
- 1 & 1/4 cups red candy melts
- 1 & 1/4 cups blue candy melts
- 1 cup creamy peanut butter
- 3 cups powdered sugar
- 1 cup red, white, and blue M&M's
Instructions
- Divide Chex cereal into three bowls (3 cups each).
- Melt white candy melts with peanut butter in a microwave-safe bowl at half power until smooth.
- Melt red and blue candy melts separately using the same method.
- Coat one bowl of Chex with the white chocolate mixture, then sprinkle with powdered sugar until well coated.
- Repeat with the red and blue melts for the corresponding bowls of Chex.
- Mix all three batches together and fold in M&M's.
- Allow to cool on parchment paper before serving.
Nutrition
- Serving Size: 1/2 cup (40g)
- Calories: 180
- Sugar: 16g
- Sodium: 60mg
- Fat: 8g
- Saturated Fat: 3g
- Unsaturated Fat: 5g
- Trans Fat: 0g
- Carbohydrates: 25g
- Fiber: 0g
- Protein: 2g
- Cholesterol: 0mg