Simple Apple Pie
There’s something profoundly comforting about the aroma of a Simple Apple Pie wafting through the kitchen, isn’t there? It’s more than just a dessert; it’s a warm embrace after a long day, a sweet memory wrapped in flaky crust and spiced apples that seems to pull us back to simpler times. Picture yourself gathering around the table with loved ones as the pie cools on the windowsill, its golden crust glinting in the sunlight. The anticipation builds as everyone eagerly awaits that first slice, the sound of the knife cutting through the tender filling echoing like music. This is why I adore baking – it’s not merely about feeding our bodies; it’s about nourishing our souls. Every bite of this Simple Apple Pie tells a story of love, tradition, and togetherness.
The magic of apple pie lies in its simplicity and versatility. While many recipes boast complex techniques or exotic ingredients, this pie embraces straightforwardness without sacrificing flavor. Using tart apples like Granny Smith adds that delightful balance of sweetness and acidity that makes each bite feel like an event. With just a handful of ingredients—sugar, cornstarch for thickening, warm spices like cinnamon and nutmeg—you can create something truly extraordinary. It’s the kind of dish that feels right at home during holidays or special gatherings but is equally perfect for an everyday treat when you crave something homemade. Trust me when I say this recipe will not only impress your guests but also fill your heart with joy.
Simple Apple Pie: A Slice of Joy
Today, I’m thrilled to share my go-to recipe for Simple Apple Pie—a classic that never fails to evoke warmth and nostalgia. With its buttery crust cradling succulent apples dusted with cinnamon, this pie is everything you’d want on a cozy evening or at a family gathering. As we dive into making this pie together, I encourage you to take your time and savor every step of the process—because cooking should be enjoyable! Let’s embark on this delicious journey!
Ingredients:
As we gather our ingredients for this delectable Simple Apple Pie, remember that each one plays an important role in crafting flavors that harmonize beautifully together. So let’s take a moment to appreciate what goes into making this timeless dessert.
- 4 large firm, tart apples (like Granny Smith). The star of our show! Choosing the right apples is crucial because we need that perfect balance between sweetness and tartness to keep things interesting. Granny Smith apples are my absolute favorite due to their crisp texture and vibrant flavor; they hold up well during baking while still allowing their natural juices to shine through. When selecting your apples, look for those that are firm with no bruises or soft spots—trust me, they’re worth it!
- 1/3 cup sugar. This simple ingredient sweetens our filling while allowing the natural flavors of the apples to come forward without overpowering them. The sugar melts into a syrup as it bakes, mingling with the apple juices and creating that luscious filling we all crave in a good pie. Don’t skimp on quality here; using granulated sugar will ensure even distribution throughout the apples.
- 1/3 cup firmly packed light brown sugar. Here’s where we add depth! Brown sugar brings a hint of caramel-like richness due to its molasses content. It not only enhances sweetness but also adds complexity that pairs perfectly with cinnamon and nutmeg—this combination will make your taste buds sing! Make sure to pack it firmly when measuring so you get all that delightful moisture locked in.
- 3 tablespoons cornstarch. This ingredient is absolutely paramount for achieving that perfect consistency in your filling! Cornstarch acts as a thickener, helping to absorb excess moisture from the apples as they bake and ensuring that your pie isn’t runny when you slice into it later on. It creates a wonderfully cohesive filling—just make sure to whisk it well with your sugars before tossing it with the apples!
- 1/4 teaspoon salt. A tiny pinch goes a long way! Salt enhances sweetness by balancing out flavors—it’s non-negotiable if you want your pie to taste vibrant rather than flat. It also helps highlight those warm spices we’ll be adding soon.
- 1 teaspoon cinnamon. Ahh, cinnamon—the quintessential spice for apple desserts! Its warm aroma fills the kitchen with comfort while infusing each bite with cozy notes reminiscent of autumn evenings spent by the fire. Use freshly ground cinnamon if possible; its potency will elevate your pie beyond compare.
- 1/8 teaspoon nutmeg. Just a whisper of nutmeg adds another layer of complexity without overwhelming the other flavors; it’s like a secret handshake among spices! This aromatic gem complements cinnamon beautifully—and trust me when I say it’ll leave everyone guessing about what makes your pie so extraordinary.
- 1 (14.1-ounce) box premade refrigerated pie crusts (2 count). Let’s be real: sometimes life gets busy, and that’s perfectly okay! Using premade pie crusts saves time while still delivering delightful results without compromising flavor or texture—think flaky layers holding all those juicy apple treasures inside! Just make sure they’re thawed before using them so they roll out easily.
- 2 tablespoons unsalted butter (cut into small cubes). Butter is essential to achieving richness in our filling—it melts during baking, creating little pockets of creamy goodness throughout those tender apples while adding wonderful flavor as well! I love using unsalted butter so I can control exactly how much salt ends up in my dish.
Equipment You’ll Need:
Now let’s talk about getting our kitchen ready for this mouthwatering adventure! Having the right tools makes all the difference when creating culinary delights like this Simple Apple Pie—it streamlines processes and ensures success along every step of our journey together.
- 9-inch pie dish: This is where all our hard work will come together! A sturdy glass or ceramic dish works best because it allows even heat distribution throughout baking while showcasing beautiful browning on those crusty edges—just what we want for presentation!
- Peeler/Coring Tool: To prepare those glorious apples efficiently, you’ll want either an apple peeler or corer (or both!). These tools save time and effort compared to doing everything by hand; plus, they help ensure uniformity amongst slices which promotes even cooking once they’re nestled snugly within their crusty abode!
- Large mixing bowl: You’ll need plenty of space for tossing those sliced apples together with sugars and spices before they head into their pastry shell—choose something large enough so everything can mix freely without spilling over!
- Small mixing bowl: For combining dry ingredients like sugar and cornstarch—having two bowls means less mess overall since you won’t have stray bits floating around each component after mixing them separately first.
- Whisk or spoon: Either tool will work wonders when blending dry ingredients together smoothly before coating those luscious apple slices evenly—the goal here being consistent flavor throughout every single bite!
- Sharp knife: A quality knife ensures clean cuts through tough apple skin while slicing precisely into desired thicknesses—a crucial step towards achieving optimal texture within baked goods!
Preparing the Simple Apple Pie
Step 1: Preheat Your Oven & Prepare Those Apples
First things first—let’s get things warming up! Preheating your oven to 450°F sets us up for success by ensuring an immediate burst of heat upon placing our pie inside later on—a technique known as “oven spring,” which helps achieve flakiness in our crust from start until finish! While that’s happening, grab four large firm tart apples (I recommend Granny Smith) because their crispness holds up beautifully during baking while providing just enough tanginess against sweetness laid forth by sugars coming soon after—they’re simply perfect here!
Peeling these beauties might seem tedious at first glance—but trust me when I say it’s worth every second once you sink your teeth into that heavenly finished product later down line! Start by coring each apple carefully using either an apple corer tool or sharp knife; then proceed onward peeling away skins before slicing them into thin 1/8-inch sections—this thickness allows quick cooking time while still retaining some structure once baked through nicely alongside buttery layers beneath surface area too!
Step 2: Toss Those Apples with Sweetness
Once you’ve got all those gorgeous slices prepped nicely in front of you laid out within reach—that’s when magic truly begins unfolding right before eyes after adding even more excitement ahead next step involves tossing them together harmoniously within large mixing bowl alongside whisked mixture combining granulated sugar/brown sugar/cornstarch/salt/cinnamon/nutmeg—all lovely additions complementing natural flavors found within fruit interior itself too!
After blending dry elements gracefully until fully incorporated without any clumps remaining visible anywhere—you’re ready now gently sprinkling over top sliced fruits layering evenly across surface area—as tempting aromas beginning waftingly drifting upward fill air surrounding space surrounding kitchen creating anticipatory buzz amongst everyone present waiting patiently nearby eager anticipating final results coming forth soon thereafter following completion steps involved here shortly thereafter arriving towards finishing goal line soon enough too giving rise ultimate satisfaction achieved upon serving slices fresh-out oven experience truly unforgettable moments shared amongst family/friends alike gathered ‘round table tonight beckoning eagerly await enjoying finale treats prepared lovingly beforehand altogether collectively assembled finally sharing bites taken warmly welcomed smiles exchanged between one another thereafter…
Step 3: Assemble Your Crust
Now let’s bring everything together by assembling our beloved Simple Apple Pie assembly process itself begins now too exciting part drawing near closer than ever before arriving soon enough culmination efforts displayed beautifully right here tonight… First up take one chilled refrigerated premade pie crust unrolling gently onto bottom/sides designated 9-inch dish ensuring full coverage throughout entire surface area underneath expectedly trimming off excess edges sticking outside rim leaving behind slight overhang remaining intact visible towards outer edge perimeter too maintaining neat appearance ultimately achieved upon completion further down road later onwards following cooking phases approaching swiftly thereafter awaiting sizzling sounds erupting from oven once baked properly completing transformation altogether turning raw ingredients magical culinary creation await savoring delightfully stimulating senses involved fully immersed exciting experience shared everywhere around us tonight bridging gaps connecting hearts filled joy…
Step 4: Fill & Seal Your Creation
Next comes filling her up gracefully now waiting impatiently inside dish awaiting arrival filling components embraced snugly beneath protective shell surrounding exterior carefully arranged neatly evenly spaced apart positioned directly atop layer laid earlier beforehand ensuring none forgotten tucked safely underneath surface preventing any leakage during baking phase taking place afterwards leading towards final glorious reveal moments drawing nearer quicker than anticipated previously imagined earlier tonight illuminating atmosphere filled excitement experienced collectively shared amongst friends gathered nearby awaiting tasty bites taken eventually served warm straight-out oven once completed successfully topped off whipped cream scoops vanilla ice cream decadently drizzled atop freshly baked creations appearing tantalizing adorned perfectly inviting everyone indulging pleasure seeking happiness nestled comfortably wrapped inside flaky layers ultimately satisfied beyond measure…
And there you have it—the journey has only just begun as we delve deeper into shaping memories alongside families gathered round tables sharing laughter love stories woven intricately throughout lives lived fully cherished moments passed down generations enduring timeless legacies left ingrained forevermore held dearly close heart minds blossoming flourishing every single day continuing onward passing traditions along forever enriching lives touched deeply uniting souls forever bonded tightly knitted fabric woven tightly through shared experiences expressed via food created lovingly nurtured within kitchens worldwide transcending boundaries connecting communities bridging gaps creating unity joy happiness felt universally everywhere around globe today celebrating life itself indeed…
Step 5: Sealing the Goodness with a Crusty Embrace
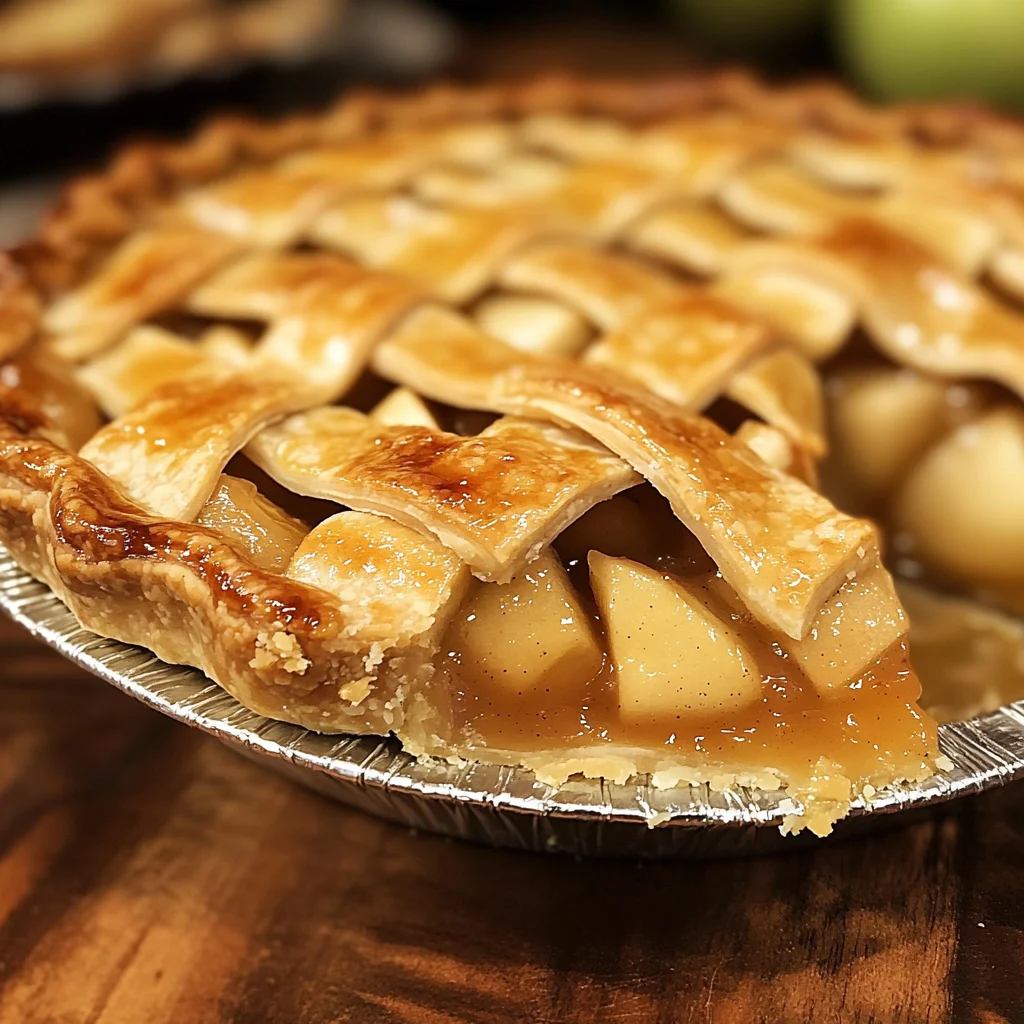
Now that we have our delectable apple filling nestled in the bottom crust, it’s time to give it a cozy lid. Gently unroll the second pie crust, taking your time to ensure it doesn’t tear – think of it as wrapping a warm blanket around your apple mixture. Centering the crust over the pie dish is crucial; this ensures an even baking and allows for those beautiful crimped edges that not only look appealing but also keep all those juicy apple flavors locked inside. The overhang is an important part of this step; don’t rush to trim it away just yet! Instead, fold any excess crust under itself along the edge of the bottom crust. This technique, which is often referred to as “crimping,” creates a wonderful seal that prevents any potential leaks while baking. Trust me, you want every bit of that luscious filling contained!
Once you’ve pinched together the edges, take a moment to admire your work — that crimped edge adds character and charm to your Simple Apple Pie! Now it’s time for some artistry: grab a sharp knife and cut 3 to 4 slits in the top of your pie, each about three inches long. These cuts are not merely decorative but absolutely paramount for allowing steam to escape during baking. If you skip this step, you risk a soggy pie or worse—an explosion of applesauce in your oven! As you make those slits, imagine them as little windows through which the sweet aroma of cinnamon and apples will waft out, enticing anyone who crosses its path. Don’t forget, though; these slits need to be deep enough to let steam out without compromising the integrity of your lovely crust.
Step 6: The Art of Baking: Creating That Golden Crust
Now we’re entering one of my favorite parts—baking! Preheat your oven to a sizzling 450°F (232°C); this initial high temperature is essential because it helps set the crust beautifully while also beginning to cook down those apples, creating that delightful filling we all adore. Place your prepared pie on a rimmed baking sheet; this is not just for aesthetics but serves a critical function as well—it catches any bubbling juices that may overflow while baking. No one wants a messy oven situation on their hands! Slide that beauty into the oven and let it bake at this high temperature for just 10 minutes; during this time, keep an eye on it—you’re looking for the crust edges to start turning golden brown.
After those first ten tantalizing minutes are up, it’s time for a little magic: reduce the heat to 350°F (175°C) and allow the pie to bake for an additional 50 minutes. This shift in temperature is vital because it allows the apples to soften further while ensuring that your crust continues developing flavor without burning. You’ll know it’s working when you see those juices bubbling through the slits in your top crust—oh, what a sight! During this time, if you notice that those edges are browning too quickly (which can happen thanks to varying oven temperatures), simply cover them with strips of aluminum foil. It’s like giving them a little sunshade while they continue their journey toward perfection.
Step 7: Patience Is Key: Cooling Down Your Pie
Once you’ve reached that glorious golden-brown stage after about an hour of baking total, remove your masterpiece from the oven with pride! But hold on just a minute—this next step is perhaps one of the most crucial parts of making an unforgettable Simple Apple Pie: cooling. I know it’s tempting to dive right in with fork in hand; however, I promise you that if you can exercise just a bit more patience and let it cool completely for 2 to 3 hours on a wire rack, you’ll be rewarded beyond measure. As it cools, something magical happens—the filling thickens beautifully and sets up perfectly so when you slice into it later, each piece holds its shape rather than oozing out like molten lava.
While waiting can feel agonizing (especially with that intoxicating aroma wafting through your kitchen), remember that cooling isn’t just about achieving optimal texture; it’s also about letting all those flavors meld together harmoniously. Think about it—allowing that sweetness from the apples and warmth from spices like cinnamon and nutmeg to fully develop is worth every minute spent waiting! So grab yourself a cup of tea or coffee during this time and allow yourself some well-deserved relaxation—you’ve earned it!
Step 8: Serving Up Joy: The Grand Finale
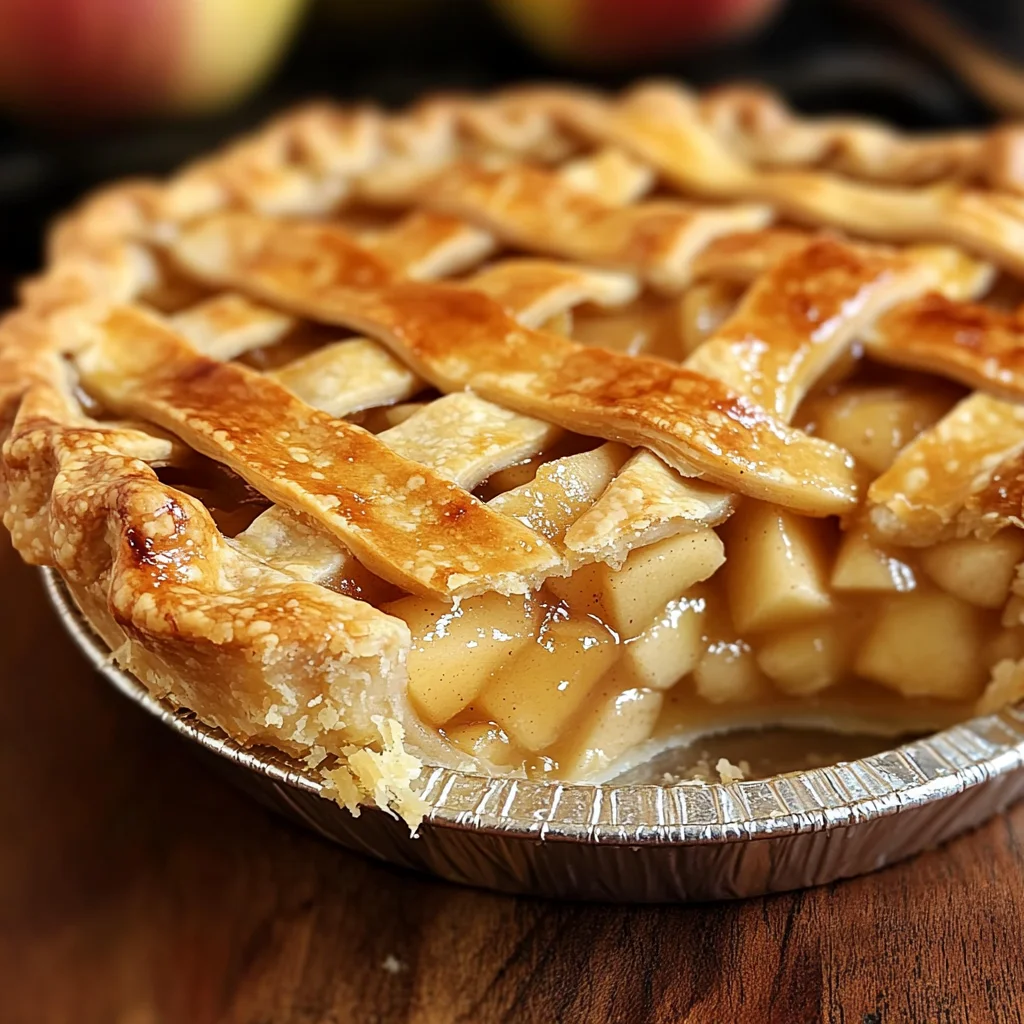
Finally, after what feels like an eternity (but really was just enough time for pure magic), it’s time for the grand reveal! Carefully slice into your cooled pie with confidence—you’ll notice how each piece stands tall and proud instead of collapsing into itself—a true testament to your patience during cooling. As you lift out each slice onto plates or bowls, take in that gorgeous blend of baked apples glistening with sugary goodness beneath their flaky top layer; it’s truly a sight that warms my heart every single time.
But wait—don’t stop there! While I adore enjoying my Simple Apple Pie on its own (it’s delightful just as it is), consider serving each piece slightly warmed with a dollop of freshly whipped cream or even vanilla ice cream if you’re feeling indulgent. This contrast between warm spiced apples and cold creamy toppings creates an utterly intoxicating experience—each bite becomes a symphony of flavors dancing on your palate. And whenever someone asks for seconds (and trust me—they will!), you can proudly share not just a slice but also stories about how much love and care went into creating this classic dessert from scratch.
In conclusion, whether it’s sharing with family or friends during gatherings or simply treating yourself after a long day, there’s something profoundly satisfying about making—and savoring—a Simple Apple Pie. It carries warmth not only through its comforting flavors but also through memories made around the dinner table. Enjoy every bite knowing you’ve crafted something truly extraordinary!
Storage and Enjoyment Tips for Your Simple Apple Pie
Oh, what a joyous moment it is when your Simple Apple Pie emerges from the oven, its golden crust glistening and the aroma wafting through the air like a warm hug! The perfect blend of sweet-tart apples and warm spices dances together in a way that feels like home. But what about those precious leftovers? Fear not! I’m here to guide you on how to store this delightful creation so you can savor every last bite, even days after it’s baked.
Storing Leftover Simple Apple Pie
To keep your Simple Apple Pie fresh and delicious, I recommend storing it in an airtight container at room temperature if you’ll be enjoying it within a couple of days. It can last up to four days this way, but trust me, it rarely lasts that long in my house! If you want to keep it for longer, pop it in the fridge where it will stay lovely for up to a week. Here’s a neat little trick: placing a slice of bread in the container can help maintain moisture, preventing the crust from becoming too dry. After storage, when you take that first slice, you’ll find that the flavors have melded beautifully; each bite is just as comforting as the first. For serving, I suggest gently reheating slices in the microwave for about 20 seconds or popping them back into a low oven until warmed through—this brings back that delightful flaky texture while enhancing those cozy aromas!
Freezing Simple Apple Pie for Later
Ah, freezing your Simple Apple Pie is another fantastic option! To do this properly, wrap your cooled pie tightly with plastic wrap or aluminum foil and place it inside a freezer-safe container or bag. This method helps shield it from freezer burn and keeps those delicious flavors intact. When done right, your pie can stay frozen for up to three months—perfect timing for unexpected guests or those cozy nights when you crave something sweet without all the fuss of baking again. When you’re ready to indulge, just let it thaw overnight in the refrigerator before popping it into the oven at 350°F for about 30 minutes to warm through. This is such a convenient option because who wouldn’t want homemade apple pie at their fingertips? Just imagine pulling out this treasure on a chilly evening; it’s like having a slice of comfort food magic waiting for you!
Simple Apple Pie

There’s nothing quite like the comforting aroma of a freshly baked Simple Apple Pie filling your home. This delightful dessert, with its flaky crust and spiced apple filling, is sure to evoke warmth and nostalgia, making it perfect for family gatherings or cozy evenings at home. Imagine sharing a slice with loved ones, each bite revealing the sweet-tartness of Granny Smith apples harmonized with cinnamon and nutmeg. Not only does this recipe deliver incredible flavor, but it also embodies the joy of baking—creating cherished memories one slice at a time.
- Prep Time: 30 minutes
- Cook Time: 60 minutes
- Total Time: 1 hour 30 minutes
- Yield: Serves approximately 8 people 1x
- Category: Dessert
- Method: Baking
- Cuisine: American
Ingredients
- 4 large firm tart apples (like Granny Smith)
- 1/3 cup granulated sugar
- 1/3 cup light brown sugar
- 3 tablespoons cornstarch
- 1/4 teaspoon salt
- 1 teaspoon cinnamon
- 1/8 teaspoon nutmeg
- 1 box premade refrigerated pie crusts (2 count)
- 2 tablespoons unsalted butter (cut into small cubes)
Instructions
- Preheat your oven to 450°F (232°C).
- Peel, core, and slice the apples into thin pieces.
- In a large mixing bowl, combine granulated sugar, brown sugar, cornstarch, salt, cinnamon, and nutmeg. Toss the apple slices in this mixture until well coated.
- Roll out one pie crust into a 9-inch pie dish and fill it with the apple mixture. Dot with butter.
- Cover with the second crust, crimping edges to seal. Cut slits in the top crust for steam escape.
- Bake for 10 minutes at 450°F; then reduce temperature to 350°F (175°C) and bake for an additional 50 minutes until golden and bubbly.
- Cool on a wire rack for at least 2 hours before slicing.
Nutrition
- Serving Size: 1 slice (100g)
- Calories: 250
- Sugar: 20g
- Sodium: 150mg
- Fat: 10g
- Saturated Fat: 5g
- Unsaturated Fat: 4g
- Trans Fat: 0g
- Carbohydrates: 38g
- Fiber: 3g
- Protein: 2g
- Cholesterol: 15mg