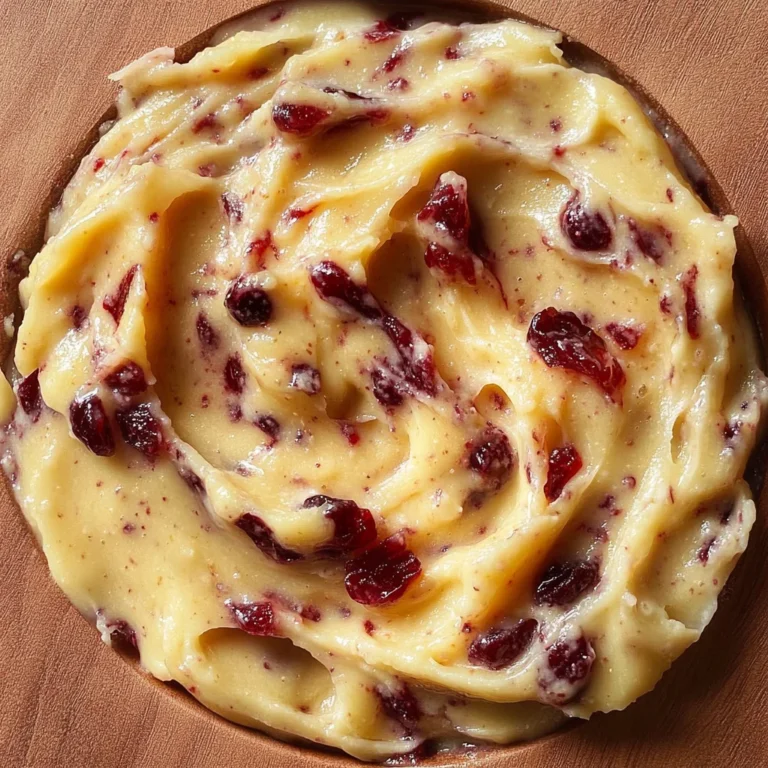
Gingerbread Latte Cookies
There’s something utterly enchanting about the aroma of spices wafting through the air, a warm hug from the kitchen that feels like home. These Gingerbread Latte Cookies are not just a treat; they are an experience, a celebration of flavors that dances between nostalgia and festive cheer. Imagine sinking your teeth into a chewy, soft cookie that carries the essence of gingerbread laced with the invigorating notes of espresso. It’s as if each bite transports you to a cozy café during winter, where the world outside is frosted with snow and inside, you’re cradling a cup of liquid gold. The combination of rich spices and coffee creates a symphony of flavors that is both comforting and exhilarating. Honestly, I can’t wait for you to try these because I promise you—this recipe will become a cherished part of your holiday traditions.
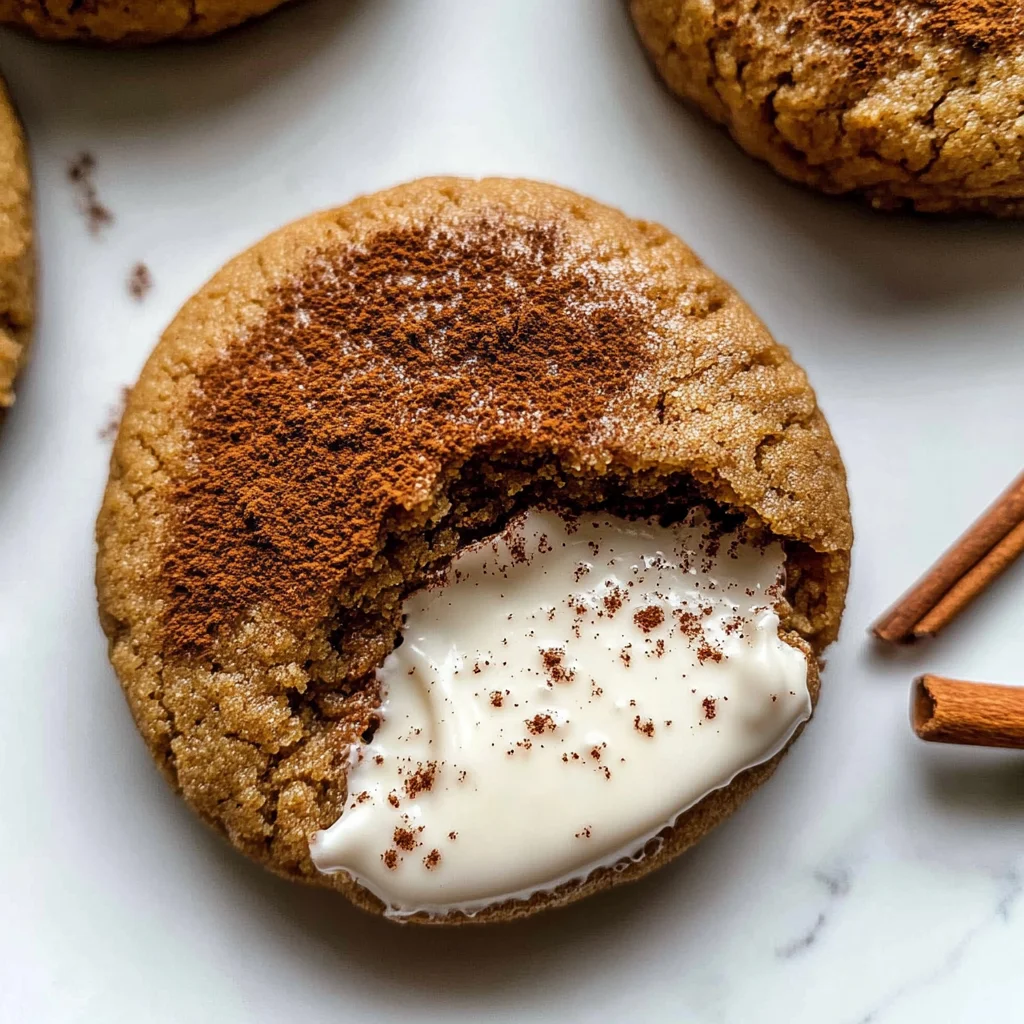
What makes these cookies so special? Well, they embody the spirit of the season while offering a delightful twist on classic flavors. These aren’t just any cookies; they’re infused with espresso powder, which complements the warm spices perfectly, creating that beloved gingerbread latte experience in cookie form. Plus, let’s not forget about the velvety white chocolate dip that adds a creamy richness to each delectable bite. They’re easy enough to whip up for an afternoon treat but fancy enough to impress at your next gathering or holiday party. Trust me when I say that these Gingerbread Latte Cookies will be the star of any dessert table!
Ingredients:
As we embark on this culinary adventure together, let’s take a moment to appreciate each ingredient for what it brings to our Gingerbread Latte Cookies. Each element plays an essential role in crafting those beloved flavors and textures we crave during this time of year.
- 2 cups (170g) old-fashioned whole rolled oats: These oats are foundational for creating that chewy texture we adore in our cookies. When pulsed lightly in a food processor, they provide both substance and a hint of nuttiness without overwhelming other flavors. Look for whole rolled oats rather than quick oats; quick oats can lead to a mushy texture when baked.
- 1 and 2/3 cups (210g) all-purpose flour: This is your classic baking staple! All-purpose flour provides structure and stability to our cookies while allowing them to rise beautifully without becoming too dense. When measuring flour, be sure to spoon it into your measuring cup and level it off to avoid compaction—a crucial step for achieving perfect results.
- 2 teaspoons espresso powder: This little powerhouse amplifies the coffee notes in our cookies without adding any liquid. Espresso powder acts like magic—intensifying flavors while giving your cookies that delightful kick reminiscent of your favorite café drinks. If you can’t find espresso powder, finely ground coffee will work in a pinch but may alter the texture slightly.
- 1 teaspoon baking soda: This leavening agent is absolutely paramount for giving our cookies that desirable lift. As it reacts with acids in other ingredients (like molasses), it releases carbon dioxide bubbles that create air pockets in the dough—a key component for achieving that light yet chewy texture we’re after.
- 1/4 teaspoon salt: Salt is often overlooked but is non-negotiable here! It enhances all those sweet and spicy flavors beautifully while balancing out sweetness from sugars. A touch of salt elevates every bite, making these cookies taste truly extraordinary.
- 1 teaspoon ground ginger: Ground ginger provides warmth and depth, capturing that quintessential gingerbread flavor we all love so much during the holidays. Freshly ground ginger would add even more vibrancy if you have it on hand; otherwise, store-bought works just fine!
- 1 teaspoon ground cinnamon: Ahh, cinnamon—the spice that wraps us in comfort! Its fragrant warmth pairs perfectly with ginger and nutmeg, forming an aromatic trio that’s simply irresistible. Choose Ceylon cinnamon if you want something unique; it’s sweeter and more delicate than standard cassia cinnamon.
- 1/4 teaspoon ground nutmeg: Nutmeg adds complexity with its slightly sweet yet earthy flavor profile. Just a pinch goes a long way in enhancing our cookie’s richness without overpowering other spices.
- 1/8 teaspoon ground cloves: Cloves pack quite a punch with their intense flavor! Just a smidge allows us to capture their warmth without overshadowing more subtle spices—it’s like adding just the right amount of mystery to our festive blend.
- 3/4 cup (12 Tbsp; 170g) unsalted butter, softened to room temperature: Butter is critical for achieving that tender crumb we’re after. It creates layers within our cookies as it melts during baking—so ensure it’s softened properly! Cold butter won’t cream effectively and melted butter will cause spreading issues; aim for butter that’s pliable yet firm enough to hold its shape.
- 1 cup (200g) packed light or dark brown sugar: Brown sugar contributes moisture and chewiness thanks to its molasses content while giving us those beautiful caramel undertones as they bake—light brown sugar yields milder flavor while dark gives deeper complexity.
- 1/4 cup (50g) granulated sugar: Granulated sugar helps achieve crisp edges on our cookies while balancing out browning from brown sugar’s moisture content during baking! Together with brown sugar, they create balance—a perfect harmony!
- 1 large egg, at room temperature: Eggs bind everything together beautifully while lending moisture and fat necessary for rich flavor profile! Room temperature eggs mix evenly into the batter; if yours are cold from the fridge, consider placing them in warm water for about five minutes before using.
- 1/4 cup (60ml/75g) unsulphured or dark molasses (do not use blackstrap): Molasses adds depth along with slight bitterness which pairs wonderfully against sweetness overall creating harmonious flavor balance—it also helps keep our cookies moist longer! Unsulphured varieties like Grandma’s brand yield better quality results than others available on shelves today!
- 8 ounces (226g) white chocolate, chopped: Creamy white chocolate serves as both decadent dip AND luscious topping once melted down—its sweetness balances spiced notes seamlessly enriching overall experience! Opt for high-quality brands when purchasing since they’ll melt more smoothly without pesky lumps ruining presentation!
- 1 teaspoon vegetable oil or coconut oil (optional): Adding oil helps thin out melted white chocolate making dipping easier plus improves flow over cookie surface area—it’s optional but recommended if you’re seeking silky-smooth finish!
- 1/2 teaspoon espresso powder: A sprinkle over melted chocolate enhances aroma elevating presentation further delightfully enveloping taste buds upon first bites—don’t skip this final touch!
- Pinch each of cinnamon and nutmeg, for sprinkling on top: A finishing touch that ties everything together beautifully visually appealing too! These last details remind us why we love this recipe even more bringing back nostalgic memories associated with holidays spent baking together!
Equipment You’ll Need:
Having the right tools at your disposal makes all the difference when embarking on this delicious journey towards crafting your Gingerbread Latte Cookies. While not technically ingredients, these essential partners will ensure everything runs smoothly—from mixing ingredients effortlessly to ensuring success every step along way!
- Food processor – This handy appliance takes care of pulsing oats finely enough so they contribute texture without becoming too gritty or dominating cookie base entirely! If you don’t have one handy? No worries—just chop by hand until desired consistency reached instead!
- Mixing bowls – A few good mixing bowls come in handy throughout process whether whisking dry ingredients together or creaming butter/sugars seamlessly blending wet components before uniting them later down line—opt for sturdy options large enough accommodate sizable batches comfortably!
- Hand mixer or stand mixer fitted with paddle attachment – Essential tools here—they do most heavy lifting during creaming stage ensuring smooth incorporation air into mixture leading fluffy results promised earlier! Hand mixers work well too if you’re short on space/money; just remember patience required here as manual effort needed…
- Measuring cups & spoons – Accurate measurements ensure consistency batch after batch guaranteeing perfect ratios every time—weighing ingredients would yield best outcomes still traditional measurements suffice nicely especially when combined knowledge gained from previous steps shared thus far…
Now that we’ve gathered everything needed let’s dive into creating something truly special together as we prepare these Gingerbread Latte Cookies—with love poured into each detail ensuring end result worth savouring repeatedly long after first bites taken…
Step 1: Pulse Those Oats!
Begin by pulsing your old-fashioned rolled oats in a food processor about 10–12 times until obtaining various textures—from finely chopped bits mingling alongside coarser pieces resembling oat flour itself! This method not only enhances chewiness but creates delightful nuances within final product… Don’t rush this step; embracing diversity yields richer taste experiences later on making bites feel more satisfying overall!
Step 2: Whisk Dry Ingredients Together
In medium bowl whisk together pulsed oats flour espresso powder baking soda salt ground ginger cinnamon nutmeg cloves until everything evenly combined appearing uniform throughout mixture looking invitingly fragrant already—a sign things going well thus far! Set aside letting scents linger filling kitchen softly encouraging anticipation building momentarily before proceeding next phase…
Step 3: Cream Butter & Sugars
Grab large bowl alongside trusty hand mixer or stand mixer equipped paddle attachment because now it’s time cream unsalted butter brown granulated sugars together medium-high speed approximately three minutes watching carefully until mixture appears light fluffy transforming color slightly paler shade indicating air incorporated successfully yielding airy structure anticipated earlier… Add egg followed by molasses beating high speed until blended thoroughly scraping down sides periodically ensuring no remnants left behind clinging stubbornly walls bowl hinders progress—you want everything harmoniously united here folks please trust me on importance task undertaking ensuring end result worth effort put forth
Step 4: Combine Wet & Dry Ingredients
Now comes pivotal moment where dry ingredients introduced wet mixture slowly mixing low speed until fully integrated forming thick sticky dough resembling luscious promise awaiting realization soon enough… Resist urge skip chilling phase which keeps developing flavors overnight allowing optimal melding achieved better results overall! Cover tightly refrigerate thirty forty-five minutes up perfectly manageable consistency rolling scooping later down road…
The excitement builds as we prepare ahead toward baking stage where aromas waft through home creating joyous atmosphere setting holiday mood alive around friends family alike joining forces sharing stories laughter—all stemming from what started simple act creating these Gingerbread Latte Cookies standing testament possibilities arises whenever culinary adventures embarked upon wholeheartedly…
Step 5: Preparing for Baking Bliss
Now that your dough has been chilling and firming up nicely—this is crucial, my friends! Chilling not only makes the dough easier to handle but also allows the flavors to meld beautifully, resulting in cookies that are profoundly satisfying. It’s like letting a good wine breathe; patience here truly pays off! Preheat your oven to 350°F (177°C). While it’s warming up, take a moment to line two large baking sheets with parchment paper or silicone baking mats. These simple tools are absolute game-changers; they prevent the cookies from sticking and ensure even baking. Trust me, you want every bit of deliciousness to come out perfectly.
Once your oven is ready, scoop the cookie dough using about 1.5 tablespoons (approximately 35 grams) of dough per cookie. This is where the magic happens! Place the dough mounds on your prepared baking sheets, ensuring they’re spaced about three inches apart. Why so much space? Well, as these cookies bake, they will spread slightly and puff up just enough to create a delightful chewy center while maintaining that signature soft exterior. Bake them for about 12 to 13 minutes—keep an eye on them! You’re looking for lightly browned edges while the centers remain very soft and slightly underbaked. Remember, cookies continue to cook even after they’ve been removed from the oven due to residual heat, so don’t rush this step!
Step 6: The Cooling Dance
Once you’ve pulled those golden-brown beauties from the oven, let them cool on the baking sheet for about ten minutes before transferring them to a cooling rack. This waiting period is essential—during these ten minutes, the cookies will firm up just enough to hold their shape when you move them. If you try to move them too soon, they might fall apart, and we certainly don’t want that now, do we? After they’ve relaxed a bit and are no longer hot but still warm and inviting (imagine that intoxicating aroma filling your kitchen), gently transfer each cookie onto a cooling rack. Allow them to cool completely before moving onto the next exciting phase—the decadent white chocolate dip! This cooling process not only prevents melting mishaps but also helps in developing that perfect chewy texture we all crave.
Step 7: Melting Magic
Now it’s time for an utterly enchanting transformation—melting your chopped white chocolate! Place your white chocolate pieces into a heat-proof bowl or liquid measuring cup along with the optional teaspoon of vegetable or coconut oil and half a teaspoon of espresso powder. The oil is non-negotiable if you want that dreamy smooth consistency when dipping; it thins out the chocolate just enough for an easy coating while adding another layer of flavor that complements our cookies beautifully. You’re going to melt this mix either over a double boiler or in the microwave; both methods work wonders if done correctly.
If you’re opting for the microwave method—my personal favorite because it’s quick and efficient—microwave in 20-second intervals. After each interval, give it a good stir. You’ll notice how quickly it begins transforming from solid chunks into silky liquid gold! Be careful not to overheat it; if you see any signs of thickening or clumping, you’ve gone too far! Once melted and impeccably smooth, you’re ready for dipping those delicious cookies into this luscious concoction.
Step 8: Dipping Delight
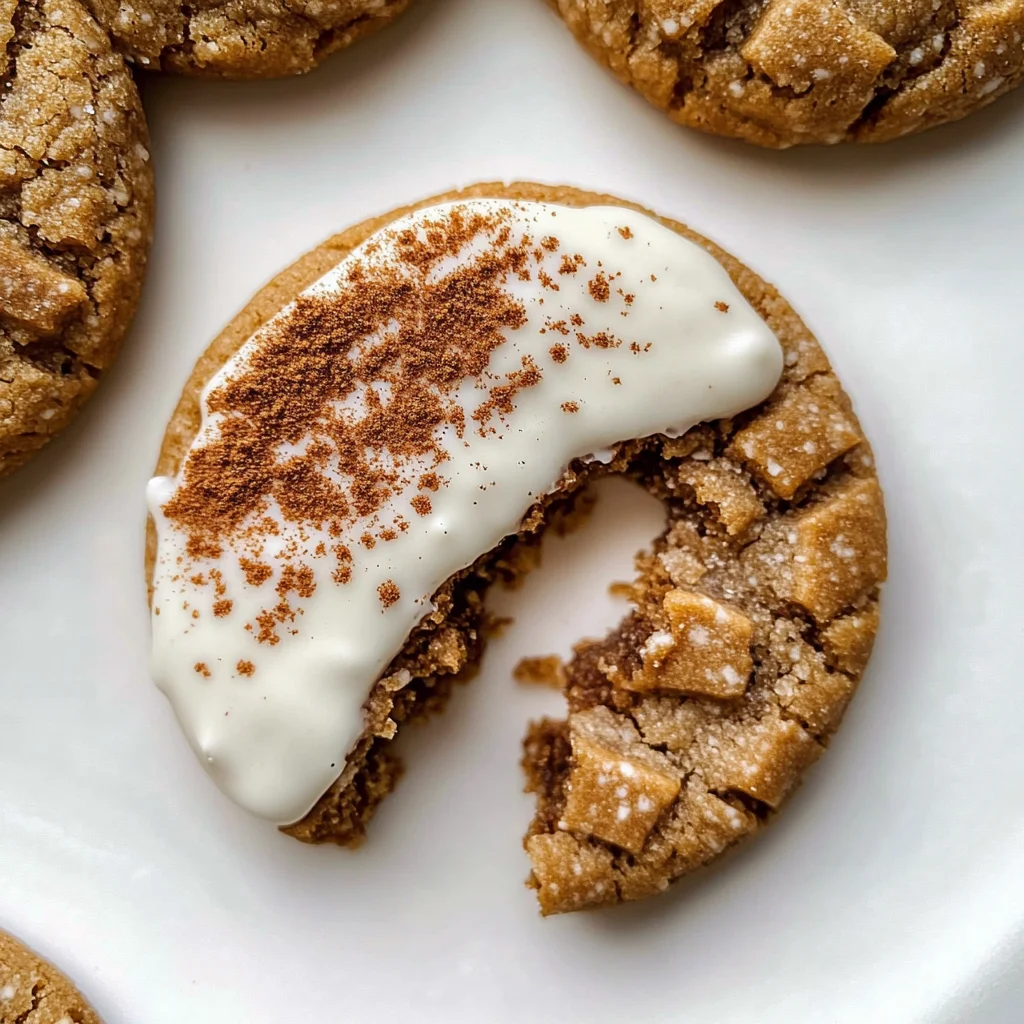
With your cookies cooled and your white chocolate beautifully melted, it’s time for some serious fun! Take each cooled cookie and dip it halfway into the smooth white chocolate mixture. Let any excess drip back into your bowl—it’s tempting to just dunk them entirely (and who can blame you?), but trust me on this one: we want that beautiful contrast between the rich brown cookie and creamy white chocolate. As you place each dipped cookie onto the lined baking sheet or cooling rack, sprinkle a pinch of your cinnamon-nutmeg mix right over the wet chocolate layer while it’s still soft. This little touch elevates these Gingerbread Latte Cookies from delightful treats into something truly extraordinary.
It’s important at this stage not to rush through; take your time enjoying each moment of dipping! You can almost feel how these flavors will harmonize together as they set—you want every cookie coated evenly without any bare spots peeking through. Once you’re finished with all your cookies (which should be around 30), pop the baking sheet into the refrigerator for about 30 minutes until everything has set beautifully. The waiting might be tough—the anticipation builds—but I promise you it will be worth every second once you take that first bite!
Final Touches: Enjoying Your Masterpiece
After those agonizing yet thrilling moments in the fridge have passed and you’ve resisted sneaking bites along the way (I know how hard it can be!), it’s finally time to indulge in your Gingerbread Latte Cookies! These little gems stay fresh covered at room temperature for about three days or can be stored in an airtight container in the refrigerator for up to one week if you somehow manage not to eat them all immediately—they’re simply that irresistible!
Picture yourself savoring one of these cookies with a steaming cup of coffee or tea during cold winter mornings or cozy evenings filled with laughter amongst friends. Each bite will transport you directly into a festive wonderland with its symphony of flavors—from spicy ginger notes dancing on your palate to that comforting warmth reminiscent of holiday gatherings around loved ones.
So go ahead—bake these Gingerbread Latte Cookies today! Share them with friends and family or keep them all for yourself because sometimes, self-care means indulging in something scrumptious made from scratch with love. Happy baking!
Storage and Enjoyment Tips for Your Gingerbread Latte Cookies
Now that your kitchen is filled with the intoxicating aroma of freshly baked Gingerbread Latte Cookies, it’s time to revel in the joy of enjoying them! I can already envision you taking that first delightful bite, a perfect balance of chewy goodness and festive spice melting in your mouth. But what about those cookies that you might not finish right away? Fear not, my dear friend! Let’s talk about how to keep these little gems fresh and flavorful for as long as possible.
Storing Leftover Gingerbread Latte Cookies
To maintain the magic of your Gingerbread Latte Cookies, store them in an airtight container at room temperature. A lovely glass jar with a tight lid or a sturdy plastic container works wonders—just make sure it’s sealed well to keep out any pesky air. These cookies will stay fresh for about three days on your countertop; however, if you find yourself with leftovers after that, you can pop them in the refrigerator where they’ll last up to a week. Now here’s a pro tip: if you want to keep them extra soft, consider placing a slice of bread in the container with the cookies. Yes, really! The cookies absorb moisture from the bread, ensuring that each bite remains delectably chewy. After storage, they still retain their enchanting flavor, though they may lose just a hint of that initial freshness. If you’re looking to enjoy them warm again, simply pop them in the microwave for about 10 seconds—trust me when I say there’s nothing like the experience of biting into a warm cookie again!
Freezing Gingerbread Latte Cookies for Later
If you’re like me and love to plan ahead, freezing your Gingerbread Latte Cookies is an excellent option! To freeze properly, allow your baked cookies to cool completely before arranging them in a single layer on a baking sheet. Place this sheet in the freezer until the cookies are firm (about an hour), then transfer them into a freezer-safe bag or container. They’ll be good for up to three months frozen—perfect for those sudden cookie cravings or unexpected guests! When you’re ready to indulge again, simply take out as many cookies as you desire and let them thaw at room temperature or warm them gently in the oven. The convenience factor here is absolutely paramount; just imagine having these delightful treats ready whenever you need a sweet pick-me-up or cozy moment during chilly evenings!
Gingerbread Latte Cookies

Experience warmth this season with delicious Gingerbread Latte Cookies—chewy, festive delights perfect for sharing! Try making them today!
- Prep Time: 30 minutes
- Cook Time: 13 minutes
- Total Time: 43 minutes
- Yield: Approximately 24 cookies 1x
- Category: Dessert
- Method: Baking
- Cuisine: American
Ingredients
- 2 cups (170g) old-fashioned whole rolled oats
- 1 and 2/3 cups (210g) all-purpose flour
- 2 teaspoons espresso powder
- 1 teaspoon baking soda
- 1/4 teaspoon salt
- 1 teaspoon ground ginger
- 1 teaspoon ground cinnamon
- 1/4 teaspoon ground nutmeg
- 1/8 teaspoon ground cloves
- 3/4 cup (170g) unsalted butter, softened to room temperature
- 1 cup (200g) packed light or dark brown sugar
- 1/4 cup (50g) granulated sugar
- 1 large egg, at room temperature
- 1/4 cup (60ml/75g) unsulphured or dark molasses
- 8 ounces (226g) white chocolate, chopped
- 1 teaspoon vegetable oil or coconut oil (optional)
- 1/2 teaspoon espresso powder
- Pinch each of cinnamon and nutmeg for sprinkling on top
Instructions
- Preheat your oven to 350°F (177°C) and line two baking sheets with parchment paper.
- Pulse the old-fashioned oats in a food processor until they reach a coarse flour consistency.
- In a bowl, whisk together the pulsed oats, all-purpose flour, espresso powder, baking soda, salt, and spices.
- Cream softened butter with brown and granulated sugars until light and fluffy; add egg and molasses, mixing until combined.
- Gradually incorporate dry ingredients into the wet mixture to form a sticky dough; chill for 30–45 minutes.
- Scoop dough onto prepared baking sheets, spacing them well apart. Bake for 12–13 minutes until edges are lightly browned.
- Allow cooling on sheets for 10 minutes before transferring to racks to cool completely.
- Melt white chocolate and dip each cookie halfway; sprinkle with cinnamon and nutmeg while still warm. Refrigerate until set.
Nutrition
- Serving Size: 1 cookie (35g)
- Calories: 160
- Sugar: 9g
- Sodium: 70mg
- Fat: 7g
- Saturated Fat: 4g
- Unsaturated Fat: 2g
- Trans Fat: 0g
- Carbohydrates: 22g
- Fiber: 1g
- Protein: 2g
- Cholesterol: 15mg