Sushi Bake
There’s something utterly enchanting about food that brings people together, isn’t there? It’s more than just nourishment; it’s a tapestry woven from memories, laughter, and the warmth of shared moments. As I sit down to write about this delightful Sushi Bake, I can’t help but feel a wave of nostalgia wash over me. Imagine gathering around a table with your loved ones, the aroma of baked sushi wafting through the air, drawing everyone in like a cozy hug. This dish transcends the ordinary—it’s a fusion of flavors that transforms simple ingredients into something extraordinary. You might think it’s just a casserole, but trust me when I say it’s an experience you’ll want to savor again and again.
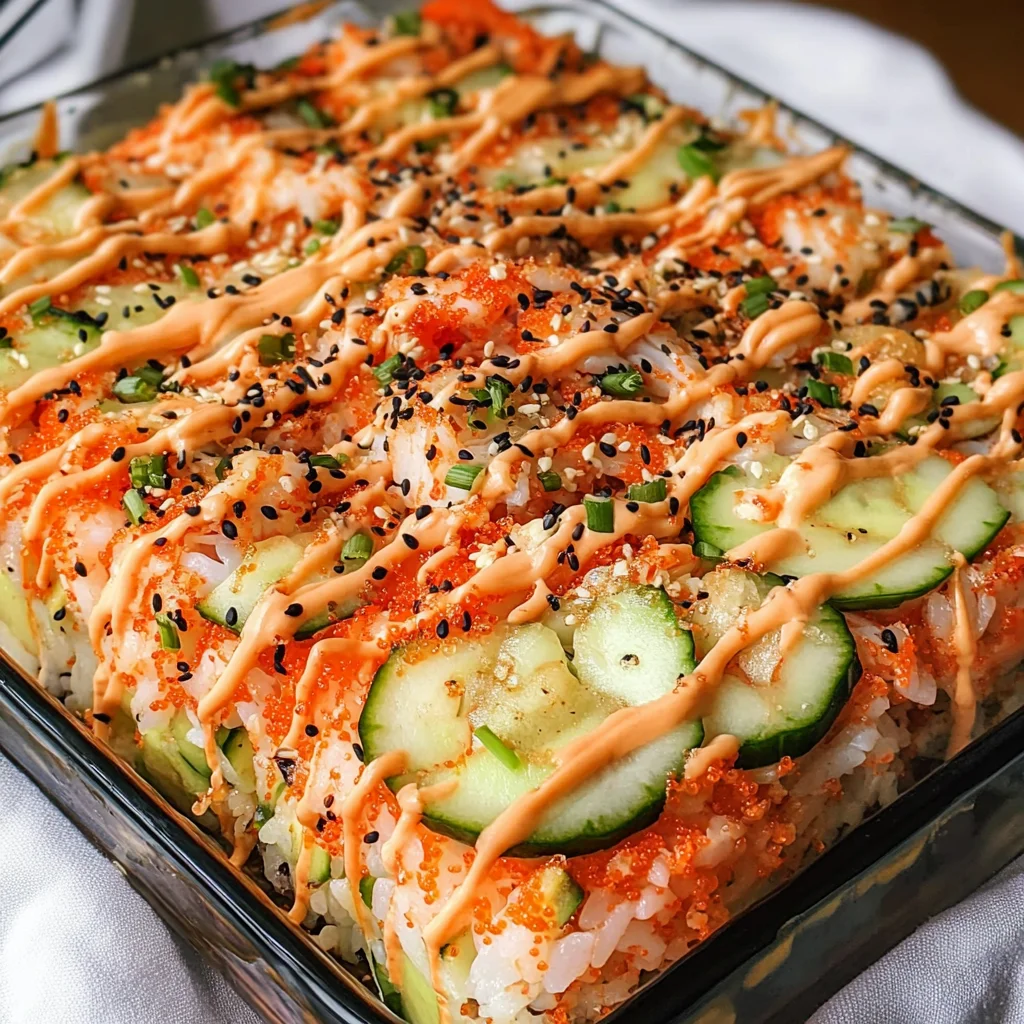
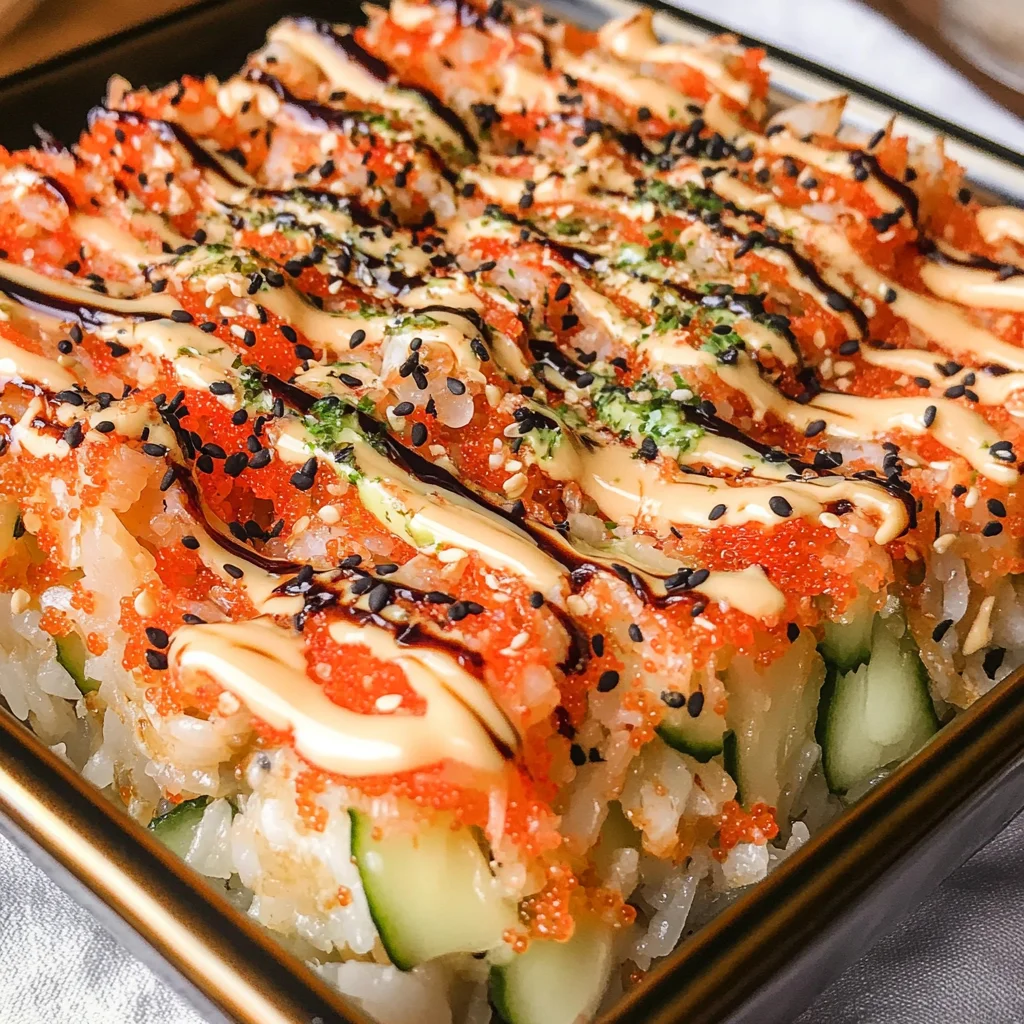
Sushi has long held a special place in my heart; its delicate balance of flavors and textures is simply magical. But let’s be real—sometimes we crave the comfort of home-cooked meals that also remind us of our favorite sushi rolls. That’s where the concept of sushi bake comes in, blending tradition with innovation in a way that feels both familiar and exciting. The layers of seasoned sushi rice, fluffy imitation crab meat, creamy spicy mayo, and a drizzle of rich unagi sauce create an irresistible symphony that dances on your palate. Whether you’re hosting a potluck or looking for an easy weeknight dinner idea, this sushi bake is your answer.
Sushi Bake: A Cozy Casserole Delight
I’m genuinely thrilled to share this recipe with you because it melds creativity with comfort in such a satisfying way. Picture this: You’re layering fluffy sushi rice infused with tangy vinegar and sweetness, topped with luscious imitation crab and creamy sauces that bring everything together in perfect harmony. It’s like taking all the elements you adore about sushi rolls and giving them a warm embrace! Plus, it’s incredibly easy to prepare—perfect for those busy evenings when you still want something special on the table.
Ingredients:
Embarking on this culinary journey starts with gathering some key ingredients that will transform your kitchen into a sushi haven. Each component plays its own vital role in crafting this delicious dish.
- 2 cups sushi rice (medium or short grain, about 4 cups cooked) – This rice is essential for achieving that signature sticky texture we love in sushi dishes. It has just the right amount of starch to hold everything together while providing a pleasantly chewy bite. When selecting your rice, look for high-quality brands; they often yield better results in flavor and texture. Rinse it well under cold water before cooking to remove excess starch—this step is crucial for achieving perfectly fluffy rice!
- ¼ cup rice vinegar (regular, NOT seasoned rice vinegar) – Rice vinegar will add that lovely tanginess we associate with traditional sushi rolls. Regular rice vinegar has a clean flavor profile that balances out the richness of other ingredients without overwhelming them. Be careful not to use seasoned rice vinegar here; its added sugars and salts can throw off the delicate balance we’re aiming for.
- 1½ tablespoons granulated sugar – This ingredient does more than sweeten; it helps to enhance the overall flavors while adding depth to each bite. Sugar works hand-in-hand with vinegar to create that delightful sweet-tart balance found in authentic sushi rice.
- 1 teaspoon salt – Salt elevates flavors—it’s non-negotiable! A pinch helps season the rice beautifully and enhances all the other components as well.
- Toasted sesame oil (just a small amount for greasing) – While optional, a hint of toasted sesame oil brings an aroma that’s simply intoxicating! It adds another layer of flavor without overpowering other ingredients. Use it sparingly just to grease your baking dish; trust me on this—it makes all the difference.
- 1 pound imitation crab meat – This is where things get exciting! Imitation crab gives us that seafood essence without needing fresh fish—perfect if you’re looking for something accessible yet satisfying. Its sweet taste and flaky texture mimic traditional crab meat wonderfully while being budget-friendly.
- ½ cup Kewpie mayo – Oh my goodness—Kewpie mayo is liquid gold! With its rich umami flavor and creaminess, it takes this dish over the top. If you’ve never tried it before, let today be your day—I promise you won’t look back!
- ¼ cup Kewpie mayo (additional) – Yes, we’re using more because one layer just isn’t enough! This extra dollop will give us that luscious creaminess we crave throughout our bake.
- 1 tablespoon Sriracha (or more or less to your preference) – Spice lovers rejoice! Sriracha injects just the right amount of heat without dominating other flavors—a little goes a long way here! Feel free to adjust based on how spicy you like things.
- 2 tablespoons sake – While sake typically adds depth in traditional Japanese dishes, here we can substitute it easily with water if needed since we’re focusing on creating something comforting rather than adhering strictly to tradition.
- 2 tablespoons soy sauce (light sodium) – Soy sauce brings umami richness—a staple in many Asian cuisines! Opting for light sodium helps keep things balanced without overwhelming saltiness.
- 2 tablespoons granulated sugar (again) – Sweetness shines through once more! This time it’s part of our unagi sauce mix—balancing salty soy sauce beautifully.
- 1 tablespoon mirin – Similar to sake but sweeter! Mirin contributes complexity and glossiness to our unagi sauce blend; if you can’t find mirin easily, feel free to substitute with additional sugar mixed into regular soy sauce.
- English cucumber (sliced) – Freshness alert! The crispness of cucumber provides an excellent contrast against our warm bake—it adds brightness both visually and texturally!
- Avocado (sliced) – Avocado makes everything better—its creamy texture pairs perfectly with all those robust flavors while adding nutritional value too!
- Furikake – A Japanese seasoning blend typically made up of seaweed flakes and sesame seeds—it adds bursts of flavor while further enhancing presentation! It’s non-negotiable if you want that authentic touch!
- Seaweed snack – These handy little sheets serve as beautiful wrapping when serving individual portions or can be crumbled over top for added crunch—the choice is yours!
Equipment You’ll Need:
Having the right tools makes cooking not only smoother but also infinitely more enjoyable! Think of these pieces as essential partners in our culinary adventure toward creating something truly wonderful together.
- Rice cooker or pot – A reliable rice cooker takes all guesswork out when cooking sushi rice; however, if using a regular pot instead, ensure you’re attentive so it doesn’t stick or burn at any point during cooking!
- Baking dish (9×13 inch recommended) – Your trusty baking dish holds everything together beautifully as it bakes—the size matters here because we want even layers throughout!
- Mixing bowls – A few mixing bowls are essential for combining ingredients separately before layering them into your casserole dish; this keeps things organized as well as ensuring even mixing!
- Spatula & spoon – These utensils are must-haves for gently folding ingredients together without smashing anything up too much—you want those textures intact!
Preparing the Sushi Bake
Step 1: Rinse and Prepare Your Rice
Begin by rinsing your sushi rice under cold water until the water runs clear—a step often overlooked but absolutely paramount for achieving fluffy grains later on! This process removes excess starch which leads directly into sticky clumps instead of distinct grains once cooked. If possible use short-grain varieties—they tend to yield better results due their higher starch content compared against medium grains!
Once rinsed thoroughly transfer your washed rice into either a pot or rice cooker along with appropriate amounts water per package instructions (usually about 1:1 ratio). Letting it soak briefly between 30 minutes up until an hour helps enhance final texture even further if time permits…so don’t rush this step! After soaking drain again then proceed by cooking until tender yet slightly firm—it should have slight chewiness left after done cooking through completely!
Step 2: Seasoning Bliss
While waiting patiently for those lovely grains get fully cooked through combine your measured quantities prepared earlier: mix together rice vinegar along with sugar & salt inside small bowl until dissolved completely—this creates flavorful dressing which elevates overall taste immensely once folded into freshly made batches following completion cooking cycle ahead…
Once done properly fluff warm cooked batch gently using fork ensuring no clumps remain stuck underneath surface layers remaining intact throughout entire mixture below… Pour dressing evenly across surface allowing gentle folds combine flavors harmoniously together before letting set aside cool slightly while working rest components ahead next steps required assembling final masterpiece later on down road…
Step 3: Create Your Creamy Sauce
Now onto one of my favorite parts—the creamy sauce! In another mixing bowl take both Kewpie mayo additions followed by Sriracha whisked together harmonizing flavors perfectly till smooth consistency achieved throughout entire mixture resulting bubbly delight awaits ahead… Adjust spiciness level depending personal preference making certain balance maintained throughout dish itself later built upon layered creations finished off at end too…
Set aside once combined effectively making sure covered tightly until needed elsewhere within assembly process coming soon next stages required focus upon assembling final components altogether towards ultimate goal achieving beautiful masterpiece ready devour eagerly awaiting family friends alike…
Step 4: Assemble Your Layers
With prepped essentials gathered now begins fun part assembling layers inside chosen baking dish appropriately sized earlier mentioned above—start off first by spreading half portion seasoned prepared cooled down perfectly cooked fluffy sushi grain base evenly across bottom layer filling entire spaces available underneath surface area present entirely beneath sightline view visible above ground level below achieving nice even spread distributed generously across whole region visible evenly everywhere beneath surface area present below sightline view target achieved successfully overall goal reached so far moving forward thereafter progressing smoothly ahead next stage planned out carefully methodically planned arriving opening next momentous occasion approaching close finish line finally arriving soon nearing completion shortly thereafter finally reaching coveted destination end result ultimately desired outcome forthcoming arrives imminently very shortly thereafter indeed exciting times await ahead eagerly anticipated moment awaiting realization expected soon enough coming closer already fast approaching timeline quickly speeding up rapidly now thanks focusing attention detail required reach ultimate goal successfully achieved culminating effort put forth thus far…
Stay tuned as we continue building layers of flavor-packed goodness in upcoming steps—it only gets better from here!
Step 5: Perfecting the Sushi Rice
Ah, the heart and soul of your Sushi Bake lies in the sushi rice. This isn’t just regular rice; it’s a delicate medium that binds everything together, creating that warm hug of texture and flavor we all crave. Begin by rinsing your 2 cups of sushi rice under cold water until the water runs clear. This step is absolutely paramount because it removes excess starch, ensuring your rice doesn’t turn into a gluey disaster but rather achieves that perfect al dente bite. Once rinsed, soak the rice in fresh water for about 30 minutes; this allows each grain to absorb moisture, which leads to even cooking. Trust me on this one—the extra care transforms the final dish!
After soaking, drain the rice and transfer it into a saucepan with 2½ cups of water (a ratio I’ve found works beautifully). Bring it to a gentle boil over medium heat, then reduce it to low, cover tightly with a lid, and let it simmer for about 20 minutes. It’s crucial not to lift the lid during this time because steam is your best friend here—it cooks the rice evenly and infuses it with a delightful stickiness that’s essential for your sushi bake. After 20 minutes, turn off the heat and let it rest for another 10 minutes without lifting that lid; patience is key here! The resting period allows the grains to settle and finish cooking through residual heat, enhancing that tender texture you’re aiming for.
Step 6: Seasoning Your Rice
Now comes the fun part—seasoning! While your rice rests, combine ¼ cup of rice vinegar, 1½ tablespoons of sugar, and 1 teaspoon of salt in a small bowl. Give this mixture a gentle whisk until everything dissolves into a harmonious blend. This seasoning process is what elevates your sushi bake from merely good to utterly intoxicating! The vinegar provides a tangy brightness that cuts through richness later on while sugar adds balance and enhances the overall flavor profile.
Once your rice has rested and cooled slightly (but is still warm), transfer it into a large mixing bowl. Slowly drizzle in your vinegar mixture over the warm rice while using a wooden spatula or paddle to gently fold it in—this technique is called ‘cutting’ and prevents mushiness by aerating the grains. You want to achieve that beautiful shiny sheen on each grain without smashing them; think gentle caresses rather than aggressive mixing! Allow it to cool down further while you prepare your other ingredients—the flavors meld beautifully as it cools.
Step 7: Crafting the Creamy Filling
Now let’s create our delectable filling! In another large bowl, combine 1 pound of imitation crab meat (which offers an incredible texture without any fishy taste), along with ½ cup of Kewpie mayo and an additional ¼ cup for good measure—yes, that’s right! Kewpie mayo brings an enchanting creaminess you won’t find in regular mayo; its unique umami flavor takes things up several notches. Add in Sriracha according to your taste; I typically recommend starting with one tablespoon if you’re unsure about heat levels—it can always be added more later if you want that delicious kick!
Mix everything together gently but thoroughly until every strand of crab is coated in that luscious creamy goodness. This step not only enhances flavor but also ensures that every bite is decadent—trust me when I say there’s nothing worse than dry filling in a dish meant to bring comfort! If you’re feeling adventurous (and I encourage you to be!), consider adding finely chopped green onions or sesame seeds for extra crunch and flavor depth.
Step 8: Layering Your Sushi Bake
Now we arrive at one of my favorite parts—the layering! Preheat your oven to 375°F (190°C) while you get ready for assembly; this ensures everything bakes evenly once we pop it in there. Grease an oven-safe baking dish with a touch of toasted sesame oil—a little goes a long way here—and spread half of your seasoned sushi rice evenly across the bottom. Use wet hands or a spatula so you can pack it down gently without squishing those precious grains too much.
Once you’ve got your first layer down, it’s time for that creamy crab filling! Spread it generously over the first layer of rice, making sure every corner is filled with that rich blend—we want no lonely bites here! Then sprinkle with furikake—a Japanese seasoning mix made from seaweed and sesame—this will add both flavor and an eye-catching garnish as well as some crunch when baked. Finally, top this masterpiece off with another layer of sushi rice remaining from earlier; make sure it’s even so each serving looks just as scrumptious as the last after baking.
Conclusion:
As we wrap up our journey through this delightful sushi bake recipe, I hope you feel inspired and excited to create something truly special in your kitchen. The layers of perfectly sticky sushi rice mingling with creamy imitation crab and that kick of spicy mayo create a symphony of flavors that dance across your taste buds. It’s these harmonious contrasts—warmth against cool freshness from cucumber and avocado—that elevate this dish beyond the ordinary into something profoundly satisfying. Every bite brings comfort reminiscent of cozy nights spent with loved ones around the table.
This recipe really is a must-try for so many reasons—not just for its incredible taste but for the joy that comes from preparing it together with family or friends! Imagine gathering everyone around as you pull this bubbling masterpiece from the oven, filling your home with an aroma that’s simply irresistible. It’s perfect for casual dinners or festive gatherings alike; you’ll find yourself reaching for seconds (and maybe even thirds!) because it’s just that good.
When serving your sushi bake, think about pairing it with some crunchy seaweed snacks for texture contrast or perhaps some pickled ginger on the side to add a tangy zing. For an afternoon pick-me-up or even as part of an elegant dinner spread, try serving slices alongside crisp salads drizzled with sesame dressing—it’s such a beautiful combination! And let’s not forget about drinks; refreshing iced green tea can complement those savory notes beautifully!
Feeling adventurous? This recipe is wonderfully adaptable! You could swap out imitation crab for other seafood alternatives like shrimp or even roasted vegetables if you’re looking to switch things up—each variation brings its own unique flair! Perhaps add mango chunks for sweetness or drizzle some extra unagi sauce right before serving—it’ll take your dish to new heights! I wholeheartedly invite you to try creating your version of this sushi bake magic and share your experience—let’s connect over our love for food!
Sushi Bake
Sushi Bake is a delightful fusion dish that brings together the comforting elements of baked casseroles with the beloved flavors of sushi. Imagine layers of perfectly seasoned sushi rice, creamy imitation crab, and a spicy mayo blend that creates a warm and inviting meal perfect for gatherings or weeknight dinners. This easy-to-make recipe captures all the essential elements of sushi in a cozy casserole form, inviting you to savor each bite surrounded by friends and family. With just a few simple ingredients and straightforward steps, you can impress everyone with this unique culinary experience.
- Prep Time: 20 minutes
- Cook Time: 20 minutes
- Total Time: 40 minutes
- Yield: Serves 8
- Category: Main
- Method: Baking
- Cuisine: Fusion
Ingredients
- 2 cups sushi rice
- ¼ cup rice vinegar
- 1½ tablespoons granulated sugar
- 1 teaspoon salt
- 1 pound imitation crab meat
- ½ cup Kewpie mayo (plus additional)
- 1 tablespoon Sriracha
- 2 tablespoons soy sauce (light sodium)
- English cucumber (sliced)
- Avocado (sliced)
Instructions
- Rinse sushi rice under cold water until clear, then soak for 30 minutes.
- Cook the rice according to package instructions; let it rest after cooking.
- Combine rice vinegar, sugar, and salt in a bowl until dissolved; mix with warm rice gently.
- In another bowl, mix imitation crab meat, Kewpie mayo, and Sriracha until well combined.
- Preheat oven to 375°F (190°C). Grease a baking dish and layer half of the seasoned rice at the bottom.
- Spread crab mixture over the rice, sprinkle with furikake if desired, and top with remaining rice.
- Bake for 15-20 minutes or until heated through and slightly golden on top.
Nutrition
- Serving Size: 1 slice (150g)
- Calories: 320
- Sugar: 5g
- Sodium: 450mg
- Fat: 12g
- Saturated Fat: 2g
- Unsaturated Fat: 8g
- Trans Fat: 0g
- Carbohydrates: 46g
- Fiber: 2g
- Protein: 10g
- Cholesterol: 15mg