Lavender Tea Bread
There’s something utterly enchanting about baking. It’s more than just mixing flour and sugar; it’s a dance of flavors, a celebration of experiences, and a warm hug for the soul. When I first stumbled upon this Lavender Tea Bread recipe, I felt an immediate connection to its delicate charm. The aroma of dried lavender wafting through the kitchen as it bakes is akin to wandering through a sun-drenched garden, where every breath is infused with tranquility and sweetness. This recipe isn’t merely about nourishment; it’s an invitation to pause, savor, and indulge in life’s simple pleasures. Trust me when I say that each bite is like taking a moment to breathe deeply in nature’s embrace—a perfect marriage between tradition and innovation.
What I adore most about this Lavender Tea Bread is its versatility. It’s perfect for gatherings—be it a quaint tea party or an elegant garden soirée. The light, fragrant loaf pairs beautifully with afternoon tea or can be enjoyed on its own as a delightful snack. The subtle floral notes are not overwhelming but rather offer a gentle hint of sophistication that will leave your guests intrigued and enchanted. As you bake this bread, you’ll find that it becomes more than just a recipe; it transforms into a cherished ritual—a way to connect with loved ones over something truly extraordinary.
Lavender Tea Bread: A Symphony of Flavors
Let me take you on this delightful journey where we’ll create the most exquisite Lavender Tea Bread together. With each ingredient we gather, we are crafting not just food but memories that linger long after the last crumb has been devoured.
Ingredients:
As we embark on this culinary adventure, let’s gather our ingredients—each one plays a pivotal role in creating our lovely Lavender Tea Bread.
- 3/4 cup milk – Milk is the backbone of many baked goods, providing moisture and richness that make our bread tender and inviting. For this recipe, whole milk is ideal because its higher fat content contributes to the luscious texture we’re aiming for. If you find yourself without whole milk, don’t fret! You can substitute with 2% milk or even a plant-based alternative like almond or oat milk; just be sure they are unsweetened so they don’t interfere with the flavor balance.
- 2 tablespoons dried culinary lavender – Ah, lavender! This fragrant herb is what sets our bread apart from conventional recipes; it infuses an aromatic essence that’s simply captivating. When selecting lavender, ensure you’re using culinary-grade varieties specifically meant for cooking—this ensures that you’re safe from any chemicals used in ornamental types. When incorporated into our batter, lavender adds an ethereal floral note that dances delightfully on your palate.
- 6 tablespoons butter (softened) – Butter is truly one of those magical ingredients that brings everything together with its rich flavor and creamy texture. Softened butter blends seamlessly into our batter, creating that airy quality we adore in baked goods. Make sure your butter is at room temperature—this step is crucial! If it’s too cold, it won’t cream properly with the sugar; if melted, your batter could turn greasy instead of light and fluffy.
- 1 cup granulated sugar – Sugar isn’t just for sweetness; it also plays an essential role in achieving that tender crumb we’re after while adding depth to flavor. Granulated sugar dissolves easily into our batter during the creaming process, which helps incorporate air into the mixture—a non-negotiable step for achieving lift as it bakes! Feel free to experiment with alternatives like coconut sugar for a slightly different taste profile if you’re feeling adventurous.
- 2 large eggs – Eggs are another key player here—they provide structure and moisture while enriching our bread’s flavor profile. They help bind all the ingredients together beautifully while also contributing to that lovely golden color as they bake. Always choose large eggs as they have the optimal weight for baking; when in doubt about freshness, remember: sinkers are fresher!
- 1/2 teaspoon vanilla extract – Vanilla extract offers warmth and depth to our flavor palette—it’s like adding a soft blanket over everything else. It harmonizes perfectly with both the lavender and sugary notes in this bread! When choosing vanilla extract, look for pure extracts rather than artificial ones; trust me on this—you’ll taste the difference!
- 2 cups all-purpose flour – Flour provides structure to our bread—it’s what holds everything together! Choosing high-quality all-purpose flour will yield the best results here since it has the right protein content for baking without being overly dense. If you need gluten-free options, feel free to swap in a gluten-free flour blend designed for baking—but keep an eye on texture adjustments!
- 1 1/2 teaspoons baking powder – This little powerhouse ingredient ensures our bread rises perfectly during baking! Baking powder works by releasing carbon dioxide when combined with wet ingredients—creating those delightful air pockets that give us an airy loaf instead of a brick-like texture! Ensure your baking powder is fresh—old leavening agents can lead to disappointing results.
- 1/2 teaspoon salt – Salt may seem simple but don’t underestimate its importance—it enhances flavors and balances sweetness beautifully! A pinch of salt rounds out all those sweet notes while helping amplify other flavors in your Lavender Tea Bread—it’s absolutely paramount!
- 1/3 cup powdered sugar – We’ll use powdered sugar later in our glaze which adds that beautiful finishing touch! Its fine texture makes for a smooth glaze without grittiness—perfectly coating each loaf slice like liquid gold.
- 2–3 teaspoons milk – Just enough milk will help achieve the right consistency for our glaze; we want it smooth yet thick enough to hold onto our bread without running off completely!
- 1/4 teaspoon vanilla extract – Just like before, this little splash adds depth and warmth to our glaze—it makes every bite feel special!
Equipment You’ll Need:
Now that we’ve gathered all these wonderful ingredients together let’s chat about some essential tools you’ll need to make your Lavender Tea Bread come alive! Having these trusty companions by your side makes everything smoother—and who doesn’t love a little extra joy while cooking?
- 9×5-inch loaf pan – This classic size is perfect for creating beautifully shaped loaves that bake evenly throughout. If you don’t have one handy, feel free to use two smaller pans instead—as long as they’re oven-safe! Greasing and flouring the pan before pouring in your batter ensures effortless removal once baked—a vital step no one wants to skip!
- Small saucepan – A cozy little saucepan is where we’ll infuse our milk with lavender. This gentle heat allows those floral notes to bloom fully before melding them into our batter—a crucial technique for maximum flavor!
- Large mixing bowl – Choose one that’s sturdy enough for vigorous mixing yet spacious enough to accommodate all those glorious ingredients as they come together harmoniously into one cohesive batter.
- Whisk – A whisk helps us combine dry ingredients effortlessly while also aerating mixtures like eggs or creams—ensuring everything comes together smoothly without lumps!
- Rubber spatula or wooden spoon – These trusty utensils are great allies when folding ingredients gently together without deflating air pockets—we want every bit of fluffiness retained during mixing!
Preparing the Lavender Tea Bread
Step 1: Prepping Your Oven & Pan
First things first: preheat your oven to 325°F (that’s about 163°C) while you prepare your loaf pan by greasing and lightly dusting it with flour—it’s such an important detail! By doing this now rather than later allows us peace of mind knowing everything will slide out effortlessly once baked—no one wants their hard work stuck inside stubbornly clinging pan walls! This meticulous preparation sets you up for success right from the start.
Step 2: Infusing Flavor
Next up, grab your small saucepan because we’re about to create some magic! Pour in your 3/4 cup of milk along with those fragrant 2 tablespoons of dried culinary lavender. Heat them gently over medium-low heat until just simmering—don’t rush this step; allow time for those divine aromas to permeate through every nook of your kitchen! Once simmering begins (with tiny bubbles forming around edges), remove from heat immediately—you want just enough warmth without boiling away any precious liquid gold! Let it cool slightly so flavors meld beautifully before incorporating into batter later.
Step 3: Creaming Butter & Sugar
In your large bowl now comes one of my favorite parts—the creamery experience! Add in your softened butter (6 tablespoons) along with granulated sugar (1 cup)—this process known as “creaming” introduces air into both components which creates lightness throughout baked goods like ours here today! Using either an electric mixer or good old-fashioned elbow grease (a wooden spoon), beat until smooth and fluffy—approximately 3–5 minutes should do nicely! By keeping things airy at this stage means fewer dense textures down-the-line—we’re aiming for heavenly softness!
Step 4: Incorporating Eggs & Vanilla
Once creamed well together comes time adding those two large eggs along with half teaspoon vanilla extract—a harmony waiting patiently amongst sweetened butter mix awaiting their chance at glory too! Beat thoroughly until fully incorporated again—we’re looking at another minute or so here—but don’t worry if there are slight lumps remaining from egg whites—that’s completely normal at this point—the magic happens next when we fold everything else in shortly after!
Stay tuned as we continue unfolding this delicious journey towards making our Lavender Tea Bread come alive…
The Sweet Symphony of Lavender Tea Bread
Ah! Now we’re diving into the heart of this delightful Lavender Tea Bread, a recipe that has been a cherished part of my kitchen repertoire for years. Each step is not just a task; it’s a moment to savor, to infuse your space with the intoxicating aroma of lavender, and to create something truly extraordinary that will warm your heart and delight your senses. So let’s roll up our sleeves and continue crafting this fragrant loaf together!
Step 5: The Art of Combining Ingredients
Now comes one of the most crucial parts of baking—combining your dry ingredients with the butter mixture. Grab that separate bowl where you whisked together the flour, baking powder, and salt. This isn’t just a simple mix; it’s about creating a harmonious balance in your batter. The baking powder is what will help your bread rise, giving it that light and airy texture we all crave. When adding these dry ingredients to the butter-sugar-egg mixture, do so alternately with the lavender-infused milk. Start by adding about a third of the flour mixture, followed by half of the lavender milk. Stir gently until just combined; you want to see some flour still visible before adding more liquid. Trust me on this—overmixing is a common pitfall that can lead to dense bread instead of the soft, fluffy interior you’re dreaming about. Pause, take a breath, and feel free to channel all that love you have for baking into these gentle folding motions.
Why do we alternate? This method allows for better incorporation without activating too much gluten too soon, which can toughen your bread. It’s truly an art form—think about it as coaxing your ingredients to come together rather than forcing them. Keep an eye on that batter; it should be thick but pourable, with no large pockets of flour remaining.
Step 6: Pouring Your Heart Into the Batter
With everything mixed just right, it’s time for the exciting part—pouring that beautiful batter into your prepared loaf pan! Make sure your pan has been greased and floured properly; this ensures that when it’s time for unveiling your masterpiece, it slides out as easily as can be without leaving any crumbs behind. As you transfer the batter from bowl to pan, use a spatula to smooth out the top. This may seem like an insignificant step, but having an even surface means it will bake evenly and provide that picture-perfect slice later on.
As you observe your batter fill up the pan, take a moment to appreciate its creamy consistency flecked with tiny specks of lavender—this visual cue is not only pleasing but also speaks volumes about what awaits you once it’s baked. You’ll want to fill the pan about two-thirds full; this gives enough room for rising without overflowing during baking. Now comes the waiting game—the oven should already be preheated at 325°F (or 160°C), which is absolutely paramount for achieving that golden crust while keeping every bite moist within.
Step 7: Baking Your Perfect Lavender Tea Bread
Once you’ve poured your batter into the prepared loaf pan and smoothed out its surface lovingly, it’s time to slide it into the oven! Baking typically takes about 45-50 minutes, but I encourage you not to set a timer and walk away completely—stay close! At around 40 minutes in, start checking on it regularly; every oven behaves differently based on size and model. Look for visual cues: does it have a lovely golden-brown color? Is there a light spring when you press down gently on top?
For testing doneness without cutting into your loaf prematurely (which would rob you of those gorgeous slices later!), insert a toothpick or skewer in the center; if it comes out clean or with just a few moist crumbs clinging onto it, then rejoice—it’s done! If there’s wet batter attached, return it to bake longer but check every few minutes until done. Remember that residual heat will continue cooking even after removing from the oven—a little patience here pays off beautifully!
Step 8: Glazing – The Final Flourish
Now that you’ve pulled this fragrant treasure from its oven sanctuary, resist the urge to dig in immediately! Letting it cool slightly in its pan for about 20 minutes allows those flavors to settle beautifully and keeps its structure intact as you transfer it onto a wire rack thereafter—this cooling phase is utterly essential because abrupt temperature changes can cause cracks or crumbles in our lovingly crafted loaf.
As your bread cools down, let’s whip up that luscious glaze—the finishing touch that makes all the difference! In a small bowl, combine powdered sugar with milk (starting with two teaspoons) and vanilla extract until smooth; adjust consistency as needed by adding more milk if necessary—it should be pourable yet thick enough to cling beautifully when drizzled over your bread’s surface like liquid gold. Once ready and while still warm (but not hot), pour or spread this glaze generously over your Lavender Tea Bread; watch how it seeps into every crevice delightfully while creating an enticing sheen atop.
Letting this glaze set adds another layer of sweetness without overwhelming—you want each bite to be balanced against that floral essence we worked so hard to bring forth throughout our baking journey together.
Enjoying Your Lavender Tea Bread
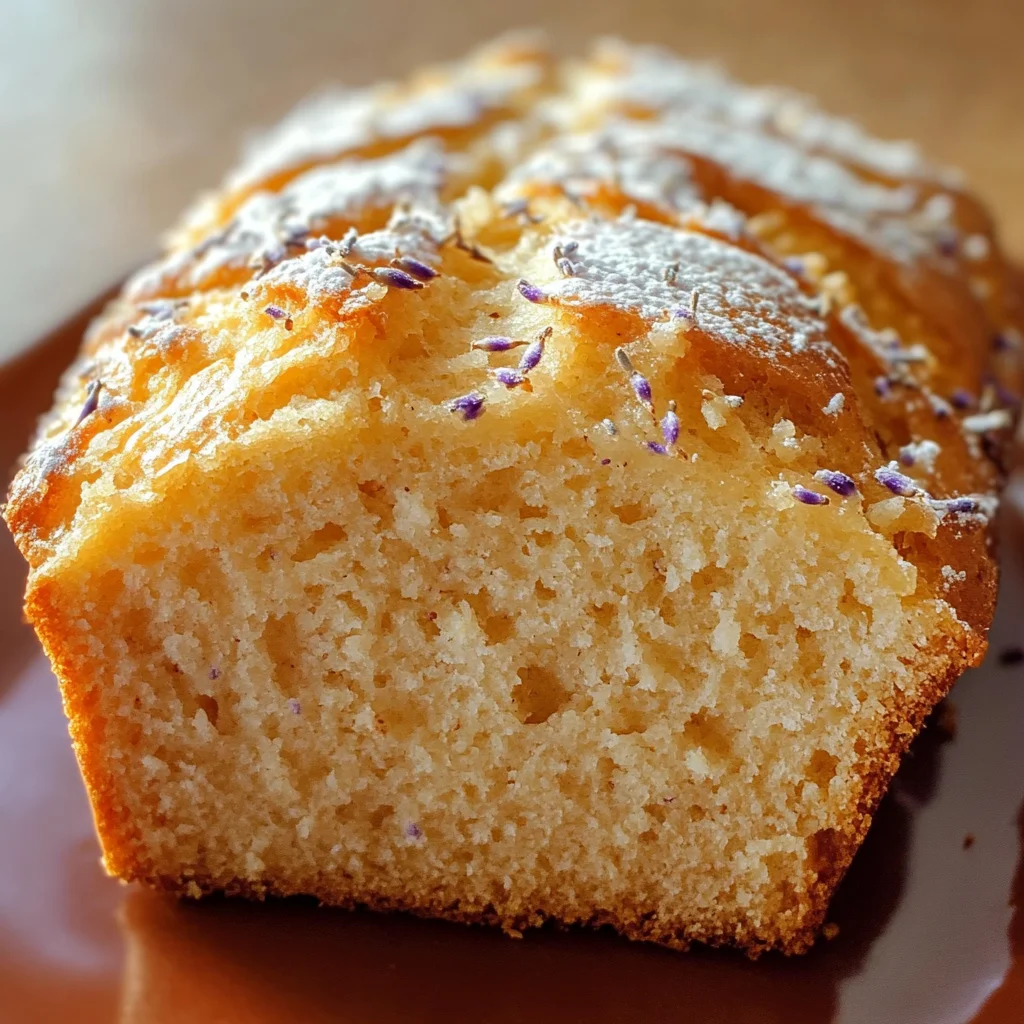
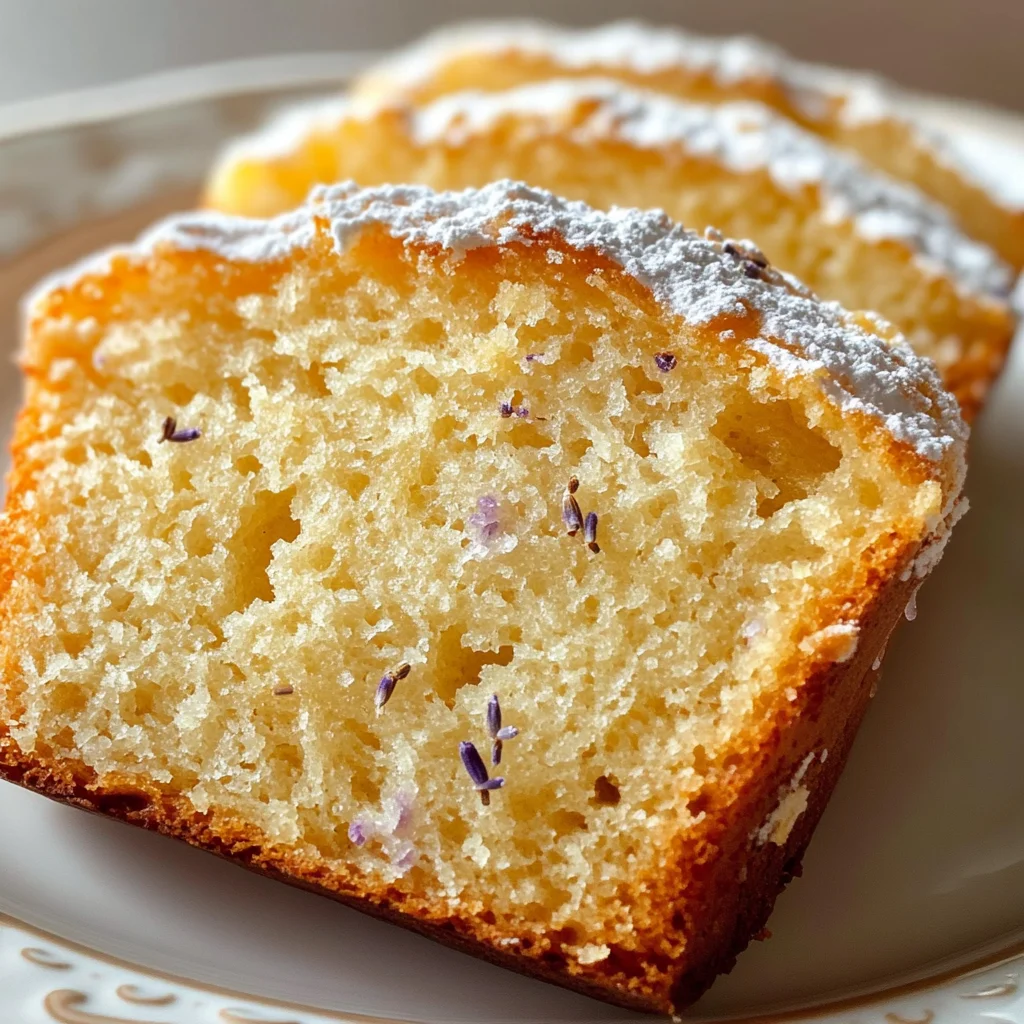
Now comes perhaps my favorite part—slicing into this beauty once it’s cooled completely! As you cut through its tender crumb, notice how each slice reveals those lovely lavender specks amidst its soft texture—a true testament to all those careful steps we took together! Whether served at afternoon tea or enjoyed solo with coffee during quiet moments at home curled up with a book (my personal favorite), I promise you will find joy in every bite.
This Lavender Tea Bread isn’t just food; it’s an experience—a sweet reminder of life’s simple pleasures and how we can create something magical in our own kitchens. So grab some friends or family members—or enjoy it all by yourself—and let those fragrant notes transport everyone back to lazy garden afternoons filled with laughter and warmth.
I hope you’ll cherish this recipe as much as I do—happy baking!
Storage and Enjoyment Tips for Your Lavender Tea Bread
Now that your Lavender Tea Bread is freshly baked and beautifully golden, it’s time to dive into enjoying every bite! This loaf not only fills your kitchen with an utterly intoxicating aroma but also serves as a delightful centerpiece for any gathering. Whether you’re serving it at a cozy tea party or sharing it with friends on a sunny afternoon, you’ll want to savor its unique flavors. But what happens when there are leftovers? Don’t worry; I’ve got you covered on how to keep this lovely loaf fresh for as long as possible.
Storing Leftover Lavender Tea Bread
To keep your Lavender Tea Bread at its best, I recommend wrapping it tightly in plastic wrap or placing it in an airtight container. This is crucial because it locks in the moisture, ensuring that each slice remains soft and tender. Store your bread in a cool, dry place for up to four days; however, I can promise you that its lovely lavender notes will be most pronounced in the first couple of days after baking. One of my favorite pro tips is to place a slice of bread inside the container; this little trick helps maintain its moisture longer! After a day or so, the flavors meld and deepen, creating an even more comforting experience with each bite. If you find yourself enjoying more than one slice at a time (because who could resist?), simply warm it slightly in the microwave for about 10 seconds before indulging.
Freezing Lavender Tea Bread for Later
If you want to extend the joy of your Lavender Tea Bread even further, consider freezing it! To do this properly, allow the bread to cool completely, then wrap each slice individually in plastic wrap followed by aluminum foil or place slices in a freezer-safe bag. This method prevents freezer burn and keeps your bread deliciously intact. It can be stored frozen for up to three months—perfect for those moments when you crave something sweet but don’t have time to bake! When you’re ready to enjoy some frozen slices, simply let them thaw at room temperature or pop them straight into a toaster or oven for a quick heat-up. Trust me; there’s something incredibly satisfying about pulling out slices from your freezer on a chilly morning and welcoming back those enchanting lavender aromas!
Lavender Tea Bread

Lavender Tea Bread is a harmonious blend of floral notes and sweet flavors, creating a delightful loaf that’s perfect for any occasion. This aromatic bread not only fills your kitchen with the enchanting scent of lavender but also delivers a light, moist texture that pairs beautifully with afternoon tea or coffee. Each slice offers a gentle sweetness with subtle hints of lavender, making it an ideal treat for gatherings or quiet moments at home. Whether served plain or drizzled with a sweet glaze, this Lavender Tea Bread is sure to charm your taste buds and elevate your dining experience.
- Prep Time: 15 minutes
- Cook Time: 50 minutes
- Total Time: 1 hour 5 minutes
- Yield: Approximately 10 servings 1x
- Category: Dessert
- Method: Baking
- Cuisine: American
Ingredients
- 3/4 cup milk (whole or plant-based)
- 2 tablespoons dried culinary lavender
- 6 tablespoons softened butter
- 1 cup granulated sugar
- 2 large eggs
- 1/2 teaspoon vanilla extract
- 2 cups all-purpose flour
- 1 1/2 teaspoons baking powder
- 1/2 teaspoon salt
- 1/3 cup powdered sugar (for glaze)
- 2–3 teaspoons milk (for glaze)
- 1/4 teaspoon vanilla extract (for glaze)
Instructions
- Preheat oven to 325°F (163°C) and grease and flour a 9×5-inch loaf pan.
- In a small saucepan, heat milk and lavender until just simmering. Remove from heat and let cool.
- In a large mixing bowl, cream together softened butter and sugar until fluffy. Add eggs one at a time, followed by vanilla extract.
- In another bowl, whisk together flour, baking powder, and salt.
- Gradually add the dry mixture to the butter mixture alternately with the lavender-infused milk until just combined; avoid overmixing.
- Pour batter into the prepared loaf pan and smooth the top.
- Bake for 45-50 minutes or until a toothpick inserted in the center comes out clean.
- Let cool for about 20 minutes in the pan before transferring to a wire rack.
- Meanwhile, prepare the glaze by mixing powdered sugar with milk and vanilla until smooth. Drizzle over cooled bread.
Nutrition
- Serving Size: 1 slice (approx. 60g)
- Calories: 210
- Sugar: 12g
- Sodium: 150mg
- Fat: 8g
- Saturated Fat: 5g
- Unsaturated Fat: 3g
- Trans Fat: 0g
- Carbohydrates: 32g
- Fiber: <1g
- Protein: 3g
- Cholesterol: 35mg