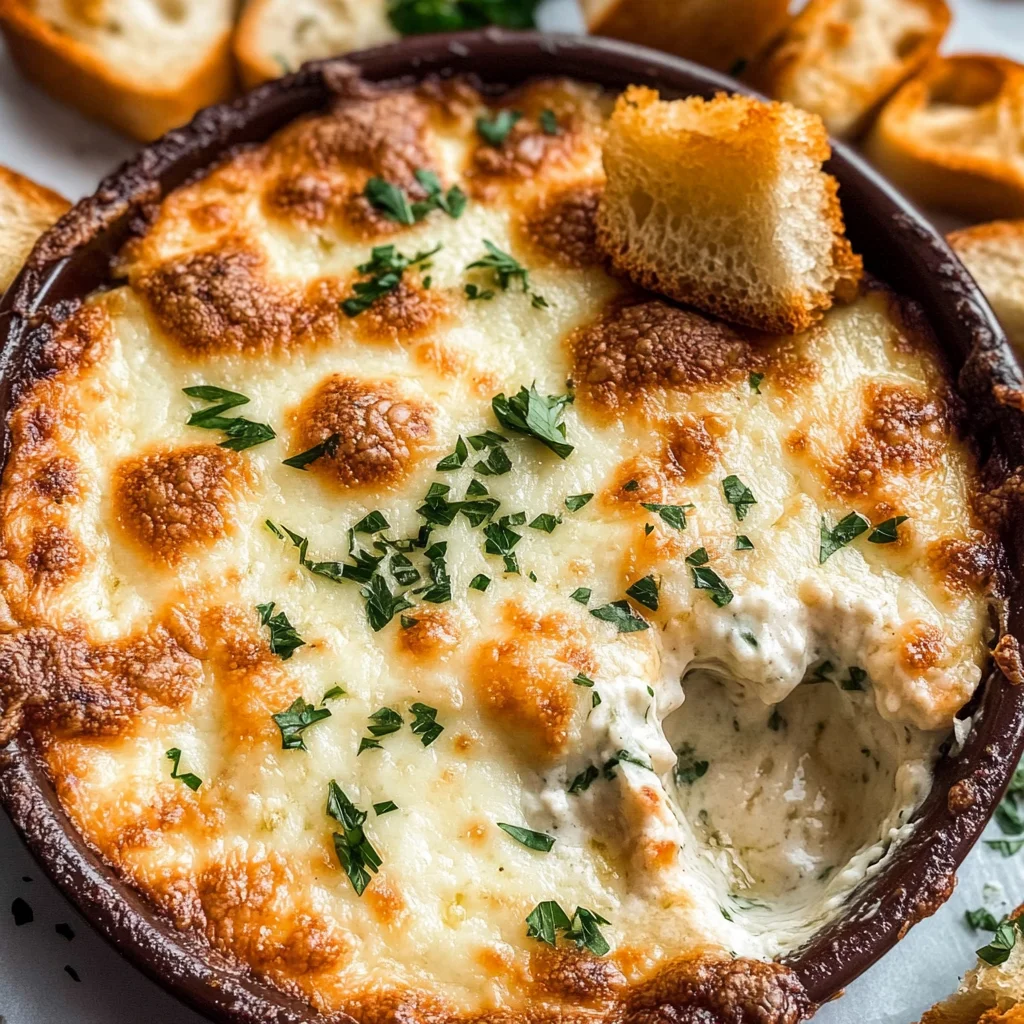
Baked Garlic Bread Dip: A Comforting, Cheesy Delight
Picture this: the irresistible aroma of roasted garlic and bubbling, golden cheese wafting through your kitchen as you prepare to serve a dish that combines the essence of garlic bread with the creaminess of a decadent dip. This Baked Garlic Bread Dip: A Comforting, Cheesy Delight is a celebration of everything we love about garlic bread—its rich, garlicky flavor, buttery undertones, and cheesy goodness—all served in a warm, dippable form. As I stand by the oven, watching this masterpiece come together, I can’t help but think about all those cozy evenings spent with family and friends, gathered around the table with laughter and stories shared over plates of delicious food. Isn’t it amazing how food can create such beautiful connections? This dip brings people together, one delicious bite at a time, and I promise you it will become a staple in your home.
This recipe has a special place in my heart because it’s not just food; it’s an experience that transforms any gathering into something memorable. Imagine game nights where everyone’s eyes light up as you pull this cheesy wonder from the oven or holiday parties where guests gather around for just one more scoop. The beauty of this Baked Garlic Bread Dip lies in its versatility—whether you’re dipping crusty bread, crunchy pita chips, or fresh veggies, there’s something for everyone to enjoy. And let me tell you, when that gooey cheese stretches delightfully from your chip to the bowl, it’s nothing short of magic. So let’s embark on this culinary journey together!
Baked Garlic Bread Dip: A Comforting, Cheesy Delight: The Perfect Gathering Snack
When you think about snacks that bring joy and warmth to gatherings, nothing quite compares to a creamy dip bursting with flavor. This Baked Garlic Bread Dip is here to elevate your appetizer game! It’s easy to prepare yet delivers an explosion of taste that will leave everyone asking for the recipe. So grab your ingredients and let’s dive into making something truly extraordinary.
Ingredients:
As we gather our ingredients for this comforting dish, each one plays a pivotal role in creating that unforgettable flavor profile we crave.
- 2 whole shallots. Shallots are like the unsung heroes of the onion family; they add a subtle sweetness and depth that regular onions can’t quite match. Their gentle flavor pairs beautifully with garlic without overpowering it. When selecting shallots at the store, look for ones that are firm and free from blemishes. If you don’t have shallots on hand, feel free to substitute with yellow onions—but keep in mind they’ll bring a slightly sharper taste.
- 2 heads of garlic. Ahh, garlic—the heart and soul of this dip! Roasted garlic becomes incredibly sweet and mellow while maintaining its aromatic charm when baked. It creates an utterly intoxicating aroma as it cooks down. You’ll want to take care when peeling these heads; separate the cloves gently to avoid bruising them. Trust me when I say roasting these will transform their pungency into liquid gold.
- 2 tablespoons olive oil. A drizzle of high-quality olive oil is absolutely paramount here—not only does it help roast our shallots and garlic beautifully while adding richness; it also brings out their flavors just like sunshine brings warmth to flowers in springtime! Look for extra virgin olive oil for its robust taste; if you’re in a pinch, avocado oil can work too.
- 8 oz block of cream cheese, softened. Cream cheese is what gives our dip its luxurious creaminess—a crucial component for achieving that smooth texture we all adore! Allow it to soften at room temperature so it blends easily with other ingredients; this step is non-negotiable if you want to avoid lumps in your dip.
- 1 cup sour cream. Sour cream adds tanginess that balances perfectly with the richness of cream cheese and cheese layers—it’s like adding zest to life! Choose full-fat sour cream for maximum creaminess or opt for Greek yogurt if you’re looking for a lighter alternative without sacrificing flavor.
- 1½ cups shredded mozzarella cheese, divided. Mozzarella is the star player here! It melts beautifully and provides that stretch we all love when digging into cheesy dips. Make sure you’re using shredded mozzarella rather than blocks—pre-shredded cheese typically contains anti-caking agents that can inhibit meltability.
- ½ cup grated Parmesan cheese. Parmesan lends an incredible nutty flavor while enhancing overall cheesiness—a delightful bonus! Freshly grated Parmesan is ideal since pre-grated versions can be drier due to added preservatives.
- ½ cup fresh parsley, chopped (reserve some for topping). Fresh herbs are essential for brightening up flavors and adding color! Parsley not only brings freshness but also acts as a lovely garnish—so don’t forget to save some!
- ½ teaspoon salt. Salt amplifies flavors—it enhances every ingredient’s potential by lifting them from background notes into harmonious melodies on your palate! Adjust according to taste as some cheeses may already contribute saltiness.
- ¼ teaspoon black pepper. Black pepper adds depth and warmth without being overly spicy—this tiny touch rounds out flavors beautifully!
- ½ teaspoon red pepper flakes (optional). For those who enjoy a little heat, red pepper flakes add just enough kick to elevate your dip without overwhelming it—consider adjusting according to your spice tolerance!
Equipment You’ll Need:
Now let’s talk about the tools you’ll need—they’re like trusty companions on this culinary adventure! Having the right equipment makes the cooking process smoother and far more enjoyable.
- Baking dish – A shallow baking dish allows for even cooking and browning of our dip; choose one that holds about 2 quarts so there’s plenty of room for bubbling goodness! Glass or ceramic options work wonderfully because they retain heat well.
- Mixing bowls – Having multiple mixing bowls on hand makes combining ingredients easier; choose medium-sized ones so you can thoroughly mix without spilling over—no one wants a mess when deliciousness awaits!
- Garlic press or knife – To make life easier while prepping our beloved garlic heads! A garlic press allows quick crushing but using a sharp knife helps control size if you prefer larger chunks—both methods have their merits depending on texture preferences!
- Wooden spoon or spatula – Essential tools for combining our creamy mixture seamlessly—you’ll want something sturdy yet gentle enough not to damage delicate ingredients.
With our ingredients gathered and equipment ready at hand, we’re prepared to dive into creating this comforting masterpiece together!
Preparing the Baked Garlic Bread Dip: A Comforting Cheesy Delight
Step 1: Roasting the Aromatics
Start by preheating your oven to 400°F (200°C). While it warms up, let’s focus on roasting those aromatic shallots and garlic until they reach golden perfection—a process known as caramelization which enhances sweetness significantly! Chop off the tops of both heads of garlic just enough so they reveal some cloves within (don’t worry—we’ll wrap them later). Place them onto a piece of aluminum foil along with diced shallots drizzled in olive oil before wrapping them tightly like little gifts destined for flavor town! Roast these gems in your preheated oven for about 30–35 minutes until tender—the kitchen will fill with an utterly intoxicating scent as they transform into sweet morsels ready for mingling!
Step 2: Preparing Your Cheese Mixture
While those aromatics work their magic in the oven, grab your mixing bowl and combine softened cream cheese along with sour cream until smooth—this creamy base will serve as our dip’s foundation! Using an electric mixer makes this process effortless; aim for light fluffiness since air incorporated helps achieve perfect textures later on during baking! Fold in half (¾ cup) shredded mozzarella along with grated Parmesan cheese next—these two melty companions will create luscious layers throughout once baked! Don’t rush this step; taking time ensures everything blends harmoniously together while bringing out unique flavors from each ingredient involved.
Step 3: Bringing It All Together
Once roasted beauties emerge from their foil cocoon (let them cool slightly!), squeeze each clove out directly into your cheesy mixture before adding reserved parsley alongside salt & black pepper plus optional red pepper flakes based on heat preference—we’re creating layers upon layers here folks! The combination should feel vibrant yet comforting simultaneously—a reflection of joyful gatherings ahead filled with laughter echoing through culinary delights born outta love & passion!
Step 4: Baking Until Golden
Transfer this glorious mixture into your chosen baking dish evenly spreading across surface area generously topped off remaining mozzarella layer before sliding back into oven set at same temperature (400°F/200°C). Bake uncovered approximately 20–25 minutes until golden brown edges appear bubbling temptingly inviting everyone nearby wanting just one more scoop! Keeping an eye during last few minutes ensures perfect results avoiding overcooking which could dry things out instead achieving desired bubbling consistency instead creating utter bliss every time someone digs-in fully enjoying flavor explosion awaiting them inside warm embrace surrounding them lovingly crafted culinary creation made straight—from heart—to plate!
And there you have it—the first steps toward crafting your own Baked Garlic Bread Dip: A Comforting Cheesy Delight! As we continue exploring further components soon remember patience pays off every time ensuring ultimate satisfaction awaits where cherished moments happen best around great food shared amongst loved ones together forever forming bonds stronger than any recipe itself ever could produce alone…
Step 5: Roasting the Garlic and Shallots to Perfection
Now, let’s move on to one of the most crucial steps in our Baked Garlic Bread Dip: roasting the garlic and shallots. This part is absolutely paramount for achieving that deep, caramelized flavor that will elevate your dip from good to utterly intoxicating. Start by preheating your oven to 400°F (200°C). While it warms up, take those two heads of garlic and two whole shallots, slice off the tops just enough to expose the cloves inside—this little act allows the natural sweetness of garlic and shallots to shine through as they roast. Drizzle them generously with about two tablespoons of olive oil; this liquid gold not only helps with roasting but also infuses a beautiful richness into the final dish.
Wrap them snugly in aluminum foil—this is where the magic happens! The foil traps steam, creating a mini sauna that softens the cloves while allowing them to develop that sweet, nutty flavor we all crave. Place your wrapped bundles on a baking sheet and pop them in the oven for about 30-35 minutes. You’ll know they’re done when you can smell that heavenly aroma filling your kitchen—trust me, it’s a scent you won’t be able to resist! When you unwrap them, you should see soft, golden cloves that easily squeeze out of their skins. Allow these beauties to cool slightly before handling; patience is key here as this will prevent burns and ensure you can enjoy every last drop of their intense flavor.
Step 6: Creaming It All Together
While your garlic and shallots bask in their warm oven bath, it’s time to prepare the creamy base for our dip. In a mixing bowl, combine an 8-ounce block of softened cream cheese and one cup of sour cream. Use a hand mixer or a sturdy spatula; whichever you prefer will work just fine! Mix until these two rich ingredients are completely blended into a luscious canvas for our dip. Why is this step so important? Well, blending these components creates a smooth texture that ensures every bite of your dip is velvety and satisfying. Just imagine scooping up that creamy goodness with crunchy bread or crispy chips—it’s going to be divine!
Next, gradually fold in one-and-a-half cups of shredded mozzarella cheese along with half a cup of grated Parmesan cheese; it’s like adding layers of flavor upon layers! As you mix, think about how each ingredient contributes its own unique character—the mozzarella offers that gooey stretch we all adore while the Parmesan adds a sharpness that cuts through the richness beautifully. Also, don’t forget to sprinkle in half a teaspoon of salt, a quarter teaspoon of black pepper, and half a teaspoon of red pepper flakes for just the right amount of kick. This balance is crucial; it brings out the flavors without overpowering them. Trust me on this one—you want that subtle warmth from the red pepper flakes dancing in harmony with everything else.
Step 7: Infusing Freshness with Herbs
Now comes one of my favorite parts—adding fresh herbs! Take half a cup of freshly chopped parsley and gently fold it into your creamy mixture. This step isn’t just about flavor; it’s about color and freshness too! That vibrant green speckled throughout adds visual appeal that makes your dip irresistible before anyone even takes their first bite. Fresh herbs play an essential role in cooking because they brighten up dishes like nothing else can; think about how parsley adds an aromatic quality that complements both garlic and cheese beautifully.
As you fold in the herbs, take care not to overmix—it’s all about maintaining those lovely flecks of green throughout your dip rather than turning it into a uniform paste. A gentle touch here ensures every scoop captures little bursts of herbaceous delight alongside all that cheesy goodness. Plus, when people see those vibrant bits peeking through, they’ll know they’re in for something truly extraordinary!
Step 8: Bringing It All Together
With our creamy mixture ready and fragrant roasted garlic and shallots cooling nearby, it’s time to bring everything together into one glorious bowl! Squeeze out those roasted garlic cloves from their skins—they should slide out effortlessly—and finely chop or mash them before folding them into your cheese mix along with the sautéed shallots you prepared earlier (if you’ve chosen to sauté them). This step is where all those rich flavors meld together—a true symphony if there ever was one!
Once everything is combined beautifully, take a moment to taste your mixture—this is where you can adjust seasonings if needed or add more salt or pepper according to your preferences. Don’t rush this step; being patient here ensures balanced flavors throughout every bite and guarantees satisfaction for everyone at your gathering! Once you’re happy with the taste (and trust me—you will be!), transfer this indulgent mixture into an oven-safe baking dish—something shallow works best as it allows for maximum cheesiness on top.
Conclusion:
As we wrap up our journey through this delicious recipe together, my heart swells with joy knowing that you now hold the secret to creating such an extraordinary dish right in your kitchen. The combination of roasted garlic’s sweetness mingling with velvety cream cheese and gooey mozzarella creates an experience that transcends mere snacking; it’s comfort food at its finest! Every bite tells a story of warmth and sharing—a truly special experience worth savoring time and again.
But why stop there? This recipe is not just about taste; it’s about creating memorable moments with friends and family gathered around your table. Picture pulling this glorious dip from the oven—the moment when everyone leans in closer, inhaling that intoxicating aroma as they eagerly await their first scoop with crusty bread or crunchy crudités. Whether it’s game day excitement or cozy holiday gatherings, this dip shines brightly as a centerpiece of joy and laughter.
When serving up your baked wonder, imagine pairing each delightful bite with crispy pita chips or fresh-cut vegetables that bring out all those rich flavors beautifully. For an afternoon pick-me-up during casual visits with friends, serve alongside sparkling water infused with lemon or even herbal iced tea—it’s simply sublime! And if you’re feeling adventurous, why not add some roasted red peppers or sun-dried tomatoes into your next batch? The possibilities are endless!
Feeling inspired yet? This recipe is wonderfully adaptable—embrace different cheeses like sharp cheddar for a twist that packs more punch or swap out parsley for fresh basil if you’re craving something herbaceous! Each variation invites exploration while maintaining the essence of what makes this dish so special: pure comfort wrapped in cheesy goodness. I encourage you not only to try making this delightful dip but also to share your own experiences with me; let’s keep this delicious conversation going!
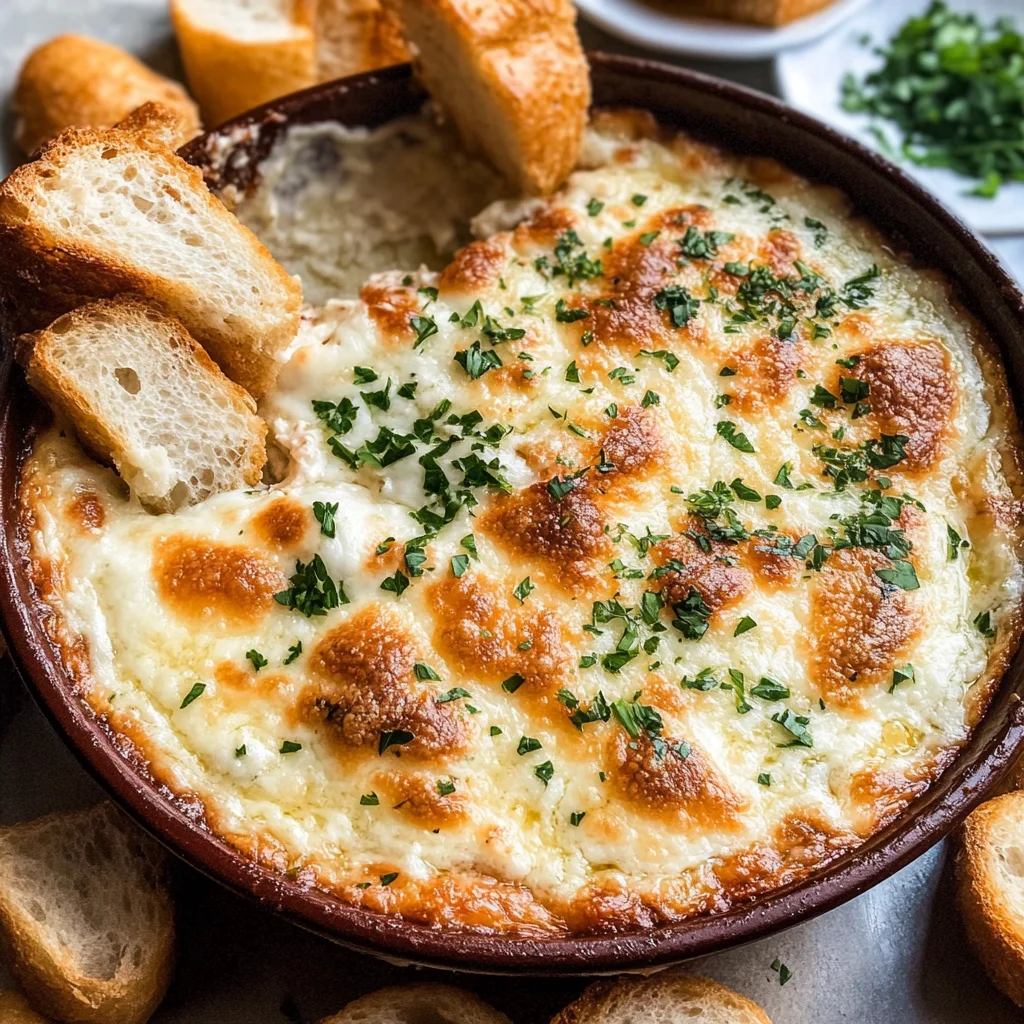
Baked Garlic Bread Dip: A Comforting, Cheesy Delight

Baked Garlic Bread Dip: A Comforting, Cheesy Delight is the ultimate appetizer for any gathering, combining the rich flavors of roasted garlic and creamy cheese into a warm, dippable delight. As this cheesy masterpiece bakes in your oven, it fills your kitchen with an irresistible aroma that invites everyone to gather around. Perfect for game nights or holiday celebrations, this dip is incredibly versatile—serve it with crusty bread, crunchy pita chips, or fresh veggies for an unforgettable experience. With a few simple ingredients and easy steps, you can create a crowd-pleasing snack that will have everyone coming back for more.
- Prep Time: 15 minutes
- Cook Time: 45 minutes
- Total Time: 1 hour
- Yield: Serves approximately 8 people 1x
- Category: Appetizer
- Method: Baking
- Cuisine: American
Ingredients
- 2 shallots
- 2 heads of garlic
- 2 tablespoons olive oil
- 8 oz cream cheese (softened)
- 1 cup sour cream
- 1½ cups shredded mozzarella cheese (divided)
- ½ cup grated Parmesan cheese
- ½ cup fresh parsley (chopped)
- Salt and pepper to taste
Instructions
- Preheat oven to 400°F (200°C).
- Slice tops off garlic heads and chop shallots; drizzle with olive oil and wrap in foil. Roast for 30-35 minutes.
- In a mixing bowl, blend softened cream cheese and sour cream until smooth.
- Fold in half of the mozzarella and Parmesan cheeses, along with salt, pepper, and optional red pepper flakes.
- Squeeze out roasted garlic cloves into the mixture and add chopped shallots and parsley; stir until combined.
- Transfer dip to a baking dish; top with remaining mozzarella and bake at 350°F (175°C) for 25-30 minutes until golden brown.
Nutrition
- Serving Size: Approximately 1/2 cup (120g)
- Calories: 290
- Sugar: 3g
- Sodium: 420mg
- Fat: 21g
- Saturated Fat: 10g
- Unsaturated Fat: 9g
- Trans Fat: 0g
- Carbohydrates: 12g
- Fiber: 1g
- Protein: 11g
- Cholesterol: 45mg