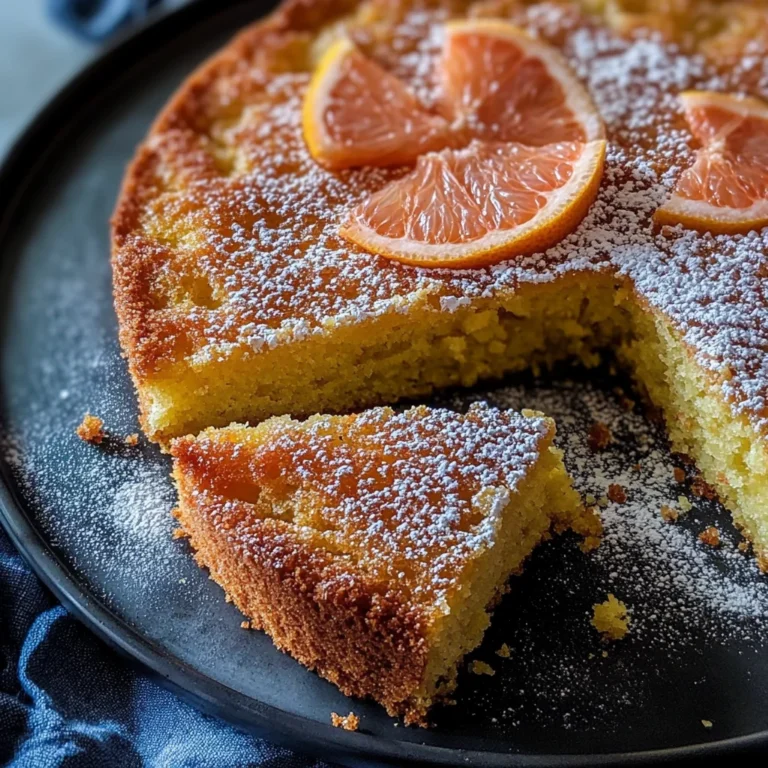
Snickerdoodle Cobbler Recipe
There’s something utterly enchanting about the way certain recipes can evoke memories and feelings that warm the very core of your being. The Snickerdoodle Cobbler is one such treat, a delightful bridge between the comforting nostalgia of childhood and the sweet indulgence we all crave as adults. Imagine walking into a cozy kitchen on a chilly evening, where the air is filled with the intoxicating aroma of cinnamon and sugar dancing together, beckoning you to take just one more bite. This isn’t just dessert; it’s an experience that brings people together, sparking laughter and joy with each gooey spoonful. Trust me when I say that this Snickerdoodle Cobbler Recipe is bound to become a cherished favorite in your household, creating memories worth savoring.
This delightful creation combines the beloved flavors of classic snickerdoodle cookies—sweet, buttery goodness infused with warm cinnamon—with a cobbler’s comforting texture. It’s like wrapping yourself in a warm blanket at the end of a long day. Whether it’s a family gathering or simply an ordinary weeknight craving for something sweet, this recipe shines brightly. The simplicity of its preparation paired with the rich flavors makes it an extraordinary dessert choice that will leave everyone asking for seconds. So grab your apron, my friend, and let’s dive into making this unforgettable Snickerdoodle Cobbler together!
Snickerdoodle Cobbler Recipe: An Indulgent Twist on a Classic Favorite
This Snickerdoodle Cobbler Recipe is sure to delight anyone who takes a bite. With its heavenly blend of flavors and textures, it’s not just another dessert—it’s a hug in food form!
Ingredients:
As we embark on this delicious journey, let’s take a moment to appreciate each ingredient that plays its part in crafting this delightful cobbler. Each element contributes to the symphony of flavors that will dance on your palate.
- ⅓ cup unsalted butter, melted. This golden liquid gold serves as the foundation for our cobbler’s rich flavor and moisture content. Unsalted butter is key because it allows us to control the saltiness of our dish perfectly—too much salt can overwhelm those delicate sweet notes! When you melt the butter, it creates a luscious base that helps achieve that signature gooey texture we all adore. Be sure to allow it to cool slightly before mixing with other ingredients; this keeps everything smooth and prevents curdling.
- ¾ cup whole milk. Whole milk adds creaminess and richness to our batter, enhancing both flavor and texture dramatically. It’s important for binding all our ingredients together while providing essential moisture—low-fat or non-dairy alternatives may not yield the same decadent results we’re after here! Look for fresh milk if you can; it makes all the difference in taste.
- 2 teaspoons vanilla extract. Ah, vanilla—the queen of flavorings! This precious ingredient infuses warmth and sweetness into our cobbler, elevating it from ordinary to extraordinary. Always opt for pure vanilla extract over imitation; you’ll be rewarded with deeper flavors that sing throughout every bite! Its aromatic presence is crucial for balancing out the sugars in our recipe.
- 1 ½ cups sugar. While sugar sweetens our cobbler beautifully, it also plays a role in achieving that coveted golden-brown crust during baking due to caramelization. As you measure this out, remember that sugar also helps retain moisture—giving us that wonderful gooeyness we’re aiming for! If you’re feeling adventurous or health-conscious, consider using coconut sugar or brown sugar as substitutes—they each add unique undertones.
- 1 ½ cups all-purpose flour. Flour provides structure to our cobbler without making it too dense—a perfect balance for achieving that soft yet slightly chewy texture reminiscent of snickerdoodles! When measuring flour, spoon it into your measuring cup rather than scooping directly from the bag; this prevents packing too much flour and throwing off our ratios!
- 2 ¼ teaspoons baking powder. This leavening agent is absolutely paramount in creating lightness within our cobbler—a key factor in ensuring we don’t end up with something overly dense or flat! Baking powder reacts with moisture and heat during baking, producing carbon dioxide bubbles that lift our batter beautifully.
- ¾ teaspoon salt. While it may seem counterintuitive to add salt when making something sweet, trust me on this—it enhances flavors tremendously! Salt rounds out sweetness and prevents everything from tasting flat; think of it as an essential seasoning in every great dish.
- 2 teaspoons cinnamon. Cinnamon is what truly brings forth those warm memories associated with snickerdoodles—it’s comforting and nostalgic all at once! This fragrant spice not only adds depth but also complements both sugar and butter perfectly; it’s what transforms ordinary baked goods into extraordinary delights!
- 1 ½ cups brown sugar, packed. Brown sugar contributes both sweetness and moisture thanks to its molasses content—it keeps our cobbler rich and fudgy as opposed to dry or crumbly! When packing brown sugar into your measuring cup, press down firmly so you achieve accurate measurements; this ensures we have enough moisture for balance.
- 1 ½ cups hot water. Hot water serves as an unexpected yet critical component—it activates ingredients like baking powder while melting through layers of sugar for unparalleled richness below that crispy top layer! Don’t skip this step; pouring hot water over your batter creates those lovely gooey pockets that make every bite irresistible!
- ¼ cup sugar & ½ teaspoon cinnamon (for sprinkling). A simple mix of these two ingredients becomes our final touch—a sprinkle over freshly baked cobbler right before serving adds extra sweetness along with aromatic warmth from cinnamon atop that beautiful crust! It’s like adding glitter to a cake—who wouldn’t want more sparkle?
Equipment You’ll Need:
Let’s talk about tools—while they may not be ingredients per se, having the right equipment can truly transform your baking experience from good to spectacular! These are essential partners in creating something wonderful.
- 9×13-inch baking pan – This size is perfect for allowing ample surface area while ensuring even cooking throughout your cobbler mixture. A glass pan works well here since it allows you to monitor browning without worrying about sticking!
- Mixing bowls – A set of various sizes will serve you well throughout many culinary adventures—not just today’s cobbler! Opt for stainless steel or glass varieties since they’re durable and easy to clean.
- Whisk – A trusty whisk will help combine wet ingredients seamlessly while incorporating air—which leads us back again towards achieving lightness within our final product!
- Measuring cups & spoons – Accurate measurements are non-negotiable when baking; invest in sturdy measuring tools so you never have doubts about proportions again!
With these tools at hand alongside fresh ingredients awaiting their turn under heat—let’s get ready to create culinary magic together!
Preparing the Snickerdoodle Cobbler Recipe
Step 1: Preheat Your Oven & Prepare Your Baking Pan
First things first: preheating your oven is crucial because we want those temperatures just right when baking begins—instead of tossing everything into a cold oven (which can lead uneven cooking), setting your oven at 350°F (175°C) now ensures even heat distribution later on! While that’s happening, pour melted butter directly into your prepared 9×13-inch baking pan; use a spatula if necessary but don’t fret over perfection—the goal here is simply covering bottom evenly so no spots go neglected during baking time.
Step 2: Whisk Together Wet Ingredients
Now grab your large mixing bowl because we’re diving into combining some magical components! Begin by whisking together whole milk (remember how important that creamy richness is?), vanilla extract (oh-so-aromatic!), and granulated sugar until everything melds beautifully together—you’ll notice how silky smooth they become as they intermingle harmoniously—this step is vital since these elements provide foundational flavor layers within each bite later on down line!
Step 3: Incorporate Dry Ingredients
Once you’ve achieved liquid bliss inside your bowl—it’s time add dry ingredients slowly but surely without overwhelming ourselves too quickly here! Add flour alongside baking powder (our rising star!), salt (don’t forget!), cinnamon (the scent wafting through my kitchen right now!) stirring gently until just combined—the key here lies within avoiding any over-mixing which could lead tough texture instead fluffy delightfulness we’re striving toward so embrace caution during this step my friend!
Step 4: Assemble Layers Without Stirring!
This part feels almost magical—spoon batter evenly atop melted butter like spreading frosting onto cake layers but resist urge mix them together—that’s right—we want them distinct allowing for dreamy pockets gooey goodness later on as they intertwine beautifully throughout bake time ahead! Afterward sprinkle generously packed brown sugar above batter followed closely behind by pouring hot water carefully over entire mixture without stirring again—we’re building layers here so patience pays off immensely trust me!!
Now let’s pop this beauty into preheated oven where she’ll bake away transforming before our very eyes—we aim anywhere between 30-35 minutes until golden brown appears atop whilst center remains slightly jiggly—that’s indication perfection awaits just around corner my dear friend…
Stay tuned for more steps ahead where we’ll finish assembling delightful topping sprinkle while letting cool ever-so-slightly before diving headfirst into enjoyment!!
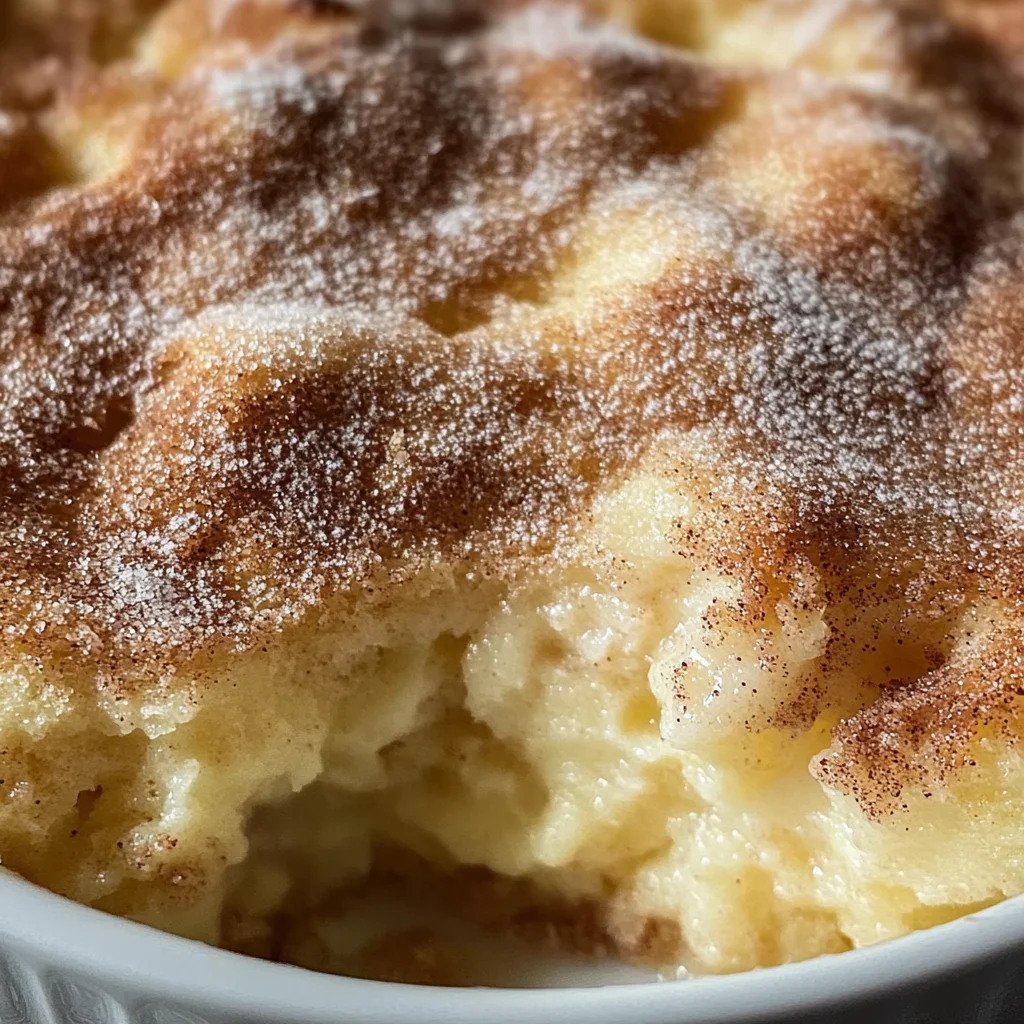
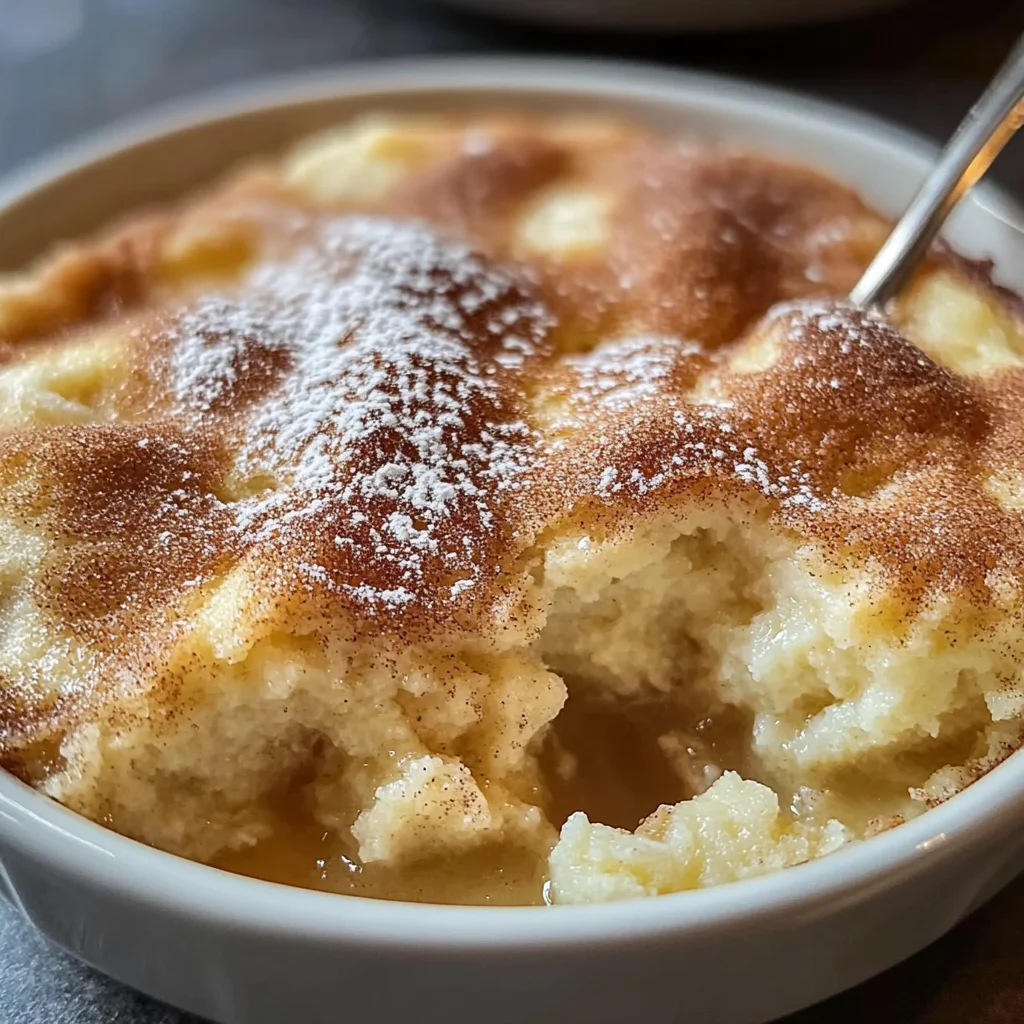
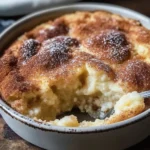
Step 5: The Sweet Cinnamon Topping
Once your cobbler has emerged from the oven, bubbling and golden, it’s time for that final touch that will elevate it to new heights of flavor! Grab a small bowl and combine the remaining sugar with the cinnamon—this is where the magic happens. As you sprinkle this delightful mixture over the hot cobbler, you’re not just adding sweetness; you’re infusing it with an utterly intoxicating aroma that wafts through your kitchen like a warm hug. This step is absolutely paramount because it creates a beautiful crust on top, enhancing both the visual appeal and the taste experience.
Now, why do we do this right after baking? The heat from the cobbler allows the sugar to melt slightly, creating a delicate crust that contrasts beautifully with the gooey filling underneath. Trust me when I say that every bite will be a symphony of flavors—the warmth of cinnamon wrapped around sweet sugar mingling with that soft, comforting cake-like texture. So, don’t hold back; sprinkle generously! You want to coat every inch so each spoonful is as flavorful as the last.
Step 6: Embrace the Cooling Period
After you’ve sprinkled on that heavenly cinnamon-sugar blend, it’s tempting to dive right in—who could resist? But here’s where patience becomes your best friend. Allowing your Snickerdoodle Cobbler to cool slightly before serving is crucial for several reasons. First off, it gives the filling a chance to set up just enough so that when you scoop into it, you don’t end up with a soupy mess (as tempting as that may sound!). This resting period allows those flavors to meld together even more harmoniously.
Imagine taking a moment to breathe in that sweet scent wafting from your kitchen while you wait. Your senses will be tingling with anticipation! Generally, letting it cool for about 10-15 minutes should do the trick; however, if you can manage to wait longer, even better! The longer it sits, the more those flavors develop and deepen. Picture this: each bite becomes an explosion of warm spices and sweet goodness—an experience you won’t want to rush.
Step 7: Serving Suggestions That Wow
When you’re finally ready to serve your masterpiece, consider how you want to present it. While it’s absolutely delicious on its own, there’s something undeniably special about pairing this Snickerdoodle Cobbler with vanilla ice cream or whipped topping! The cold creaminess cuts through the warmth of the cobbler like liquid gold—it’s a contrast that brings out all those cozy flavors even more profoundly. If you’re feeling adventurous (and I know you are!), drizzle some caramel sauce over the top for an extra decadent touch; it adds another layer of sweetness and richness that’s simply extraordinary.
As you scoop out servings into bowls or plates, don’t forget to grab a spoonful of that ooey-gooey filling along with every piece of cake—it’s all about balance! Each serving should encapsulate everything wonderful about this dessert: warm cinnamon notes layered under a fluffy top crust, topped off with that luscious ice cream slowly melting into deliciousness. I promise you; everyone will be reaching for seconds!
Step 8: Enjoying Every Last Bite
Finally, let’s talk about savoring this Snickerdoodle Cobbler Recipe. As you gather around the table (or perhaps snuggle up on the couch), take a moment to appreciate what you’ve created—a dish born from love and shared joy. There’s something profoundly satisfying about enjoying homemade desserts with friends or family; it’s not just food but also an experience filled with laughter and stories shared over each bite.
As you dig in, pay attention to how each component interacts—the warm spices dancing on your palate alongside that rich sweetness and comforting gooeyness. It’s truly extraordinary! And don’t forget: leftovers (if there are any) are just as delicious! Store them covered at room temperature for up to two days or pop them in the fridge for up to five days—just remember to reheat them gently in the microwave or oven before indulging again so they regain their original glory.
Conclusion:
As we wrap up this delightful journey through my cherished Snickerdoodle Cobbler Recipe, I can’t help but feel a swell of excitement that I hope you share too! From the moment those sweet ingredients come together, creating an utterly intoxicating aroma that wafts through your kitchen, to watching each slice reveal its warm layers of cinnamon-sugar goodness—it all adds up to something truly extraordinary. The blend of textures—the soft cobbler base that gently cradles those sugary pockets—is unlike anything else. I promise you; once you’ve tasted it warm from the oven with that sprinkle of cinnamon sugar on top, you’ll be hooked.
This recipe is an absolute must-try for anyone who loves easy yet rewarding baking experiences. It shines at family gatherings or cozy weekday dinners alike. Just imagine pulling this golden treasure out of your oven; everyone will gather around as they catch whiffs of cinnamon swirling through the air. The joy it brings is palpable as people take their first bites—it’s not just dessert; it’s an experience filled with warmth and comfort.
For serving suggestions, imagine savoring one warm slice topped with creamy vanilla ice cream—trust me when I say this will elevate your dessert game! Or perhaps enjoy a piece with a steaming cup of coffee for an afternoon pick-me-up; there’s something profoundly satisfying about pairing the two. If you’re feeling particularly indulgent, drizzle some chocolate sauce over the top; it’s utterly decadent and oh-so-delicious!
Feeling adventurous? This recipe is wonderfully adaptable! If you’d like to switch things up, consider adding chopped nuts for crunch or swirls of caramel sauce throughout for added depth—a delightful twist on tradition! You could even fold in seasonal fruits like apples or pears before baking to create a fruity variation that’s equally divine. So go ahead and make this recipe your own—experiment with flavors—and don’t forget to share your experiences with friends and family! I would love to hear how yours turns out!
Snickerdoodle Cobbler
Indulge in the warm, gooey delight of this Snickerdoodle Cobbler Recipe, a comforting dessert that’s perfect for sharing with family and friends. This irresistible treat blends the nostalgic flavors of classic snickerdoodle cookies—sweet, buttery goodness infused with cinnamon—into a delightful cobbler that’s sure to become a favorite.
- Prep Time: 15 minutes
- Cook Time: 35 minutes
- Total Time: 50 minutes
- Yield: Approximately 12 servings 1x
- Category: Dessert
- Method: Baking
- Cuisine: American
Ingredients
- ⅓ cup unsalted butter, melted
- ¾ cup whole milk
- 2 teaspoons vanilla extract
- 1 ½ cups granulated sugar
- 1 ½ cups all-purpose flour
- 2 ¼ teaspoons baking powder
- ¾ teaspoon salt
- 2 teaspoons cinnamon
- 1 ½ cups packed brown sugar
- 1 ½ cups hot water
Instructions
- Preheat your oven to 350°F (175°C). Pour the melted butter into a greased 9×13-inch baking pan.
- In a large mixing bowl, whisk together whole milk, vanilla extract, and granulated sugar until smooth.
- Gradually add the flour, baking powder, salt, and cinnamon to the wet mixture, stirring gently until just combined.
- Spoon the batter over the melted butter without stirring. Sprinkle packed brown sugar evenly over the batter.
- Carefully pour hot water over the entire mixture without stirring again.
- Bake for 30-35 minutes or until golden brown on top and slightly jiggly in the center.
Nutrition
- Serving Size: 1 serving
- Calories: 320
- Sugar: 42g
- Sodium: 190mg
- Fat: 10g
- Saturated Fat: 6g
- Unsaturated Fat: 3g
- Trans Fat: 0g
- Carbohydrates: 56g
- Fiber: <1g
- Protein: 3g
- Cholesterol: 30mg