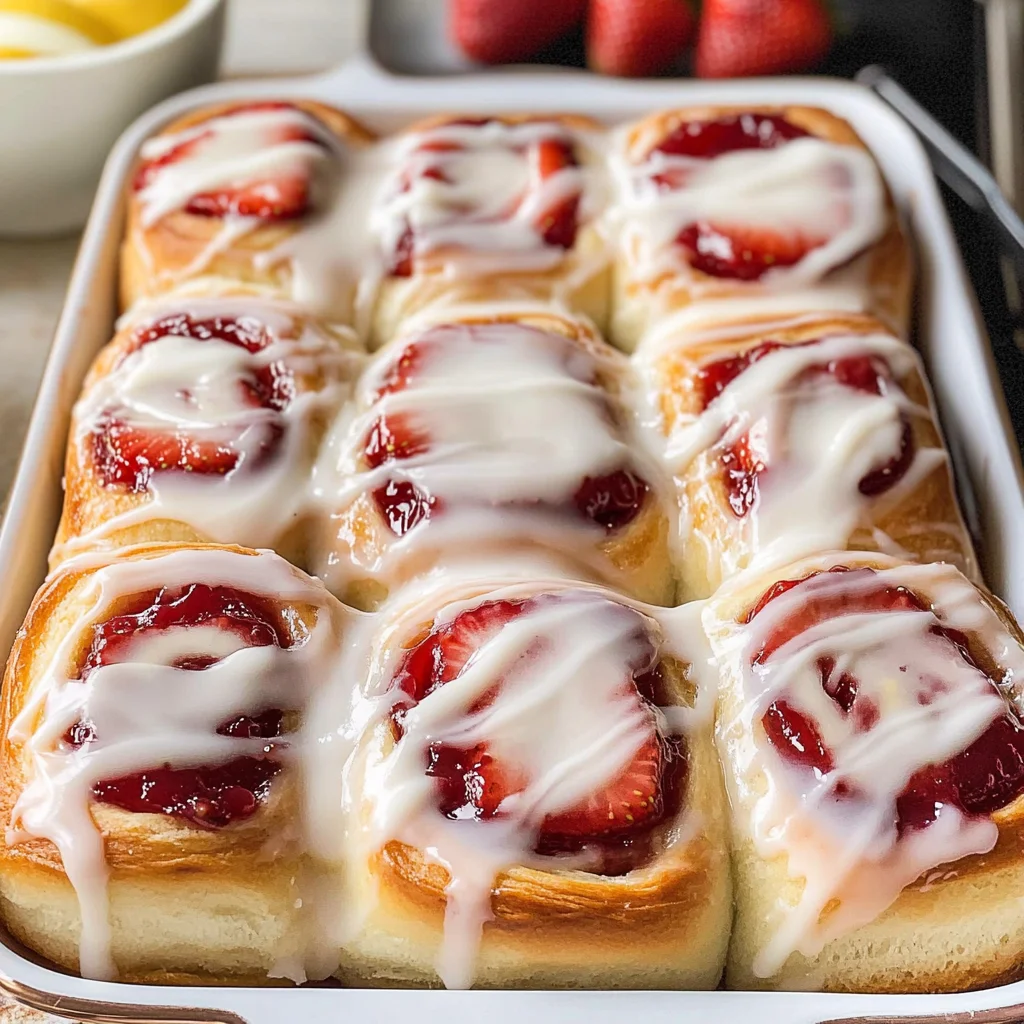
Strawberry Rolls
There’s something undeniably magical about the scent of freshly baked goods wafting through your home, isn’t there? It’s like a warm hug that wraps around you, bringing comfort and joy. Strawberry rolls are not just a recipe; they are an experience that bridges the gap between tradition and innovation. Imagine waking up to the soft light of morning, the air filled with the sweet and fruity aroma of ripe strawberries mingling with warm, buttery dough. Each bite promises a symphony of flavors: pillowy bread that melts in your mouth, luscious strawberry jam bursting with freshness, and a creamy lemon icing that adds a zesty kick. Trust me when I say these strawberry rolls will transform your breakfast routine into a delightful occasion you’ll want to repeat again and again.
These rolls have been my go-to for special weekend mornings or when I want to treat my friends to something extraordinary. They remind me of family gatherings where laughter echoed in the kitchen, and everyone eagerly awaited their turn to savor these delectable treats. The beauty of these strawberry rolls lies not only in their taste but also in their ability to bring people together, creating memories over shared moments at the breakfast table. So let’s dive into this culinary adventure together—I’m excited to share all my tips and secrets along the way!
Strawberry Rolls: A Sweet Morning Indulgence
Let’s embark on this journey of creating strawberry rolls that will make your taste buds dance! These delightful rolls are more than just a breakfast option; they can easily double as dessert, making them versatile for any occasion. The combination of fluffy dough with homemade strawberry filling and luscious lemon cream cheese icing is simply irresistible. You’ll find that each step in this process is straightforward yet rewarding, allowing you to create something truly special from scratch.
Ingredients:
As we gather our ingredients for these scrumptious strawberry rolls, think of this as assembling the building blocks for a beautiful creation. Each ingredient plays an essential role in achieving that perfect balance of flavors and textures.
- 1 cup whole milk (warmed, 105°-110°). Milk is often considered the backbone of many baking recipes due to its ability to enrich dough with moisture and fat. In this case, warming it slightly activates the yeast more effectively—think of it like waking up your ingredients! When choosing milk, opt for whole milk for its richness; however, if you’re looking for lower fat options, almond or oat milk can work well too.
- 2 1/4 tsp active dry yeast. This little powerhouse is vital for creating those light and fluffy rolls we all adore. Yeast is what makes our dough rise by producing carbon dioxide gas when it feeds on sugars from other ingredients. Make sure your yeast is fresh—if it bubbles when mixed with warm milk and sugar during activation, you’re good to go!
- 1/4 tsp sugar (to activate the yeast). Sugar isn’t just for sweetness; it acts as food for our yeast during activation. A small amount helps jumpstart fermentation without making your rolls overly sweet. It’s like giving your yeast a little pep talk before the big performance!
- 6 tbsp unsalted butter (melted). Butter adds richness and flavor while contributing to the dough’s tender crumb structure—this is crucial for achieving those pillowy textures we crave in our rolls! Using unsalted butter allows you more control over the saltiness of your final product; plus, melting it ensures easy incorporation into your mixture.
- 2 large eggs (room temperature). Eggs provide structure and act as natural emulsifiers in our dough, helping bind everything together beautifully while adding richness. Remember to let your eggs come to room temperature before using them; this helps them combine more smoothly into the batter.
- 1/2 cup white granulated sugar. Here comes that sweet touch! While we’ve already added sugar for activating yeast, this portion contributes directly to flavor balance in our rolls—the sweetness enhances every bite without overpowering those lovely strawberries.
- 4 cups all-purpose flour (spooned and leveled). Flour serves as the foundation—it’s what gives our rolls structure! Spoon-and-level technique ensures accurate measurements because too much flour can lead to dry rolls; if your dough feels sticky after mixing, don’t hesitate to add an extra tablespoon or two until you reach that perfect consistency.
- 1 tsp salt. Salt might seem simple but think of it as enhancing all other flavors at play here—it’s absolutely paramount! It also helps strengthen gluten formation giving us those beautifully chewy results.
- 2 cups fresh strawberries (washed, hulled and sliced). The star fruit of our show! Fresh strawberries bring bursts of juicy sweetness that completely elevate these rolls from ordinary to extraordinary—there’s nothing quite like using seasonal produce to capture nature’s bounty!
- 1 tsp fresh lemon juice. Adding lemon juice brightens up our filling by complementing sweetness with acidity—it’s like sunshine in a bottle! Just be mindful not to overdo it; we want harmony among flavors rather than overwhelming tartness.
- 1/3 cup white granulated sugar (for jam). This sugar will help create a deliciously sweet jam-like filling when combined with strawberries during cooking—a key part of making each roll an experience unto itself!
- 1 tbsp water. A touch of water aids in cooking down strawberries without burning during jam-making process—trust me on this one!
- 2 tbsp cornstarch. Cornstarch acts as a thickening agent here; it helps give our strawberry mixture that jammy consistency we desire while preventing excess liquid from seeping into our dough later on.
- 4 oz cream cheese (softened). Cream cheese transforms into luscious icing that complements both flavors beautifully while adding smoothness—we’re talking about pure indulgence here!
- 2 tbsp butter (softened). Similar role as cream cheese but enhances richness even further; both contribute crucially towards achieving desirable texture in icing.
- 1 cup powdered sugar. To achieve desired sweetness level plus light airy texture in icing—this is where magic happens!
- Zest of 1 lemon adds depth not only flavor-wise but aromatically too—imagine how delightful it’ll be once those citrus notes mingle within creamy goodness above!
- 2 tbsp whole milk allows us flexibility over icing consistency; adjust according personal preference until you reach perfection worthy enough drizzling atop these beauties!
Equipment You’ll Need:
Having the right tools at hand makes all the difference when embarking on any culinary adventure! While they may not be edible ingredients themselves, these kitchen companions are critical partners ensuring success throughout each step.
- Mixing bowls – A variety of sizes allows flexibility depending on what stage you’re at—whether mixing dry ingredients or whipping up creamy icings later on—you’ll appreciate having several options available!
- Measuring cups & spoons – Accurate measurements matter immensely when baking—it ensures consistent results every single time so investing in quality measuring cups/spoons pays off big time down line!
- Whisk – Perfect tool for blending wet ingredients smoothly together without lumps appearing unexpectedly—we want silky textures here folks!
- Rubber spatula – Essential for scraping every last bit from bowls cleanly & efficiently—no one likes wasting precious mixtures after all hard work put forth earlier!
- Baking dish or pan – Depending upon size needed (9×13 inch works well) ensure it’s greased properly beforehand so nothing sticks—a non-stick option could be handy too if available!
Now that we’ve gathered our ingredients and equipment let’s dive into preparing these delightful strawberry rolls!
Step 1: Activating Your Yeast
To get started on our delectable journey towards strawberry rolls perfection, we begin by activating our yeast—a step that’s often overlooked but absolutely crucial! In a small bowl or measuring cup, combine your warmed whole milk with 1/4 teaspoon sugar followed by sprinkling over active dry yeast evenly across surface area—this encourages healthy bubbling action as everything wakes up together harmoniously! Allow mixture sit undisturbed until frothy bubbles form across top surface—about 5–10 minutes typically suffices here depending upon freshness level observed earlier when purchasing supplies at store(s). This period serves two purposes: first it proves yeast viability while second giving us opportunity breathe life into upcoming dough creation through gentle warmth provided by milk itself which helps foster optimal environment necessary fermentation later down road during rising phase too—all non-negotiable factors contributing towards ultimate success ahead!
Step 2: Preparing Your Dough
Once you’ve seen those beautiful bubbles forming atop activated yeast mixture indicating life within those tiny granules has indeed commenced—we move onto crafting our glorious dough! In a large mixing bowl combine remaining granulated sugar alongside melted unsalted butter followed immediately afterward by incorporating room temperature eggs one at time ensuring everything gets blended nicely before introducing activated yeast-milk concoction next directly into bowl contents below—it’s vital ensure no lumps remain after whisking thoroughly prior adding flour since lump-free batter translates better texture overall once baked later on—the goal being smooth consistency achieved through gentle incorporation here rather than vigorous beating which could toughen final product instead! Now sift all-purpose flour along with salt collectively atop wet mixture then gently fold together using rubber spatula until just combined—that perfect moment arrives when no dry pockets linger behind but without overmixing either—the key lies finding balance between both extremes leading us closer towards fluffy results desired ultimately upon completion yielding soft bite every time enjoyed thereafter…
Step 3: Kneading Your Dough
Time has come now where hands-on approach becomes necessary—I promise you will love this part! Lightly flour countertop surface before transferring out sticky mass previously formed within bowl onto clean workspace below allowing yourself get comfortable kneading away vigorously for approximately eight minutes until smooth elastic texture develops beneath fingertips revealing glossy sheen appearing atop outside layer gradually forming round ball shape instead messy pile originally started off with earlier stages involved here; trust intuition guiding throughout process gently stretching pulling rolling back forth lightly dusting additional flour onto surfaces intermittently should stickiness occur unexpectedly preventing frustration felt otherwise during kneading session overall—it’s truly transformative experience witnessing raw elements morph into cohesive unit reflecting effort expended thus far leading closer towards culmination point expected soon arriving shortly thereafter ahead…
Step 4: First Rise
After successfully kneading away expectant energy built-up inside dough earlier unleashed through efforts spent—we now prepare ourselves transitioning into proving stage known colloquially among bakers alike simply referred first rise. Gently place shaped ball formed earlier within greased bowl covering snugly using damp kitchen towel ensuring warmth retained during duration resting phase ideally lasting sixty minutes minimum allowing volume increase significantly visible alongside puffy appearance observed gradually taking shape confirming progress made thus far whilst drawing anticipation levels higher amongst participants involved eagerly awaiting outcome reaching conclusion soon thereafter…
Stay tuned as we continue crafting these irresistible Strawberry Rolls together—you won’t want miss what comes next!
Step 5: Preparing the Strawberry Filling
Now that your dough has had a chance to rise, let’s create the star of the show—the strawberry filling. This step is not just about mixing ingredients; it’s where we infuse our rolls with that vibrant burst of summer sweetness. Start by taking your freshly washed, hulled, and sliced strawberries—two cups should do nicely—and place them in a medium saucepan over medium heat. To these luscious berries, add 1/3 cup of white granulated sugar, a tablespoon of water, and a teaspoon of freshly squeezed lemon juice. The sugar will draw out the natural juices from the strawberries, creating a beautiful syrup that makes this filling utterly irresistible.
Stir gently as the mixture heats up, allowing the strawberries to soften and release their juices. You’ll know you’re on the right track when you see the berries bubbling away—that’s the moment when all those flavors start to meld together into an intoxicating melody. To thicken this lovely concoction, sprinkle in 2 tablespoons of cornstarch that you’ve previously dissolved in a little bit of water—this is crucial! Cornstarch acts like magic here, transforming your juicy mixture into a luscious jam-like consistency. Keep stirring for about 5-7 minutes until it thickens beautifully; it should coat the back of a spoon when done. Once it’s ready, remove it from heat and let it cool slightly before using it to fill your rolls. Trust me on this one: letting it cool prevents it from making your dough soggy and allows those flavors to deepen even more.
Step 6: Shaping Your Strawberry Rolls
With your delicious strawberry filling ready, it’s time to roll out that beautiful dough. Flour your work surface generously—don’t skimp on this part! A well-floured surface prevents sticking and allows for easy manipulation of your dough. Gently turn out your risen dough onto this floured surface and use a rolling pin to stretch it into a rectangle—a large rectangle! Aim for about 16 inches long by 12 inches wide. Make sure the thickness is approximately 1/4 inch; you want enough structure to hold that scrumptious filling but not so thick that they become dense instead of fluffy.
Once you have your rectangle laid out before you like a blank canvas, spread a generous layer of your strawberry filling evenly over the entire surface, leaving about an inch border around the edges. This is where things can get messy—in an absolutely wonderful way! Don’t rush this step; take your time spreading the filling so every bite will be an explosion of flavor. Now comes the fun part: starting from one end, carefully roll up your dough tightly into a log shape. This action is vital because how tightly you roll will affect how swirled and spiraled each roll turns out—too loose means less defined rolls while too tight might make them burst open during baking! Once rolled up snugly like a cozy blanket around its strawberry treasure, pinch the seam to seal everything in and prevent any leaking during baking.
Step 7: Slicing Your Rolls
Now that you’ve got your beautiful log ready, it’s time for slicing—this part is where anticipation really builds! Using a sharp knife or dental floss (yes, I said dental floss—it works wonders!), cut your log into equal pieces about 1½ inches wide. This should yield around twelve delightful rolls; however, don’t fret if they vary slightly in size—each one will still be deliciously unique! The key here is to apply gentle pressure when cutting rather than sawing back and forth which can squish those heavenly layers together; we want them to maintain their fluffiness!
Once sliced, place each roll cut-side up in a greased baking dish or lined with parchment paper—a 9×13 dish works perfectly for this recipe. Make sure they are spaced apart just enough to allow room for rising without crowding each other too much—they need their space as they continue their journey towards becoming perfect strawberry rolls! Cover them loosely with plastic wrap or a clean kitchen towel and let them rest again for about 30-45 minutes at room temperature until they puff up beautifully; you’ll notice they’ll double in size as they come alive once more! This resting period is absolutely paramount—it allows gluten to relax further while giving those yeast little soldiers time to produce carbon dioxide bubbles that make these rolls airy instead of dense.
Step 8: Baking Your Perfect Strawberry Rolls
Your kitchen must be smelling wonderful by now as those rolls rise in anticipation! It’s almost time for baking magic! Preheat your oven to 350°F (175°C) while you’re waiting; this temperature is crucial because it’s hot enough to create that golden-brown exterior while keeping the inside tender and fluffy—a true balancing act that makes all the difference for texture. Once preheated and after all that loving care you’ve given these beauties during their rise, uncover them gently and pop them into the oven.
Bake for about 25-30 minutes until they’re golden brown and puffed up beautifully—keep an eye on them during those last few minutes because every oven behaves differently! You’re looking for that gorgeous golden hue on top—if they start getting too dark too quickly but aren’t fully cooked through yet, feel free to cover them loosely with aluminum foil for protection against over-browning while allowing continued cooking inside. The aroma wafting through your home at this point? Pure bliss! When done baking, insert a toothpick into one of the center rolls; if it comes out clean with just crumbs attached (not wet batter), then congratulations—you’ve successfully baked up some magnificent strawberry rolls!
Final Touches: Drizzling That Irresistible Lemon Icing
Let’s bring everything together with our tangy lemon cream cheese icing—the perfect finishing touch that elevates these strawberry rolls from delightful breakfast treat to downright extraordinary indulgence! While those warm rolls cool slightly on a wire rack (about 10-15 minutes), grab another mixing bowl and combine 4 ounces of softened cream cheese with 2 tablespoons of softened butter until incredibly smooth and creamy—this combination creates such an enticing base full of richness.
Next, slowly sift in 1 cup of powdered sugar—I love using powdered sugar here since it dissolves effortlessly without any gritty texture—and mix thoroughly until you achieve perfection in both consistency and flavor! Then add two tablespoons of whole milk along with the zest of one lemon—that bright zest adds such vibrancy both visually and flavor-wise; trust me when I say it’s non-negotiable if you’re aiming for depth in every bite! Mix until silky smooth; you’re looking for an icing that’s pourable yet thick enough to cling lovingly onto each roll without running off completely.
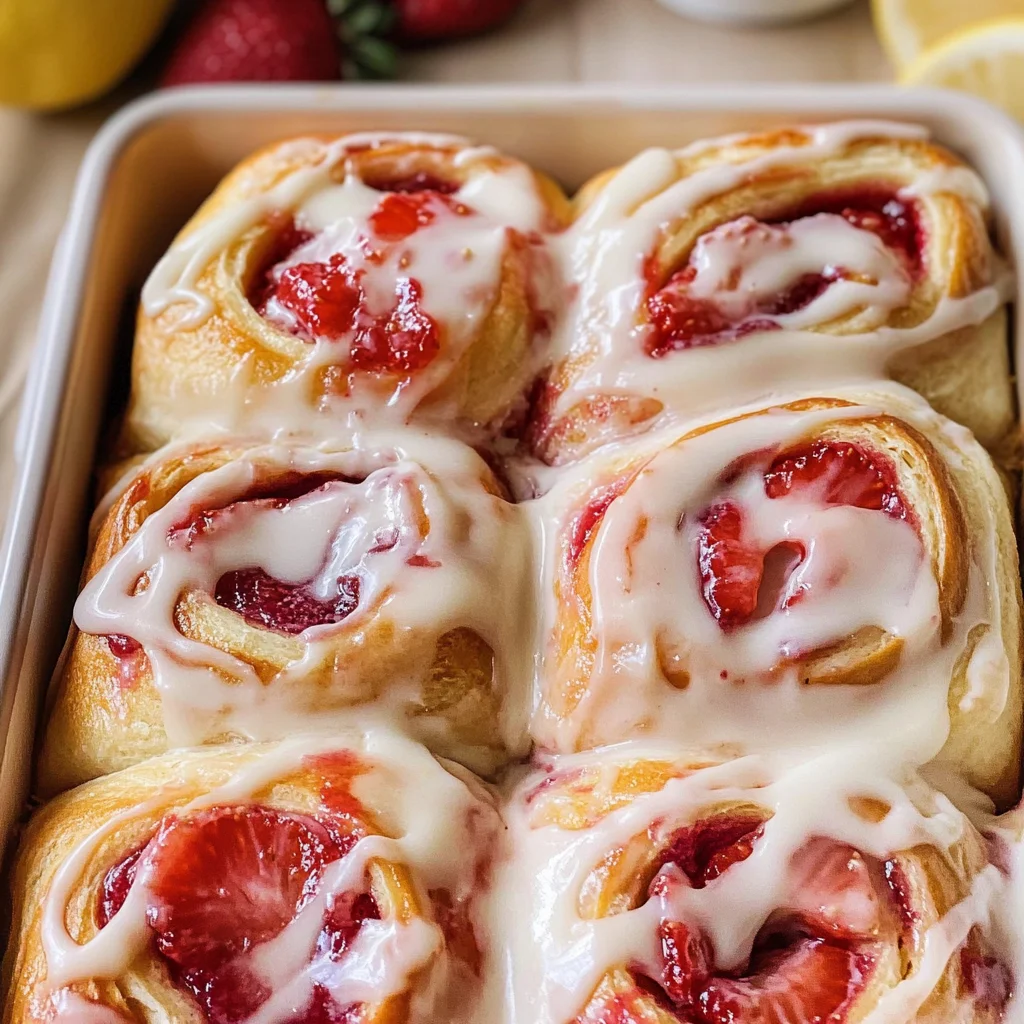
Once mixed perfectly together into what I like to call “liquid sunshine,” drizzle generously over each warm roll—watch how they soak it up like eager little sponges! Allow this icing momentarily settle before diving in (if you can resist!). And there you have it—the ultimate Strawberry Rolls ready to brighten up any morning or sweeten any moment shared with loved ones at breakfast or dessert time alike!
These strawberry rolls are not just food; they’re memories waiting to happen—each bite brings warmth not only from delightful flavors but also from shared smiles around tables filled with laughter. So gather everyone around because once they get a whiff of these beauties coming fresh outta the oven drizzled with zesty icing… well let’s just say they’ll be asking for seconds before they’ve even finished their first!
Enjoy making these Strawberry Rolls as much as I do sharing my passion behind every step—and remember: cooking isn’t just about following recipes but crafting memories infused with love along every delicious journey taken within our kitchens together!
Storage and Enjoyment Tips for Your Strawberry Rolls
Your strawberry rolls are now ready to be the star of your breakfast or dessert table! The delightful aroma of freshly baked strawberry rolls wafts through your kitchen, and I can already see the smiles they bring to your loved ones’ faces. But what if you have leftovers? Let’s dive into how to store these delicious treats so they remain as scrumptious as the moment they came out of the oven.
Storing Leftover Strawberry Rolls
To keep your strawberry rolls fresh and fluffy, it’s essential to store them properly. I recommend placing them in an airtight container lined with parchment paper to absorb any moisture—this is crucial for maintaining their pillowy texture. If you don’t have an airtight container, a resealable plastic bag will do just fine, but remember to squeeze out as much air as possible before sealing. When stored this way, your strawberry rolls will stay delightful for up to three days at room temperature. If you want to maintain that fresh-baked taste even longer, consider placing a slice of bread in the container; this little trick keeps everything moist and prevents dryness! After a couple of days, you might notice the flavors deepening and melding together in a truly profound way, making each bite even more satisfying. When you’re ready to enjoy them again, simply pop them into the microwave for about 10-15 seconds or warm them in a low oven until they’re heated through—trust me, nothing beats that warm roll melting in your mouth!
Freezing Strawberry Rolls for Later
If you’re like me and love meal prepping or simply want to ensure you have some sweet indulgence on hand whenever the craving strikes, freezing these strawberry rolls is an excellent option! To freeze them properly, allow the rolls to cool completely after baking—this prevents ice crystals from forming. Then wrap each roll individually in plastic wrap and place them in a freezer-safe bag or container. This method keeps them fresh for up to three months! When you’re ready to savor one (or several), just take them out and let them thaw at room temperature for a few hours or overnight in the fridge. You can also warm them directly from frozen in the microwave or oven—how convenient is that? Knowing you have these little bundles of joy tucked away gives such peace of mind; it’s like having a secret stash of happiness waiting just for you!
Strawberry Rolls

Indulge in the delightful experience of homemade Strawberry Rolls, where fluffy dough meets a luscious strawberry filling and zesty lemon icing. These rolls are perfect for transforming your breakfast routine or serving as a sweet treat for any occasion. With each bite, enjoy the balance of soft bread and fresh fruit that evokes the joys of summer. Easy to make and impossible to resist, these Strawberry Rolls might just become your new go-to recipe for gatherings or cozy mornings at home. Let’s embark on this culinary adventure together and create a memorable dish that brings comfort and joy!
- Prep Time: 30 minutes
- Cook Time: 30 minutes
- Total Time: 1 hour
- Yield: Approximately 12 servings 1x
- Category: Breakfast
- Method: Baking
- Cuisine: American
Ingredients
- 1 cup whole milk (warmed)
- 2 1/4 tsp active dry yeast
- 1/4 tsp sugar (to activate the yeast)
- 6 tbsp unsalted butter (melted)
- 2 large eggs (room temperature)
- 1/2 cup white granulated sugar
- 4 cups all-purpose flour (spooned and leveled)
- 1 tsp salt
- 2 cups fresh strawberries (washed, hulled and sliced)
- 1 tsp fresh lemon juice
- 1/3 cup white granulated sugar (for jam)
- 1 tbsp water
- 2 tbsp cornstarch
- 4 oz cream cheese (softened)
- 2 tbsp butter (softened)
- 1 cup powdered sugar
- Zest of 1 lemon
- 2 tbsp whole milk
Instructions
- 1. Activate the yeast: In a small bowl, combine warmed milk, sugar, and yeast. Let sit until frothy (about 5–10 minutes).
- 2. Prepare the dough: In a large bowl, mix melted butter, eggs, activated yeast mixture, flour, and salt until combined. Knead on a floured surface for about 8 minutes until smooth.
- 3. First rise: Place dough in a greased bowl, cover with a damp cloth, and let rise for about 60 minutes.
- 4. Prepare filling: In a saucepan over medium heat, combine sliced strawberries, sugar, lemon juice, and water. Cook until bubbling; stir in cornstarch mixed with water to thicken. Remove from heat and cool.
- 5. Shape rolls: Roll out dough into a rectangle, spread strawberry filling evenly, then roll tightly into a log. Slice into equal pieces.
- 6. Second rise: Place rolls in a greased baking dish; cover loosely and let rise for about 30–45 minutes.
- 7. Bake: Preheat oven to 350°F (175°C) and bake rolls for 25–30 minutes until golden brown.
- 8. Make icing: Mix softened cream cheese, butter, powdered sugar, lemon zest, and milk until smooth; drizzle over warm rolls.
Nutrition
- Serving Size: 1 roll (85g)
- Calories: 250
- Sugar: 15g
- Sodium: 180mg
- Fat: 9g
- Saturated Fat: 5g
- Unsaturated Fat: 3g
- Trans Fat: 0g
- Carbohydrates: 38g
- Fiber: 1g
- Protein: 5g
- Cholesterol: 35mg