The BEST Classic Deviled Eggs Recipe
The magic of cooking often lies in the connection we form with our food, a relationship that transcends mere sustenance. When I think of The BEST Classic Deviled Eggs Recipe, I’m transported back to sunlit kitchens filled with laughter, where every bite tells a story and every ingredient speaks of cherished memories. There’s an undeniable charm in the simplicity of deviled eggs; they carry a nostalgic weight that evokes gatherings, celebrations, and heartfelt conversations. Picture this: rich, creamy yolks, lovingly mixed with just the right amount of tangy mayonnaise and zesty mustard, nestled inside silky egg whites and topped with a sprinkle of paprika. The moment you take a bite, you’re enveloped by layers of flavor that dance on your palate, making it not just food but an experience worth savoring.
These little delights are more than just appetizers; they embody comfort and creativity. Maybe you’ve enjoyed them at family barbecues or elegant brunches, or perhaps they remind you of your grandmother’s kitchen, where she would whip them up with love and care. What makes this recipe truly special is its versatility—it can be dressed up or down for any occasion while still holding true to its classic roots. Whether it’s a festive gathering or a cozy dinner at home, these deviled eggs are sure to bring joy to your table. So let’s explore how to create The BEST Classic Deviled Eggs Recipe together—trust me, your taste buds will thank you!
The BEST Classic Deviled Eggs Recipe: A Timeless Treat
Welcome to your new favorite appetizer! In this delightful recipe, we’ll transform simple boiled eggs into an elegant dish bursting with flavor that’s perfect for any occasion. With just a handful of ingredients—mayonnaise, mustard, apple cider vinegar, and spices—you’ll discover how easy it is to impress your friends and family with this crowd-pleaser.
Ingredients:
As we embark on this culinary journey together, let’s take a moment to appreciate each ingredient that plays its part in creating our delectable deviled eggs.
- 12 boiled & peeled eggs. The star of our show! When selecting your eggs, freshness is key—not only do fresh eggs have a better flavor profile, but they also peel more easily after boiling. To boil them perfectly, I recommend placing the eggs in cold water first and then bringing them to a gentle boil before letting them simmer for about 9-12 minutes. This way, you’ll achieve the ideal creamy yolk texture without any greenish tint forming around the yolk—a sign of overcooking!
- 1/3 cup mayonnaise. This creamy delight serves as the glue that holds everything together and provides that luscious mouthfeel we crave in deviled eggs. You can opt for regular or light mayo based on your preferences; however, I find that traditional mayonnaise delivers the richest flavor. If you’re feeling adventurous or health-conscious, consider alternatives like avocado or Greek yogurt for a twist that still keeps things smooth.
- 1 tbsp yellow mustard. Mustard adds a wonderful zing that elevates our filling from ordinary to extraordinary. It brings brightness and acidity to balance out the richness of the mayo while adding depth with its warm spice notes. Don’t hesitate to adjust the amount based on your taste—some like it tangier than others!
- 1 tsp apple cider vinegar. This little splash introduces just enough acidity to cut through the creaminess and enhance all those flavors harmoniously dancing together. It offers a subtle sweetness with an earthy undertone that complements the other ingredients beautifully.
- Salt, pepper and garlic powder to taste. Seasoning is everything! These staples are essential for bringing out the flavors in our mixture. Salt enhances all the elements while pepper adds warmth and depth—don’t skip this step! Garlic powder is optional but highly recommended for an extra layer of flavor that elevates your deviled eggs from good to unforgettable.
- Paprika (for garnish). Finally, we have paprika—a beautiful finishing touch that adds both color and smokiness. You can use sweet paprika for its mild flavor or smoked paprika if you’re looking for something with depth and character! This sprinkle transforms our already stunning dish into something visually appealing too.
Equipment You’ll Need:
Before we dive into preparing these delightful deviled eggs, let’s gather the essential tools that will make our cooking experience smoother and more enjoyable—think of them as partners in our culinary adventure.
- Mixing bowl – A sturdy mixing bowl is crucial for combining our egg yolks with all those delicious ingredients seamlessly. Choose one large enough so there’s plenty of room for mixing without splattering—you want every bit of flavor melded together perfectly!
- Fork – This humble tool will be key in smashing up those yolks until they’re creamy and smooth! A fork is ideal because it allows you to break apart clumps easily while incorporating air into your mixture for fluffiness.
- Spoon or piping bag – For filling those egg white halves beautifully! Using a small spoon works fine; however, if you want presentation worthy of an Instagram post (because who doesn’t?), grab yourself a piping bag fitted with a star tip—this will create those lovely swirls we see at fancy brunches!
- Plate for serving – Presentation matters when it comes to food! A beautiful plate not only showcases your creation but also adds elegance to whatever gathering you’re attending.
Preparing The BEST Classic Deviled Eggs Recipe
Step 1: Cut and Separate
Begin by cutting each boiled egg in half lengthwise—this step is crucial as it allows us access to those golden yolks nestled within their snowy white jackets! Gently scoop out each yolk using a small spoon; set aside the egg white halves on a plate where they can await their delicious filling without getting messy or damaged. As you do this, admire how beautifully cooked each egg looks—a perfect canvas ready for transformation!
Step 2: Create Your Yolk Mixture
Now comes one of my favorite parts: smashing up those egg yolks! Place them into your mixing bowl and use your fork to break them down until you achieve a crumbly texture before adding in 1/3 cup mayonnaise along with yellow mustard and apple cider vinegar. As you mix these ingredients together vigorously with your fork—trust me on this—you’ll witness an incredibly creamy concoction coming together before your eyes! The goal here is smoothness; no lumps allowed if we want that luxurious texture everyone craves when biting into deviled eggs.
Step 3: Seasoning Perfection
With our yolk mixture now velvety smooth, it’s time for seasoning magic! Start by sprinkling salt and pepper liberally—the beauty here lies in adjusting according to personal preference; begin light-handedly as you can always add more later if needed! Remember: tasting as you go is non-negotiable—it helps ensure everything balances perfectly without overpowering any single component within our filling masterpiece. If you’re feeling bold (and I encourage you!), add about half teaspoon garlic powder at this stage; it’s optional but oh-so-rewarding!
Step 4: Fill Those Egg Whites
Now comes perhaps one of the most satisfying parts—the filling process! Using either your trusty spoon or piping bag filled with glorious yolk mix (if you’ve chosen this route), carefully distribute generous amounts into each hollowed-out egg white half until they’re brimming full yet not overflowing—balance is key here! Take pride in how they look; arranging them neatly on their serving plate creates an inviting visual display that’ll have everyone reaching out before they’ve even tasted one!
And there you have it—the beginning steps toward crafting The BEST Classic Deviled Eggs Recipe that’ll leave everyone talking long after they’ve disappeared from sight! Keep an eye out for my next steps where we’ll dive deeper into garnishing these beauties before serving them up proudly at whatever occasion awaits us next…
The BEST Classic Deviled Eggs Recipe
Deviled eggs have a special place in my heart. I can still remember the joyful gatherings at my grandmother’s house where the aroma of her kitchen wafted through the air, inviting friends and family to indulge in her culinary creations. This recipe is not just any deviled egg; it’s a celebration of flavors, a nod to tradition, and an absolute crowd-pleaser. So, gather your ingredients and let’s embark on this delicious journey together!
Step 5: Filling the Egg Whites – A Labor of Love
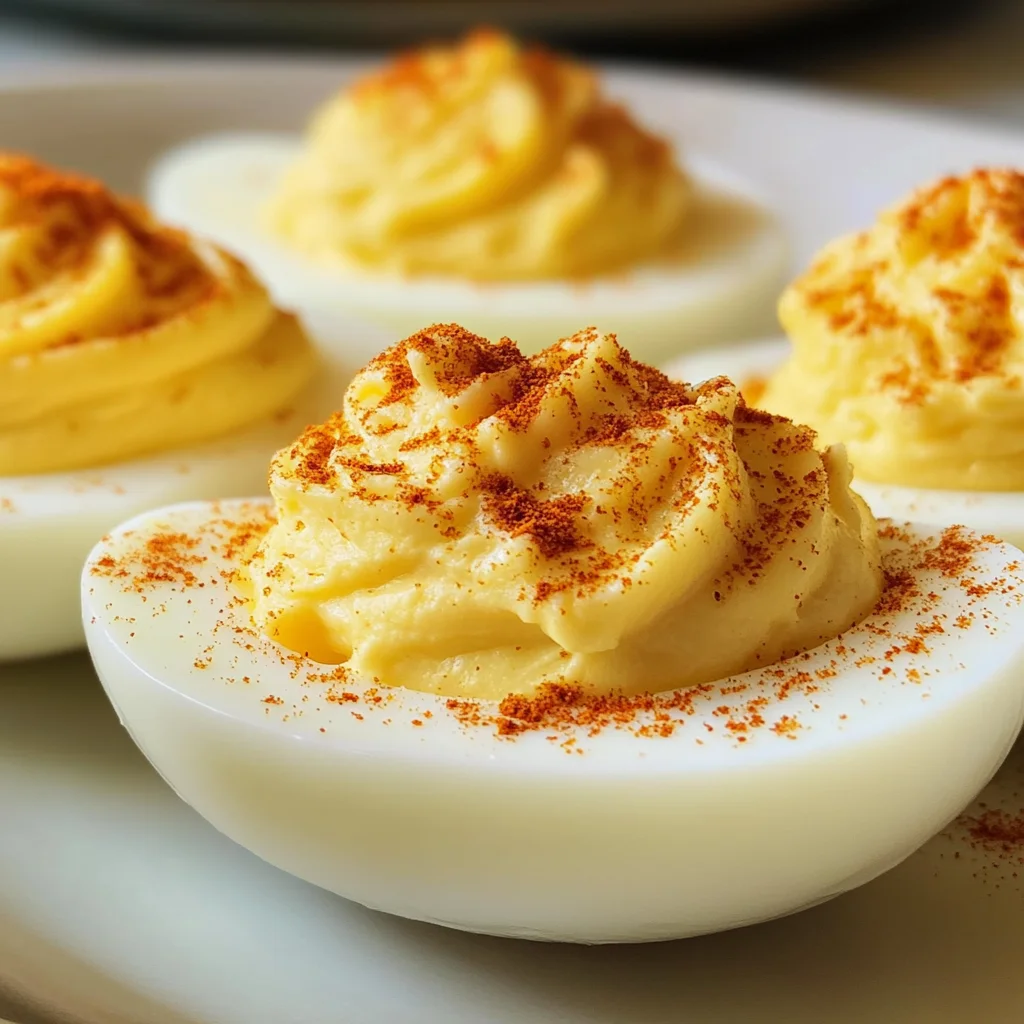
Once you’ve prepared that luscious yolk mixture, it’s time to bring your deviled eggs to life by filling those beautiful egg whites. Start by taking a small spoon or—if you’re feeling particularly fancy—a piping bag fitted with a star tip for that extra touch of elegance. Now, gently spoon or pipe the creamy yolk mixture into each egg white half, ensuring they are filled generously but not overflowing. You want those yolks to create a lovely mound atop each white, like little clouds of joy waiting to be savored.
This step is crucial because it’s where all your hard work begins to take shape—visually and flavor-wise! As you fill the whites, take a moment to admire the contrast between the bright yellow filling and the pristine white of the egg—it’s utterly intoxicating! Make sure not to rush this process; careful attention will pay off in presentation and taste. And trust me, when you take that first bite, you’ll appreciate how each component harmonizes together.
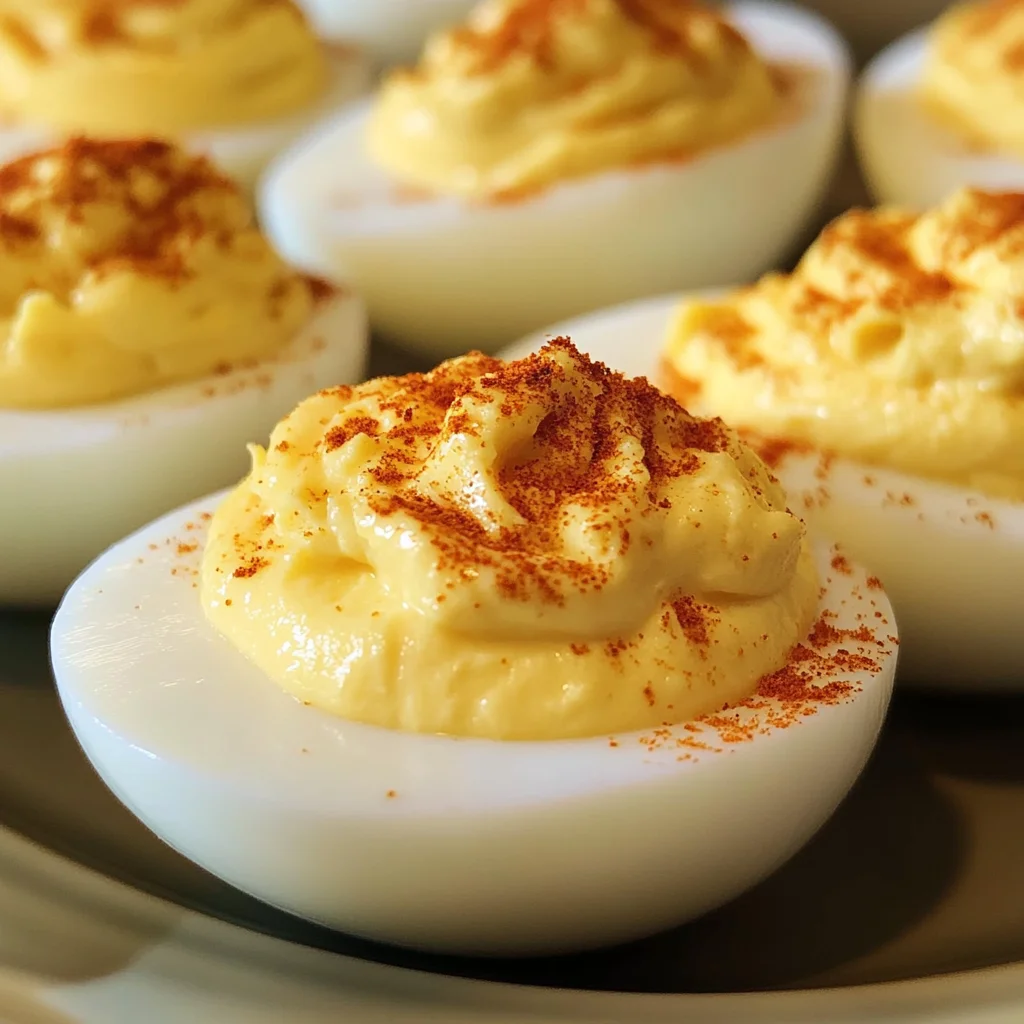
Step 6: The Finishing Touch – A Dusting of Paprika Magic
Now comes one of my favorite parts: garnishing! Once your deviled eggs are filled to perfection, sprinkle them lightly with paprika. It may seem like a small detail, but I promise you, it adds both color and flavor that elevates these little bites from ordinary to extraordinary. The warm hue of paprika against the white and yellow creates a visual feast for your eyes—it’s all about those first impressions!
But why paprika? Not only does it lend a mild smokiness that complements the rich creaminess of your filling, but it also speaks volumes about care and attention in cooking. When guests see that bit of color on top, they know they’re in for something special. Remember: don’t skimp on this step! A generous dusting will make every bite feel like a celebratory occasion.
Step 7: Chilling Time – Patience is Key
After garnishing your deviled eggs with paprika magic, it’s time for one final crucial step before serving: chilling them in the refrigerator. I cannot stress enough how important this step is! Allowing your beautifully crafted deviled eggs to chill for at least 30 minutes ensures that all those wonderful flavors meld together beautifully. The cool temperature also enhances their texture; as they chill, they become firmer yet delightfully creamy—a perfect balance.
While you’re waiting (and I know it’s hard!), take this time to set up your serving platter or think about how you’ll present these gems at your next gathering. Visualize their arrival on the table—the anticipation builds as everyone waits to dive into these delectable bites! Trust me on this one: when you allow them to chill properly, each bite becomes profoundly satisfying as those flavors truly blossom.
Step 8: Serving Your Masterpiece – The Grand Reveal
Finally, once your deviled eggs have chilled beautifully and are ready for their big debut, it’s time to serve them up! Carefully arrange them on a decorative platter—feel free to get creative here! Perhaps add some fresh herbs around them for an aromatic touch or even place some colorful vegetables alongside for added crunch and vibrancy. Presentation matters more than we often realize; it sets the tone for how much love went into making these delightful treats.
As you serve these little masterpieces, prepare yourself for compliments galore! Each bite will transport taste buds straight to flavor heaven—a symphony of richness from the yolks balanced by tangy notes from mustard and vinegar, all crowned with that smoky sprinkle of paprika. Remember to encourage everyone to savor each mouthful slowly; after all, good food deserves good company and thoughtful enjoyment.
Next Major Phase – Storing Your Deviled Eggs
If by some miracle there are leftovers (which I doubt!), let’s talk about how best to store them so they remain as delicious as ever! Place any uneaten deviled eggs in an airtight container lined with parchment paper between layers if necessary—this helps avoid any unwanted moisture. You can keep them stored in the fridge for up to two days; however, I recommend enjoying them fresh within 24 hours if possible.
This serves as a gentle reminder that while these deviled eggs are best enjoyed right away when made fresh, having some ready-to-go treats in your fridge can make any day feel like a special occasion. Just imagine opening your fridge door and being greeted by those delightful bites waiting patiently for you—the ultimate comfort food at its finest!
So there you have it—the complete journey through making The BEST Classic Deviled Eggs Recipe! From boiling and peeling those perfect eggs to whipping up that creamy filling and finally enjoying every single bite—this recipe embodies love-filled gatherings around tables brimming with laughter and deliciousness. I can’t wait for you all to try this recipe—I promise it’ll quickly become a cherished staple in your home just like it has been in mine!
Storage and Enjoyment Tips for Your The BEST Classic Deviled Eggs Recipe
Now that you’ve crafted this delightful dish, filled with creamy, tangy goodness, it’s time to dive into enjoying your creations! I can almost hear the praises singing as you present these beautifully garnished deviled eggs at your next gathering. But what happens when you have leftovers? Fear not! Storing your leftovers properly will ensure that the joy of these deviled eggs lingers on for a few more days.
Storing Leftover The BEST Classic Deviled Eggs Recipe
To maintain the integrity and flavor of your exquisite deviled eggs, it’s essential to store them in an airtight container. This is absolutely paramount for keeping them fresh and preventing any unwanted odors from seeping in. Place a piece of wax paper or parchment between the layers if you’re stacking them, as this helps avoid any unwanted squishing—trust me, you want to keep that beautiful presentation intact! Ideally, they’ll stay deliciously fresh in the fridge for up to two days. I do recommend consuming them within this timeframe, as they taste best when enjoyed fresh. And here’s a pro tip: if you’d like to keep them extra moist, you can place a slice of bread in the container with your eggs; it helps retain moisture and prevents drying out—don’t underestimate that little slice of heaven! You’ll find that even after storage, they retain their creamy texture and tantalizing flavor; however, they may lose a touch of their original vibrancy in color.
Freezing Egg Yolks for Later
Now let’s talk about freezing those luscious egg yolks if you happen to have some leftover filling. While I wouldn’t recommend freezing the completed deviled eggs (the texture just doesn’t hold up well), freezing egg yolks mixed with the mayonnaise and seasoning is a fantastic option! Simply spoon the yolk mixture into ice cube trays or small freezer bags, making sure to label them clearly. When stored properly, they can last in the freezer for up to three months without losing their rich flavor. When you’re ready to whip up another batch of deviled eggs or use them in another dish, just thaw overnight in the refrigerator before using. This is such a convenient way to save time on future cooking adventures while still enjoying that same delectable flavor profile!
And there you have it—the secrets to storing and preserving your The BEST Classic Deviled Eggs Recipe so that every bite continues to bring joy!
The BEST Classic Deviled Eggs Recipe
Discover The BEST Classic Deviled Eggs Recipe that’s easy and delicious—perfect for any occasion! Get ready to impress your guests today!
- Prep Time: 15 minutes
- Cook Time: 12 minutes
- Total Time: 27 minutes
- Yield: Makes 24 egg halves (12 servings) 1x
- Category: Appetizer
- Method: Boiling
- Cuisine: American
Ingredients
- 12 boiled & peeled eggs
- 1/3 cup mayonnaise
- 1 tbsp yellow mustard
- 1 tsp apple cider vinegar
- Salt, pepper, and garlic powder to taste
- Paprika (for garnish)
Instructions
- Cut each boiled egg in half lengthwise and gently scoop out the yolks into a mixing bowl.
- Mash the yolks using a fork until crumbly. Add mayonnaise, mustard, and apple cider vinegar; mix until smooth.
- Season with salt, pepper, and garlic powder to taste.
- Fill each egg white half generously with the yolk mixture using a spoon or piping bag.
- Garnish with paprika before chilling in the refrigerator for at least 30 minutes.
Nutrition
- Serving Size: 1 egg half (31g)
- Calories: 70
- Sugar: 0g
- Sodium: 80mg
- Fat: 5g
- Saturated Fat: 1g
- Unsaturated Fat: 4g
- Trans Fat: 0g
- Carbohydrates: 1g
- Fiber: 0g
- Protein: 6g
- Cholesterol: 186mg