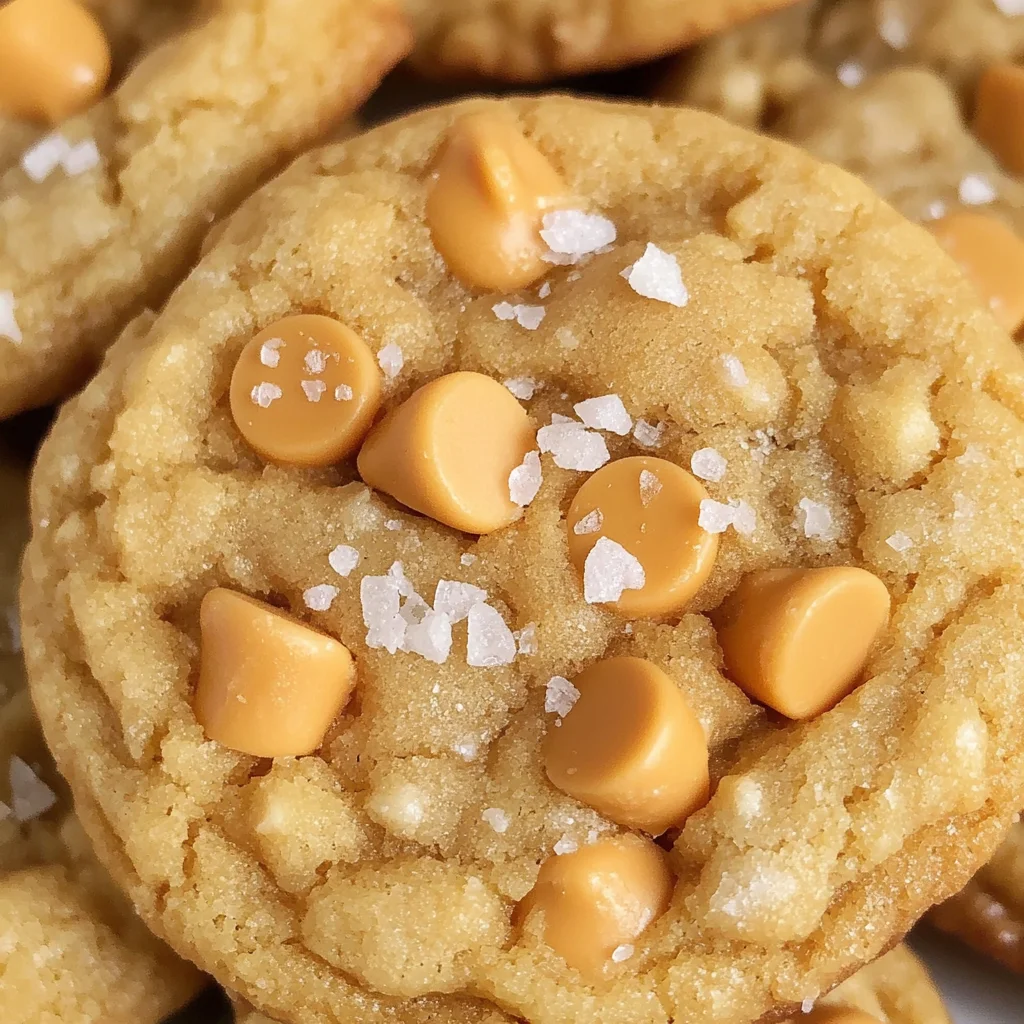
Salted Butterscotch Cookies
There’s something utterly magical about baking cookies, especially when it involves the rich, inviting aroma of butterscotch wafting through your kitchen. These Salted Butterscotch Cookies are not just any treat; they’re a warm embrace on a chilly day, a nostalgic reminder of childhood afternoons spent with family, and an experience that captures the essence of comfort. Imagine the soft, chewy texture giving way to sweet butterscotch chips that melt in your mouth, complemented by a sprinkle of flaky salt that dances on your taste buds. Each bite is like a gentle hug from a dear friend, making you feel instantly at home. I promise you, these cookies are more than just dessert; they’re a moment to savor and share.
What makes these Salted Butterscotch Cookies truly special is the delightful interplay between sweet and salty. This dynamic duo creates an irresistible flavor profile that keeps you reaching for just one more cookie—trust me! It’s almost too easy to fall into the rhythm of baking them; the process feels like an age-old tradition infused with new life. Whether it’s during the holidays or any day that calls for sweetness, these cookies bridge generations and bring people together. Picture yourself sharing a plate with loved ones, watching their eyes light up as they take their first bite—their smiles will tell you everything you need to know about how extraordinary these cookies are.
Salted Butterscotch Cookies: A Sweet Symphony of Flavor
Let’s embark on this delicious journey together! Baking these Salted Butterscotch Cookies is both an art and a science, and I’m here to guide you every step of the way. You’ll find that each ingredient plays its own unique role in crafting this delightful treat. So grab your apron and let’s get started!
Ingredients:
Every great recipe begins with quality ingredients, and these Salted Butterscotch Cookies are no exception. As we gather our components, think about how each one contributes to the final masterpiece we are about to create.
- 1⅔ cups (210g) all-purpose flour: Flour is the backbone of our cookie dough—it provides structure and stability. When selecting flour, opt for all-purpose because it strikes a perfect balance between strength and tenderness. If you’re looking for alternatives due to dietary needs or preferences, consider using a gluten-free blend or almond flour; just keep in mind that this may slightly alter the texture.
- 1 teaspoon baking soda: This leavening agent is absolutely paramount for achieving that soft and chewy texture we adore in cookies. It helps our dough rise beautifully while creating those enticing golden edges. Freshness matters here—baking soda loses its potency over time, so if yours has been sitting in the pantry for ages, it might be time for a replacement!
- ¼ teaspoon kosher salt: While it may seem small, salt enhances every other flavor in our cookies. It balances out sweetness and brings depth to our butterscotch flavor profile. Using kosher salt is preferred because its larger crystals dissolve nicely without overwhelming each bite.
- ½ cup (113g) unsalted butter, softened but still cool to the touch: Butter is crucial for creating that rich flavor and tender crumb we crave in our cookies. Softening it just enough allows us to cream it effectively with sugars—this process introduces air into our mixture for lightness. Always choose high-quality unsalted butter; it gives you control over the salt level in your recipe.
- ½ cup (107g) light brown sugar, packed: Brown sugar adds moisture and a hint of caramel flavor to our cookies due to its molasses content—it’s what gives them that chewy goodness! Make sure to pack it tightly into your measuring cup so you get all that lovely sweetness.
- ¼ cup (50g) granulated sugar: This serves as our primary sweetener alongside brown sugar but also contributes to the crispiness around the edges of each cookie while keeping the center delightfully chewy. Don’t underestimate its importance!
- 1 large egg: Eggs act as binding agents in our dough while also adding richness and moisture. For best results, let your eggs come to room temperature before mixing them in; this helps them incorporate more smoothly into your batter.
- 1 teaspoon pure vanilla extract: Vanilla elevates flavors beautifully—it’s like magic! Always go for pure vanilla extract rather than imitation; you’ll notice a profound difference in taste that makes your cookies extra special.
- 1 cup (170g) butterscotch chips: These little nuggets of joy are what make our cookies truly sing! They provide bursts of sweetness throughout each bite, melting softly against the warm dough. If you’re feeling adventurous or want an extra kick of flavor, try mixing in some dark chocolate chips too!
- Flaky finishing salt (like Maldon) (for topping): This final touch is not just decorative; it enhances flavors by adding contrast to the sweet butterscotch notes. A delicate sprinkle over fresh-out-of-the-oven cookies creates an unforgettable taste sensation.
- Additional butterscotch chips (for topping cookies – optional): If you really want to impress your family or guests—and let’s be honest—who wouldn’t? Add some extra chips right after pulling them from the oven for visual appeal and even more delicious bites!

Equipment You’ll Need:
Having the right tools can truly elevate your baking experience; think of them as essential partners on this culinary adventure! While not technically ingredients themselves, these items will help ensure your Salted Butterscotch Cookies turn out perfectly every time.
- Mixing bowls – A set of mixing bowls in various sizes will serve as your canvas for combining ingredients harmoniously. Opt for glass or stainless steel since they’re easy to clean and won’t absorb odors or flavors from previous uses.
- Hand mixer or stand mixer with paddle attachment – This is where the magic happens! A good mixer takes care of creaming butter with sugars quickly and efficiently while incorporating air into your batter—a non-negotiable step for achieving fluffy cookies.
- Measuring cups & spoons – Precision is key when baking; having separate dry measuring cups for flour and sugars ensures accuracy while keeping things neat. A set of measuring spoons will help you get those smaller quantities spot-on too!
- Baking sheets – Choose light-colored metal sheets which promote even browning across your cookies instead of dark ones that can cause burning around edges before centers bake through properly.
- Parchment paper – Lining baking sheets with parchment paper prevents sticking while also allowing easy cleanup later on—because who wants to deal with scrubbing pans?
Preparing the Salted Butterscotch Cookies
Step 1: Preheat Your Oven Like You Mean It
First things first! Preheat your oven to 350°F (175°C). This step is crucial because starting with a properly heated oven ensures even cooking throughout every cookie batch—you want them baked uniformly so they emerge golden brown yet soft at their core! While waiting for heat perfection, line two baking sheets with parchment paper; this simple act will prevent any sticky situations down the line when it’s time to transfer those beautiful dough balls onto hot trays!
Step 2: Whisk Together Dry Ingredients
While your oven warms up its cozy embrace, let’s focus on whisking together our dry ingredients—this process is essential! In a small bowl or mixing jug, combine 1⅔ cups all-purpose flour with 1 teaspoon baking soda and ¼ teaspoon kosher salt until well blended—it should look uniform without lumps or clumps peeking through! Setting this mixture aside allows us later on to incorporate everything seamlessly without overmixing when we add it into wet ingredients—a key factor in maintaining tenderness within those heavenly bites we’re creating together!
Step 3: Creaming Butter & Sugars
Now comes my favorite part—the creaming stage! In another large bowl (or using your stand mixer), add ½ cup softened unsalted butter along with both sugars—½ cup packed light brown sugar plus ¼ cup granulated sugar—and start mixing at medium speed for about two minutes until fluffy perfection emerges before us! The goal here is simple yet powerful: aeration leads us closer towards lighter textures later down this cookie road ahead so don’t rush this step—trust me when I say patience pays off big time here!
Step 4: Incorporate Egg & Vanilla
Once you’ve achieved that delightful fluffy consistency from creaming butter mixed with sugars—which should now resemble pale clouds—you’ll want to incorporate one large egg along with 1 teaspoon pure vanilla extract next! Mix until fully combined—this infusion brings richness whilst enhancing overall flavor profiles immensely—as soon as both elements meld together harmoniously watch how color changes slightly turning richer golden hues before adding dry ingredient mixture we prepared earlier…
Stay tuned as we continue crafting these delectable Salted Butterscotch Cookies together—you won’t want miss what’s next!
Step 5: Forming the Dough Balls with Love
Now that your cookie dough is beautifully mixed and just begging to be baked, it’s time for one of my favorite parts: forming those perfect little dough balls. Grab a sturdy cookie scoop or a tablespoon—this is where you can really let your creativity shine! Take about 2 tablespoons of dough and gently roll it into a ball in your hands. This step is crucial because the warmth of your hands will slightly soften the dough, making it easier for the cookies to spread evenly while baking. You want to handle the dough gently; overworking it can lead to tough cookies, which is an absolute no-no in my book!
Once you’ve formed those delightful balls, place them on your prepared baking sheets, ensuring there’s ample space between each one—about two inches apart should do. This distance allows the cookies to spread out comfortably while they bake, creating those lovely, chewy edges we all adore. And don’t forget this magical touch: before they go into the oven, sprinkle the tops generously with flaky salt. Trust me on this; the contrast of sweet butterscotch with a hint of salt elevates these cookies from delicious to utterly extraordinary!
Step 6: The Art of Baking
Now comes the moment we’ve all been waiting for: baking those heavenly Salted Butterscotch Cookies! Preheat your oven to 350°F (that’s about 175°C for my friends outside of the U.S.) and get ready for that intoxicating aroma to fill your kitchen. Carefully slide your baking sheets into the oven—make sure not to overcrowd them if you’re using multiple sheets. If you have two sheets going at once, I highly recommend rotating them halfway through the baking time. This simple act ensures that every cookie bakes evenly and has that beautiful golden-brown color we all crave.
You’ll want to keep a close eye on these beauties as they begin to puff up and develop their signature edges. Bake them for anywhere between 9-11 minutes; I promise you, there’s nothing quite like watching them transform! The key visual cue here is when the edges turn a lovely golden brown while the centers remain soft and slightly underdone—that’s exactly what we’re aiming for! Remember, they will continue cooking even after they come out of the oven due to residual heat, so resist the urge to leave them in longer than necessary; nobody likes a dry cookie!
Step 7: Cooling with Care
Once those cookies have reached their glorious state of baked perfection, it’s time for our next essential step: cooling them properly. Carefully remove your baking sheets from the oven and place them on wire racks—this is absolutely paramount! Allowing your cookies to cool on the sheets only leads to soggy bottoms; nobody wants that! Instead, let them rest on those racks for about 5-10 minutes until they’re firm enough to transfer without falling apart.
While they’re cooling, take a moment to relish that heavenly scent wafting through your home—it’s like a warm hug in cookie form! After this brief resting period, gently lift each cookie off with a spatula and place them back onto the rack until they are completely cool. At this point, you might be tempted to dive right in—and who could blame you? But trust me when I say holding off just a tad longer will make every bite even more satisfying.
Step 8: The Final Flourish
Now that your Salted Butterscotch Cookies are beautifully cooled and looking absolutely irresistible, let’s add that final flourish which will elevate them from delicious to divine! If you’d like to add an extra touch of butterscotch goodness (and honestly, who wouldn’t?), warm up some additional butterscotch chips just enough so they become slightly melty—around 15-20 seconds in the microwave should do it! As soon as you pull those cookies from their cooling racks, gently press a few of these warm chips into each cookie’s tops.
This little step not only makes for an enticing presentation but also offers an indulgent burst of flavor right when you take a bite. And don’t forget about that sprinkle of flaky salt; it serves as a beautiful finishing touch that brings everything together harmoniously. Picture sinking your teeth into one of these soft cookies—the warm butterscotch melting in your mouth combined with that delightful crunch from the salt creates an unforgettable symphony of flavors!
Conclusion:
As we wrap up this delightful journey through baking Salted Butterscotch Cookies together, I’m filled with excitement at the thought of you making them in your very own kitchen! There’s something truly extraordinary about combining simple ingredients into such a heartwarming treat. The way brown sugar melds with creamy butterscotch chips creates an unforgettable symphony of flavors that dances on your palate, while those flecks of flaky salt elevate each bite into pure bliss. I hope you’re as inspired as I am to share these cookies with loved ones because sharing food has a way of bringing people closer together—it’s like wrapping everyone in a warm hug.
Now let me tell you why these cookies are an absolute must-try! Not only do they deliver on taste with their perfect balance of sweetness and saltiness, but there’s also sheer joy in making them. Whether it’s a casual weeknight dessert or part of a festive gathering, these cookies fit seamlessly into any occasion. Picture yourself pulling a tray from the oven; the golden edges beckon while the centers remain slightly gooey—what could be more inviting? If you’ve got children or friends visiting, this recipe offers endless opportunities for laughter and fun while baking together.
For serving suggestions that will enhance your experience even further: imagine savoring one with a scoop of vanilla bean ice cream on top; it’s an indulgent pairing that’s simply divine! Or perhaps enjoy one alongside your favorite warm beverage—a cup of rich hot chocolate or spiced chai tea would complement those butterscotch notes beautifully. For an afternoon pick-me-up or even as part of dessert charcuterie boards during gatherings where sweets reign supreme, these cookies are sure to steal the show!
Feeling adventurous? This recipe is wonderfully adaptable! Try swapping in dark chocolate chips or adding chopped nuts if you’re looking for some crunch—each variation opens up new realms of flavor that keeps things exciting and fresh! And don’t forget about mix-ins; maybe throw in some toasted coconut flakes for tropical vibes or swirl in some peanut butter before baking for another layer of richness. I wholeheartedly invite you to experiment and make this recipe uniquely yours. So go ahead—bake up a batch (or two), share your creations with friends and family, and let’s create lasting memories together over these delightful Salted Butterscotch Cookies!
Salted Butterscotch Cookies

Salted Butterscotch Cookies are the ultimate sweet treat, combining a chewy texture with rich butterscotch flavor and a delightful sprinkle of flaky salt. Each bite is a beautiful balance of sweet and salty, creating an unforgettable cookie experience that evokes warmth and nostalgia. Perfect for sharing with loved ones or enjoying as a comforting snack, these cookies are easy to make and will quickly become a favorite in your household. With simple ingredients and straightforward preparation, you can bake up a batch of these delicious cookies whenever the craving strikes.
- Prep Time: 15 minutes
- Cook Time: 10 minutes
- Total Time: 25 minutes
- Yield: Approximately 24 cookies 1x
- Category: Dessert
- Method: Baking
- Cuisine: American
Ingredients
- 1⅔ cups all-purpose flour
- 1 teaspoon baking soda
- ¼ teaspoon kosher salt
- ½ cup unsalted butter, softened
- ½ cup light brown sugar
- ¼ cup granulated sugar
- 1 large egg
- 1 teaspoon pure vanilla extract
- 1 cup butterscotch chips
- Flaky finishing salt (for topping)
Instructions
- Preheat your oven to 350°F (175°C) and line two baking sheets with parchment paper.
- In a bowl, whisk together flour, baking soda, and salt; set aside.
- In another bowl, cream together the softened butter, brown sugar, and granulated sugar until fluffy.
- Add the egg and vanilla extract; mix until combined.
- Gradually incorporate the dry ingredients into the wet mixture until just combined.
- Fold in butterscotch chips.
- Scoop dough onto prepared baking sheets, spacing them about two inches apart. Sprinkle with flaky salt before baking.
- Bake for 9-11 minutes or until edges are golden while centers remain soft. Allow cooling on wire racks.
Nutrition
- Serving Size: 1 cookie (30g)
- Calories: 140
- Sugar: 10g
- Sodium: 90mg
- Fat: 7g
- Saturated Fat: 4g
- Unsaturated Fat: 2g
- Trans Fat: 0g
- Carbohydrates: 19g
- Fiber: <1g
- Protein: 1g
- Cholesterol: 15mg