Italian Love Cake
There’s something utterly magical about baking an Italian Love Cake, isn’t there? It’s as if every layer whispers a sweet story of love and heritage. This cake is a celebration on a plate, a delightful fusion of creamy ricotta and rich chocolate that dances together in perfect harmony. Imagine slicing through the layers, revealing that luscious creaminess swirled with chocolatey goodness, filling the air with an intoxicating aroma that makes your heart flutter. The moment you take that first bite, it’s not just about tasting flavors but feeling a warm embrace from your loved ones. This Italian Love Cake is not merely food; it’s an experience that brings people together around the table, sharing laughter and joy.
What I adore most about this cake is its ability to bridge generations and traditions. Each forkful embodies both the classic Italian roots and a contemporary twist that has captured America’s heart. It’s like a love letter to our taste buds, crafted with care and affection. Perfect for birthdays, anniversaries, or even just a cozy family dinner, this cake holds the promise of comfort and happiness. When you serve it, you’re not just offering dessert; you’re sharing a piece of your soul, an invitation to indulge in something truly extraordinary.
Italian Love Cake: A Slice of Heaven in Every Layer
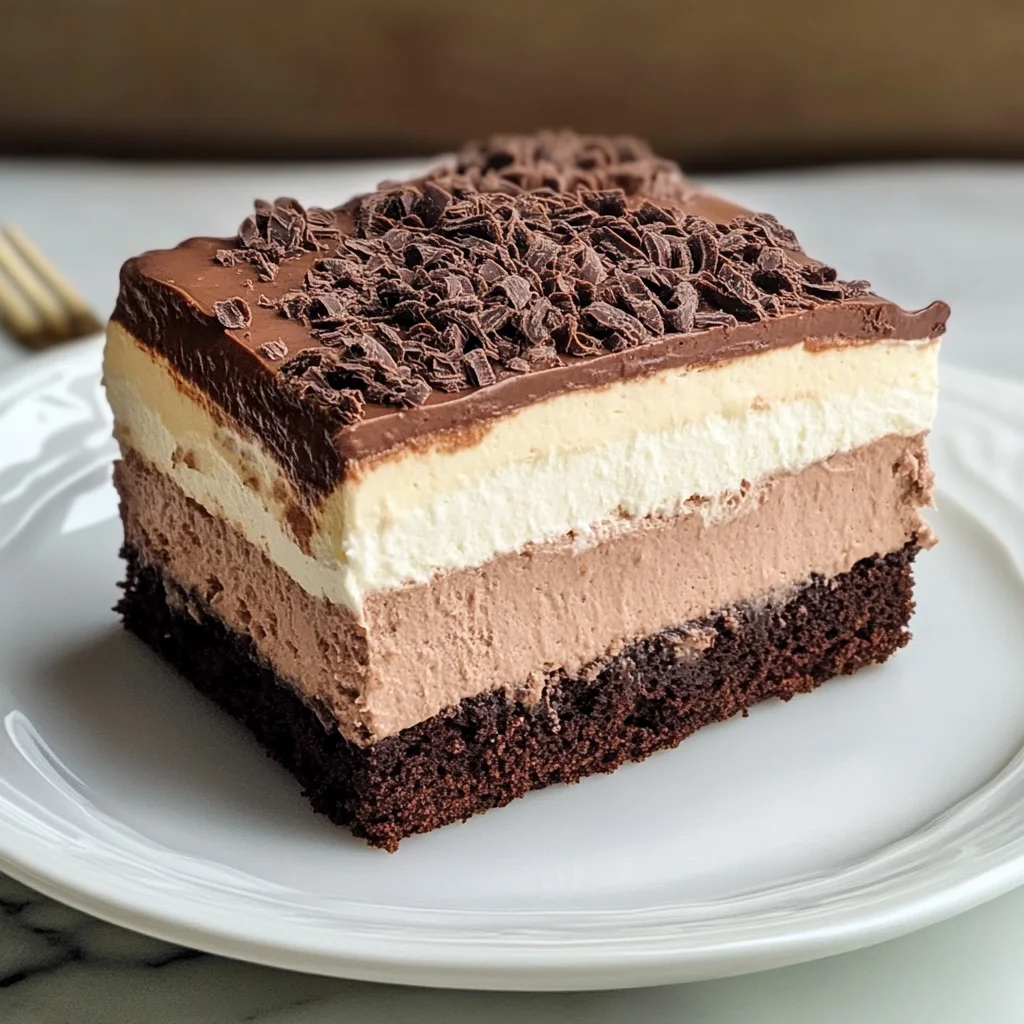
Today, I am overjoyed to share my version of this beloved recipe—the Italian Love Cake. This layered marvel combines smooth ricotta with decadent chocolate cake topped with silky whipped pudding. It’s a symphony of flavors that invites everyone into your kitchen and wraps them in warmth. I promise you; once you take the first bite, you’ll understand why this cake has stolen so many hearts!
Ingredients:
As we embark on this delightful culinary journey together, let’s gather our ingredients with love and intention. Each component plays an essential role in creating this masterpiece.
- 2 15-ounce containers of ricotta cheese. Ricotta is the star player here! Its creamy texture adds moisture and richness while creating that beautifully dense base layer we adore in our Italian Love Cake. Look for high-quality ricotta—preferably whole milk—for the best flavor. The freshness of ricotta will make all the difference; when you taste it, you’ll notice how it melts into every bite like liquid gold.
- 1 cup of granulated sugar. Ah, sugar—the sweet magic that balances our flavors! Not only does it add sweetness to our cake layers, but it also contributes to the lovely browning during baking through caramelization. I recommend using fine granulated sugar; it dissolves more seamlessly into our batter for that velvety texture we’re aiming for.
- 1 teaspoon of vanilla extract. Vanilla is often called the soul of baking—it’s absolutely paramount here! A good quality vanilla extract elevates our cake’s flavor profile by adding depth and warmth. Don’t rush to grab any old bottle; choose pure vanilla extract rather than imitation for an exceptionally aromatic experience.
- 4 large eggs (room temperature). Eggs are vital in binding everything together while providing structure and moisture to our layers. Room temperature eggs mix more evenly into the batter compared to cold ones—this simple step can have profound effects on texture! If you’ve forgotten to take them out ahead of time, no worries! Simply place them in warm water for about 10 minutes to bring them up to temp.
- 1 15.25 ounce box of chocolate or devil’s food cake mix. This boxed mix is where we get our rich chocolatey goodness without hours spent measuring flour and cocoa powder! When selecting your mix, consider one without artificial additives for a more wholesome dessert experience—after all, we want each layer to resonate with authenticity.
- 1/2 cup canola or vegetable oil. Oil plays a crucial role by keeping our cake moist and tender while ensuring it has that delightful crumb structure we crave in every forkful! Canola or vegetable oil works beautifully here because they have neutral flavors allowing the chocolate and ricotta to shine through without interference.
- 1 cup of water. Water may seem unassuming but trust me—it’s essential! It helps activate the dry ingredients in the cake mix while contributing additional moisture needed during baking so your layers remain soft and fluffy inside.
- 3 large eggs (another set!). These eggs will work their magic alongside the instant pudding later on; they provide stability in creating that beautiful topping texture we desire as well as enriching flavor throughout!
- 1 5-ounce box of instant chocolate pudding. Instant pudding is one of those delightful shortcuts! It thickens quickly when mixed with cold milk while adding richness and creaminess that complements our whipped topping perfectly—trust me when I say it brings everything together like nothing else can!
- 3 cups of milk (cold). Milk provides hydration for our pudding layer while enhancing its silkiness—the colder it is when added, the better emulsification you’ll achieve with your pudding mix!
- 1 8-ounce container of whipped topping, thawed. This is where things get extra dreamy! Whipped topping adds lightness on top after chilling; its airy nature creates a stunning contrast against those denser layers below while bringing additional sweetness without overpowering everything else.
Equipment You’ll Need:
Having the right tools at hand makes all the difference in your baking experience—it allows creativity to flow freely without unnecessary hindrances! While these might not be ingredients, they are certainly essential partners in crafting something wonderful.
- 9×13-inch baking dish – This dish is perfect for baking our layered creation evenly, ensuring each slice looks just as fabulous as it tastes! Glass or metal both work well; however, glass dishes tend to conduct heat more evenly which promotes thorough cooking throughout—just remember not to shock them by moving from hot oven directly onto cold surfaces!
- Mixing bowls (various sizes) – You’ll need these for combining ingredients effortlessly—a larger bowl for mixing wet components together before incorporating dry elements will help keep everything tidy! Choose sturdy bowls made from glass or ceramic—they’re easier on whisking hands compared to flimsy plastic options.
- Electric mixer (handheld or stand) – An electric mixer saves time while ensuring everything gets thoroughly blended together smoothly without any lumps hiding inside those delicious layers—you deserve smooth perfection! If you don’t have one handy though don’t fret; mixing by hand works just fine too; just be prepared for slightly more arm workout!
- Spatula – A flexible spatula helps fold delicate mixtures gently whilst scraping down sides effectively so nothing goes wasted—it’s crucial for achieving those lovely airy textures we want!
- Measuring cups & spoons – Precision matters when baking! Accurate measurements ensure consistency throughout each layer so grab yourself some reliable measuring tools before diving into this adventure!
Now that we’ve gathered all our ingredients and equipment together lovingly let’s jump into preparing our gorgeous Italian Love Cake!
Preparing the Italian Love Cake
Step 1: Preheat Your Oven
Before anything else begins bubbling away under warm lights within your kitchen sanctuary—let’s set up shop by preheating your oven to 350 degrees Fahrenheit (175 Celsius). Preheating ensures even cooking throughout every inch; skipping this step may lead unevenly baked layers which could affect overall taste—so don’t rush this part! While waiting patiently for those temperatures rise don’t forget to grease your trusty 9×13-inch baking dish generously with cooking spray—it’ll prevent sticking later on when it comes time to unveil this beauty!
Step 2: Create That Luscious Ricotta Mixture
In a large mixing bowl (ideally one that’s easy enough to work with), combine both containers of ricotta cheese along with granulated sugar and vanilla extract using your electric mixer set on medium speed until everything becomes smooth yet creamy—this process known as blending infuses air pockets within creating beautiful fluffiness! Gradually add four room-temperature eggs one at a time allowing each egg integrate fully before moving onto next—you should see mixture transform into liquid gold as flavors meld harmoniously together resembling heavenly custard-like texture once complete!
Step 3: Combine Dry Ingredients
Now let’s tackle those dry components—the heartiness behind every great layered cake begins here! In another bowl whisk together your box of chocolate cake mix alongside half cup canola oil plus one cup water until no lumps remain visible—this step activates those leavening agents hidden within powder ensuring splendid rise during bake time later on so do pay close attention here folks because skipping this might leave us flat-footed instead flavorful heights we’re striving towards achieving today!
Step 4: Marrying Wet & Dry Components
With both wet ricotta mixture alongside perfectly blended dry ingredients ready—the real fun begins now as we gently fold them together using spatula until combined thoroughly yet being careful not overmixing which can lead tough results rather than tender ones desired from cakes like ours today—that softness must be preserved like secret treasure within layers themselves! Pour batter evenly into greased dish then slide straight into preheated oven allowing magic unfold inside where aromas begin wafting gently making mouths water anticipation build stronger each passing minute until timer rings signaling time serve slice happiness soon followed afterwards…
Stay tuned for more steps where we’ll finish crafting this stunning masterpiece that’ll surely become cherished staple amongst friends family gatherings alike—I can’t wait for us dive deeper into proceeding stages transformation leading towards final product ready adorn tables celebrations everywhere!
Step 5: Mix the Ricotta Filling to Perfection
Now, let’s dive into creating that luscious ricotta filling that is truly the heart and soul of our Italian Love Cake. In a large mixing bowl, combine two 15-ounce containers of ricotta cheese, one cup of granulated sugar, and one teaspoon of vanilla extract. As you mix these ingredients together, you may notice the ricotta transforming from its dense, grainy texture into a creamy, inviting concoction. This change is essential; blending these ingredients creates a smooth base that will contrast beautifully with the chocolate layers. Use an electric mixer on medium speed for about 2 to 3 minutes until everything is well combined and fluffy. This step is absolutely paramount because it not only ensures that the sugar dissolves properly but also incorporates air into the mixture, giving it a lightness that will make each bite feel like a cloud of creamy goodness.
Then, one by one, add in four large eggs, making sure each egg is fully incorporated before adding the next. This is crucial because eggs are what bind our cake together and provide structure; they help create that moist texture we all adore. You’ll know when you’re ready to move on when your mixture appears smooth and slightly thickened—think custard-like in its consistency. Trust me on this: take some time to really blend everything well! You want every spoonful of your ricotta filling to be perfectly balanced and harmonious.
Step 6: Prepare the Chocolate Layer
Next up is our rich chocolate layer—this is where things get exciting! In another bowl, take a 15.25-ounce box of chocolate or devil’s food cake mix and combine it with 1/2 cup of canola or vegetable oil and 1 cup of water. I can already hear the delightful sounds of mixing as you stir these ingredients together! Use a whisk or spatula here; while a mixer can be tempting, stirring by hand allows you to gauge the batter’s consistency more accurately. You want this batter to be smooth but be careful not to overmix—overworking it can lead to a denser cake than desired.
Once your batter looks glossy and silky (it should flow off your spatula like liquid gold), it’s time for a crucial moment: layering! Pour about half of this rich chocolate batter into your greased 9×13 baking dish, ensuring it covers the bottom evenly. This chocolate layer serves as a perfect foundation for your fluffy ricotta filling; its richness complements the creaminess beautifully, creating that signature layered effect we all love in an Italian Love Cake.
Step 7: Layering It Up
Here comes the fun part! Carefully scoop out your prepared ricotta filling and dollop it over the chocolate layer in big spoonfuls—don’t worry about spreading it out too much at this point; just let those heavenly clouds rest atop that dark chocolate canvas. The ricotta will bake into delightful pockets throughout your cake, giving you scrumptious bites filled with creamy goodness amidst rich chocolate layers. Once you’ve added all of the ricotta mixture, gently pour the remaining chocolate batter over the top—this creates a spectacular visual effect as well as an incredibly delicious contrast when baked.
Before we move on to baking, take a moment to appreciate what you’ve created so far. Each layer holds promise—a promise of flavors melding together beautifully in the oven. As we prepare to bake this masterpiece, remember: patience is key here! Your Italian Love Cake needs time for those flavors to truly develop as they meld together during baking.
Step 8: Baking Your Perfect Italian Love Cake
Now comes perhaps one of my favorite moments in baking—the aroma that fills your kitchen as your creation bakes! Preheat your oven to 350 degrees Fahrenheit (you’ve done this already earlier) and slide your cake into the center rack. Let it bake for about 60-70 minutes—yes, I know it feels like forever but trust me on this—it’s worth every minute! Keep an eye on it starting around the 50-minute mark, checking for doneness by inserting a toothpick into the center; if it comes out clean or with just a few moist crumbs clinging to it, you’re golden!
During baking, something magical happens—the chocolate layer combines with the airy ricotta filling creating an irresistible symphony of textures and flavors. You’ll notice some slight puffing around the edges as it bakes—that’s normal! Don’t panic if it seems puffy at first; once removed from heat, it’ll settle back down beautifully as it cools. The edges should look firm yet soft enough in the center; if it’s jiggly but not liquidy when gently shaken, you’re right on track!
Step 9: The Cooling Phase
Oh, sweet anticipation! Once your cake has finished baking and has turned into a glorious golden-brown color with slight cracks forming on top (that’s how you know it’s done!), remove it from the oven carefully—be cautious because hot pans can be sneaky little devils! Allow your Italian Love Cake to cool in its pan for about 30 minutes before transferring it to a wire rack or simply leaving it in its cozy spot if you’re using serving directly from there.
Cooling might seem like an afterthought, but I promise you—it’s not! This process allows steam to escape which ensures that your cake doesn’t become soggy while helping solidify those beautiful layers you’ve created so lovingly. Once it’s cool enough to handle comfortably (but still warm), feel free to cut a slice—but wait just a bit longer before moving onto frosting!
Step 10: The Decadent Topping
Now let’s elevate our creation further with an utterly intoxicating topping! In another bowl, mix together one box (5 ounces) of instant chocolate pudding with three cups of cold milk until it’s thickened nicely—this should take about two minutes using either an electric mixer or whisking vigorously by hand if you’re feeling adventurous! The pudding adds another layer of richness—a velvety finish that will put smiles on everyone’s faces!
Once thickened, gently fold in an 8-ounce container of whipped topping, making sure everything blends seamlessly without losing any fluffiness—you want this topping light yet decadent. Spread this luscious concoction generously over the cooled cake’s surface—don’t skimp here; remember that every inch deserves love!
After completing this final step, chill your masterpiece in the refrigerator for at least two hours before serving—I know waiting can feel unbearable sometimes but trust me: chilling allows all those flavors to deepen and meld beautifully together which leads us to pure bliss upon first bite!
Conclusion:
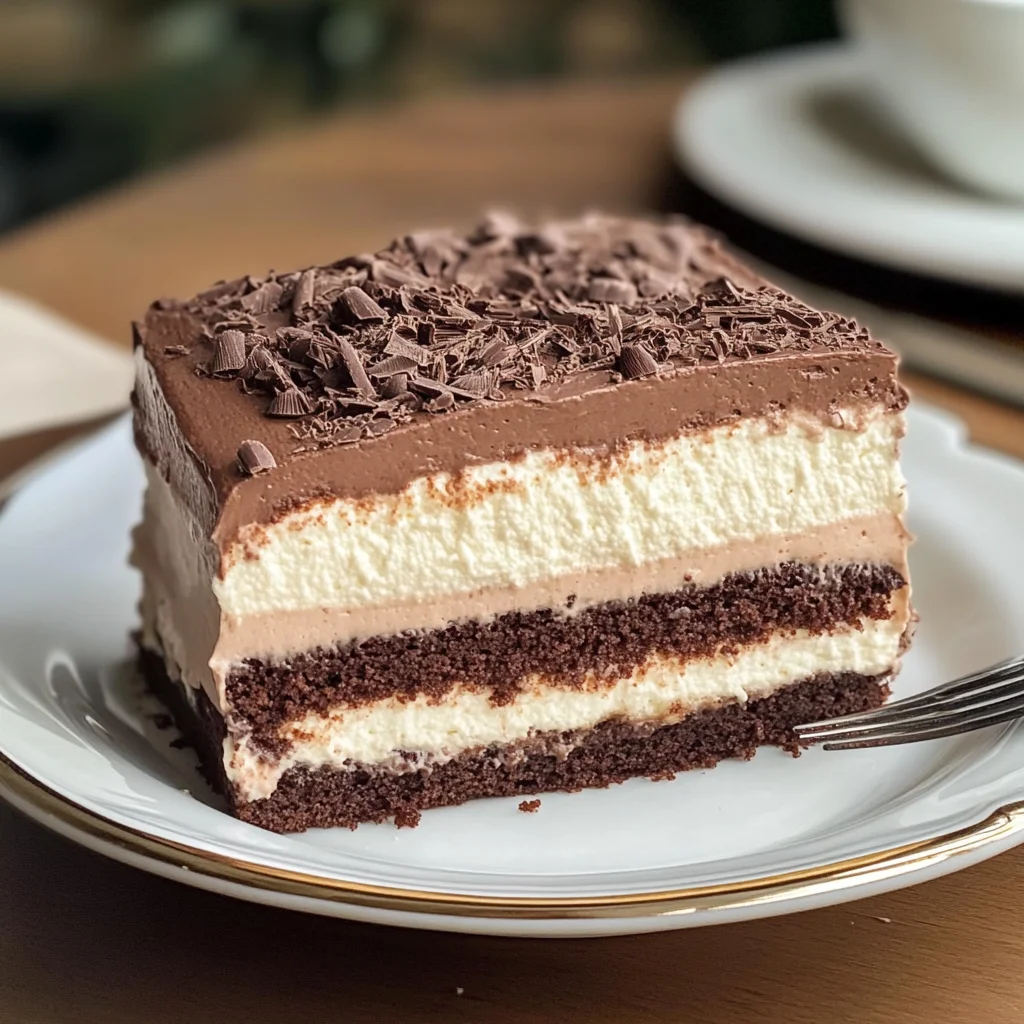
As we wrap up our journey through crafting this exceptional Italian Love Cake together, I hope you feel as excited as I do about bringing this recipe into your kitchen. There’s something truly extraordinary about how each layer harmonizes—the rich chocolate base meets the creamy ricotta filling in a delightful dance of flavors that’s utterly captivating. With just one bite, you’re transported to a cozy Italian trattoria where every dessert tells a story of love and family tradition. The texture is soft yet satisfying; every forkful offers a symphony of sweetness that is simply unforgettable.
This Italian Love Cake isn’t just another dessert; it’s an experience waiting to happen! Whether you’re celebrating a birthday, hosting friends for dinner, or simply treating yourself after a long day, this recipe shines brightly during any occasion. It invites laughter and joy into your home as everyone gathers around the table to share stories and create memories together. Picture yourself pulling this beauty from the oven: the warm chocolate aroma fills your space like a comforting hug—what could be better than that?
And when it comes to serving suggestions, don’t hold back! Imagine savoring one delightful slice with freshly brewed coffee for an afternoon pick-me-up or pairing it with vanilla ice cream for an indulgent dessert experience that will leave everyone raving. For those special moments—the holidays or family reunions—consider drizzling some homemade raspberry sauce over top for an added burst of tartness that balances out the richness beautifully.
Feeling adventurous? This recipe is wonderfully adaptable! You could swap out ricotta cheese for mascarpone if you’re craving something even creamier or add layers of fresh berries between those luscious layers for a fruity twist that’s both refreshing and vibrant. The possibilities are endless! So go ahead—experiment, make this recipe your own, and share your delicious creations with family and friends. I can’t wait to hear how yours turns out!
Italian Love Cake
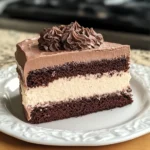
Indulge in the enchanting layers of this Italian Love Cake, a delightful fusion of creamy ricotta and rich chocolate that brings warmth and joy to any occasion. With its luscious texture and harmonious flavors, each bite feels like a warm embrace from loved ones. This cake isn’t just dessert; it’s an experience that unites family and friends around the table, celebrating life’s special moments. Whether for birthdays, anniversaries, or a cozy family dinner, this cake promises comfort and happiness with every slice.
- Prep Time: 30 minutes
- Cook Time: 70 minutes
- Total Time: 1 hour 40 minutes
- Yield: Approximately 12 servings 1x
- Category: Dessert
- Method: Baking
- Cuisine: Italian
Ingredients
- 2 containers (15 ounces each) ricotta cheese
- 1 cup granulated sugar
- 1 teaspoon vanilla extract
- 7 large eggs (room temperature)
- 1 box (15.25 ounces) chocolate or devil's food cake mix
- 1/2 cup canola or vegetable oil
- 1 cup water
- 1 box (5 ounces) instant chocolate pudding
- 3 cups cold milk
- 1 container (8 ounces) whipped topping
Instructions
- Preheat oven to 350°F (175°C) and grease a 9×13-inch baking dish.
- In a bowl, mix ricotta cheese, sugar, and vanilla until smooth. Add eggs one at a time until fully blended.
- In another bowl, combine cake mix, oil, and water until smooth. Pour half into the prepared dish.
- Spoon the ricotta mixture over the chocolate layer without spreading too much.
- Pour the remaining chocolate batter on top.
- Bake for 60-70 minutes or until a toothpick comes out clean.
- Cool for 30 minutes before preparing the topping by mixing pudding with cold milk and folding in whipped topping.
- Spread the topping over cooled cake and chill for at least two hours before serving.
Nutrition
- Serving Size: 1 slice (approximately 150g)
- Calories: 320
- Sugar: 22g
- Sodium: 270mg
- Fat: 15g
- Saturated Fat: 4g
- Unsaturated Fat: 10g
- Trans Fat: 0g
- Carbohydrates: 42g
- Fiber: 1g
- Protein: 7g
- Cholesterol: 55mg