Teriyaki Chicken and Rice Casserole
There’s something profoundly satisfying about gathering with loved ones over a meal that warms not just the belly but the heart. The Teriyaki Chicken and Rice Casserole is more than just a dish; it’s a heartfelt embrace on a plate, a comforting reminder of shared moments and laughter around the table. Imagine the rich aroma filling your kitchen as the chicken bakes to perfection, mingling with the sweet and savory notes of homemade teriyaki sauce. Each bite is an explosion of flavors that transports you straight to a bustling Asian market, where vibrant colors and tantalizing scents beckon from every stall. This casserole doesn’t just nourish; it creates memories, making it an extraordinary choice for family dinners or cozy gatherings with friends.
I’ve always been captivated by the harmony of flavors in Asian cuisine, where each ingredient plays a vital role in crafting something uniquely delightful. The balance of salty soy sauce, sweet pineapple, and fragrant ginger creates a symphony that resonates deeply with anyone who has ever savored these tastes together. This Teriyaki Chicken and Rice Casserole embodies that spirit, as it draws inspiration from traditional recipes while providing the convenience of a one-pan meal. Perfect for those busy weeknights or when you’re simply craving something comforting yet exciting, I promise you’ll find yourself coming back to this recipe time and again.
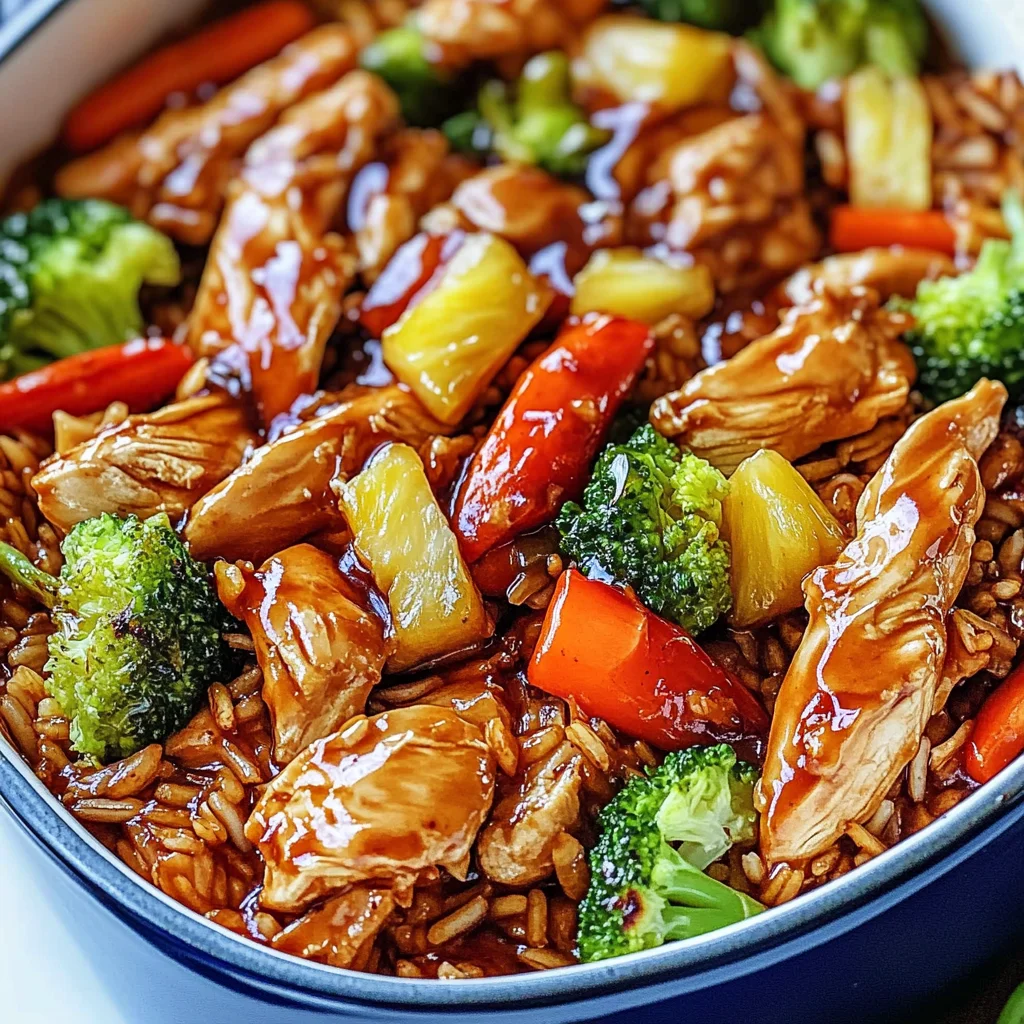
Teriyaki Chicken and Rice Casserole: A Warm Embrace in Every Bite
Let’s embark on this culinary journey together! This recipe is straightforward yet filled with layers of flavor that will impress your family or guests without requiring hours in the kitchen. As we dive into the ingredients, think about how each element contributes to this delightful dish—like old friends coming together for a reunion.
Ingredients:
- 3/4 cup low sodium soy sauce. Soy sauce serves as the backbone of our teriyaki sauce, infusing everything with its umami goodness. Opting for low sodium ensures you can enjoy all that flavor without overwhelming saltiness; it allows the delicate balance of other ingredients to shine through. When purchasing soy sauce, look for brands that prioritize quality—this small detail can elevate your dish immensely.
- 1/2 cup water. Water might seem like an insignificant player here, but it’s crucial for achieving the right consistency in your teriyaki sauce. It helps to dilute some flavors initially so they can meld beautifully while thickening later when combined with cornstarch. Always remember—every ingredient plays its part!
- 1/3 cup packed brown sugar. Brown sugar adds depth and richness to our sauce; its molasses content complements the soy sauce’s saltiness perfectly. It creates that irresistible sticky sweetness we associate with classic teriyaki dishes. Be sure to pack it well into your measuring cup to achieve that luscious caramel-like flavor in every bite.
- 1 tablespoon honey. Honey brings not only sweetness but also floral notes that are simply delightful against the backdrop of savory chicken and vegetables. Using honey instead of corn syrup or refined sugar provides a natural touch while enhancing the overall texture of our teriyaki sauce—it’s like liquid gold adding richness!
- 3/4 teaspoon ground ginger. Ginger is essential here—it brings warmth and spiciness that brightens up our casserole wonderfully! Fresh ginger would be ideal if you have it available; however, ground ginger works beautifully too when you’re short on time or ingredients. Its zing cuts through heavier flavors, creating balance.
- 1 teaspoon olive oil. Olive oil is not just a cooking medium here; it’s also added for its healthier fat content which enhances flavor absorption during cooking. It helps create smoothness in our sauce while allowing all those aromatic elements to mingle perfectly—a non-negotiable step towards success!
- 1/2 teaspoon minced garlic. Garlic is like nature’s seasoning wizard; its pungent aroma transforms as it cooks down into something sweet and mellow, adding layers of flavor throughout our casserole. Make sure to chop it finely—this ensures even distribution within your dish so no clove goes uneaten!
- 2 tablespoons cornstarch (for slurry). Cornstarch acts as our thickening agent here; it transforms our teriyaki sauce from thin liquid to luscious glaze when cooked properly! Creating a slurry by mixing cornstarch with water prevents clumps from forming—trust me on this technique—it’s crucial!
- 2 tablespoons water (for slurry). Just like before, this bit of water combines seamlessly with cornstarch to create that magical thickening mixture needed for perfect consistency in our rich teriyaki sauce.
- 1.5 pounds boneless skinless chicken breasts. The star of our casserole! Using boneless skinless chicken breasts keeps things simple while ensuring tender bites throughout each serving! When selecting chicken at the store, look for plump pieces without any discoloration or unpleasant odors—the fresher they are, the better they’ll taste!
- 32 oz frozen mixed vegetables (unsauced Asian varieties). Frozen mixed veggies offer convenience without sacrificing nutrition or flavor—they’re often flash-frozen right after harvest which preserves their vibrant colors and nutrients! Look for unsauced varieties featuring peas, carrots, broccoli—all fantastic companions alongside our chicken and rice!
- 1 cup pineapple tidbits (drained, packed in juice). Pineapple adds not only sweetness but also acidity that cuts through richness beautifully! When selecting canned pineapple tidbits, go for those packed in juice rather than syrup—this ensures you’re keeping things light yet flavorful—not overly sugary.
- 3 cups cooked brown rice. Brown rice serves as both base and backbone for this hearty casserole; its nutty flavor complements all other ingredients seamlessly while providing fiber that’ll keep everyone satisfied longer! Cooking brown rice may take longer than white but trust me—the extra effort is worth every chewy bite!
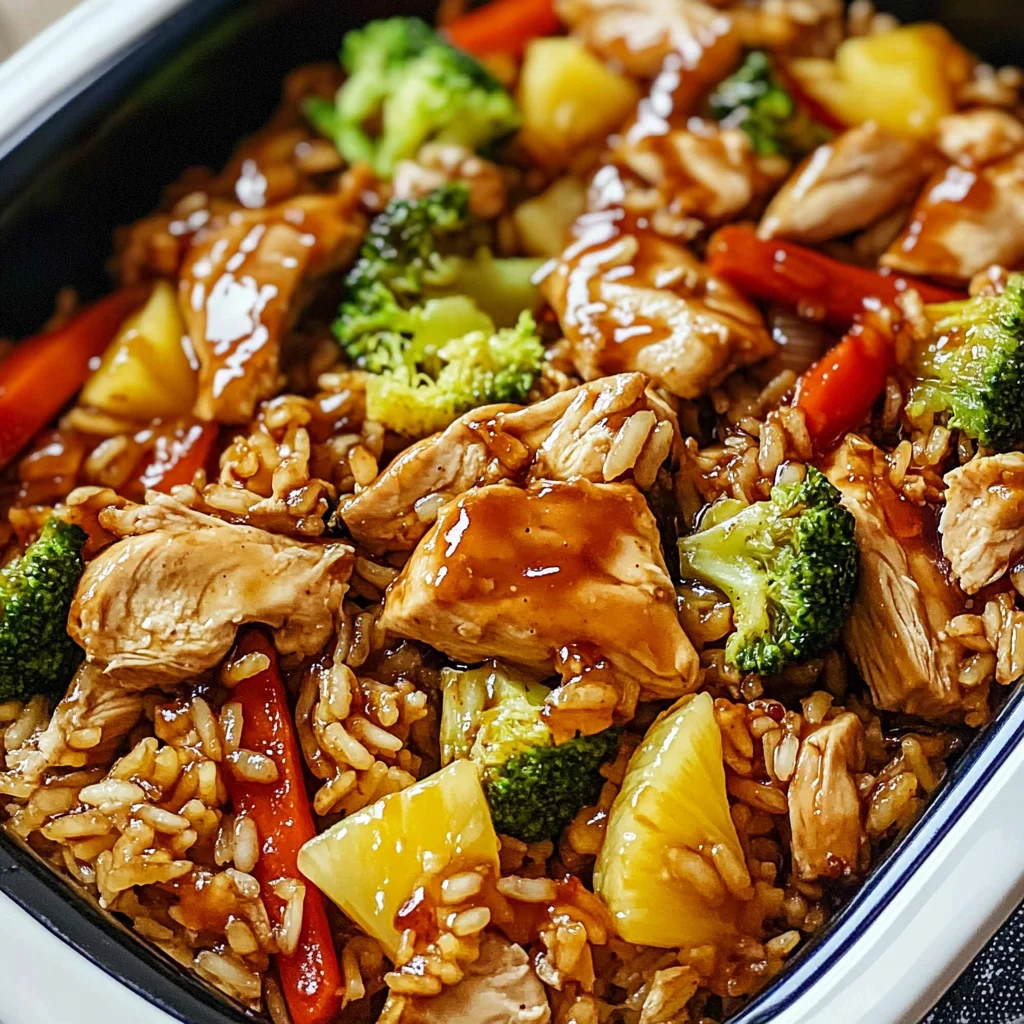
Equipment You’ll Need:
Having the right tools makes this cooking adventure smoother and much more enjoyable! While these items aren’t ingredients themselves, they are essential partners in creating something truly wonderful.
- 9×13-inch casserole dish – This size is perfect for holding all those delicious layers we’re building up! It provides enough space to bake everything evenly while ensuring easy serving later on when you want to dig into this comforting treasure.
- Small saucepan – A versatile tool indeed! You’ll need it for creating that incredible teriyaki sauce from scratch—the gentle heat allows flavors to meld harmoniously without burning anything crucial along the way.
- Mixing bowl – Great for combining ingredients smoothly without creating too much mess—especially useful when prepping your cornstarch slurry before adding it into boiling sauces!
- Whisk or wooden spoon – Either tool works wonders here! A whisk helps incorporate air as you mix sauces while preventing clumping; however, if you prefer sturdy stirring action throughout cooking processes then opt for a trusty wooden spoon instead—it feels so familiar!
Now that we’ve got our ingredients lined up beautifully alongside essential equipment ready at hand let’s get cooking this Teriyaki Chicken and Rice Casserole!
Step 1: Creating Liquid Gold
In a small saucepan over medium heat combine your low sodium soy sauce along with half a cup of water—that initial dilution allows flavors ample room to blossom rather than overwhelm each other right off-the-bat! Add brown sugar—which will dissolve gently into mixture along with honey followed closely by ground ginger too—all these elements work together creating truly inspired layers within each serving later on down line—don’t rush this step; allow them sufficient time melding together nicely before covering pan fully heating until bubbling begins dancing across surface—it should feel like magic unfolding right before eyes!
Step 2: Thickening Up
Once bubbling occurs (you’ve mastered patience already!), grab yourself another small bowl where we’ll prepare slurry using two tablespoons cornstarch plus two tablespoons water mixing until smooth consistency forms—this process called ‘slurry-ing’ prevents any lumps sneaking into final product once added back into boiling pot stirring constantly till desired thickness achieved—it’ll transform from thin liquid into glossy glaze coating chicken beautifully throughout casserole later on!
Step 3: Prepping Our Chicken
Preheat oven now at 350°F (175°C) because soon enough we’ll be placing those juicy boneless skinless chicken breasts inside 9×13-inch baking dish readying them up under lovingly crafted teriyaki sauce drenching over top generously coating each piece equally making sure no inch untouched—we want maximum flavor infusion happening here folks!
Step 4: Baking Perfection
Slide your prepared dish into preheated oven allowing magic happen within over next thirty-five minutes watching closely until internal temperature reaches 165°F (74°C)—when done correctly meat becomes tender enough easily shreddable once removed from oven allowing quick transformation bite-sized pieces awaiting incorporation later down line alongside veggies plus rice gathering together forming harmony amongst them all within final baked masterpiece ahead!
Stay tuned as we continue crafting this delightful casserole together—and believe me—you won’t want to miss out on what’s coming next!
Step 5: Shredding the Chicken to Perfection
As your chicken bakes in the warm embrace of the oven, you’ll notice how enticingly fragrant your kitchen becomes. This is when aromas of garlic and ginger start dancing through the air, creating an atmosphere that feels like a cozy hug from an old friend. Once the timer beeps, signaling that your chicken has been baking for 30-35 minutes, it’s time to check for doneness. You’re looking for an internal temperature of 165°F (74°C), which is absolutely paramount to ensure that your chicken is safely cooked while remaining juicy and tender—trust me, no one wants dry chicken in their casserole!
When you confirm that the chicken has reached this ideal temperature, carefully remove the casserole dish from the oven (remember, it’s hot!). Using two forks or meat claws—whatever you have on hand—gently pull apart the chicken breasts right there in the dish. Shredding it directly into the sauce allows those delightful flavors to mingle and soak into each morsel of chicken, ensuring every bite is a symphony of taste. Take your time with this step; there’s something incredibly satisfying about shredding chicken when it’s perfectly cooked and infused with teriyaki goodness. You want it to be in bite-sized pieces so that each spoonful of casserole offers a little bit of everything.
Step 6: Preparing Your Colorful Vegetable Medley
While your chicken is basking in its shredded glory, it’s time to turn our attention to those gorgeous frozen mixed vegetables. I’ve always been captivated by how vibrant colors can transform a dish—those greens, oranges, and yellows not only add visual appeal but also bring a variety of nutrients that are essential for maintaining health and wellness. Follow the package instructions to steam or cook your frozen vegetables; this usually involves either microwaving them or boiling them briefly until they are tender-crisp. You want to avoid overcooking because that can lead to mushiness—a definite no-no when we want our casserole to have texture!
Once they’re cooked just right—a few minutes should do—you’ll notice their colors become more vibrant and their natural sweetness intensifies. This step is crucial because adding these perfectly cooked vegetables means you’re infusing your casserole with freshness and crunch, balancing out the richness of the teriyaki sauce and shredded chicken beautifully. It’s like adding a burst of sunshine to your meal! After cooking, set them aside while you prepare your brown rice.
Step 7: The Heartwarming Brown Rice Experience
Now let’s talk about brown rice—a whole grain powerhouse packed with fiber and nutrients! Cooking brown rice does take a little longer than white rice due to its bran layer, but I promise you, it’s worth every extra minute for both flavor and health benefits. Follow the package directions carefully; typically, you’ll need about two cups of water for every cup of brown rice. Bring it all to a boil before reducing it down to a simmer and covering it tightly.
This step requires patience—it usually takes about 40-50 minutes for brown rice to fully cook—but trust me on this: Allowing it to absorb all that water slowly helps achieve a fluffy texture rather than being gummy or sticky. You’ll know it’s done when all the water has evaporated and the grains are tender yet slightly chewy. Once cooked, fluff the rice gently with a fork before adding it into your casserole mixture; this will help keep those grains separate while still adding heartiness to our comforting dish.
Step 8: Bringing It All Together
Ahh, here comes one of my favorite parts—the moment everything comes together in one glorious casserole dish! With your shredded chicken waiting patiently alongside those deliciously vibrant mixed vegetables and fluffy brown rice, grab that beautiful teriyaki sauce you prepared earlier—oh yes, don’t forget about this liquid gold! Pour most of it over your shredded chicken and vegetables in the casserole dish; save just a little for drizzling later on top for an extra kick of flavor.
Now gently fold everything together using a large spatula or wooden spoon—be careful not to mash anything down too aggressively; we want those ingredients to retain their integrity while mixing together harmoniously. Picture this: as you stir everything up, you’ll see how each component combines into a colorful medley teeming with texture and taste! The rich teriyaki sauce wraps around each element like an affectionate embrace, ensuring every bite will transport you straight into flavor town.
Baking Your Perfect Teriyaki Chicken and Rice Casserole
With everything beautifully combined in your casserole dish, it’s time for one last trip into the oven. Preheat again if needed (though at this point, your oven should still be warm) to 350°F (175°C). Carefully spread out your combined mixture evenly across the dish; this ensures even heating throughout—which is non-negotiable if we want every bite to be as delicious as possible!
Cover with foil for the first ten minutes as it bakes; this prevents excessive browning while allowing all those irresistible flavors mingling within our casserole to meld beautifully together without drying out any ingredients too quickly. After ten minutes have passed (and trust me when I say you’ll feel anticipation building!), remove that foil so we can let our masterpiece get golden brown on top during those final five minutes in the oven—the perfect finishing touch!
Step 9: The Finishing Touch
Finally! As you pull your Teriyaki Chicken and Rice Casserole from the oven after its final bake—and oh my goodness, look at that bubbling goodness—you might find yourself overcome by an intoxicating aroma wafting through your kitchen! Let it rest for about five minutes before serving; this brief pause allows all those flavors one last chance to settle—an essential step because rushing could lead some ingredients running away from their flavorful friends!
Drizzle any reserved teriyaki sauce on top just before serving—it adds an extra layer of depth that’s simply irresistible! Scoop generous portions onto plates or into bowls; don’t forget those lovely bits of pineapple nestled amongst everything else—they add such delightful sweetness! Trust me when I say each mouthful will be profoundly satisfying as you’re enveloped by textures ranging from tender chicken bites mingling harmoniously with crisp veggies against that luscious sauce backdrop.
So there you have it! A hearty Teriyaki Chicken and Rice Casserole made from scratch—a true labor of love that’s not just food but an experience filled with laughter around dinner tables everywhere! Whether enjoyed as leftovers or fresh out of the oven steaming hot—you’ll find it’s sure to become a cherished addition among family favorites! Enjoy every delicious bite!
Storage and Enjoyment Tips for Your Teriyaki Chicken and Rice Casserole
Now that your Teriyaki Chicken and Rice Casserole has emerged from the oven, bubbling and golden, it’s time to dig in! The aroma wafting through your kitchen is utterly intoxicating, promising a meal that’s both comforting and packed with flavor. But before you rush to devour every last bite, let’s talk about how to store this delicious creation for another day or two. Trust me; you’ll want to extend the joy of this dish as long as possible!
Storing Leftover Teriyaki Chicken and Rice Casserole
To keep your leftover Teriyaki Chicken and Rice Casserole fresh and flavorful, transfer it into an airtight container. Glass containers are my personal favorite since they don’t retain odors or stains like plastic can. This casserole will stay delicious in the refrigerator for up to four days. An insider tip: place a slice of bread in the container with your casserole; it helps absorb excess moisture, keeping the rice fluffy and delightful! When you take it out for a quick meal later, you’ll find that the flavors have mingled beautifully overnight, creating an even more profound taste experience. Reheating is a breeze too; just pop it in the microwave or warm it gently in the oven until heated through, adding a splash of water if needed to revive any dryness.
Freezing Teriyaki Chicken and Rice Casserole for Later
If you’re thinking ahead (which I wholeheartedly encourage), consider freezing portions of this Teriyaki Chicken and Rice Casserole! To do this properly, let it cool completely first, then divide it into freezer-safe containers or heavy-duty freezer bags—squeeze out any excess air before sealing. This dish can be frozen for up to three months without losing its wonderful flavors. Whenever you’re ready for a cozy meal on a busy night, simply pull out a portion from the freezer. You can thaw it overnight in the fridge or reheat directly from frozen at a low temperature in the oven to ensure even warming while maintaining that beloved texture. This method is not only convenient but allows you to enjoy this comforting dish even when life gets hectic!
I hope these tips inspire you to savor every bit of your Teriyaki Chicken and Rice Casserole experience!
Teriyaki Chicken and Rice Casserole
Discover the joy of sharing a meal with loved ones through this Teriyaki Chicken and Rice Casserole. This comforting dish is a delightful fusion of flavors, combining tender chicken, sweet pineapple, and vibrant vegetables enveloped in a rich homemade teriyaki sauce. Ideal for busy weeknights or cozy gatherings, this one-pan wonder not only nourishes the body but also warms the heart. With its easy preparation and satisfying taste, it’s bound to become a family favorite. Enjoy the fragrant aroma as it fills your kitchen, leading to unforgettable moments around the dinner table.
- Prep Time: 20 minutes
- Cook Time: 45 minutes
- Total Time: 1 hour 5 minutes
- Yield: Serves approximately six people 1x
- Category: Main
- Method: Baking
- Cuisine: Asian
Ingredients
- 3/4 cup low sodium soy sauce
- 1/2 cup water
- 1/3 cup packed brown sugar
- 1 tablespoon honey
- 3/4 teaspoon ground ginger
- 1 teaspoon olive oil
- 1/2 teaspoon minced garlic
- 2 tablespoons cornstarch (for slurry)
- 1.5 pounds boneless skinless chicken breasts
- 32 oz frozen mixed vegetables (unsauced Asian varieties)
- 1 cup pineapple tidbits (drained, packed in juice)
- 3 cups cooked brown rice
Instructions
- Preheat oven to 350°F (175°C).
- In a small saucepan over medium heat, combine soy sauce, water, brown sugar, honey, ground ginger, olive oil, and minced garlic. Heat until bubbling.
- In a separate bowl, mix cornstarch with two tablespoons of water to create a slurry; add to the bubbling sauce and stir until thickened.
- Place chicken breasts in a greased 9×13 inch casserole dish and pour teriyaki sauce over them.
- Bake for 30-35 minutes or until internal temperature reaches 165°F (74°C). Shred chicken in the dish once cooked.
- Steam or cook frozen vegetables according to package instructions and set aside.
- Add cooked brown rice and vegetables to the shredded chicken and stir gently to combine.
- Return casserole to the oven for an additional 10 minutes before serving.
Nutrition
- Serving Size: 1 serving
- Calories: 410
- Sugar: 13g
- Sodium: 590mg
- Fat: 7g
- Saturated Fat: 1g
- Unsaturated Fat: 5g
- Trans Fat: 0g
- Carbohydrates: 62g
- Fiber: 4g
- Protein: 28g
- Cholesterol: 70mg