No Knead Cheddar Bread in the Dutch Oven
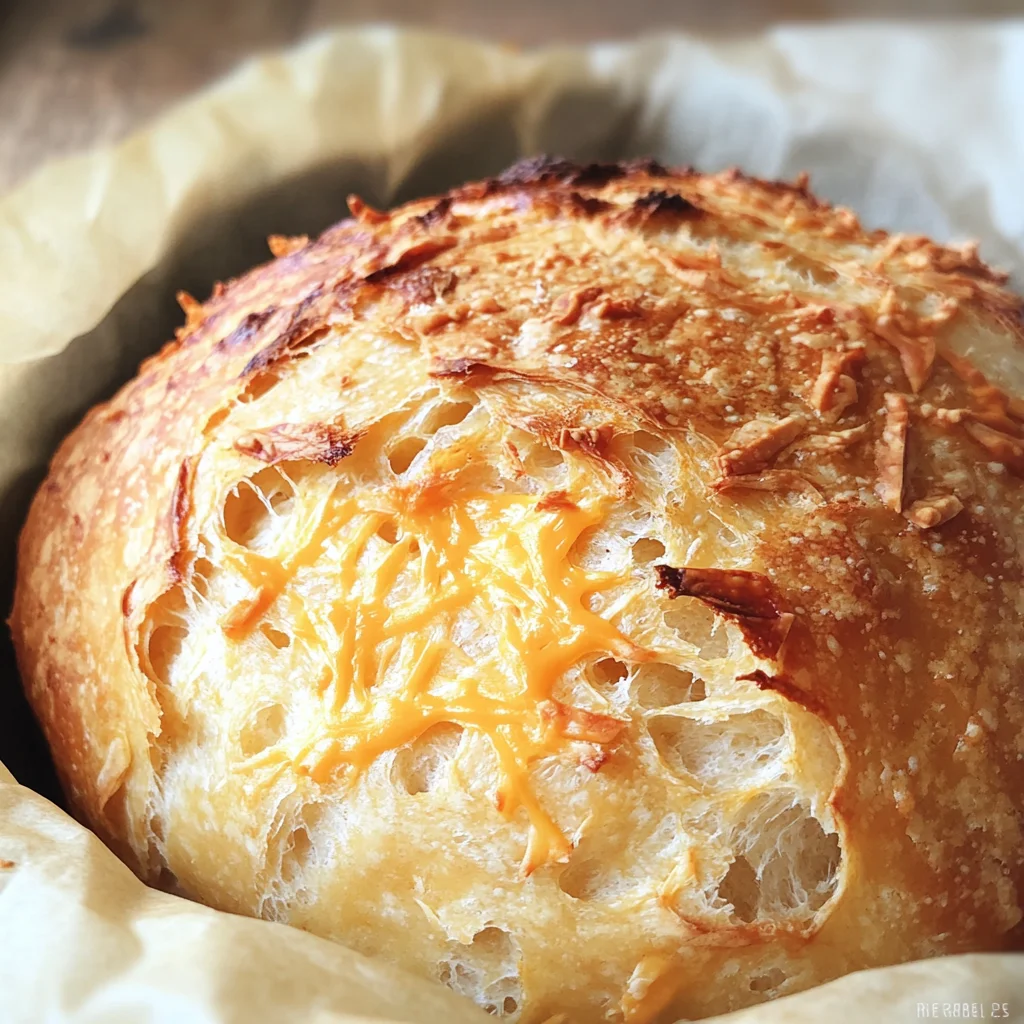
There’s something undeniably magical about the aroma of freshly baked bread wafting through your home. It’s a symphony that beckons friends and family to gather around, sharing stories and laughter while savoring warm, golden slices. When I think of comforting recipes that bridge the gap between tradition and innovation, my mind immediately dances to this No Knead Cheddar Bread in the Dutch Oven. This recipe is more than just a culinary creation; it’s an experience filled with anticipation and joy. Imagine the moment you pull that bubbling loaf from the oven, its crust crackling invitingly as you slice into it, revealing a soft, cheesy interior. Each bite is a delightful blend of flavors, where sharp cheddar meets rustic bread—a true testament to how simple ingredients can come together to create something profoundly satisfying.
The beauty of this No Knead Cheddar Bread lies not just in its taste but also in its simplicity. You won’t need fancy techniques or hours of kneading; instead, we embrace the art of patience and allow time to work its magic. As the dough rests and bubbles away for hours, it develops a depth of flavor that’s utterly intoxicating. And let’s not forget that comforting sensation of pulling apart a warm piece of bread, the cheese melting slightly as you tear into it—it’s a moment that feels like a warm hug on a cold day. Whether it’s for a cozy dinner with loved ones or simply to enjoy with a cup of soup on your own, this bread is an invitation to pause and savor life’s simple pleasures.
No Knead Cheddar Bread in the Dutch Oven: A Rustic Delight
Let’s dive into this beautiful recipe that will undoubtedly become your new favorite! There’s something so rewarding about creating bread at home—watching it rise and transform into a glorious loaf is truly special. With just five ingredients and minimal effort, you’re on your way to baking brilliance!
Ingredients:
As we embark on this culinary journey together, let’s take a moment to appreciate each ingredient’s role in creating our delicious No Knead Cheddar Bread in the Dutch Oven. Each component plays an important part in building flavor and texture.
- 3 cups all-purpose flour. This is the foundation of our bread—the canvas upon which we’ll paint our cheesy masterpiece. All-purpose flour is versatile and provides just the right balance of protein for structure without being too heavy. When choosing flour, look for brands that are finely milled for optimal texture; it should feel soft between your fingers. If you’re feeling adventurous or want to add depth of flavor, consider substituting up to half with whole wheat flour for an earthy twist!
- 2 teaspoons salt. Salt isn’t merely seasoning; it’s an essential ingredient that deepens flavors and strengthens gluten structures in bread-making. This is crucial for creating that perfect crust while also enhancing the sharpness of our cheddar cheese. I always recommend using kosher salt because it’s easy to measure and dissolves well during mixing—just remember that table salt can be more concentrated!
- 1/2 teaspoon yeast. Yeast might seem small but trust me when I say it’s absolutely paramount here! It acts as our leavening agent, allowing our dough to rise beautifully over time without needing any kneading at all—which is what makes this recipe so special! The key is patience; we’re using less yeast than traditional recipes because we want slow fermentation to develop those complex flavors.
- 1 1/2 cups water (room temperature). Water brings everything together—it hydrates the flour and activates our yeast! Using room temperature water helps kickstart fermentation without shocking the yeast cells, allowing them to work their magic effortlessly over hours. Be mindful that if your water is too hot or too cold, it could stall fermentation or kill off those precious yeast cells.
- 1 1/4 cups shredded sharp cheddar cheese. Ahh, here’s where things get exciting! Sharp cheddar adds not only rich flavor but also moisture and texture within our bread. I love using freshly shredded cheese because pre-packaged varieties often contain anti-caking agents that can impact meltability—you want those glorious cheesy pockets throughout! Feel free to experiment with different types of cheeses or combine them for unique flavors; just ensure they melt well!
Equipment You’ll Need:
Now that we’ve gathered all our beautiful ingredients let’s talk about some essential tools that’ll make this baking adventure smooth sailing! Having the right equipment can truly elevate your experience in the kitchen.
- Large mixing bowl – This is where all the magic begins! A large bowl gives you ample space for mixing without risking spills—trust me; nobody wants a flour explosion during dough preparation! Choose one that’s sturdy enough for some enthusiastic stirring yet light enough for easy handling.
- Dutch oven – This iconic cast-iron pot serves as our vessel for baking this rustic loaf perfectly! The heavy lid traps steam inside while cooking, creating an environment similar to professional steam ovens—resulting in that gorgeous crust we crave! If you don’t have one yet, consider investing in one; it’s such an invaluable tool not just for bread but also soups and stews.
- Parchment paper (optional) – While not strictly necessary, lining your Dutch oven with parchment paper makes removing your loaf much easier once it’s done baking—and who doesn’t love minimal cleanup? It also prevents sticking when serving!
- Whisk – A simple yet essential tool for combining dry ingredients evenly before adding liquids ensures no clumps remain while bolstering gluten strands from day one. Whisks come in various sizes, but opt for one with sturdy wires for effective mixing.
Preparing the No Knead Cheddar Bread in the Dutch Oven
Step 1: Mixing It All Together
Begin by taking your large mixing bowl—the heart of this process—and whisk together 3 cups of all-purpose flour, 2 teaspoons of salt, and 1/2 teaspoon of yeast until combined thoroughly. This step may seem simple but trust me when I say it’s crucial: whisking helps aerate your dry ingredients while ensuring even distribution throughout your dough later on! Once combined, slowly pour in 1 1/2 cups room temperature water while gently stirring with a wooden spoon or spatula until you see no dry flour left behind—this should result in a sticky dough that’s almost shaggy looking. Don’t worry if it seems too wet initially; that’s exactly what we want—it means we’re setting ourselves up for an incredible rise later!
Step 2: Incorporating Cheese
Once you’ve mixed your dough into that sticky consistency (and perhaps licked some off your fingers—I won’t tell!), sprinkle 1 1/4 cups shredded sharp cheddar cheese over top before folding it into itself gently using your spatula until fully incorporated throughout the mixture. The incorporation process here should be delicate—over-mixing could lead us toward tough bread instead of tender loveliness! What you’ll notice as you fold each section over itself is how beautifully melted cheese begins mingling within these lovely strands formed by gluten development.
Step 3: Time To Rest
Next comes one of my favorite parts: patience! Cover your mixing bowl tightly with plastic wrap or a damp cloth (to prevent drying out) and set aside at room temperature for anywhere from twelve to eighteen hours—yes really! During this time, wild yeasts will feast on sugars within our dough while producing gases resulting in bubbles forming throughout—a signifier that fermentation is happening beautifully beneath its surface! Don’t rush this step as it’s absolutely paramount—it allows flavors to deepen significantly while giving us those airy pockets throughout once baked!
Step 4: Prepping For Baking
When ready to bake after patiently waiting overnight (or possibly longer), preheat your oven along with an empty Dutch oven inside at 450 degrees Fahrenheit—this ensures maximum heat retention once we introduce our beloved dough into this steamy chamber later on! Meanwhile prepare yourself by heavily dusting either parchment paper laid out on a smooth surface or simply sprinkling flour directly onto said surface before nudging out your rested dough from its bowl gently (it may seem sticky still). Roll it softly through additional flour until shaped roughly into a ball form—this doesn’t need perfection since rustic loaves thrive on character rather than uniformity!
With these steps complete so far we’ve already laid down great groundwork towards crafting memorable moments shared over home-baked food—the anticipation builds as you envision slicing through golden crusty goodness soon enough… Trust me when I say good things come from embracing both time + care within cooking endeavors alike!
Stay tuned as we continue exploring further steps leading us closer towards enjoying slices bursting with cheesy goodness straight from our very own kitchens…
The Joy of Preparing No Knead Cheddar Bread in the Dutch Oven
As we embark on this delightful baking journey together, let’s take a moment to revel in the magic of bread-making. There’s something profoundly satisfying about creating a loaf of No Knead Cheddar Bread in the Dutch Oven that fills your kitchen with warmth and tantalizing aromas. This isn’t just any bread; it’s a rustic masterpiece that marries the simplicity of basic ingredients with the bold flavor of sharp cheddar cheese. I promise you, once you get a whiff of that golden crust and taste the rich, cheesy interior, you’ll understand why this bread has earned a special place in my heart.
Step 5: Embrace the Resting Period
After your dough has been lovingly mixed together, it’s time for one of the most crucial steps: resting. This isn’t just waiting around; this is a transformative period where patience pays off in spades! Cover your bowl with a clean kitchen towel or plastic wrap and let it sit at room temperature for 12 to 18 hours. Yes, you read that right—this lengthy rest is absolutely paramount to developing flavor and texture. During this time, the yeast will work its magic, bubbling away and fermenting as it creates carbon dioxide gas which leads to that airy texture we all adore in bread.
Don’t rush this step! I know it can be tempting to want to bake immediately, but trust me on this: allowing your dough to rise slowly enhances its flavor profile tremendously, resulting in a loaf that is complex and utterly intoxicating. When you eventually unveil your dough after its long slumber, you should see a bubbly surface with a slightly domed shape—a sure sign that all those yeasty little soldiers have been hard at work!
Step 6: Preheating with Purpose
Now comes an exciting moment—preheating your dutch oven! This step is not just about raising the temperature; it’s about creating an ideal environment for baking your bread. Place your empty dutch oven into your oven and preheat it to 450 degrees Fahrenheit. It may seem like an extraneous step, but heating up the dutch oven beforehand is non-negotiable when it comes to achieving that gorgeous crust we’re after. The high heat helps create steam within the pot while baking, which keeps your crust crispy while allowing the inside to remain soft and fluffy.
As you preheat, take this opportunity to prepare your workspace by heavily flouring a smooth surface where you’ll shape your dough later on. The flour acts like a protective layer, preventing sticking—so don’t skimp on this part! You’re not just rolling out dough; you’re setting yourself up for success in every bite later on.
Step 7: Shaping Your Dough
Once your dutch oven has reached its peak temperature and tantalizing heat radiates from it, it’s time for some hands-on action—shaping that beautiful dough! Gently turn your rested dough onto the floured surface; it may seem sticky at first, but no worries! Flour will be your best friend here. Use floured hands to gently work the dough into a ball without kneading it (hence our no knead approach!).
By folding and tucking the edges towards the center rather than aggressively kneading, you’re preserving all those lovely bubbles formed during fermentation—this technique is crucial for achieving an airy crumb structure. Aim for a rustic look; don’t stress over perfection! Simply roll it into enough of a ball shape so that it fits snugly inside your dutch oven without squishing down too much or losing air pockets. This shaping process takes mere minutes but sets up your loaf for glorious success in both structure and taste.
Step 8: Baking Your Perfect Loaf
Here we are—the moment we’ve all been waiting for! With everything prepped and ready, it’s time to bake our delightful No Knead Cheddar Bread in the Dutch Oven. Carefully remove your dutch oven from the oven (remember—it’s hot!), and line it with parchment paper if desired—this makes removal easier later on but isn’t essential if you’ve floured well enough.
Place your beautifully shaped dough inside, cover it with the lid, and pop it back into the oven. Baking covered allows steam to circulate within the pot, providing moisture that helps achieve that crisp crust while keeping the inside perfectly tender. Set a timer for 30 minutes; this initial phase allows for even cooking while trapping all those heavenly flavors inside.
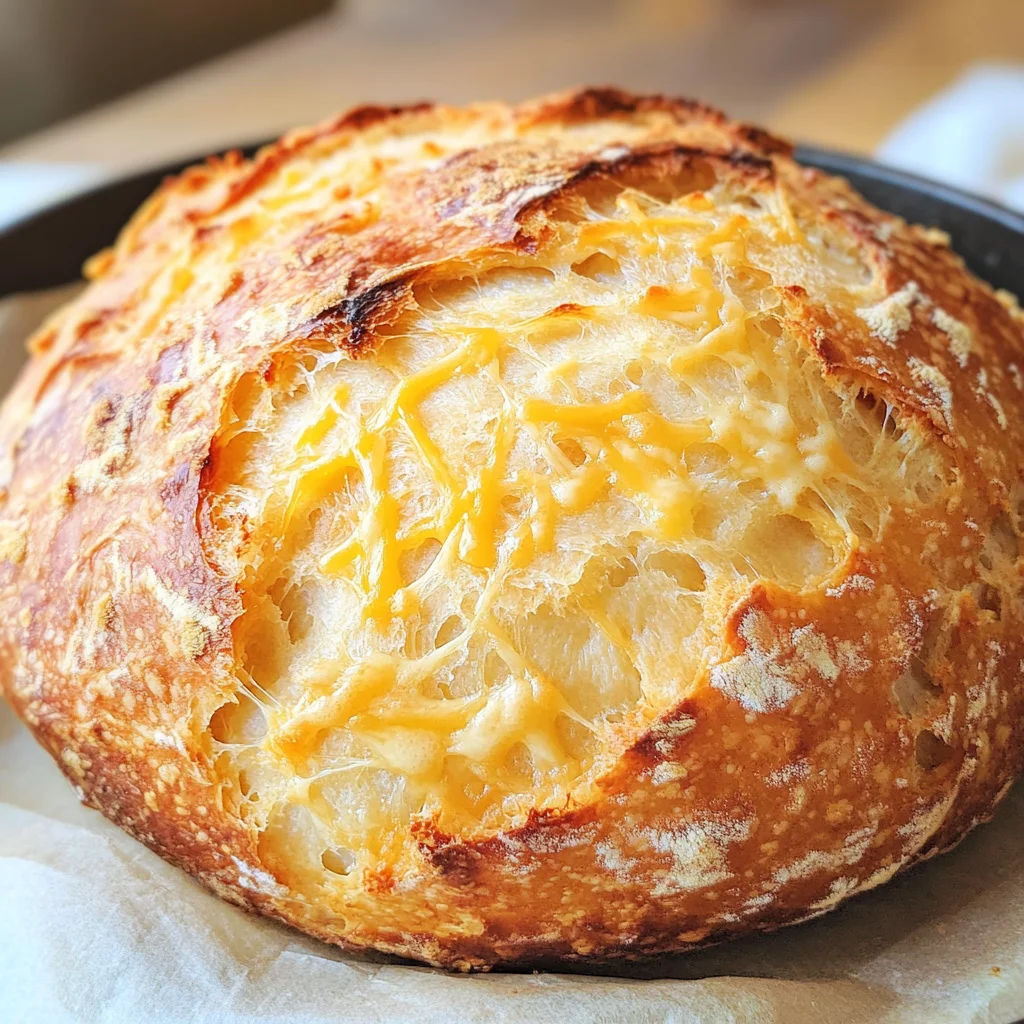
After 30 minutes have passed (and trust me—you’ll be able to smell its mouthwatering aroma wafting through!), remove the lid to reveal what should now be an enticingly puffy loaf. Letting it bake uncovered for an additional 15-20 minutes will give you that stunning golden brown exterior we crave so much. Keep an eye on it as ovens can vary; look for that deep color and listen for subtle crackling sounds as it bakes—it’s like music to my ears!
When finished baking, carefully take out your dutch oven once more (you’ve got this!) and allow your bread to cool slightly before slicing into its warm embrace. The moment those slices yield their fluffy centers filled with melted cheddar goodness will undoubtedly feel like pure bliss!
Final Touches
Step 9: The Joyful Reveal
Ahh… there’s something utterly magical about slicing into freshly baked bread—the sound of crackling crust followed by soft insides is simply divine! Allowing it to cool slightly before slicing ensures that every bite remains perfectly structured rather than gooey or mushy—a small yet vital detail worth waiting for!
I hope you’ve enjoyed every step of crafting this No Knead Cheddar Bread in the Dutch Oven alongside me because truly sharing food brings us closer together. Enjoy warm slices slathered with butter or paired alongside soups or salads—it’s versatile enough to shine as both comfort food or an impressive addition at gatherings with friends or family.
So go ahead—dive into this delightful experience of homemade bread-making! Each loaf carries not just flavors but stories waiting to unfold in every bite shared around tables filled with laughter and love. Happy baking!
Storage and Enjoyment Tips for Your No Knead Cheddar Bread in the Dutch Oven
Ah, the moment we’ve all been waiting for! Your kitchen is filled with the delightful aroma of freshly baked No Knead Cheddar Bread in the Dutch Oven, and it’s finally time to dig in. But wait—let’s talk about how to make the most of this golden treasure once it’s out of the oven. After all, this rustic loaf not only shines when it’s fresh but also holds its charm beautifully in storage.
Storing Leftover No Knead Cheddar Bread in the Dutch Oven
To keep your leftover No Knead Cheddar Bread as delightful as when it first emerged from that dutch oven, I recommend storing it in a simple paper bag or wrapped loosely in a clean kitchen towel. Why paper? It allows the bread to breathe while keeping that crust nice and crisp—absolutely paramount for maintaining texture! This splendid bread can last about 2-3 days at room temperature. If you want to stretch its life a bit longer, consider placing it in an airtight container, but remember that this might soften that glorious crust we’ve worked so hard to achieve. I promise you, even after a day or two, you’ll find that the cheddar flavor becomes richer, creating an utterly intoxicating experience when you slice into it. If you’re looking to enjoy it warm again, simply pop slices into a toaster or oven for a quick refresh.
Freezing No Knead Cheddar Bread for Later
Now, if you find yourself with extra loaves or just want to plan ahead for those busy weeknight dinners, freezing is an exceptional option. To freeze your bread properly, allow it to cool completely before wrapping it tightly in plastic wrap or aluminum foil—this helps lock in moisture and flavor like liquid gold! You can then place it into a freezer-safe bag or container. When stored this way, your cheddar bread can be enjoyed for up to three months without compromising taste! The beauty of having this flavorful loaf on hand is that you can thaw slices as needed; simply remove them from the freezer and let them sit at room temperature for about 30 minutes before reheating. Trust me on this—having No Knead Cheddar Bread ready to go will elevate any meal from ordinary to extraordinary!
No Knead Cheddar Bread in the Dutch Oven

No Knead Cheddar Bread in the Dutch Oven is a delightful and easy-to-make recipe that brings the comforting aroma of freshly baked bread into your home without the need for extensive kneading or complicated techniques. This rustic loaf combines simple ingredients like all-purpose flour, salt, yeast, and sharp cheddar cheese to create a flavorful masterpiece that’s golden on the outside and soft on the inside. Perfect for sharing with family or enjoying with a warm bowl of soup, this bread is an invitation to savor life’s simple pleasures. With minimal effort and time, you can create a deliciously cheesy bread that will quickly become a favorite in your baking repertoire.
- Prep Time: 15 minutes
- Cook Time: 50 minutes
- Total Time: 1 hour 5 minutes
- Yield: Approximately 12 servings 1x
- Category: Bread
- Method: Baking
- Cuisine: American
Ingredients
- 3 cups all-purpose flour
- 2 teaspoons salt
- 1/2 teaspoon yeast
- 1 1/2 cups water (room temperature)
- 1 1/4 cups shredded sharp cheddar cheese
Instructions
- In a large mixing bowl, whisk together flour, salt, and yeast until combined.
- Gradually add water while stirring until no dry flour remains; the dough will be sticky.
- Fold in shredded cheddar cheese gently until evenly distributed.
- Cover the bowl with plastic wrap or a damp cloth and let it rest at room temperature for 12 to 18 hours.
- Preheat your oven to 450°F (232°C) with an empty Dutch oven inside.
- Gently turn the rested dough onto a floured surface and shape it into a ball.
- Carefully remove the hot Dutch oven from the oven, line it with parchment paper if desired, and place the dough inside.
- Cover with the lid and bake for 30 minutes, then remove the lid and bake for an additional 15-20 minutes until golden brown.
- Allow to cool slightly before slicing.
Nutrition
- Serving Size: 1 slice (60g)
- Calories: 195
- Sugar: 0g
- Sodium: 350mg
- Fat: 6g
- Saturated Fat: 3g
- Unsaturated Fat: 2g
- Trans Fat: 0g
- Carbohydrates: 30g
- Fiber: 1g
- Protein: 7g
- Cholesterol: 20mg