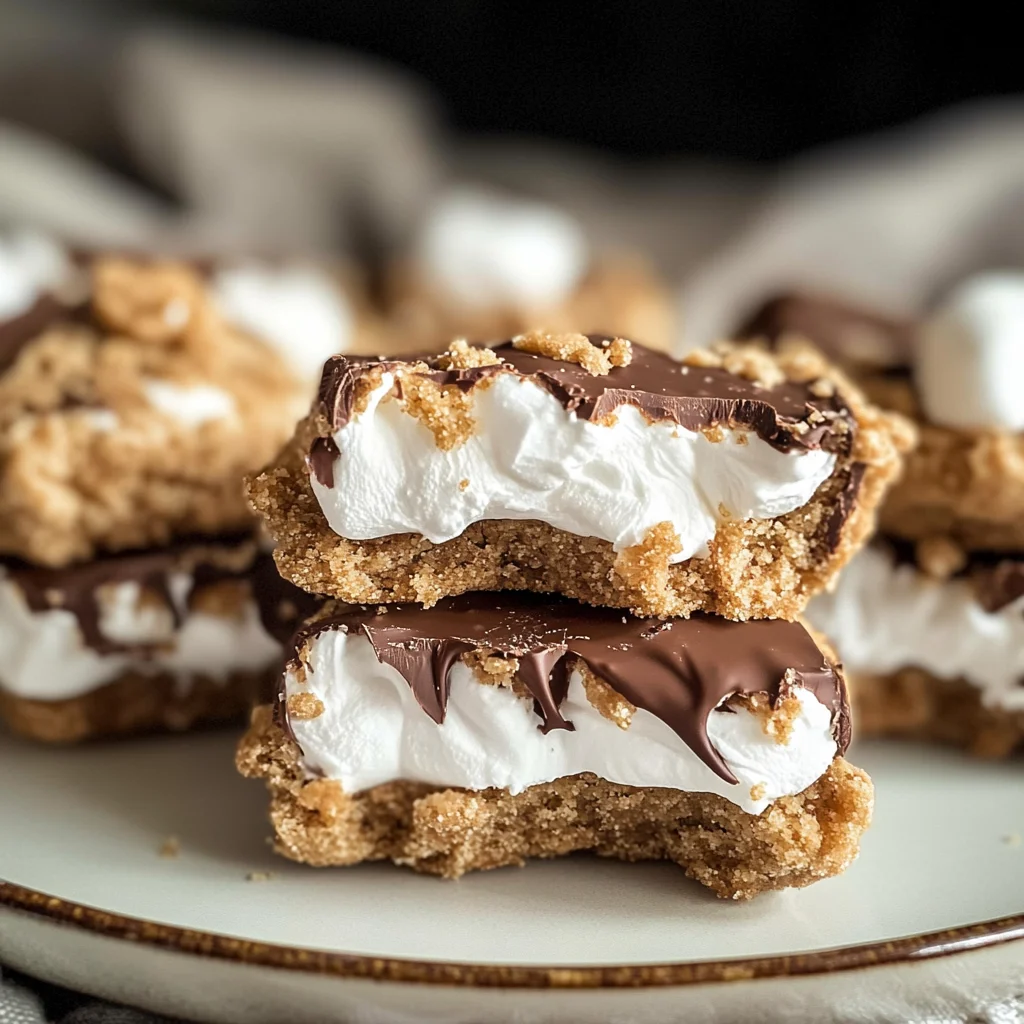
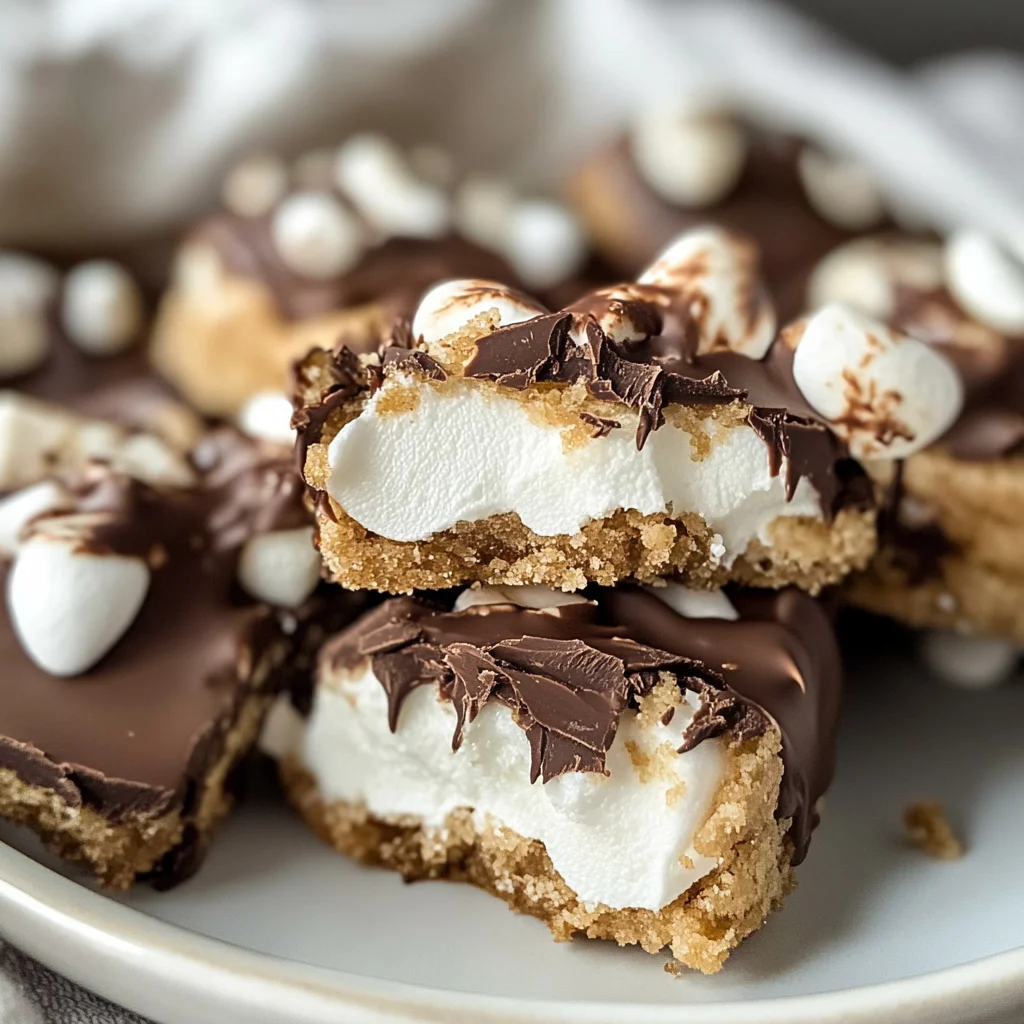
No Bake S’mores Cookie Dough Bites
When it comes to indulging in a sweet treat, few things can match the nostalgia and comfort of s’mores. Picture this: the crackling of a campfire, the sweet aroma of toasted marshmallows wafting through the air, and the delightful crunch of graham crackers enveloping gooey chocolate. These No Bake S’mores Cookie Dough Bites take that enchanting experience and transform it into an easy, no-bake dessert that’s perfect for any time of day. I’ve always been captivated by how simple ingredients can come together to create something truly extraordinary, and trust me when I say these bites are a revelation. They’re not just a treat; they’re a celebration of flavors that will leave you feeling deeply satisfied.
The beauty of these No Bake S’mores Cookie Dough Bites lies not only in their flavor but also in their convenience. With just about 15 minutes of prep time, you can whip up a batch that boasts 7 grams of protein per bite—making them not just a delectable dessert but also a nourishing snack option. Imagine sharing these with friends or family at your next gathering, watching their eyes light up as they bite into each fluffy, chocolatey morsel. It’s an experience worth savoring! So let’s dive into this delightful culinary journey together!
No Bake S’mores Cookie Dough Bites: The Ultimate Sweet Indulgence
These No Bake S’Mores Cookie Dough Bites are my go-to sweet indulgence whenever I need a quick pick-me-up or something special to share with loved ones. They embody the spirit of summer camping adventures while keeping the process utterly simple and accessible. Trust me when I say that making these will quickly become one of your favorite kitchen escapades!
Ingredients:
Embarking on this culinary adventure means gathering some wonderful ingredients that work harmoniously together to create pure bliss in each bite. Let’s explore what you’ll need:
- 1/2 cup semisweet or dark chocolate chips. This is crucial because chocolate is the heart and soul of our bites; it adds richness and depth that complements the other flavors beautifully. When choosing chocolate chips, opt for high-quality brands that use real cocoa butter instead of fillers—this ensures a luscious melting quality when you drizzle it over your bites later on.
- 1/4 cup oat flour (30g). Oat flour brings such a lovely nutty flavor along with a gluten-free twist to our cookie dough base. Its fine texture allows for smooth mixing and contributes to the chewy consistency we desire in these bites. If you don’t have oat flour on hand, you can easily make your own by grinding rolled oats in a blender until they reach a flour-like consistency.
- 1/4 cup vanilla protein powder (31g). This ingredient adds not only protein but also enhances the overall flavor profile with its sweet vanilla notes—a fantastic complement to our cookie dough theme. I personally love using PEScience protein powder because it mixes seamlessly without clumping, ensuring our bites remain deliciously creamy.
- 3 Tbsp peanut butter (45g). Peanut butter provides creaminess and binds all our ingredients together perfectly while delivering healthy fats and proteins! Choose natural peanut butter without added sugars or oils for an authentic flavor boost that elevates these treats from good to extraordinary.
- 2 Tbsp brown sugar sweetener (14g). This ingredient gives us that classic sweetness reminiscent of traditional cookie dough while keeping things healthier—no refined sugars here! Using a brown sugar sweetener like Truvia helps maintain that caramel-like depth without overwhelming sweetness.
- 2 Tbsp maple syrup (I used sugar-free pancake syrup). Maple syrup lends its beautiful liquid gold sweetness and moisture to our mixture, providing balance against the rich peanut butter and chocolate flavors. If you’re avoiding sugar altogether, feel free to use sugar-free alternatives; just ensure they measure similarly so as not to alter the texture too much.
- 1/8 tsp cinnamon. A pinch of cinnamon is non-negotiable here; it adds warmth and complexity to our bites while enhancing all those sweet flavors dancing together! It evokes memories of cozy evenings spent around fireside chats—absolutely essential for capturing that s’mores essence.
- Pinch of salt. A little bit of salt does wonders by amplifying all those delicious flavors we’ve created thus far! It’s amazing how such a tiny amount can elevate everything from bland to brilliant—don’t skip it!
- 6 Tbsp vegan marshmallow fluff. This ingredient is where the magic happens—bringing in that signature s’mores experience with its lightness and sweetness! Look for vegan marshmallow fluff brands at your local grocery store or online; they provide all the satisfaction without any animal products.
- 12 mini vegan marshmallows (optional for presentation). While optional, these mini marshmallows add an adorable touch when layered atop our treats before serving—you know we eat with our eyes first! They give each bite that charming “s’more” appearance everyone knows and loves.
Equipment You’ll Need:
Before we jump into making these delightful treats, let’s gather some essential tools that’ll make your experience smoother than melted chocolate on hot s’mores night!
- Muffin pan lined with cupcake liners: This is where our magic happens! Lining your muffin pan makes removal easier later on and prevents sticking—nobody wants their precious treats left behind in the pan! Plus, those cute liners add extra charm when serving.
- Microwave-safe bowl: We’ll be melting chocolate here, so having a bowl designated for this purpose is key. Opt for one that’s deep enough so you don’t risk splattering melted goodness everywhere—as tempting as it might be!
- Spatula or spoon: These trusty companions will help mix ingredients smoothly while ensuring every last bit gets incorporated evenly into our heavenly blend!
- Freezer-safe container: Once assembled, we’ll need to pop these beauties into the freezer to firm up nicely—having an airtight container handy keeps them safe from freezer odors too!
Preparing the No Bake S’mores Cookie Dough Bites
Step 1: Crafting Your Chocolate Base
The first step is absolutely paramount; we want to create a solid foundation for our treats using melted chocolate! Begin by lining six cupcake liners inside your muffin pan—it sets us up perfectly for layering later on. Next, grab those semi-sweet or dark chocolate chips and place them into your microwave-safe bowl. Heat them in increments; start with 30 seconds before stirring gently then continue heating until fully melted yet glossy—this should take no more than 1 minute total depending on your microwave’s power level.
Why do we melt chocolate? Melting transforms solid chips into liquid gold which gives us versatility—we’ll use this molten goodness both at the bottom layer AND drizzled atop each bite later! After melting, scoop about half a tablespoon into each cupcake liner; tap gently against your counter so it spreads evenly across both bottom AND slightly up the sides—a crucial detail if you want every bite covered in decadent richness! Once done spreading, tuck them away in the freezer for about 5–10 minutes until they’re firm enough for assembly.
Step 2: Mixing Up The Cookie Dough
Now comes one of my favorite parts—the creation of cookie dough magic! In another mixing bowl (or simply rinse out that same one), combine oat flour through salt carefully using either a spatula or spoon—it’s important we incorporate everything well so there aren’t any dry pockets hiding within this luscious mix! The textures should meld seamlessly together creating an almost playful consistency that’s both thick yet pliable enough for rolling later on.
This step is vital because incorporating ingredients properly ensures even distribution throughout every single bite—you want every tastebud treated equally after all! Once mixed thoroughly (think doughy goodness), roll small portions into balls approximately one inch round before flattening them slightly between your palms—this shape allows them fit perfectly atop those hardened chocolate bases once ready!
Step 3: Layering On The Fluff
With hardened chocolate cups waiting patiently in their frosty abode, let’s add layers upon layers starting with cookie dough rounds pressed firmly onto each base—you should see hints peeking through as we go along which means we’re right on track! Press down gently but firmly until they sit snugly without spilling over edges; remember we’re building towards something truly scrumptious here!
Next comes everyone’s favorite—the vegan marshmallow fluff! Take about one tablespoon per cup (a generous dollop really) then spread over cookie dough layers evenly ensuring every mouthful gets its fair share—you won’t regret this indulgence as it creates an ultra-creamy contrast against richer elements below!
Step 4: Drizzling That Decadent Chocolate
Finally—I promise we’re almost there—we get to top off these beauties with remaining melted chocolate drizzled artfully across all cups like icing on cake! Use either spatula or spoon again depending on how artistic you’re feeling today; swirl patterns work wonders if you’re aiming for presentation points too—not necessary but oh-so-fun if you’ve got extra time!
Once completed drizzle generously across tops until they’re coated well (you may even have some leftover—we’re talking about true indulgence here!). Place back into freezer again now for AT LEAST thirty minutes allowing everything settle nicely before enjoying what we’ve created together—a delicious chorus echoing every nostalgic summer evening around campfires past…
And just like that—you’ve made No Bake S’mores Cookie Dough Bites that’ll delight taste buds young AND old alike while keeping spirits high during every occasion imaginable! Now go ahead indulge freely knowing you’ve whipped up something unforgettable…
Step 5: Creating the Cookie Dough Layer
Now that your chocolate base has set beautifully in the freezer, it’s time to whip up the cookie dough layer, which is truly the heart of these No Bake S’mores Cookie Dough Bites. In a medium bowl, combine 1/4 cup of oat flour, 1/4 cup of vanilla protein powder, and a pinch of salt. This combination not only provides structure but also adds that delightful nutty flavor from the oats. I love using oat flour because it keeps everything gluten-free while offering a slightly sweet taste that complements the other ingredients wonderfully. Next, mix in your 3 tablespoons of peanut butter; trust me when I say this creamy delight is non-negotiable. It brings richness and moisture to the dough, creating that delightful chewiness we all adore in cookie dough.
Once you’ve added the peanut butter, stir in 2 tablespoons of brown sugar sweetener and 2 tablespoons of maple syrup. The brown sugar sweetener will give you that familiar caramel-like flavor that traditional cookie dough boasts, while the maple syrup adds a hint of warmth and depth—just like a cozy campfire on a chilly evening! To finish this magic potion off, sprinkle in 1/8 teaspoon of cinnamon; this is where things get interesting because cinnamon elevates the flavor profile beautifully, making it feel utterly indulgent without any guilt attached. Mix everything together until you have a nice cohesive dough—don’t worry if it seems a bit sticky; that’s exactly what you want! Now comes my favorite part: rolling this mixture into little balls. Not too big—about one tablespoon each—and then flatten them slightly before pressing them gently onto your cooled chocolate bases. This step is crucial; it ensures every bite has that perfect balance of chocolate and cookie dough goodness.
Step 6: The Marshmallow Fluff Surprise
With our delectable cookie dough layer nestled on top of that luscious chocolate base, we now turn to perhaps my favorite element—vegan marshmallow fluff! Grab your jar of vegan marshmallow fluff (I promise you’ll be amazed by how close it mimics traditional marshmallows) and scoop out about one tablespoon for each cupcake liner filled with cookie dough. You might wonder why I’m so enthusiastic about this ingredient; well, it’s because it adds that fluffy, gooey texture reminiscent of classic s’mores straight out of summer camp! As you dollop the fluff over each piece, take a moment to appreciate how its glossy sheen catches the light—it’s like adding a touch of magic to your creation.
If you’re feeling adventurous (and I always encourage you to be!), feel free to add two mini vegan marshmallows as an optional topping for presentation. They add not just visual appeal but also an extra pop of sweetness when you bite into them later on. Just imagine sinking your teeth into these bites only to discover that delightful marshmallow melt! After arranging these little fluffy clouds atop all those layers, it’s time for yet another drizzle—this time with any leftover melted chocolate from earlier. Drizzle generously across the tops; this final touch isn’t just for looks—it seals everything together and creates an inviting layer that will harden beautifully while chilling in the freezer.
Step 7: The Chilling Phase
Now comes one of those critical moments where patience is key—let’s talk about chilling! Place your muffin pan back into the freezer for at least 30 minutes (though I often leave them there for longer if I can resist!). Chilling does more than just firm up our treats; it allows all those flavors to meld together beautifully. Think about how when you let a stew sit overnight—the flavors deepen and grow richer; it’s the same concept here! During this freezing phase, you’ll notice how your chocolate shell hardens nicely around the edges while the marshmallow fluff becomes almost gel-like—a transformation that’s nothing short of alchemy.
Keep an eye on them during this time; check after about 20 minutes to see how they’re setting up. You want them firm enough to hold their shape when removed from their liners but still soft enough inside to provide that wonderful contrast between textures when bitten into later. If you notice they’re not quite firm yet after half an hour, allow them to chill just a bit longer—don’t rush this step! It’s absolutely paramount for ensuring every bite is perfectly balanced between chewy cookie dough and silky chocolate.
Step 8: Unwrapping Your Delicious Creation
After what may feel like an eternity (but really was just half an hour), it’s finally time for the grand reveal! Pull out your muffin pan from the freezer and take a moment to admire your handiwork before diving in—trust me; this is part of enjoying cooking! Carefully peel away those cupcake liners; they should come off easily if everything was set correctly. As you do this, take note of how your No Bake S’mores Cookie Dough Bites come away intact—a testament to our chilling phase working its magic!
Once unwrapped, prepare yourself for an incredibly satisfying experience as you sink your teeth into one of these bites. The first thing you’ll notice is how the outer chocolate shell cracks ever so gently as you bite down—a welcome sound indeed! Then there’s that moment when the luscious marshmallow fluff melds with rich chocolate and nutty cookie dough—it’s simply divine! Serve these beauties immediately or store them in an airtight container in the fridge for up to five days (if they last that long!). Trust me when I say sharing these will make you everyone’s new best friend—they’re utterly intoxicating!
Final Touches: Enjoying Your No Bake S’mores Cookie Dough Bites
As we wrap up our delicious journey through making No Bake S’mores Cookie Dough Bites, take some time to revel in what you’ve created—each bite packed with nostalgia and warmth reminiscent of summer nights spent around campfires with friends and family. These bites are not only perfect as an afternoon snack or dessert but also as fun additions to gatherings or even meal prep for healthy treats throughout your week.
Remember, cooking isn’t just about following recipes—it’s about pouring love into each step and savoring every moment along the way. So go ahead, indulge guilt-free because you’ve crafted something truly extraordinary right from scratch! And don’t forget—I’d love to hear all about your experiences making these delightful bites! What variations did you try? How did they turn out? Share away; let’s keep spreading those good cooking vibes!
Storage and Enjoyment Tips for Your No Bake S’mores Cookie Dough Bites
Now that you’ve crafted these delightful No Bake S’mores Cookie Dough Bites, it’s time to revel in the sweet satisfaction of your creation! I can practically hear the crunch of the chocolate and the chewy goodness of vegan marshmallow fluff waiting for you. These little bites are perfect for any time of day—whether it’s a midday snack or an evening indulgence while curled up with a good book. But before you dive in, let’s talk about how to store them properly so you can savor every last morsel.
Storing Leftover No Bake S’mores Cookie Dough Bites
To keep your delicious No Bake S’mores Cookie Dough Bites fresh and scrumptious, you’ll want to store them in an airtight container—this is absolutely crucial! A glass container works beautifully, as it prevents moisture from seeping in and keeps those flavors vibrant. You can pop them in the fridge where they’ll stay delightful for about a week. If you’re like me and want every bite to be as fresh as the first, here’s a pro tip: place a slice of bread in the container with them. This little trick helps maintain moisture levels, keeping your treats soft and tender. After storage, they taste just as rich and satisfying as when you made them, a testament to their incredible flavor! When you’re ready to enjoy one again, simply take it out and let it sit at room temperature for a few minutes; this brings back that wonderful gooey texture that makes each bite utterly intoxicating.
Freezing No Bake S’mores Cookie Dough Bites for Later
If you find yourself with extra bites (or if you’re just being smart about meal prep), freezing these gems is an excellent option! To freeze your No Bake S’mores Cookie Dough Bites properly, simply place them on a baking sheet lined with parchment paper, making sure they don’t touch each other. Pop the entire sheet into the freezer until they’re solid—this usually takes about 1-2 hours. Once they’ve frozen through, transfer them into a freezer-safe bag or container. They can last up to three months this way! When you’re ready to enjoy one, just pull it from the freezer and let it thaw at room temperature for about 10-15 minutes; trust me, the wait is worth it! The convenience of having these delectable bites ready whenever a craving strikes is beyond compare, making them perfect not just for your own snacking pleasure but also as delightful gifts to share with friends or family.
No Bake S’mores Cookie Dough Bites
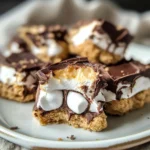
Indulge in the nostalgic flavors of No Bake S’mores Cookie Dough Bites, a delightful treat that captures the essence of summer campfires without any baking required. These easy-to-make bites combine creamy peanut butter, rich chocolate, and fluffy vegan marshmallows to create a satisfying snack that packs 7 grams of protein per serving. In just 15 minutes of preparation, you can whip up these scrumptious morsels that are perfect for sharing with friends or enjoying as a quick pick-me-up. The combination of textures—from chewy cookie dough to gooey marshmallow—will leave your taste buds singing. So gather your ingredients and get ready to embark on this sweet culinary journey!
- Prep Time: 15 minutes
- Cook Time: None
- Total Time: 0 hours
- Yield: Approximately 12 servings 1x
- Category: Dessert
- Method: No Bake
- Cuisine: American
Ingredients
- 1/2 cup semisweet or dark chocolate chips
- 1/4 cup oat flour
- 1/4 cup vanilla protein powder
- 3 tablespoons peanut butter
- 2 tablespoons brown sugar sweetener
- 2 tablespoons maple syrup
- 6 tablespoons vegan marshmallows fluff
Instructions
- Melt the chocolate chips in a microwave-safe bowl for about 30 seconds, stirring until smooth.
- Line a muffin pan with cupcake liners and pour a layer of melted chocolate into each liner. Freeze for about 5-10 minutes until firm.
- In a mixing bowl, combine oat flour, protein powder, peanut butter, brown sugar sweetener, maple syrup, cinnamon, and salt. Mix until well combined.
- Roll the mixture into small balls and flatten them slightly before placing them on top of the hardened chocolate bases.
- Add a tablespoon of vegan marshmallows fluff on top of each cookie dough layer.
- Drizzle remaining melted chocolate over the tops and freeze for at least 30 minutes before serving.
Nutrition
- Serving Size: 1 bite (35g)
- Calories: 130
- Sugar: 8g
- Sodium: 45mg
- Fat: 7g
- Saturated Fat: 1g
- Unsaturated Fat: 6g
- Trans Fat: 0g
- Carbohydrates: 15g
- Fiber: 2g
- Protein: 7g
- Cholesterol: 0mg