Miso-Butter Chicken: Easy Dinner That Will Wow Your Tastebuds
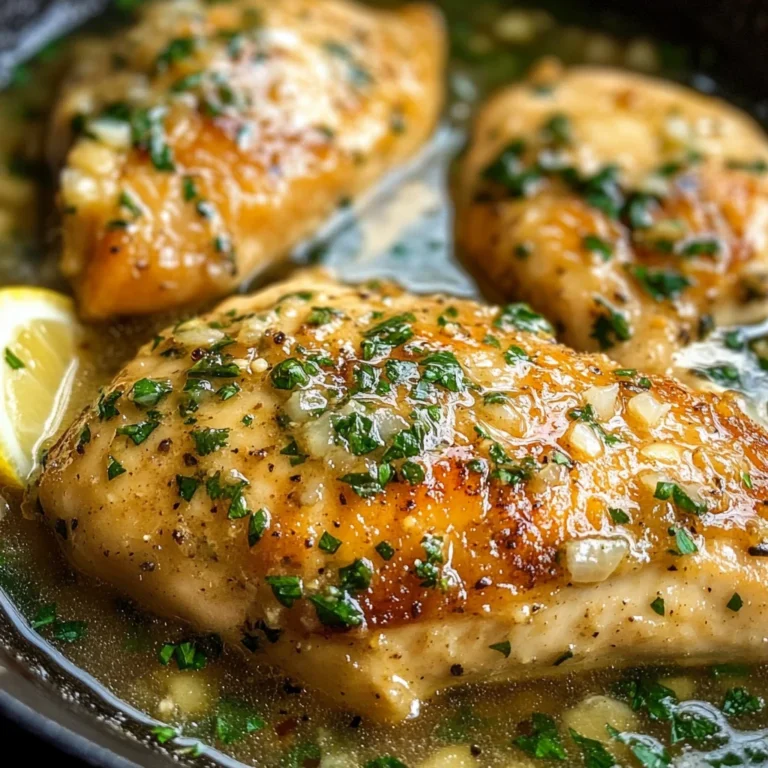
There’s something profoundly satisfying about preparing a meal that not only nourishes the body but also warms the soul. Miso-Butter Chicken is one of those dishes that does just that. Imagine the tender, juicy chicken thighs bathed in a luscious sauce that combines the umami richness of miso with the velvety embrace of butter and a hint of sweetness from maple syrup. The aroma alone is enough to entice anyone into the kitchen, creating an atmosphere of comfort and anticipation. This recipe isn’t just food; it’s an experience that takes you on a journey through flavors, memories, and moments shared around the dinner table. The Miso-Butter Chicken: Easy Dinner That Will Wow Your Tastebuds is not merely about satisfying hunger—it’s about indulging in a meal that feels like a warm hug.
As you embark on this culinary adventure, think about how food connects us across cultures and generations. The marriage of savory and sweet in this dish speaks to our innate love for balance—think of the comforting warmth of family gatherings or cozy nights spent with friends. It’s no wonder that this dish has become a beloved staple for those seeking quick yet impressive weeknight meals. Every bite is a celebration of simplicity and flavor, reminding us that sometimes, the most extraordinary meals come from the simplest ingredients, lovingly combined to create something magical.
Miso-Butter Chicken: Easy Dinner That Will Wow Your Tastebuds
This delightful recipe is perfect for those evenings when you want to impress without spending hours in the kitchen. Trust me; once you try Miso-Butter Chicken, you’ll find yourself returning to it again and again!
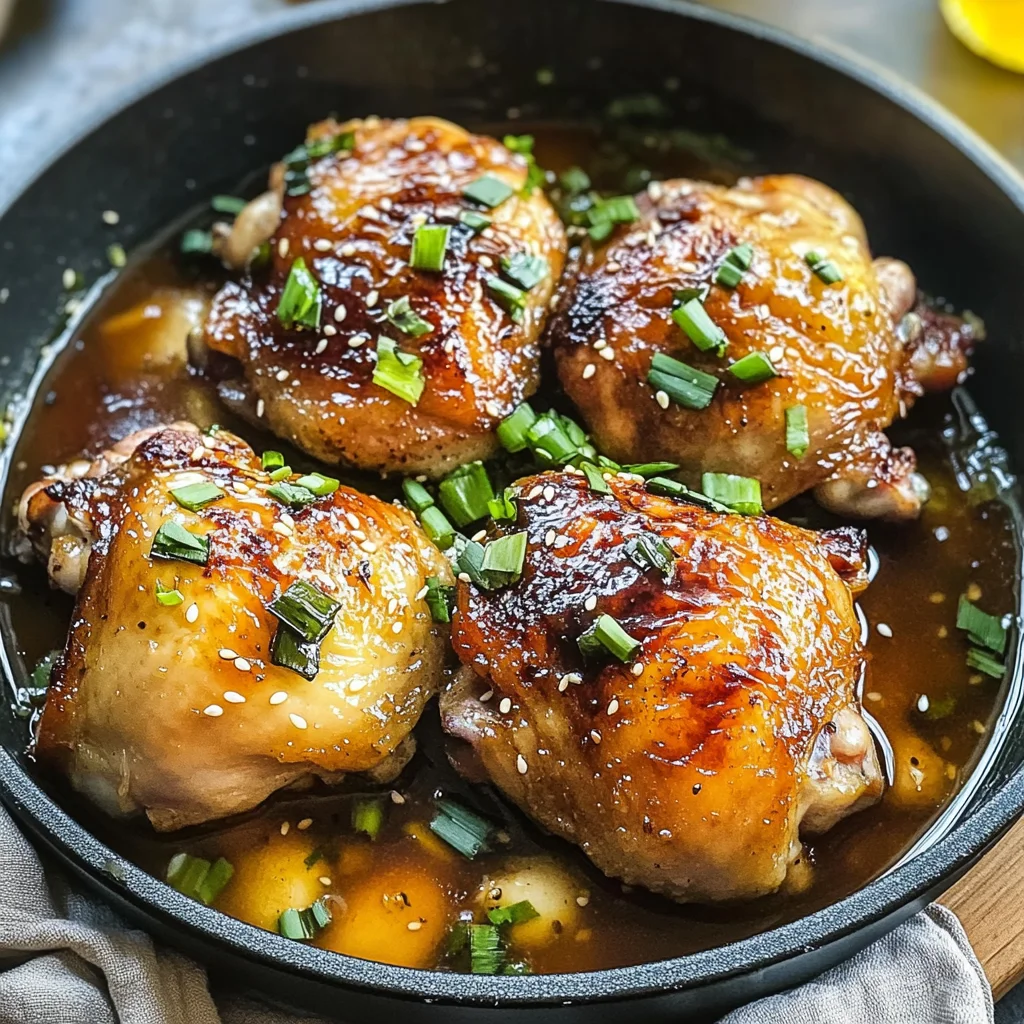
Ingredients:
Now, let’s dive into our list of ingredients! Each one plays an essential role in crafting this unforgettable dish, so let’s explore them together.
- 8 pieces skin-on, bone-in chicken thighs. These thighs are truly the stars of our show! Their natural juiciness and rich flavor make them perfect for absorbing all those delicious sauces we’ll be creating. If you’re short on time or prefer something leaner, boneless thighs can be substituted for quicker cooking without sacrificing too much flavor or tenderness.
- 4 tablespoons unsalted butter. Ahh, butter—the golden liquid that transforms any dish into something truly special! In this recipe, it adds depth and richness to our miso glaze while helping to carry those lovely flavors throughout the chicken. If you’re looking for a lighter alternative, olive oil can step in beautifully here without losing any essence.
- 1/2 cup white miso. This ingredient is absolutely paramount—it provides that signature umami flavor which creates a depth that will leave your taste buds dancing! White miso has a milder profile compared to its darker counterparts, making it ideal for this dish where we want sweetness and savoriness to shine through harmoniously.
- 3 tablespoons maple syrup. Here’s where we introduce a touch of sweetness! Maple syrup not only enhances the overall flavor profile but also helps create a beautifully caramelized crust on our chicken as it cooks. If you prefer honey or agave syrup, feel free to swap it out; they’ll work just as well!
- 1 inch piece ginger (grated). Ginger brings warmth and spice into our dish—a little zing that perfectly complements the richness of miso and butter. Fresh ginger has such vibrant flavor compared to ground ginger; however, if that’s all you’ve got on hand, it can certainly do in a pinch!
- 8 cloves garlic (unpeeled, lightly smashed). Garlic is truly one of my favorite aromatics; it’s like magic! We’re using unpeeled cloves here because they lend a mellow sweetness as they roast alongside our chicken while infusing their flavor into the sauce without overpowering it.
- 1 tablespoon rice vinegar. A splash of acidity is crucial here—it brightens up the overall flavors while balancing out the richness from butter and miso beautifully! Apple cider vinegar works as an excellent substitute if rice vinegar isn’t available.
- Black pepper (to taste). Freshly cracked black pepper is simply non-negotiable for elevating flavors—it adds warmth and complexity without overshadowing other ingredients. I always recommend starting with just a pinch and adjusting based on your preference!
- 2 pieces scallions (finely sliced). Scallions bring freshness and crunch—offering a delightful contrast against our tender chicken thighs when sprinkled over at the end! Chives can also work nicely if that’s what you have available.
- 2 teaspoons toasted sesame seeds. These are optional but add such lovely texture! If you’re sensitive to seeds or simply don’t have them on hand, feel free to skip this step; your dish will still be exquisite!
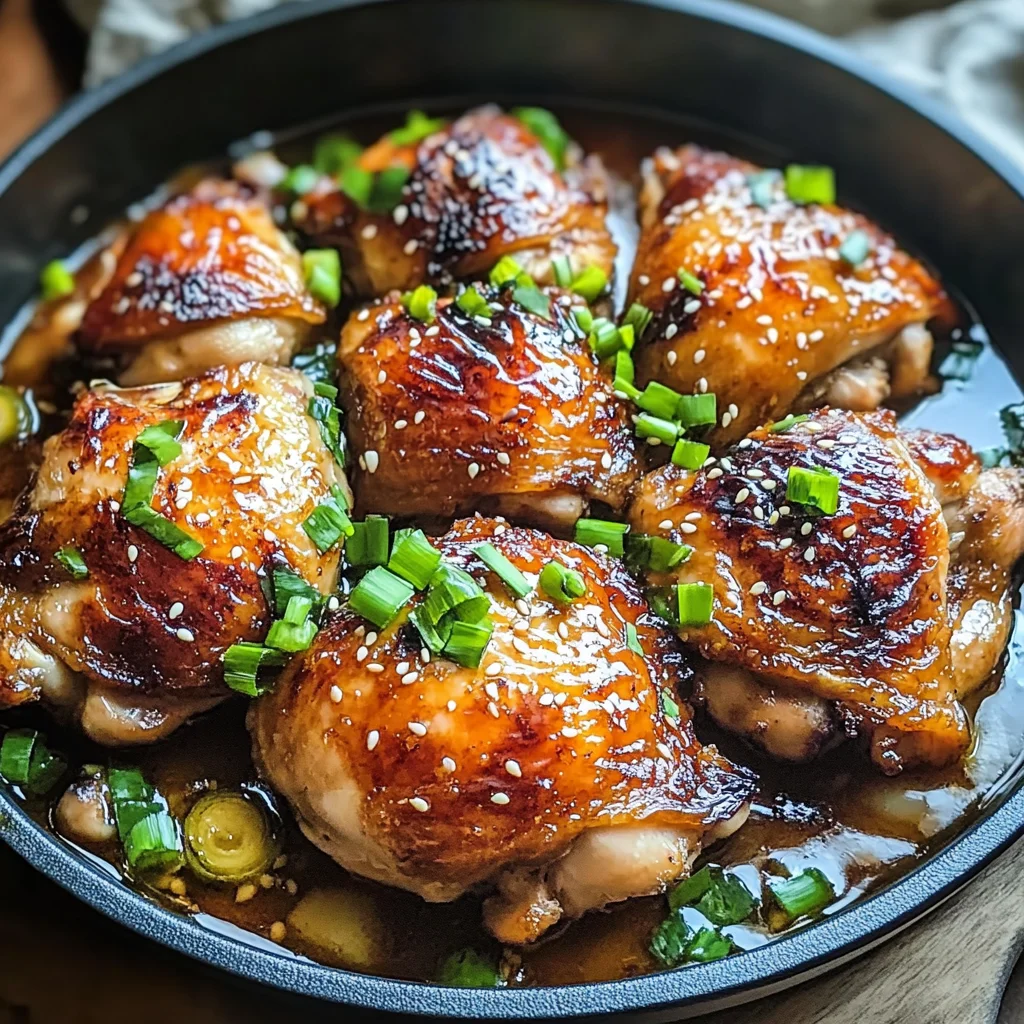
Equipment You’ll Need:
To make this process seamless and enjoyable, having the right tools at your fingertips makes all the difference! Let’s gather some essential partners in crime for this culinary endeavor:
- Large skillet or frying pan – A heavy-bottomed skillet helps maintain even heat throughout cooking—this ensures our chicken gets perfectly crispy skin while staying juicy inside! Look for one with good heat retention properties.
- Wooden spoon or spatula – A trusty wooden spoon allows us to stir gently without scratching our skillet’s surface—we want every last bit of flavor incorporated into our sauce!
- Meat thermometer (optional but recommended) – This little gadget takes away any guesswork regarding doneness—ensuring your chicken reaches an internal temperature of 165°F guarantees it’s cooked perfectly every time!
With these tools ready at hand, we’re set up for success as we prepare our Miso-Butter Chicken: Easy Dinner That Will Wow Your Tastebuds!
Step 1: Prepare Your Chicken Thighs
First things first—let’s prep our chicken thighs by patting them dry with paper towels before seasoning generously with salt and freshly cracked black pepper on both sides. Drying them helps achieve that coveted crispy skin while seasoning enhances their natural flavors right from the start! Place your skillet over medium heat until it’s nice and hot—this allows us to sear those thighs perfectly golden brown before finishing cooking through gently in sauce later on.
Step 2: Sear Until Golden Brown
Once your skillet is hot enough (you’ll know when water droplets dance across its surface!), carefully add two tablespoons of unsalted butter into the pan before laying down your seasoned chicken thighs skin-side down—avoid overcrowding so each piece gets maximum contact with heat! Sear them undisturbed for about 5–7 minutes until they develop gorgeous caramelization; resist temptation to move them around during this time as it creates fond—the flavorful bits stuck at bottom—which will deepen overall taste later when deglazing with sauce!
Step 3: Flip & Add Aromatics
When golden brown perfection happens (and oh my word does it smell divine), flip each thigh over gently using tongs then scatter unpeeled garlic cloves around them along with grated ginger; let everything mingle together delightfully as they cook another 5 minutes until fragrant! At this stage, we’re layering flavors—garlic softens while releasing its essence into pan along with ginger adding warmth which balances sweetness later provided by maple syrup.
Step 4: Create Your Miso Sauce
Now comes my favorite part—the creation of our utterly intoxicating miso sauce! In small mixing bowl combine remaining two tablespoons butter with white miso paste along with maple syrup and rice vinegar; whisk until smooth consistency emerges resembling velvety liquid gold waiting to coat those beautiful chicken thighs lovingly! Once mixed well pour directly over seared thighs ensuring each piece gets enveloped lovingly while watching moisture rise up—all those elements working harmoniously together creating an aromatic symphony enticing everyone close by!
Stay tuned as we continue crafting this remarkable dish together—it’s going to be truly extraordinary!
Step 5: Sear the Chicken to Golden Perfection
Now, let’s turn our attention to the chicken because this is where the magic begins! Heat a large, heavy-bottomed skillet over medium-high heat, and add two tablespoons of that glorious unsalted butter. As it melts and starts to bubble, listen closely—this is the sound of flavor being developed! While the butter is warming up, pat your chicken thighs dry with paper towels; this simple step is absolutely paramount for achieving that coveted golden-brown crust. If you skip this, moisture will linger on the surface and prevent that beautiful sear from forming.
Once your butter is shimmering but not smoking, gently place your chicken thighs skin-side down in the skillet. You should hear a satisfying sizzle—this means you’re on the right track! Don’t overcrowd the pan; if necessary, work in batches to keep everything spaced out and allow for even cooking. Sear each thigh for about 5-7 minutes without moving them around. This time allows the skin to render its fat and become crispy while infusing the butter with a rich flavor that will later mingle with the sauce. The goal here is to achieve a deep golden brown; watch as the skin transforms into something utterly intoxicating. Trust me on this—the aroma wafting through your kitchen will have everyone eagerly anticipating dinner!
Step 6: Flip and Add Aromatics
Once those thighs have reached that perfect shade of brown on one side, it’s time to flip them over like a pro! Using tongs, carefully turn each thigh so that the skin side is now facing up. The sizzling sounds should still be present—if they’ve quieted down too much, increase your heat slightly. Now it’s time to introduce our lovely aromatics: toss in those unpeeled garlic cloves and grated ginger around the edges of the pan. This isn’t just for show; as these ingredients cook, they will release their essential oils and flavors into the fat, creating an utterly captivating aroma that permeates every inch of your kitchen.
Next up, drizzle in that tablespoon of rice vinegar—all I can say is wow! This little addition will help deglaze any bits stuck at the bottom of your pan (and trust me, those bits are flavor gold). Allow everything to cook together for another 5 minutes or so until you can see juices pooling around the chicken and it’s starting to look deliciously caramelized. Keep an eye on things; you want a gentle simmer rather than a raging boil. Remember, patience pays off—don’t rush this step!
Step 7: Create Your Miso-Butter Sauce
Now we arrive at what makes this dish truly extraordinary—our rich and flavorful miso-butter sauce! In a small bowl, whisk together that half cup of white miso with three tablespoons of maple syrup until smooth. The sweetness from the maple syrup perfectly balances out the umami-rich miso paste, creating a symphony of flavors that will coat your chicken beautifully. Pour this lovely mixture directly into your skillet over those beautifully seared chicken thighs along with a generous sprinkle of fresh cracked black pepper.
Here’s where we need to get cozy with our cooking technique: cover your skillet with a lid or aluminum foil and reduce the heat to low. This step is crucial because it allows everything to steam gently while soaking up all those delightful flavors combined in there. Let it simmer away for about 20-25 minutes until your chicken reaches an internal temperature of 165°F (75°C). The skin will continue to crisp up thanks to all those layers of flavor interacting in such a magical way! It’s normal for some liquid to accumulate at this stage; don’t worry—it’s all part of making an incredible sauce.
Step 8: Finish Cooking and Resting
As we near completion, let’s make sure our Miso-Butter Chicken shines like a star! After about 25 minutes of gentle simmering under cover, remove your skillet from heat but resist the temptation to dive right in! Instead, transfer each piece of chicken onto a plate and tent it loosely with aluminum foil for about five minutes while you prepare yourself for what’s coming next. I know waiting can feel like torture when something smells as heavenly as this does—but resting allows juices within each thigh to redistribute evenly throughout the meat.
During this fleeting moment before serving, take stock of how gorgeous your dish has turned out so far—those glistening pieces of chicken sitting proudly beside aromatic garlic cloves are truly worthy of admiration! Just remember that if you cut into them too soon, all those flavorful juices will escape onto your cutting board instead of enriching every bite you take later on.
Final Touches: Elevate Your Miso-Butter Chicken Experience
With everything prepped perfectly during these last moments, let’s put on some final touches before serving up this delectable masterpiece! Return your skillet back onto low heat just long enough for any remaining sauce to bubble gently again—this will ensure it’s perfectly warmed through when served alongside our star ingredient. Once heated thoroughly but not boiling (we want it velvety rather than aggressive), turn off heat completely.
Now sprinkle those finely sliced scallions over top along with toasted sesame seeds if you’re using them—these tiny additions bring both color contrast and an extra layer of texture that’s simply irresistible! Serving suggestions? I love pairing my Miso-Butter Chicken with fluffy steamed rice or even quinoa for something different; both options soak up every drop of that lush sauce ensuring no flavor goes unappreciated.
And there you have it—a dish that’s not just food but an experience meant to be savored by family and friends alike! So gather everyone around and prepare yourself for smiles all around because this Miso-Butter Chicken truly is an easy dinner that will wow your taste buds beyond belief. Enjoy every moment as you dig into this exquisitely crafted meal—I promise you won’t regret it!
Storage and Enjoyment Tips for Your Miso-Butter Chicken: Easy Dinner That Will Wow Your Tastebuds
Now that your Miso-Butter Chicken is golden-brown and absolutely irresistible, the time has come to dig in and savor every bite! The aroma wafting through your kitchen is just the beginning of this flavor-filled journey. As you sit down with your loved ones or enjoy a moment of quiet reflection, I promise you, this dish will create memories that linger long after the last bite. But what if you find yourself with leftovers? Fear not, my friend! There are some wonderful ways to preserve this culinary delight without losing its magic.
Storing Leftover Miso-Butter Chicken: Easy Dinner That Will Wow Your Tastebuds
To keep your Miso-Butter Chicken in its prime, I recommend using an airtight container; glass containers are fantastic because they don’t absorb odors and help retain moisture. You can store it in the refrigerator for up to three days—perfect for those busy weeknights when you want a quick meal without sacrificing flavor! One small tip that works wonders is to place a slice of bread in the container; it helps maintain moisture and keeps your chicken juicy and tender. Even after storage, the flavors meld beautifully, creating a truly delightful experience when reheated. When you’re ready to enjoy it again, simply pop it in the microwave or oven until heated through; trust me, your taste buds will thank you!
Freezing Miso-Butter Chicken for Later
Freezing is another excellent option if you’re looking to extend the life of your delicious creation. To properly freeze your Miso-Butter Chicken, let it cool completely before transferring it into freezer-safe bags or containers—removing as much air as possible helps prevent freezer burn and keeps those flavors intact. This dish can be stored in the freezer for up to three months; think about how convenient it would be to pull out a savory meal on a busy night! When you’re ready to enjoy it again, just thaw overnight in the fridge and reheat gently on the stove or in the oven. The ease of having such an extraordinary meal at your fingertips makes this option not only practical but incredibly satisfying!
Miso-Butter Chicken: Easy Dinner That Will Wow Your Tastebuds
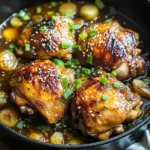
Miso-Butter Chicken is a delightful dish that beautifully marries savory and sweet flavors, making it an ideal choice for a comforting weeknight meal. Picture tender chicken thighs enveloped in a rich, umami-packed miso glaze with a hint of sweetness from maple syrup, creating a dish that’s both indulgent and heartwarming. This easy recipe will not only impress your family but also fill your kitchen with an irresistible aroma that beckons everyone to the table. Whether you’re hosting friends or enjoying a cozy night in, Miso-Butter Chicken is sure to become a new favorite in your culinary repertoire.
- Prep Time: 15 minutes
- Cook Time: 30 minutes
- Total Time: 45 minutes
- Yield: Serves 4
- Category: Main
- Method: Frying
- Cuisine: Asian
Ingredients
- 8 skin-on, bone-in chicken thighs
- 4 tablespoons unsalted butter (or olive oil)
- 1/2 cup white miso
- 3 tablespoons maple syrup
- 1 inch ginger (grated)
- 8 cloves garlic (unpeeled, lightly smashed)
- 1 tablespoon rice vinegar (or apple cider vinegar)
- Black pepper (to taste)
- 2 scallions (finely sliced)
- Optional: 2 teaspoons toasted sesame seeds
Instructions
- Pat the chicken thighs dry and season both sides with salt and black pepper.
- In a large skillet over medium heat, melt two tablespoons of butter. Add the chicken thighs skin-side down and sear for about 5–7 minutes until golden brown.
- Flip the chicken, add garlic and ginger around them, and cook for another 5 minutes.
- In a bowl, mix the remaining butter with white miso, maple syrup, and rice vinegar until smooth. Pour this sauce over the seared chicken.
- Cover the skillet and reduce heat to low. Simmer for about 20–25 minutes until the internal temperature reaches 165°F (75°C).
- Let rest for five minutes before serving garnished with scallions and optional sesame seeds.
Nutrition
- Serving Size: 1 chicken thigh (150g)
- Calories: 290
- Sugar: 4g
- Sodium: 620mg
- Fat: 18g
- Saturated Fat: 7g
- Unsaturated Fat: 10g
- Trans Fat: 0g
- Carbohydrates: 6g
- Fiber: 0g
- Protein: 28g
- Cholesterol: 120mg