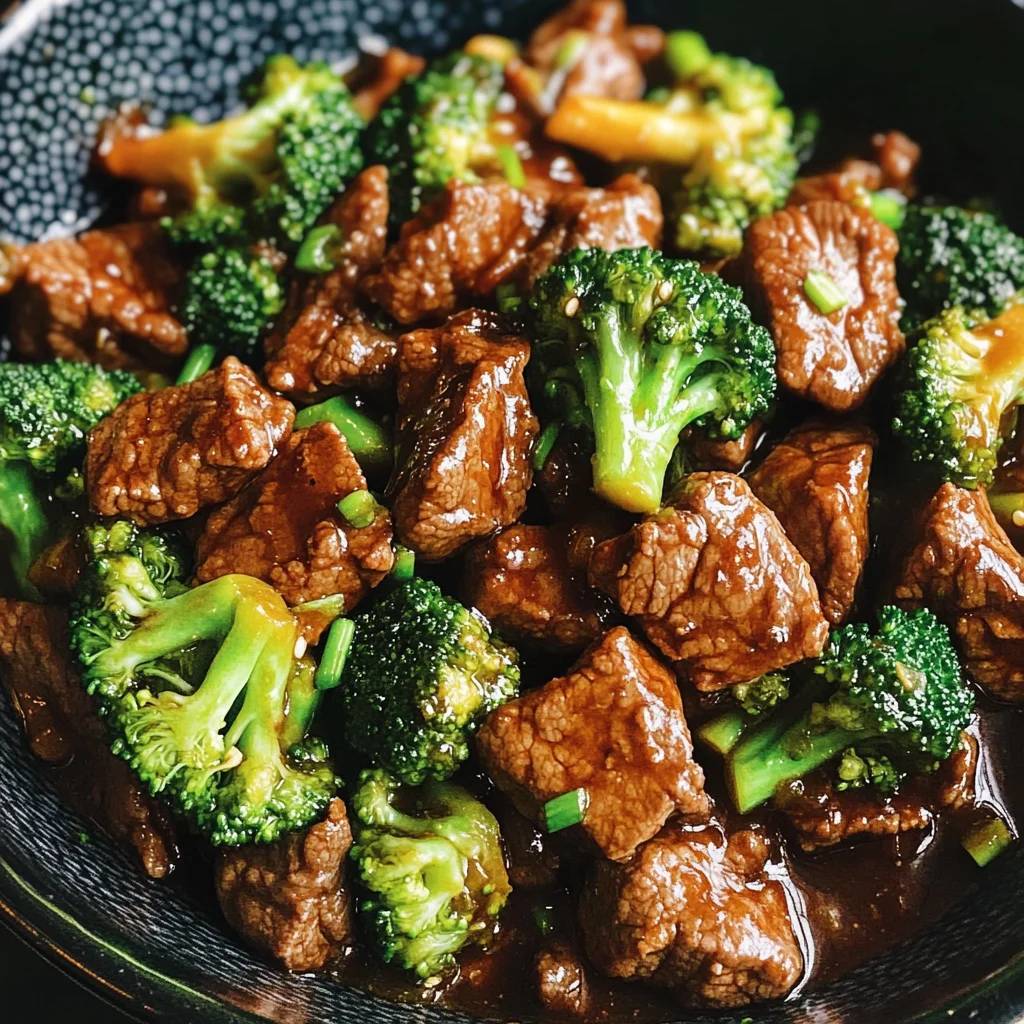
Chinese Beef and Broccoli
There’s something wonderfully enchanting about the aroma of sizzling beef mingling with the fresh, crisp scent of broccoli wafting through your kitchen. It’s as if each ingredient in this Chinese Beef and Broccoli recipe has a story to tell, an experience waiting to unfold on your plate. This dish is not just a meal; it’s a delightful symphony of flavors and textures that evokes the essence of bustling Chinese kitchens and the comforting embrace of homemade food. With tender slices of beef bathed in a rich, savory sauce, paired with vibrant green broccoli, every bite is an invitation to savor life’s simple pleasures. I promise you, once you try this at home, it will quickly become one of your go-to recipes for weeknight dinners.
The beauty of this Chinese Beef and Broccoli lies not only in its taste but also in its versatility and ease of preparation. It’s a dish that invites you into the kitchen with open arms, encouraging creativity while providing a comforting sense of familiarity. As you serve it over steaming bowls of fluffy rice, you’ll find that this meal is perfect for any occasion—from casual family dinners to impressing friends during a gathering. Plus, it’s healthier than most take-out options without sacrificing flavor or satisfaction! Trust me when I say that you’ll appreciate how easily you can whip up this classic dish right in your own kitchen.
Chinese Beef and Broccoli: A Heartwarming Take on a Classic
Welcome to the world of homemade comfort food! This recipe for Chinese Beef and Broccoli promises all the deliciousness of your favorite takeout but with the added love only home cooking can provide. As we embark on this culinary journey together, you’ll find that it’s not just about following steps—it’s about embracing each ingredient and celebrating the process.

Ingredients:
Let’s gather our ingredients as we set off on this flavorful adventure! Each component plays a crucial role in creating that authentic restaurant-quality experience right at home.
- 1 lb flank steak (or skirt steak): Choosing the right cut is absolutely paramount for achieving tenderness in your beef and broccoli. Flank steak is known for its rich flavor and ability to absorb marinades beautifully, ensuring each slice is juicy and satisfying. When purchasing your meat, look for cuts that are bright red with fine marbling; these hints indicate freshness and flavor. If flank steak isn’t available, skirt steak works beautifully too—just remember to slice against the grain for that melt-in-your-mouth texture!
- 1 tablespoon soy sauce: This liquid gold adds depth and umami to our dish—a non-negotiable flavor enhancer! It not only seasons the beef but also helps tenderize it thanks to its salt content. Opt for low-sodium soy sauce if you’re watching your salt intake; it will still impart all those delightful flavors without overwhelming your palate.
- 1 tablespoon peanut oil (or vegetable oil): The choice of oil can make or break your stir-fry! Peanut oil has a high smoke point, making it ideal for sautéing at high temperatures while imparting a subtle nuttiness that complements our ingredients perfectly. If peanut oil isn’t available or if allergies are a concern, vegetable oil or canola oil will work just as well without compromising taste.
- 1 tablespoon cornstarch: This ingredient might seem simple, but it’s truly essential for achieving that glossy finish we all crave in stir-fries! By coating our beef in cornstarch before cooking, we create an almost protective barrier that locks in juices while giving us that sought-after velvety texture when combined with our sauce later on.
- 1/2 teaspoon baking soda (optional): Now here’s a little secret weapon! Adding baking soda helps to tenderize tougher cuts by breaking down proteins more effectively. It’s optional—if you’re using flank steak or skirt steak—which are naturally tender—but if you happen to have a less expensive cut on hand, this step can elevate the texture significantly.
- 1/2 cup chicken stock (or beef stock): Stock serves as the flavorful backbone of our sauce. Using chicken stock lends an extra layer of richness without overpowering other flavors; however, if you prefer beef stock for more robust flavor profiles, feel free to use it instead! Homemade stock is always best if you have some stashed away—nothing beats that deep complexity!
- 2 tablespoons Shaoxing apple vinegar (or dry apple juice): This vinegar adds brightness and tanginess to balance out our rich sauce beautifully. If Shaoxing vinegar isn’t accessible or desired due to dietary preferences, dry apple juice works as an excellent substitute while maintaining sweetness without overpowering other flavors.
- 2 tablespoons soy sauce: We’re adding more soy sauce here because we simply can’t get enough! This additional splash enhances both flavor profile and color—elevating our dish from ordinary to extraordinary!
- 1 teaspoon dark soy sauce: Dark soy sauce differs from regular soy due to its thicker consistency and deeper color—it brings sweetness along with color enhancement to our stir-fry while balancing out saltiness beautifully. If unavailable, feel free to use more regular soy sauce in moderation.
- 2 teaspoons brown sugar (or white sugar): Sweetness is key in balancing savory dishes like ours! Brown sugar not only adds sweetness but also contributes moistness thanks to its molasses content. However, white sugar would work just fine if that’s what you have on hand—it’ll still give us that lovely touch!
- 1 head broccoli: Fresh broccoli adds crunchiness alongside vibrant color—the nutritional powerhouse we need here! When selecting broccoli heads at the store or market, look for firm stalks with tightly closed florets; they should be bright green without any yellow spots indicating age.
- 1 tablespoon peanut oil (or vegetable oil): Yes—another round of oil needed here! Just as before, we want high heat cooking capabilities along with those lovely nutty undertones enhancing our final dish’s flavor profile!
- 3 garlic cloves (minced): Garlic infuses every bite with aromatic warmth—it’s one ingredient I could never imagine omitting from my kitchen repertoire! Use fresh garlic whenever possible; its pungency elevates dishes beyond compare compared to pre-minced versions found in jars.
- 2 teaspoons ginger (minced): Ginger brings an invigorating zest while also aiding digestion—a wonderful addition alongside garlic for enriching flavors within Asian cuisine! Fresh ginger offers far superior taste compared against powdered varieties; always choose fresh when available!
Equipment You’ll Need:
Having the right tools makes all the difference when preparing meals like our delightful Chinese Beef and Broccoli! These essential partners will help streamline your cooking process while allowing you space to explore creativity throughout!
- Large nonstick skillet: This piece is non-negotiable—it allows us freedom regarding cooking methods involving high heat without worrying about sticking or burning ingredients along the way! Nonstick surfaces also mean easier cleanup afterwards—an added bonus after creating such delectable dishes!
- Sharp chef’s knife: A good knife becomes an extension of yourself during prep work—investing time into finding one you’re comfortable using will pay off tenfold during chopping tasks like slicing beef against grain or mincing garlic & ginger precisely!
- Cutting board: Choose one that’s sturdy enough yet gentle enough not to dull those precious blades over time! Bamboo boards offer durability while being eco-friendly as well—a win-win situation indeed!
Now that we’ve gathered everything together let’s dive into preparing this fantastic Chinese Beef and Broccoli dish so we can enjoy its marvelous flavors soon enough!
Step 1: Preparing Your Flank Steak
To start off our culinary adventure, let’s focus on properly preparing our flank steak—a crucial step that sets the tone for tenderness throughout our finished dish. Using your sharp chef’s knife, slice against the grain into 0.5 cm (1/4 inch) thick slices or 1-cm (1/2 inch) sticks. Why slice against the grain? This technique shortens muscle fibers ensuring each bite melts effortlessly upon contact with your tongue—that’s what we’re aiming for here! Once sliced up neatly transfer them into a small bowl where we’ll marinate them momentarily by adding soy sauce along with peanut oil followed by cornstarch—mix gently by hand until every piece receives a generous coating creating an initial layer of flavor plus tenderness as they marinate together for about 10 minutes while prepping remaining ingredients.
Step 2: Crafting Our Sauce
While we’re letting those flavors mingle happily together let’s shift focus towards crafting our tantalizing sauce—it ties all components together harmoniously later on creating depth throughout every mouthful enjoyed afterward! In medium-sized bowl combine chicken stock along with Shaoxing apple vinegar (or dry apple juice), standard soy sauces plus dark soy sauce mixed alongside brown sugar until thoroughly blended—this mixture should feel harmonious already just by observing colors melding together perfectly inside bowl alone before moving onto next stage ahead.
Step 3: Steaming Our Vibrant Broccoli
With marinade complete let’s move onto steaming broccoli—an essential step ensuring vibrancy remains intact while retaining nutrients within florets themselves so they come alive within final presentation too! In large skillet add approximately 1/4 cup water over medium-high heat allowing boiling point reached quickly before introducing freshly cut broccoli heads covered tightly allowing steam circling around until turning tender yet still bright green—a process lasting roughly one minute tops should suffice providing optimal results here—afterward transferring steamed veggies onto plate readying them forth following stages next before proceeding onward wiping any excess moisture left behind carefully using paper towel held securely via tongs preventing unwanted residual water affecting future steps taken forth thereafter smooth sailing ahead guaranteed folks!
Step 4: Searing Our Flank Steak
Now comes perhaps my favorite part—the actual searing itself which creates those beautiful charred edges transforming mere slices into glorious bites bursting forth rich flavors developed respectively throughout cooking process ahead await eagerly upon hot stove beneath us right now magically unfolding before eyes no less exciting than theatrical performance happening live before audience members present witnessing grandeur unfold firsthand today! Heat remaining peanut oil within cleaned nonstick skillet swirling around generously covering bottom surface entirely heating up until visibly shimmering indicating readiness achieved prior spreading marinated pieces across evenly positioning side-by-side allowing them cook undisturbed initially sitting idly untouched approximately thirty seconds whilst bottom side browns enticingly revealing caramelized exterior forming gradually awaiting flipping action enacted shortly after checking signs confirming doneness taking precedence next involved steps catching fire indeed keeping excitement alive throughout experience shared today dear readers alike witnessing greatness unfold within confines kitchens everywhere inspiring joy across time zones wherever hearts beat passionately towards culinary endeavors pursued diligently forevermore captured essence moments treasured deeply shared histories forged through delicious meals lovingly prepared proudly served unto loved ones gathered ’round tables sharing laughter stories celebrated endlessly together long after plates cleared leaving behind echoes memories created forevermore cherished fondly beyond measure experienced lived fully embraced truthfully acknowledged openly candidly reflective journeys embarked upon whilst savoring delightfully crafted dishes made home sweet homes lastingly remembered!
Step 5: Infusing Flavor with Aromatics
Now that our beef is sizzling with that beautiful golden-brown hue, it’s time to introduce the aromatic duo of garlic and ginger—two essential ingredients that will take our dish from good to extraordinary. As you add the minced garlic and ginger to the pan, take a moment to inhale that intoxicating aroma as it wafts through your kitchen; it’s like a warm hug for your senses! Stir them in gently, allowing the heat of the skillet to coax out their vibrant flavors. This step is crucial because garlic and ginger not only enhance the taste but also provide depth, creating a symphony of flavors that will dance on your palate.
Cook these aromatics for just 15 to 30 seconds until they become fragrant but are careful not to let them burn. Burning can turn these lovely ingredients bitter, which we absolutely want to avoid. You’ll know you’re right on track when you see them soften slightly and release their delightful scent into the air—this is where the magic starts! Trust me on this, taking those few seconds to properly infuse these flavors makes all the difference in achieving a truly authentic Chinese Beef and Broccoli experience.
Step 6: Reintroducing Our Vibrant Broccoli
Next up, it’s time to bring back that beautifully steamed broccoli! Gently return the bright green florets to the skillet, taking care to nestle them amongst the beef so they can soak up all those rich flavors we’ve built so far. This reintroduction not only adds texture but also brings an explosion of color and nutrition back into our dish. Remember, visual appeal is just as important as taste—after all, we eat with our eyes first!
Before pouring in our luscious sauce, give everything a good stir so that each piece of beef and broccoli feels loved and coated in those fragrant aromas. Now, grab your previously mixed sauce and give it another stir—this is crucial because we need to ensure that any settled cornstarch gets mixed back in. When you pour this velvety liquid gold into the pan, watch as it envelops everything in its silky embrace. The beauty of this sauce is in its transformative nature; within minutes of cooking over medium-high heat, it will thicken beautifully and cling perfectly to each morsel.
Step 7: Cooking Down for That Perfect Glaze
At this stage, let’s talk about timing. Cook everything together for about one minute, stirring continuously until you see that magical thickening happen. The science behind this is simple yet fascinating—the heat activates the cornstarch which thickens our sauce while also creating a glossy finish that makes your dish visually captivating. Keep an eye on it; you want a saucy consistency that clings rather than pools at the bottom of your pan—it should look inviting enough for someone to dive right in!
As you stir, notice how everything begins to meld—each slice of beef becomes coated with a glistening layer of sauce while the broccoli takes on a deep sheen from absorbing those flavors. This moment is utterly satisfying; it’s like watching pieces come together in perfect harmony! And don’t forget: once you see that thickness form, act quickly! Transfer everything onto a plate immediately. This ensures we keep all those wonderful textures intact—you want your broccoli crisp-tender and your beef juicy.
Step 8: Plating Your Masterpiece
Ah, plating—the final act of creation where all our hard work comes together in one stunning presentation! Here’s where you can really shine and show off what you’ve created. Grab your favorite serving platter or individual bowls if you’re feeling fancy (because why not?). If you’d like an extra touch of elegance and freshness, consider garnishing with some sliced green onions or sesame seeds on top; both add a lovely crunch and visual flair.
As you spoon out generous portions over fluffy white rice or quinoa (both work beautifully!), take a moment to appreciate what you’ve created—a beautiful blend of textures and flavors that truly encapsulates comfort food at its finest. I promise you, when friends or family see this colorful dish before them, they won’t be able to resist digging in! Serve immediately while everything is hot—this dish tastes best fresh off the stove when the aromas are still swirling around invitingly.
Conclusion:
As we wrap up this delightful culinary adventure together, I hope you feel as excited as I am about making Chinese Beef and Broccoli at home! It’s truly incredible how such simple ingredients can harmonize into a symphony of flavors—a tender embrace of juicy beef enveloped in that rich brown sauce with crisp broccoli providing just the right crunch. Every bite is not just food; it’s comfort wrapped in love, nostalgia for take-out nights transformed into something even more special.
This recipe is an absolute must-try not only for its taste but for the joy it brings in the making process itself. Picture pouring your heart into each step—the marinating beef, stirring aromatic ginger and garlic into sizzling oil; it’s pure magic! And let’s not forget its versatility; whether you’re serving it for family dinner or impressing friends at game night, this dish effortlessly shines on every occasion. Just imagine pulling steaming bowls from the stovetop and watching everyone gather around with anticipation—it’s bound to create memorable moments.
For serving suggestions, envision heaping spoonfuls over fluffy jasmine rice that soaks up all that delicious sauce—absolutely divine! Or perhaps alongside fragrant stir-fried noodles for a twist that really turns up the fun factor. If you’re feeling adventurous, toss in some sautéed bell peppers or snap peas for added color and crunch; they complement this dish beautifully! Feeling inspired yet?
And of course, this recipe is wonderfully adaptable too! Want a kick? Add some chili flakes for heat. Craving more greens? Toss in bok choy or sugar snap peas during cooking—the options are endless! Don’t rush; take your time experimenting with different flavors until you find what sings to your palate. So why wait? Gather your ingredients today, make this cherished recipe yours, and join me in celebrating all things delicious! I’d love to hear how yours turns out—let’s connect through our shared passion for cooking!
Chinese Beef and Broccoli

Experience the delight of homemade Chinese Beef and Broccoli, a dish that transforms your kitchen into a haven of savory aromas and vibrant colors. This recipe captures the essence of classic takeout with tender beef slices marinated to perfection, complemented by fresh broccoli florets in a rich, glossy sauce. It’s not just a meal; it’s an invitation to gather around the table, share stories, and savor life’s simple pleasures. Quick to prepare and packed with flavor, this dish is perfect for weeknight dinners or impressing guests at gatherings. Enjoy the comfort of creating a beloved classic right at home!
- Prep Time: 15 minutes
- Cook Time: 15 minutes
- Total Time: 30 minutes
- Yield: Serves 4
- Category: Main
- Method: Stir-frying
- Cuisine: Chinese
Ingredients
- 1 lb flank steak (or skirt steak)
- 1 tablespoon soy sauce
- 1 tablespoon peanut oil (or vegetable oil)
- 1 tablespoon cornstarch
- 1/2 cup chicken stock (or beef stock)
- 2 tablespoons dry apple juice (or Shaoxing apple vinegar)
- 1 head broccoli
- 3 garlic cloves (minced)
- 2 teaspoons ginger (minced)
Instructions
- Slice flank steak against the grain into thin strips and marinate with soy sauce, peanut oil, and cornstarch for about 10 minutes.
- In a bowl, mix chicken stock, dry apple juice, soy sauces, and brown sugar to create the sauce.
- Steam broccoli for about one minute until bright green and tender.
- Heat peanut oil in a skillet over medium-high heat and sear the marinated beef until browned.
- Add minced garlic and ginger; cook briefly until fragrant.
- Reintroduce steamed broccoli to the skillet and pour in the sauce mixture. Stir until sauce thickens.
- Serve hot over rice or quinoa.
Nutrition
- Serving Size: 1 plate (about 300g)
- Calories: 320
- Sugar: 8g
- Sodium: 610mg
- Fat: 14g
- Saturated Fat: 3g
- Unsaturated Fat: 9g
- Trans Fat: 0g
- Carbohydrates: 20g
- Fiber: 3g
- Protein: 32g
- Cholesterol: 70mg