Quick Pickled Red Cabbage
There’s something truly magical about pickling. It transforms humble vegetables into vibrant, tangy delights that can elevate almost any dish. When I first discovered the art of Quick Pickled Red Cabbage, it was like a revelation—a delicious bridge between tradition and innovation. The crunch of finely shredded cabbage, coupled with the sweet-tart liquid gold of apple cider vinegar, creates a symphony of flavors that dances on your palate. Each bite is a burst of color and zest, bringing life to salads, sandwiches, or simply enjoyed straight from the jar. This recipe for Quick Pickled Red Cabbage is so easy to master that I promise you’ll find yourself making it time and again, not just for its taste but for the joy it brings to your meals.
Imagine standing in your kitchen, chopping vibrant purple cabbage as its crispness fills the air with a fresh scent. The anticipation builds as you prepare the pickling brine—the delightful mingling of vinegar and sugar that will soon envelop your cabbage in warmth and flavor. This isn’t just a recipe; it’s an experience that connects us to our roots while allowing us to play with flavors in exciting new ways. Whether you’re preparing a weeknight meal or planning a grand feast, this Quick Pickled Red Cabbage will shine as a standout side dish that everyone will love.
Quick Pickled Red Cabbage: A Tangy Delight for Every Table
There’s nothing quite like having a jar of homemade pickled red cabbage ready to brighten up any meal. This recipe is not only simple but also incredibly rewarding—each jar you fill is a testament to your culinary prowess! The balance of tangy and sweet makes this dish versatile enough to serve alongside everything from grilled vegetables to hearty grain bowls. Plus, it’s an excellent way to add some crunch and color to your plate! So let’s roll up our sleeves and embark on this flavorful journey together!
Ingredients:
As we gather our ingredients for this Quick Pickled Red Cabbage, take a moment to appreciate each component’s role in creating this delicious dish. You might be surprised by how these seemingly simple elements come together in such an extraordinary way.
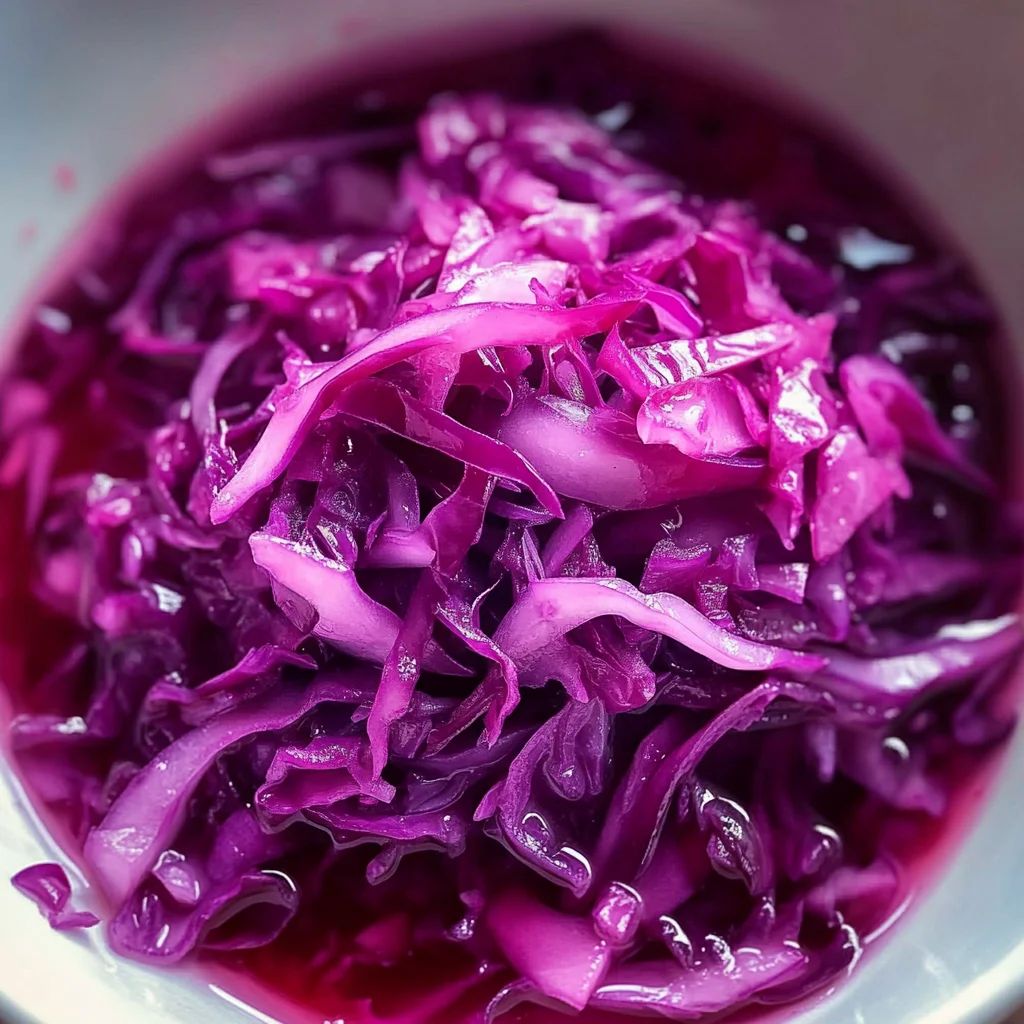
- 6 to 7 cups red cabbage (approx 1 small cabbage, quartered, cored, and very finely shredded). The star of our show! Red cabbage isn’t just visually stunning; it also boasts health benefits packed with vitamins K and C. When selecting your cabbage, look for one that feels heavy for its size with tightly packed leaves—this signals freshness. Finely shredding it ensures maximum surface area exposure during pickling, allowing the brine to penetrate deeply and infuse every bite with flavor. Trust me when I say: don’t skip this step; the texture is key!
- 2 teaspoons kosher salt. Salt works wonders in drawing out moisture from vegetables through osmosis—a technique known as “salting.” In our case, it softens the cabbage before we immerse it in the tangy brine. Kosher salt is preferred here because its larger crystals dissolve more easily compared to table salt without adding unwanted iodine flavors. Just don’t rush this process; letting the salted cabbage sit for half an hour allows it to develop an incredible texture that’s both tender yet crunchy.
- 16 ounces raw apple cider vinegar. Ahh…this delightful vinegar adds not only acidity but also flavor depth! Its slightly fruity notes distinguish it from other vinegars, balancing perfectly against the sweetness we’ll add later. Make sure you’re using raw apple cider vinegar that’s unfiltered; it’ll contain beneficial probiotics that contribute positively to your gut health while enriching the taste.
- 1 cup granulated sugar. This ingredient may seem counterintuitive in such a savory context, but hear me out: sugar plays an absolutely crucial role in balancing acidity! It rounds out the sharpness of vinegar beautifully, resulting in a harmonious blend that’s pleasantly sweet yet refreshingly tart. If you’re looking for alternatives due to dietary preferences or restrictions, consider using agave syrup or maple syrup—both can add their unique sweetness.
- 24 ounces water. Water acts as a medium here—it dilutes the vinegar slightly while ensuring our pickling liquid doesn’t overwhelm the delicate flavor of the cabbage itself. For best results, opt for filtered or spring water; avoiding tap water helps eliminate any off-flavors that could interfere with our masterpiece.
- Optional: ½ teaspoon red pepper flakes or a dried red chile pepper (mild to hot). If you’re feeling adventurous—or if spice runs through your veins—adding some heat can elevate this dish even further! The optional red pepper flakes introduce warmth and complexity without overpowering the other flavors; they offer just enough kick if you choose wisely based on your heat tolerance.
Equipment You’ll Need:
Before we dive into making this colorful treat, let’s chat about some essential tools that will make your cooking experience smoother and more enjoyable! Having the right equipment at hand can really transform how effortlessly you create something wonderful in your kitchen.
- A large mixing bowl – This versatile piece of equipment is crucial for combining ingredients without causing any mess! It provides ample space for tossing shredded cabbage with salt before letting it sit—a step vital for achieving optimal texture.
- A small saucepan – Perfectly sized for heating up our pickling liquid without taking over your stovetop! You’ll use this little gem to dissolve sugar into vinegar and water gently; consider using one with a pour spout if available—it makes transferring liquids so much easier!
- Clean glass jars with lids – These are essential for storing your pickled cabbage once it’s ready! Opt for glass jars since they won’t react with acidic foods like plastic might do over time. Make sure they’re thoroughly cleaned—this ensures no unwanted bacteria interfere with our beautiful fermentation process.
- A sharp knife or mandoline slicer – For finely shredding that lovely red cabbage! A sharp knife will give you precise cuts while keeping all those beautiful juices intact—if using a mandoline slicer instead (which can save time), exercise caution as those blades are incredibly sharp!
Now that we’ve gathered everything we need let’s jump right into preparing this delightful Quick Pickled Red Cabbage!
Step 1: Salting Our Shredded Cabbage
Start by tossing your finely shredded red cabbage into that large mixing bowl along with those two teaspoons of kosher salt we talked about earlier. As you mix them together gently yet thoroughly (think loving caresses rather than aggressive stirring), you’ll be amazed at how quickly the salt begins working its magic! In about 30 minutes’ time, you’ll notice significant changes—the volume will reduce considerably as moisture seeps out from within each piece of cabbage due to osmosis thanks to our trusty salt companion.
This step is crucial because salting not only softens but also enhances flavor by concentrating it within each strand of vibrant purple goodness! Don’t rush through this waiting period; it’s during these moments when transformation happens—and trust me when I say patience pays dividends here!
Step 2: Preparing Our Liquid Gold
While we wait on our salted cabbage partner-in-crime (patience truly does reward!), let’s turn our attention towards creating what I affectionately call “liquid gold.” In that small saucepan you’ve set aside earlier, combine 16 ounces of raw apple cider vinegar with 24 ounces of water along with one cup of granulated sugar—yes, all at once!
Place over medium heat until boiling begins bubbling away merrily—don’t walk away too far now! Stir occasionally until all traces of sugar disappear completely into this fragrant elixir—it should only take around five minutes tops before removing from heat entirely once dissolved beautifully together like old friends reuniting after years apart!
This harmonious blend forms not only pickle brine but also serves double duty by infusing flavors back into otherwise bland veggies—all thanks primarily due its acidic nature balancing both sweetness AND tartness perfectly together harmoniously!
Step 3: Packing Our Jars
Once you’ve allowed both mixtures—the salted shredded cabbage and warm pickling liquid—to cool slightly separately (we don’t want glass jars cracking!), begin packing those clean glass jars tightly full—but not overly so—as they’ll shrink down once submerged properly beneath their new bath of bright colors swirling around gracefully within them!
Use tongs or forks if necessary during transfer time—it’s all about precision here! Pour enough hot liquid over top until everything is covered completely without drowning them entirely; aim for just below rim level where possible so sealing later remains easy-peasy too! Wipe down edges carefully afterwards using damp cloths afterward—you don’t want any stubborn drips ruining presentation afterwards when guests arrive expecting perfection upon serving time itself!
Step 4: Cooling Before Storage
After sealing those jars shut tightly using their respective lids (make sure they fit securely), leave them sitting untouched upon countertop until cool completely naturally—this usually takes approximately an hour depending on room temperature conditions surrounding ambiance overall inside kitchen space itself.
Resist temptation at all costs during cooling phase—not even one tiny taste test unless absolutely necessary because patience rewards again here: allow flavors meld together fully overnight within fridge afterward before digging into first bites tomorrow when everything has had time really settle down comfortably among themselves—a true party awaits after waiting patiently like excited guests arriving shortly thereafter filled anticipation building steadily throughout entire night ahead filled promise awaiting discovery ahead soon enough!
By following these steps closely while enjoying every minute spent crafting something special uniquely yours along way—you’ll have created an utterly intoxicating side dish guaranteed impress family & friends alike whether served alongside grilled proteins colorful salads galore across table spread showcasing creativity shining brightly throughout evening celebrations enjoyed endlessly ahead—all thanks dedicated efforts put forth today crafting own masterpiece worth celebrating proudly far beyond mere meals alone forever cherished memories created shared together joyously around tables shared lovingly evermore…
I can’t wait for you all try making my version Quick Pickled Red Cabbage yourselves too soon someday soon hopefully before next big gathering arrives knocking loudly asking needed assistance brightening dinners celebrating joys found within food cooked lovingly served heartily around company bringing smiles laughter shared moments unforgettable throughout seasons passed together experienced deeply forever treasured fondly always cherished warmly…
Step 5: Packing Your Cabbage with Care
Once your cabbage has been salting and softening for those transformative thirty minutes, it’s time to pack it into jars. This step is not just about putting cabbage into containers; it’s about ensuring that every bite will be infused with that tangy pickling liquid. First, squeeze the cabbage gently to release any excess moisture—this helps concentrate its flavor even further. Now, I love using wide-mouth jars for this because they allow for easy packing and serving later. Start by taking a handful of the softened cabbage and pressing it firmly into the jar. You want to create layers, so don’t be shy! Pack it down as you go; this is crucial because it helps eliminate air pockets that can affect the pickling process.
As you layer the cabbage, consider adding those optional red pepper flakes or a whole dried chile pepper if you’re in the mood for a little heat. Trust me, this adds an utterly intoxicating kick that balances perfectly with the sweet and tangy notes of your pickling liquid. Once your jar(s) are filled to the brim—leave about half an inch of space at the top—you’re ready for the next exciting phase! Not only does proper packing help with flavor infusion, but it also ensures that your cabbage has enough liquid surrounding it when we add that hot brine.
Step 6: Crafting Your Brine Symphony
Now comes one of my favorite parts: making the pickling brine! In a small saucepan, combine your raw apple cider vinegar, water, and granulated sugar. The ratio here is absolutely paramount; you want a balance between acidity and sweetness that will elevate your cabbage to a whole new level. Turn the heat to medium and bring this mixture to a boil while stirring occasionally—watch as those sugar crystals dissolve like magic! The moment you see bubbles beginning to rise, take a moment to inhale deeply; there’s something so inviting about that sharp yet sweet aroma wafting through your kitchen.
Once your sugar is fully dissolved—this usually takes just a few minutes—remove the saucepan from heat. This is also where patience kicks in again; let it cool slightly before pouring over your packed cabbage. Why do we let it sit? Well, pouring boiling brine over cold cabbage can shock it and lead to unwanted texture changes. A gentle introduction to warmth allows for even distribution of flavors without compromising on crunchiness. Remember, we want our Quick Pickled Red Cabbage to be both tender and crisp—a delicate dance between two worlds!
Step 7: Pouring The Liquid Gold
It’s finally time to pour that beautiful brine over your packed cabbage! Carefully ladle or pour the hot pickling liquid over each jar until everything is submerged—this is where those layers come together in harmony. It’s crucial at this point to ensure there are no floating bits of cabbage above the liquid line; anything exposed risks becoming mushy instead of delightfully crunchy during storage. If you find any stray bits bobbing above the surface, simply press them down gently with a clean spoon until they’re submerged.
After you’ve poured in all that glorious brine, take a clean cloth or paper towel and wipe off any spills around the rim of each jar—this simple act keeps everything tidy and ensures a tight seal when you screw on the lids. And oh boy, once those lids are affixed tightly, I recommend letting them sit on your counter until they reach room temperature before transferring them into the fridge. This resting period allows all those vibrant flavors to mingle beautifully—it’s like letting friends get to know one another before throwing them into a party!
Step 8: The Waiting Game – Chill Out!
Ahh, patience—the most critical ingredient in this entire process! While waiting may feel tedious (I totally understand!), I promise you it’s absolutely worth every moment. Ideally, you’ll want these jars of Quick Pickled Red Cabbage to chill in your refrigerator for at least 24 hours before diving in; however, if you’re feeling adventurous (and I know you are), they can be enjoyed after just two hours of chilling! But trust me on this: giving them time allows all those flavors—the tang from vinegar, sweetness from sugar, and saltiness from our initial salting step—to meld together into an unforgettable experience.
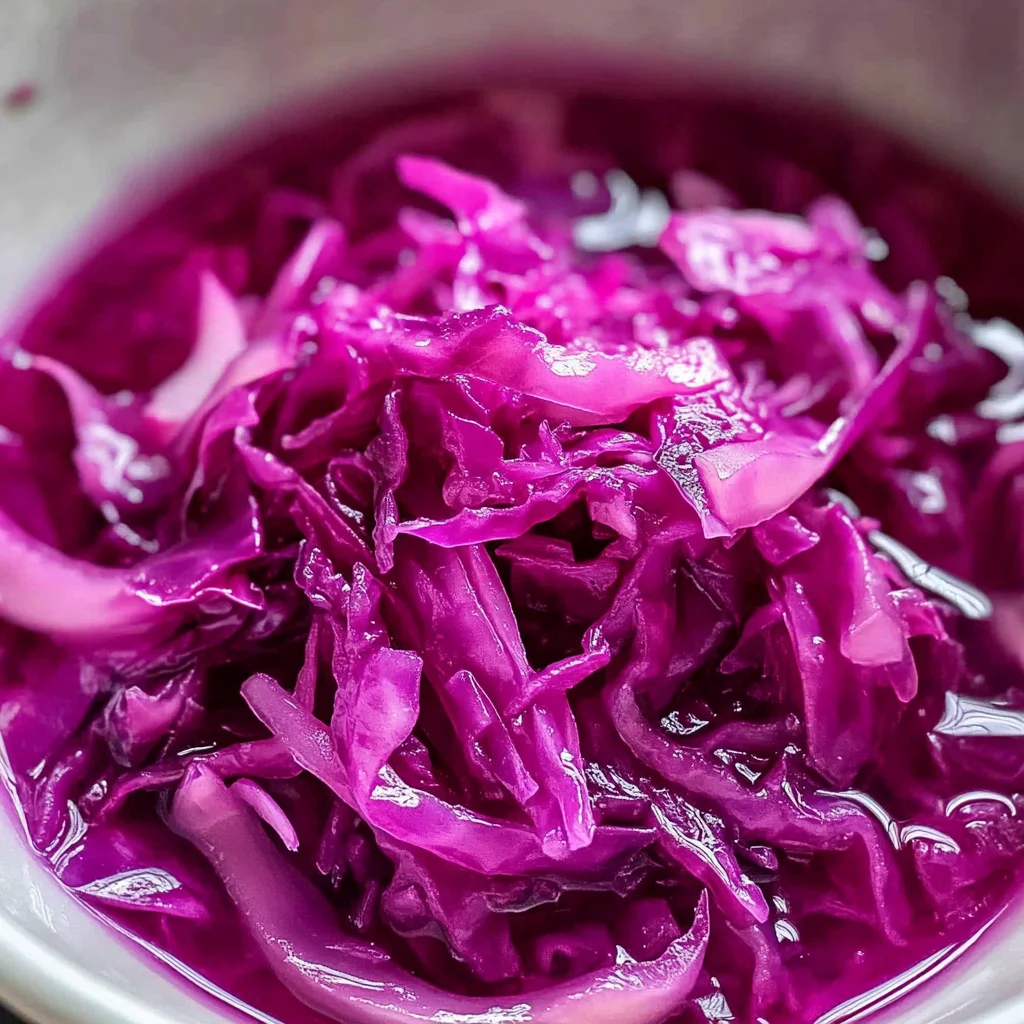
During this chilling phase, take note of how vibrant the color becomes—a stunning deep magenta hue that practically glows! As they marinate in their tangy bath, the natural crunch of red cabbage transforms into something profoundly satisfying; each bite will be both crisp and bursting with flavor when you’re finally ready to serve them up at dinner or alongside lunch!
Next Major Phase – Enjoying Your Quick Pickled Red Cabbage
Now comes perhaps my favorite part—serving up this delightful side dish! With its brilliant color and zesty flavor profile, Quick Pickled Red Cabbage adds not just taste but also visual flair to any meal spread. Whether you’re topping off tacos or serving alongside grilled vegetables or hearty grains like quinoa or farro, I guarantee everyone will be reaching for seconds (or thirds!).
Step 9: The Final Touch – Serving Suggestions
When you’re ready to savor these vibrant bites of joy, simply drain off most of the pickling liquid (though I encourage leaving just a drizzle for extra zing) and serve at room temperature—or even chilled if you prefer! You’ll find that each forkful offers an irresistible crunch followed by an explosion of flavor dancing on your palate—a true testament to why I’ve always been captivated by homemade pickles!
Feel free to experiment with how you incorporate this fabulous creation into meals; it’s incredibly versatile! Toss it onto salads for an unexpected twist or use it as a garnish atop sandwiches for added brightness—there’s really no wrong way here! And don’t forget: these beauties keep well in the fridge for up to two weeks (if they last that long!). I hope you enjoy every bite as much as I do—happy pickling!
Storage and Enjoyment Tips for Your Quick Pickled Red Cabbage
Now that you’ve lovingly crafted your Quick Pickled Red Cabbage, it’s time to revel in the satisfaction of having this vibrant, tangy treat ready to grace your table! But before you dive in, let’s talk about how to store it properly so you can enjoy this delightful dish for days to come. The beauty of this recipe lies not just in its fresh crunch and flavor but also in its incredible staying power when stored correctly.
Storing Leftover Quick Pickled Red Cabbage
To keep your Quick Pickled Red Cabbage as fresh and flavorful as possible, be sure to transfer any leftovers into an airtight container. Glass jars work wonders here—not only do they look charming sitting on your fridge shelf, but they also prevent any uninvited odors from mingling with your cabbage. When stored properly, this pickled beauty will last up to two weeks in the refrigerator, allowing you ample time to savor its flavors without the pressure of finishing it all at once. A nifty tip I love to share is placing a slice of bread in the jar; it absorbs excess moisture and keeps the cabbage crispier for longer. After a few days, you might notice the flavors deepening into a more complex tapestry of sweet and tangy notes—truly, it becomes even more extraordinary with time! When you’re ready to serve it again, simply drain off some of the pickling liquid and let it come back to room temperature for that perfect fresh bite.
Freezing Quick Pickled Red Cabbage for Later
If you want to extend the life of your Quick Pickled Red Cabbage even further, consider freezing it! Though pickles are typically enjoyed fresh or refrigerated, freezing is a fantastic option if you find yourself with an abundance. To freeze properly, pour the cooled cabbage along with its liquid into freezer-safe bags or containers—be sure to remove as much air as possible before sealing them up tight. When stored this way, it can last up to three months in your freezer. Just imagine pulling out a bag of this vibrant red treasure on a busy weekday night—it’s like having a little jar of joy waiting for you! Whether tossed into salads or used as a topping on tacos or grain bowls straight from frozen, this quick pickled delight maintains its flavor while providing convenience at your fingertips.
With these tips in hand, your Quick Pickled Red Cabbage is not just a dish but an experience that can brighten up meals for days!
Quick Pickled Red Cabbage
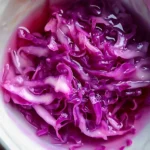
Quick Pickled Red Cabbage is a vibrant and tangy delight that effortlessly elevates any meal. This simple recipe transforms an ordinary cabbage into a crunchy, flavorful side dish that adds a burst of color and zest to salads, sandwiches, and more. Made with fresh red cabbage, raw apple cider vinegar, and just the right amount of sweetness, this quick pickle is not only easy to prepare but also offers numerous health benefits packed with vitamins. Perfect for meal prep or as a last-minute addition to your dinner table, this pickled cabbage will quickly become a staple in your kitchen.
- Prep Time: 15 minutes
- Cook Time: 5 minutes
- Total Time: 20 minutes
- Yield: About 8 servings 1x
- Category: Side Dish
- Method: Pickling
- Cuisine: American
Ingredients
- 6 to 7 cups red cabbage (finely shredded)
- 2 teaspoons kosher salt
- 16 ounces raw apple cider vinegar
- 1 cup granulated sugar
- 24 ounces water
- Optional: ½ teaspoon red pepper flakes
Instructions
- In a large mixing bowl, combine finely shredded red cabbage and kosher salt. Toss well and let it sit for 30 minutes to soften.
- In a small saucepan over medium heat, mix apple cider vinegar, water, and sugar. Stir until the sugar dissolves completely, then remove from heat.
- Pack the salted cabbage into clean glass jars tightly but without overfilling. If desired, sprinkle red pepper flakes between layers.
- Pour the warm pickling liquid over the cabbage until fully submerged. Seal the jars tightly.
- Allow them to cool at room temperature for about an hour before transferring to the refrigerator. For best flavor, let them chill for at least 24 hours before enjoying.
Nutrition
- Serving Size: 1/4 cup (60g)
- Calories: 40
- Sugar: 9g
- Sodium: 120mg
- Fat: 0g
- Saturated Fat: 0g
- Unsaturated Fat: 0g
- Trans Fat: 0g
- Carbohydrates: 10g
- Fiber: 2g
- Protein: 0g
- Cholesterol: 0mg