Dutch Apple Pie Recipe
There’s something truly magical about the aroma of a freshly baked Dutch Apple Pie wafting through the home, isn’t there? It’s that intoxicating blend of warm spices and sweet, caramelized apples that evokes the cozy embrace of fall. This Dutch Apple Pie recipe is more than just a dessert; it’s a celebration of memories shared with family and friends gathered around a table, savoring each slice while exchanging stories. The buttery, crumbly topping paired with tender apple filling creates a symphony of flavors and textures that sings to the heart. I promise you, every bite feels like a warm hug on a chilly day.
As I share this recipe with you, I want you to feel empowered in your kitchen. Baking can often feel daunting, but trust me when I say that this pie is approachable for anyone willing to roll up their sleeves and dive in. The combination of Granny Smith apples for their tartness and McIntosh apples for their sweetness creates an extraordinary balance—like the perfect duet. And don’t even get me started on that streusel topping! It’s the kind of crumble that makes your heart skip a beat—crispy yet buttery, with just the right amount of sweetness. So grab your apron, and let’s embark on this delicious journey together!
Dutch Apple Pie Recipe: A Slice of Autumn Bliss
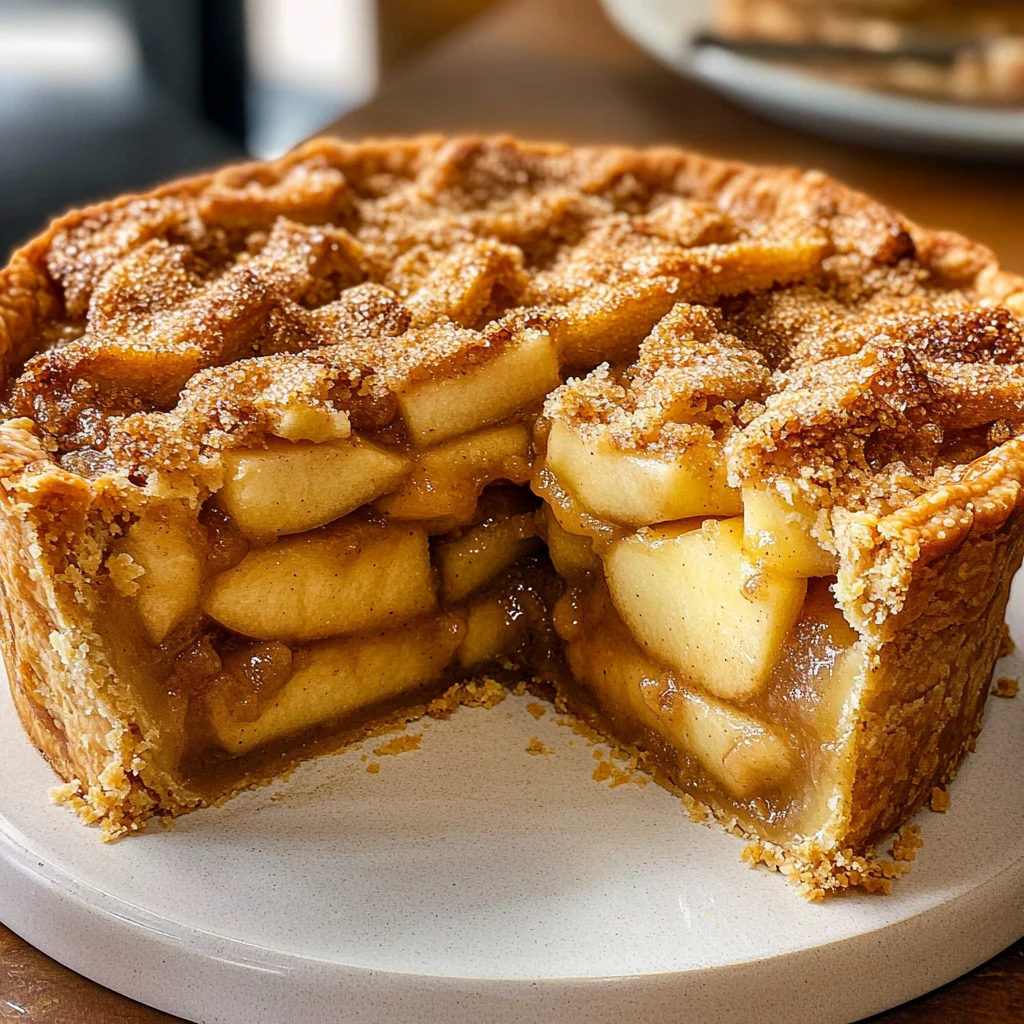
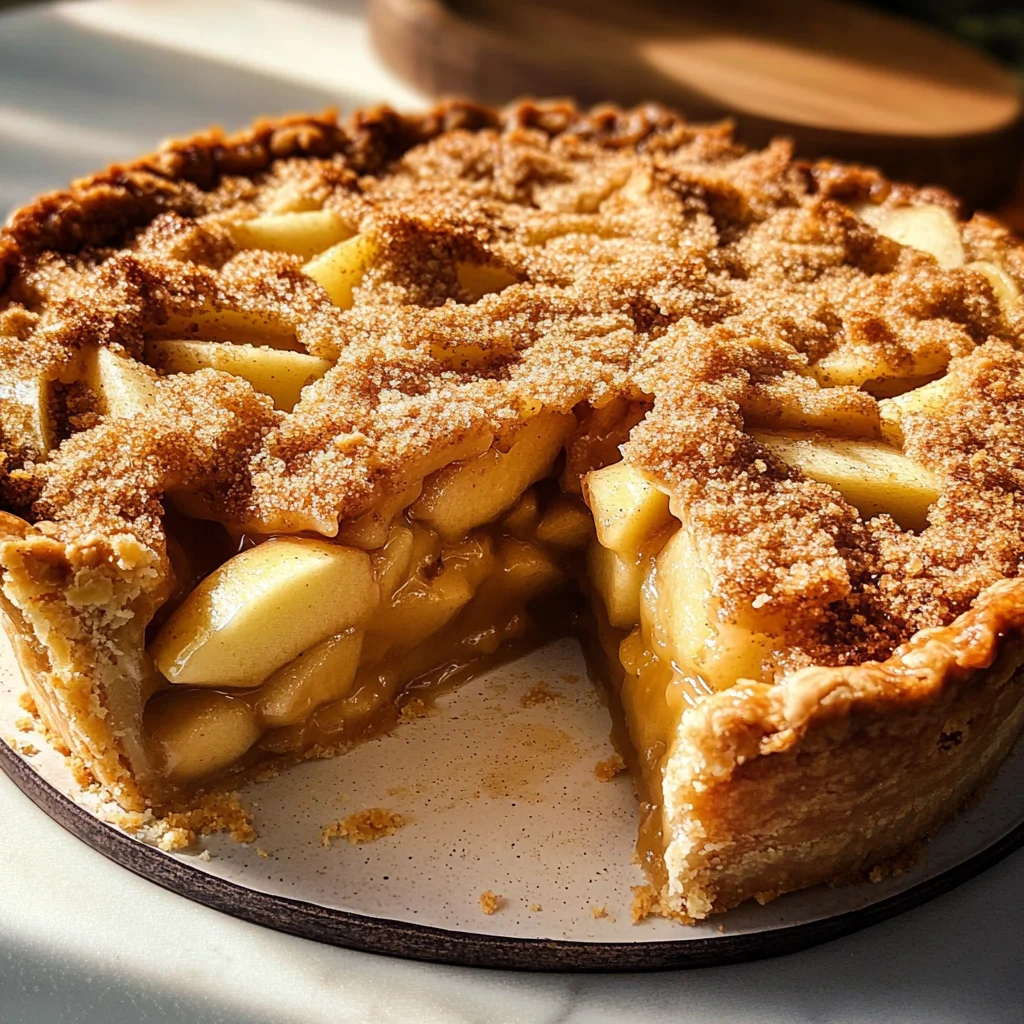
Welcome to my cherished Dutch Apple Pie recipe! This pie is not just any dessert; it’s a canvas where juicy apples meet an irresistible crumble topping—a true comfort food classic that’s perfect for gatherings or quiet evenings at home.
Ingredients:
As we embark on this culinary adventure, let’s chat about each ingredient that will make our Dutch Apple Pie unforgettable. Each component plays a crucial role in creating that perfect balance of flavors and textures.
- 1¼ cups all-purpose flour (divided): Flour is the backbone of our pie crust and streusel topping. It provides structure while allowing us to create that flaky texture we all love. For best results, use unbleached all-purpose flour; it has a slightly higher protein content which helps develop gluten when mixed with water, giving us that desirable crispiness.
- 1 tablespoon granulated sugar: Just a touch of sugar in the crust helps to enhance flavor while also aiding browning during baking. It contributes to that beautiful golden crust we all crave without making it overly sweet.
- ½ teaspoon salt: Salt may seem small, but it’s absolutely paramount in balancing flavors throughout our pie. It enhances sweetness and rounds out the overall taste experience—think of it as nature’s flavor booster!
- 6 tablespoons cold unsalted butter (cut into ¼-inch slices): Butter brings richness and moisture to our crust. Chilling it ensures those little bits remain intact during mixing, creating pockets of steam as they bake—this is what gives us those lovely flaky layers. I always recommend using high-quality butter; it significantly influences the final flavor.
- ¼ cup vegetable shortening (chilled, cut into 2 pieces): Shortening helps create an incredibly tender crust because it interferes with gluten development more than butter does alone. I prefer vegetable shortening for its neutral flavor and ability to produce an exceptionally flaky texture.
- 2 tablespoons ice water: This step is crucial! Ice water hydrates our dough without warming it up too much; keeping everything cold ensures our butter remains solid as we work it into flour.
- 2 tablespoons white grape juice (chilled): This delightful addition replaces traditional liquid sweeteners without imparting any strong flavor changes. It adds just enough sweetness to help bind our crust while also giving it a subtle fruity note.
- 5 large Granny Smith apples (about 2½ pounds): These apples are my go-to for their tartness which contrasts beautifully with the sweetness from our other ingredients. Their firm texture holds up well during baking ensuring we have tender slices rather than mushy filling.
- 4 large McIntosh apples (about 2 pounds): McIntosh apples add softness and sweetness to our mix—plus they break down beautifully during cooking which helps create that luscious filling we’re after.
- ¼ cup granulated sugar: This sugar will mingle with our apple filling enhancing its natural sugars as they cook down into gooey goodness—just wait until you see how these flavors meld together!
- ½ teaspoon ground cinnamon: What would apple pie be without cinnamon? It’s warm and aromatic notes elevate every bite—trust me when I say it transforms ordinary apples into something utterly intoxicating!
- Pinch of salt: Just like before, this pinch amplifies flavors—it’s amazing how such a tiny amount can make such a big difference!
- 2 tablespoons unsalted butter: A little dotted over the apple mixture before baking adds richness as well as helps prevent sticking by creating a barrier between fruit juices and crust.
- ½ cup heavy cream: This decadent addition enriches our apple filling making every slice creamy and luxurious—not overly sweet but deeply satisfying in each mouthful.
- 1¼ cups all-purpose flour: We’ll use more flour here for our streusel topping—it absorbs excess moisture from the fruit filling while providing structure so every crumb stays intact atop our delicious pie.
- 1/3 cup light brown sugar: This not only adds sweetness but also offers depth thanks to its molasses content—it pairs beautifully with cinnamon enhancing those warm flavors perfectly!
- 1/3 cup granulated sugar: Adding another layer of sweetness without overpowering—the goal here is balance; we want every bite to sing!
- 7 tablespoons unsalted butter (melted): Melting the butter allows us to combine this topping easily; its richness will result in crispy crumbles that contrast delightfully with soft apple filling underneath!
Equipment You’ll Need:
Having the right tools at your disposal makes all the difference in creating something truly wonderful. While they may not be ingredients themselves, these essential partners will ensure your baking experience is smooth sailing from start to finish.
- Food processor – This handy appliance makes quick work of blending your pie crust ingredients together seamlessly; plus, it helps maintain control over mixing time so you achieve that perfect flaky texture without overworking your dough.
- 9-inch pie plate – A good-quality pie plate distributes heat evenly ensuring your crust bakes beautifully golden brown rather than soggy or burnt. If you don’t have one on hand, glass or ceramic plates work great alternatives too!
- Rolling pin – Essential for rolling out dough evenly! A wooden rolling pin offers excellent control while silicone ones are non-stick options if you’re worried about sticking too much during prep time.
- Baking sheet – Setting your pie plate atop this prevents any messy spills should juices bubble over during baking—all part of keeping things tidy while achieving perfect results!
Now that we’ve gathered everything we’ll need let’s dive into preparing this gorgeous Dutch Apple Pie!
Step 1: Crafting Our Flaky Crust
Start by combining ¾ cups of flour along with granulated sugar and salt in your food processor until just mixed—it’ll only take about two quick pulses! Next comes one of my favorite parts; add those cold slices of butter along with chilled shortening into the mix—and pulse until you see clumpy bits begin forming—around seven seconds should do nicely! Keep an eye out—the goal here isn’t total uniformity; some small chunks should remain visible because they’ll melt beautifully during baking creating those delectable flaky layers we adore! After scraping down any stray bits stuck along sides and bottom redistributing everything evenly around bowl add remaining ½ cup flour—pulse again lightly until everything resembles coarse crumbs.
Step 2: Bringing Our Dough Together
Now sprinkle both white grape juice and ice water directly over this mixture—it feels almost like magic! Using your trusty rubber spatula fold & press gently down onto dough until it sticks together slightly tacky consistency forms—that’s where we’re aiming for! Turn out onto lightly floured surface bringing together by hand pressing firmly into six-inch round shape before rolling out gently into thirteen-inch circle ensuring even thickness throughout—don’t forget to give yourself quarter turns along way preventing sticking from happening…Trust me on this; patience pays off here!
Step 3: Shaping Our Pie
This step requires precision as well as attention—carefully transfer rolled-out dough onto nine-inch pie plate pressing down gently across bottom & up sides trimming excess leaving about one inch hanging beyond edge tucking under itself flush against rim gives us nice clean look ready for fluting edges or pressing down fork tines adding charming decorative touch! Once done pop lined plate into fridge allowing at least two hours chilling time—this vital step keeps fats firm resulting ultimately in ultra-flaky finished product!
Step 4: Blind Baking Perfection
Preheat oven now heating up nicely around three hundred fifty degrees Fahrenheit time blind bake begins! Grab aluminum foil lining chilled dough then fill entirely using granulated sugar covering bottom entirely creating barrier preventing shrinking whilst forming crisp base underneath filled later on—we’re building layers here folks! Bake away for forty minutes then remove foil & sugar let cool slightly on wire rack before moving forward preparing mouthwatering apple filling next…
Stay tuned for all those tantalizing details coming up next—I promise it’ll be worth every minute spent waiting patiently whilst dreaming about slicing through beautiful golden crust revealing luscious spiced fruit inside!
Step 5: Prepping for Perfectness
Now that we’ve blind baked our pie crust to create a solid foundation for our Dutch Apple Pie, it’s time to turn our attention to the star of the show—the apples! This step is all about preparing the filling, and let me tell you, this is where the magic truly begins. You’ll want to peel and core five large Granny Smith apples and four large McIntosh apples. The reason for this delightful combination is simple: Granny Smith apples bring that delightful tartness that cuts through the sweetness beautifully, while McIntosh apples soften perfectly to create a heavenly texture. Slice each quarter crosswise into pieces about ¼ inch thick; this ensures even cooking and a beautiful presentation in your finished pie.
Once your apples are sliced, toss them in a large bowl with ¼ cup of granulated sugar, ½ teaspoon of ground cinnamon, and a pinch of salt. This mixture creates an intoxicating aroma that will fill your kitchen and beckon everyone nearby! Why add salt? It’s crucial for amplifying the flavors, drawing out the natural sweetness from the apples while balancing their acidity. Now, let’s take these slices over to a large Dutch oven or pot on high heat. You’ll want to melt two tablespoons of unsalted butter until it’s foaming—this is key because it adds richness to your filling and helps caramelize those apple slices beautifully. Add in your apple mixture and toss them gently to coat in that luscious butter. Reduce the heat slightly and cover your pot; cook while stirring occasionally until those Granny Smith slices are tender yet still holding their shape (around 10 minutes). You’re looking for a gentle simmer—too much heat will turn them mushy too soon!
Step 6: The Draining Dance
Now comes an important step that might seem tedious but trust me—it’ll pay off in flavor dividends! Once your apples are beautifully softened (but not falling apart), it’s time to drain them using a colander set over a large bowl. This process removes excess juices that can make your pie soggy—a situation no one wants! Shake gently but with purpose; you want to get rid of as much liquid as possible without mashing those lovely apple pieces.
Meanwhile, take that drained juice and pour it back into your now-empty Dutch oven along with ½ cup of heavy cream. Bring this mixture to a boil over high heat while stirring occasionally until it thickens—this will take about five minutes. You’ll know it’s ready when you can draw a line through it with a wooden spoon—this step transforms what could be watery filling into something truly extraordinary! The cream adds richness and stability, ensuring every slice holds its shape when served. So don’t rush this part; allow the flavors to meld together beautifully!
Step 7: Marrying Flavors
With our luscious filling ready, it’s time to bring everything together! Carefully transfer your beautifully cooked apple slices back into the pre-baked pie shell—take a moment here to admire how beautifully they glisten after cooking. Pour that thickened juice mixture over the apples gently; use a rubber spatula to help smooth everything out evenly. This is where those flavors really start marrying together, creating an exquisite symphony of tastes that will leave everyone begging for more.
At this point, you might be thinking about how amazing it smells already—and I promise you, once it’s baked, it gets even better! The combination of sweet and tart from the different apple varieties combined with that creamy sauce will blow you away. And remember, patience is key here; let those flavors develop fully before moving on.
Step 8: The Streusel Crown
Ahh, now we arrive at one of my favorite parts—the streusel topping! This crumbly crown not only adds texture but also elevates our Dutch Apple Pie Recipe with its sweet crunchiness that contrasts so wonderfully against the soft apple filling below. In a medium bowl, combine 1¼ cups of all-purpose flour with both ⅓ cup light brown sugar and ⅓ cup granulated sugar; this blend is non-negotiable because it gives depth and complexity to each bite! Drizzle in seven tablespoons of melted unsalted butter while tossing everything together with a fork until you achieve large chunks mixed throughout—think pea-sized pieces nestled among bigger crumbles.
The beauty here lies in achieving the right consistency; you want those big chunks so they create crispy bits during baking while still maintaining some smaller crumbs for overall coverage. Once combined perfectly, sprinkle this topping generously over your apple filling—you want every inch covered because who wouldn’t want that delicious crunch on every single slice?
Step 9: Baking Your Perfect Dutch Apple Pie Recipe
It’s finally time for our masterpiece to meet its destiny in the oven! Preheat your oven up to 425 degrees F (a crucial temperature jump!) because we want that streusel topping to become gloriously golden brown while allowing those apples beneath to bubble up joyously without turning mushy. Place your assembled pie on a baking sheet (to catch any potential drips) and slide it into the hot oven.
Bake until you see that streusel topping transform into a deep golden color—this should take somewhere between 10-20 minutes depending on how hot your oven runs (and trust me, ovens can be finicky!). Keep an eye on it during those last few minutes because we don’t want burnt edges ruining our beautiful creation! What you’re looking for is bubbling around the edges of the filling which indicates readiness—once achieved, pull out your pie and let it cool on a wire rack at room temperature.
Allowing cooling serves two purposes: first, it will help set up all those incredible layers so when you slice into it—you get neat slices instead of an unrecognizable mess—and second, letting those flavors continue mingling makes each bite even more profound when served warm or at room temperature later on!
With just these final touches complete, I hope you’re just as excited as I am about diving into this Dutch Apple Pie Recipe that’s sure to become an instant favorite! Remember—the joy lies not only in creating but also in sharing this warm dessert with loved ones around your table. Enjoy every delicious moment!
Storage and Enjoyment Tips for Your Dutch Apple Pie Recipe
Now that your kitchen is filled with the warm, intoxicating aroma of freshly baked Dutch apple pie, it’s time to dive into the delightful experience of enjoying every last bite! This pie is not just a dessert; it’s a celebration of flavors and textures that brings people together. But what happens if you find yourself with some leftovers? Fear not, because I have you covered with all the tips to preserve this treasure!
Storing Leftover Dutch Apple Pie Recipe
To keep your Dutch apple pie as delicious as the moment it came out of the oven, storing it properly is key. You’ll want to place any leftover pie in an airtight container or cover it tightly with plastic wrap. If you have a large enough container, that’s perfect! Otherwise, a simple aluminum foil wrap will do wonders to seal in freshness. If stored correctly at room temperature, your pie will stay delightful for about 2 to 3 days. However, if you want to keep it for even longer—maybe you’re planning a special occasion or just want to enjoy its comforting taste later—refrigerate it, and it should maintain its charm for up to a week. To elevate your storage game further, try placing a slice of bread in the container; this little trick helps absorb excess moisture and keeps the crust from becoming soggy. The flavors mature beautifully after a day or two, creating that profound satisfaction when you take a bite! When you’re ready to indulge again, simply reheat individual slices in the microwave for about 20-30 seconds or warm them in an oven preheated to 350°F until they are heated through. Trust me; there’s nothing quite like savoring a warm slice of this pie with its sweet apple filling and crunchy topping—it’s pure bliss!
Freezing Dutch Apple Pie for Later
If you’re looking ahead and want to stash away some slices of joy for those impromptu celebrations or cozy evenings in, freezing your Dutch apple pie is an exceptional option! Start by letting your pie cool completely before wrapping it tightly in plastic wrap followed by aluminum foil—this two-layer protection ensures no frostbite can ruin your beloved creation. When frozen correctly, your pie can last up to three months while maintaining its exquisite flavor and texture. When you’re ready to bring it back from the freezer, simply transfer it to the refrigerator overnight so it can thaw gently. For those moments when you crave instant comfort food, pop it straight into a preheated oven at 350°F until heated through—about 25-30 minutes should do the trick! Imagine pulling out that golden-brown beauty from the freezer on a chilly day; it’s like unearthing a hidden treasure that instantly lifts your spirits and warms your heart.
Dutch Apple Pie
Indulge in the comforting embrace of homemade Dutch Apple Pie. This delightful dessert showcases a harmonious blend of tart Granny Smith apples and sweet McIntosh apples, encased in a perfectly flaky crust and topped with a buttery streusel. Each slice offers an inviting aroma of warm spices, making it an ideal centerpiece for your fall gatherings or cozy evenings at home.
- Prep Time: 30 minutes
- Cook Time: 70 minutes
- Total Time: 1 hour 40 minutes
- Yield: Serves approximately 8
- Category: Dessert
- Method: Baking
- Cuisine: American
Ingredients
- 1¼ cups all-purpose flour (divided)
- 1 tablespoon granulated sugar
- ½ teaspoon salt
- 6 tablespoons cold unsalted butter (cut into slices)
- ¼ cup vegetable shortening (chilled)
- 2 tablespoons ice water
- 5 large Granny Smith apples
- 4 large McIntosh apples
- ¼ cup granulated sugar (for filling)
- ½ teaspoon ground cinnamon
- Pinch of salt
- 2 tablespoons unsalted butter (for apple mixture)
- ½ cup heavy cream
- 1¼ cups all-purpose flour (for streusel)
- ⅓ cup light brown sugar
- ⅓ cup granulated sugar (for streusel)
- 7 tablespoons unsalted butter (melted)
Instructions
- Prepare the Flaky Crust: In a food processor, combine ¾ cup flour, sugar, and salt. Add cold butter and shortening; pulse until coarse crumbs form. Mix in remaining flour lightly. Add grape juice and ice water, mixing until dough comes together. Roll out into a circle and fit into a pie plate. Chill for at least two hours.
- Blind Bake: Preheat oven to 350°F. Line pie crust with foil and fill with sugar to prevent shrinking. Bake for about 40 minutes, then remove foil and cool slightly.
- Prepare Apple Filling: Peel and slice apples; toss with sugar, cinnamon, and salt. Sauté in melted butter until slightly tender. Drain excess liquid.
- Make Creamy Sauce: Boil drained apple juice with heavy cream until thickened.
- Assemble Pie: Layer apple slices in the crust; pour sauce over the top.
- Make Streusel Topping: Combine flour, sugars, and melted butter until crumbly; sprinkle over pie.
- Bake: Increase oven temperature to 425°F; bake until topping is golden brown and filling bubbles (10-20 minutes). Cool before serving.
Nutrition
- Serving Size: 1 serving
- Calories: 380
- Sugar: 25g
- Sodium: 180mg
- Fat: 18g
- Saturated Fat: 10g
- Unsaturated Fat: 7g
- Trans Fat: 0g
- Carbohydrates: 52g
- Fiber: 3g
- Protein: 3g
- Cholesterol: 30mg