Classic Pasta Salad
There’s something incredibly special about a bowl of Classic Pasta Salad. It’s more than just a dish; it’s a vibrant celebration of flavors, colors, and textures that can bring any gathering to life. Just imagine the moment you lift the lid off a chilled bowl and are greeted with the sight of those sun-kissed cherry tomatoes glistening like little jewels, surrounded by spirals of tri-color rotini dancing together in harmony. The aroma wafts up, promising a delightful experience with each bite. This recipe has been my go-to for potlucks, barbecues, and family gatherings — it’s an effortless way to feed a crowd while sharing love through food. Trust me when I say, once you whip up this Classic Pasta Salad, it will become an undeniable favorite in your culinary repertoire.
I’ve always been captivated by how pasta salad can bridge cultures and generations. Each ingredient tells a story — the fresh vegetables evoke memories of sun-drenched summer days at the farmer’s market, while the cheeses add richness that speaks to comfort and warmth. This dish is perfect for any occasion — whether you’re hosting a casual weeknight dinner or prepping for a festive holiday feast. It invites everyone to gather around the table and share in its deliciousness. So grab your apron and let’s embark on this culinary journey together as we create something truly extraordinary!
Classic Pasta Salad: A Colorful Celebration on Your Table
This Classic Pasta Salad is not only easy to make but also packed with flavor and vibrancy that will leave your taste buds dancing! It embodies everything we love about summer meals — fresh ingredients, hearty bites, and a tangy homemade vinaigrette that ties it all together beautifully.
Ingredients:
As we prepare to dive into this delightful recipe, let’s take a moment to appreciate each ingredient’s role in creating our masterpiece. Each component contributes something unique, ensuring every forkful is bursting with flavor.
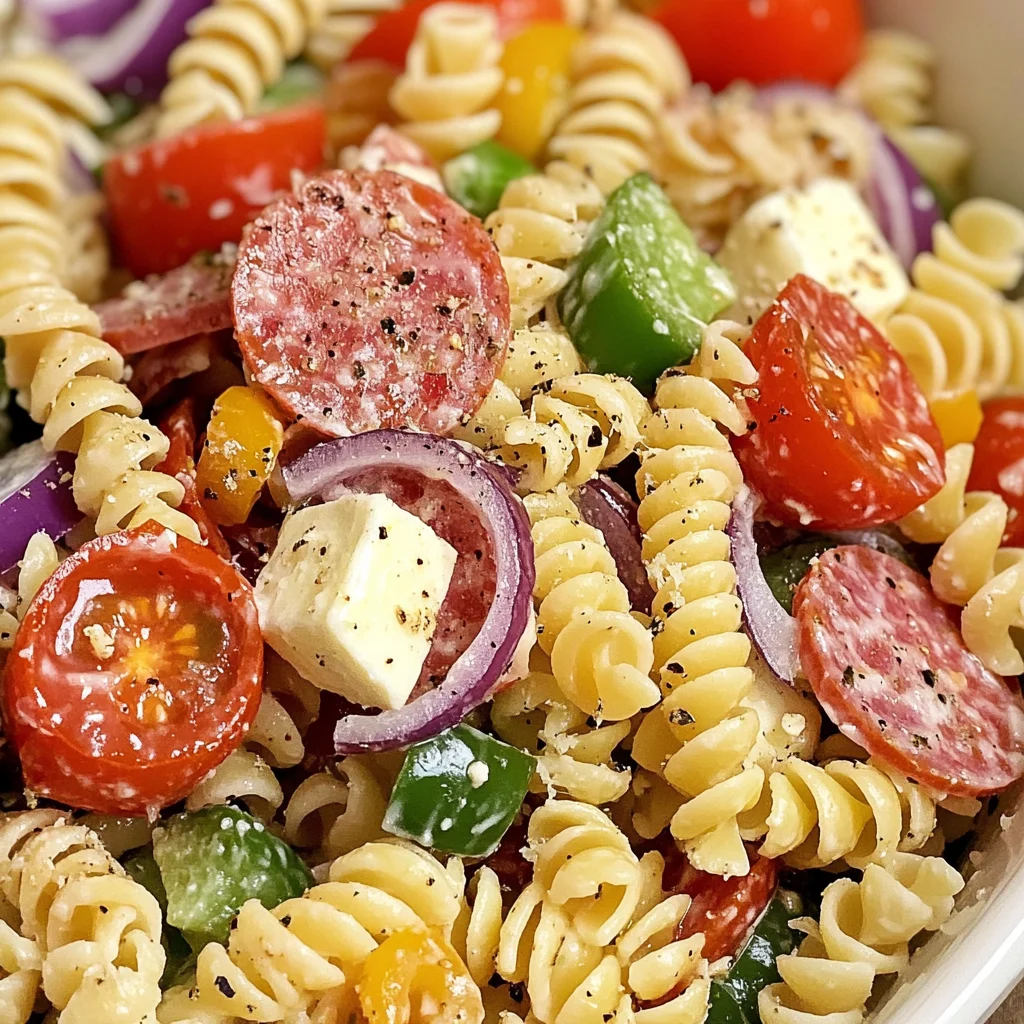
- 24 ounces tri-color rotini pasta (uncooked). This beautiful pasta adds not just color but texture as well! The spiral shape helps capture the vinaigrette and tiny bits of vegetables in every bite, making sure no flavor goes unnoticed. Opt for high-quality durum wheat pasta; its firm structure holds up well against delicious dressings without becoming mushy after sitting in the fridge.
- 1 pint cherry tomatoes (halved). These little gems offer bursts of sweetness that contrast beautifully with the savory elements of the salad. Look for tomatoes that feel firm but slightly soft when gently squeezed — they should be vibrant in color and free from blemishes. Their juiciness will infuse the salad with freshness and brighten every mouthful.
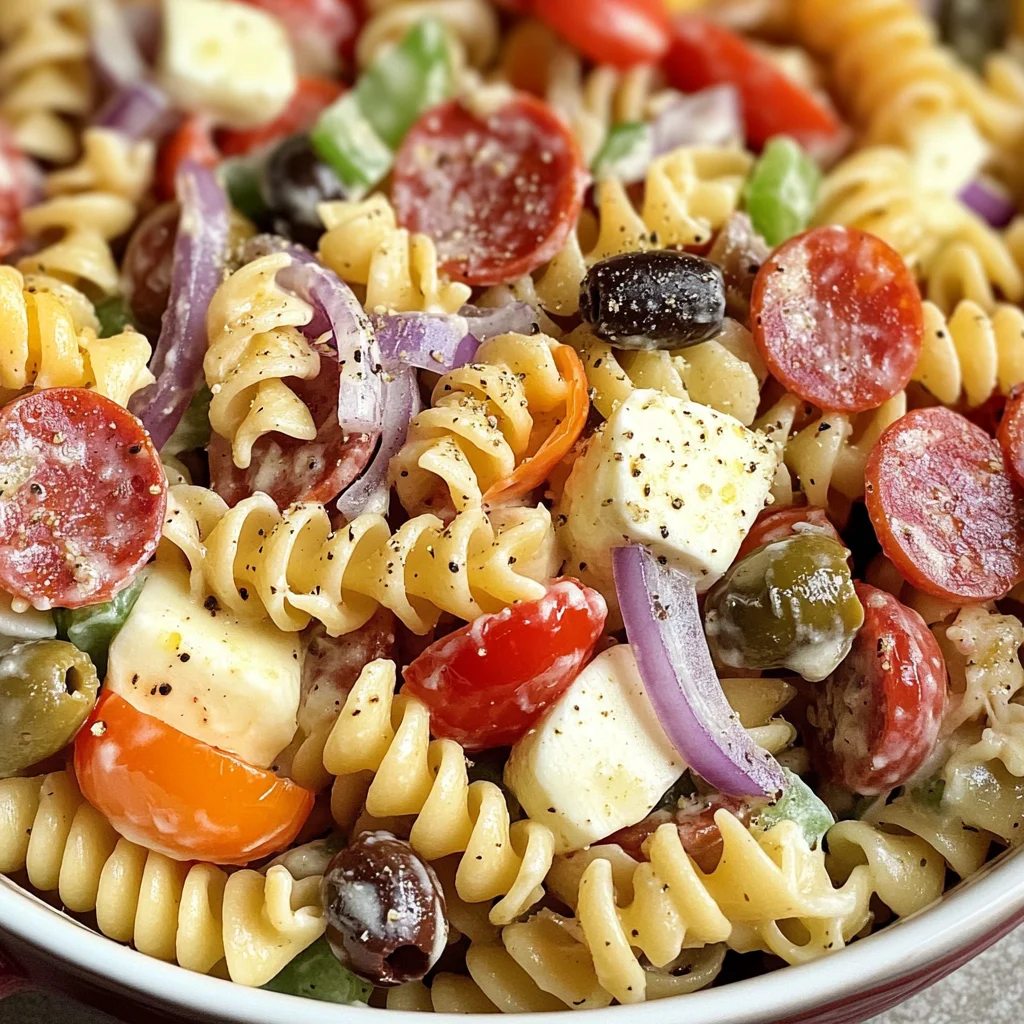
- 12 ounces sliced turkey pepperoni. This turkey alternative provides that satisfying umami kick without overwhelming the dish with grease. When selecting pepperoni, choose nitrate-free options if possible; they taste fresher and have fewer preservatives. The pepperoni adds delightful savory notes while complementing the creaminess of the mozzarella.
- 1 red onion (diced). Red onions contribute both crunch and a mild sweetness that balances out the other ingredients splendidly. Dice them finely so they integrate seamlessly into the salad without overpowering other flavors. If raw onions are too pungent for your palate, soak them in cold water for about ten minutes before adding them — it mellows their sharpness wonderfully!
- 1 green bell pepper (diced). Bringing crispness and a hint of earthiness to our mix, green bell peppers are an excellent source of vitamins A and C as well! Choose peppers that feel heavy for their size; they should be smooth with no soft spots or wrinkles. Dicing them uniformly ensures even distribution throughout the salad.
- 16 ounces mozzarella cheese (cubed). Creamy mozzarella brings richness to this dish that’s simply irresistible! Opt for fresh mozzarella if you can find it; its milky flavor elevates our salad to new heights. Cubing it into bite-sized pieces allows each forkful to deliver creamy goodness alongside crunchy veggies.
- 1 cup grated parmesan cheese. This cheesy addition adds depth and umami flavor while melding beautifully with our homemade vinaigrette! When purchasing parmesan, look for block cheese that you can grate fresh — it’s so much tastier than pre-grated versions which often contain anti-caking agents.
- 8 ounces olives (sliced). Olives pack a salty punch that brightens up every bite! You can choose black or green olives based on your preference; just ensure they’re pitted before slicing them up! They lend complexity to our salad while enhancing its Mediterranean flair.
- 1 1/2 cups olive oil. This golden liquid is absolutely paramount for creating our vinaigrette! Use extra virgin olive oil for its fruity notes which enhance all other flavors beautifully while providing healthy fats essential for overall well-being.
- 1/2 cup apple cider vinegar. The acidity from apple cider vinegar is crucial as it balances out rich ingredients like cheese and oil! Look for organic varieties if possible; they have more nuanced flavors compared to regular versions we often find at grocery stores.
- 2 tablespoons Italian seasoning. This blend brings warmth with hints of herbs like basil, oregano, rosemary — all essential players in Italian cuisine! If you want an extra kick, consider adding crushed red pepper flakes too; they’ll elevate your dish’s flavor profile even further!
- 2 teaspoons garlic powder. Garlic powder gives us robust flavor without being overpowering — perfect if you’re not keen on raw garlic’s intensity but still want its aromatic essence in this recipe!
- 1 1/2 teaspoons salt & 1 teaspoon pepper combined work together harmoniously to amplify all these wonderful flavors we’ve gathered around today!
- 1/2 teaspoon red pepper flakes (optional). If you’re looking for just a touch more heat in your classic pasta salad, sprinkle some red pepper flakes at this stage! They add an exciting layer without overwhelming other tastes present within this beautiful creation we’re crafting today!
Equipment You’ll Need:
Before we jump into action, it’s important to gather our trusty kitchen companions—those essential tools that will make creating this Classic Pasta Salad smoother than ever! Having everything at hand not only simplifies cooking but also allows you to focus on enjoying every step along the way.
- Large pot – You’ll need this when boiling your pasta; select one large enough so that water can move freely around those roti shapes as they cook properly! A heavy-bottomed pot retains heat better too—helping achieve consistent results while cooking away.
- Colander – Once your pasta reaches al dente perfection (firm yet tender), you’ll want to drain it swiftly using a colander; this removes excess water efficiently while allowing steam escape—preventing any sogginess later down the line!
- Mixing bowls – Having multiple mixing bowls makes combining ingredients easier at different stages of preparation! One large bowl will house your cooked pasta while another smaller one handles dressing components until combined perfectly before pouring over everything later on!
- Whisk – An essential utensil when creating dressings like ours today: whisking emulsifies oils & vinegars together creating luscious liquid gold ready-for-drizzling over salads—trust me when I say doing so by hand yields superior results compared with using blenders/mixers here!
Preparing the Classic Pasta Salad
Step 1: Boil That Beautiful Pasta
To kick things off right, bring a large pot filled with salted water to boil over high heat—this step is crucial because salting enhances flavor throughout each strand of pasta during cooking time! Once boiling vigorously away like bubbling lava springs forth from nature’s wonders below ground level—add your tri-color rotini carefully into its depths ensuring none sticks together as they dance around joyfully whilst cooking according package directions until achieving al dente texture—perfectly firm yet tender enough still able hold onto sauces later down line once dressed properly afterwards too!
After approximately 8–10 minutes depending upon brand specifics indicated clearly via packaging—in order confirm readiness—you’ll test by tasting just one piece lightly cooled off first before draining under cool running water via colander positioned snugly over sink nearby so nothing escapes during transfer process either way through straining action here too!
Step 2: Combine Those Colorful Ingredients
Now comes one of my favorite parts: mixing everything together into one big happy bowl full vibrant colors waiting patiently beneath surface layer awaiting reveal shortly thereafter once tossed about lovingly among themselves harmoniously blending flavors amid friendlier company available nearby kitchen space here now exciting times ahead indeed folks trust me here!!
In larger mixing vessel previously allocated aside earlier—toss cooled-down rotini pasta immediately followed by halved cherry tomatoes popping open revealing juicy interiors plus diced red onion adding crunch factor alongside diced green bell peppers showcasing freshness boldly throughout whole ensemble participating fully within delightful medley created together synergistically working side-by-side resulting ultimately outcome worthy celebration ahead truly extraordinary experience ahead indeed now friends!!
Step 3: Craft That Irresistible Vinaigrette
While those colorful components mingle cheerfully amongst themselves—it’s time whip up our homemade vinaigrette—a simple task requiring minimal effort yielding maximum satisfaction once completed successfully achieving desired goals set forth early upon entering kitchen today altogether despite initial hesitations perhaps looming earlier moments prior during preparations undertaken thus far here now lovely readers!!
In another smaller mixing bowl measure out extra virgin olive oil pouring generously followed right behind by refreshing apple cider vinegar—these two liquids coming together creates base foundation dressing we’ll use coating entire salad thoroughly later before serving guests awaiting eagerly soon enough too my friends!! Next sprinkle Italian seasoning accompanied by garlic powder plus salt & freshly cracked black pepper into mixture whisking quickly until fully combined resulting creamy consistency needed throughout journey ahead culminating ultimate destination awaits shortly thereafter once dressing poured onto finished product later down line here friends!!
Step 4: Toss It All Together
Once vinaigrette reaches desired consistency achieved earlier via whisked efforts made diligently prior—it’s time pour lovely concoction over large bowl filled colorful ingredients previously assembled earlier allowing magic commence once again here folks!! Gently toss everything together using spatula incorporating dressing equally across entire surface area ensuring no nook nor cranny left unattended amidst glorious gathering taking place right before eyes unfolding beautifully throughout entire kitchen space available surrounding us both visually appealing aromatic fragrances wafting upward inviting everyone join partake festivities occurring imminently soon thereafter present moments captured forever lasting impressions made tonight indeed!!
Let this sumptuous mixture rest inside refrigerator chilling nicely minimum hour prior serving guests awaiting eagerly anticipation building excitement growing palpable atmosphere surrounding event unfolding gradually leading delightful conclusion gathering memories shared cherished forever beyond limitations confines physical realm itself truly remarkable experience await ahead indeed dear friends!!!
Classic Pasta Salad: Bringing it All Together
Step 5: Crafting the Perfect Vinaigrette
Now we’re diving into the heart of our classic pasta salad, and trust me, this vinaigrette is where the magic truly happens. In a medium-sized bowl, gather your olive oil, apple cider vinegar, Italian seasoning, garlic powder, salt, pepper, and red pepper flakes. I can already smell those aromatic spices coming together! The olive oil acts as a silky canvas that carries all these vibrant flavors throughout your dish. Whisk everything together vigorously until it’s perfectly emulsified; you want to see a beautiful blend of ingredients that resembles liquid gold. This step is absolutely paramount because the vinaigrette not only enhances the taste of the pasta salad but also helps to marry all those fresh ingredients. A well-mixed dressing ensures an even distribution of flavor, so each bite bursts with deliciousness.
As you whisk, take a moment to appreciate how the vinegar’s tang complements the oil’s richness—it’s like a little dance in your bowl! The acidity from the vinegar cuts through the creaminess of the cheeses while adding a refreshing zing that brightens every other ingredient. Trust me on this: if you skip or skimp on this step, you’ll miss out on that profoundly satisfying flavor profile that makes this salad so extraordinary. Once you’ve achieved a smooth consistency without any oily separation, set it aside for just a moment while we prepare to unite it with those lovely pasta and veggies.
Step 6: Assembling Your Flavor Symphony
With your vinaigrette ready to go, it’s time to bring all those delightful components together in one glorious bowl. Carefully pour your prepared vinaigrette over the tri-color rotini pasta that you’ve lovingly cooked and cooled down to room temperature. You’ll want to make sure every twist and turn of that pasta gets coated in this heavenly dressing. Gently toss everything together using tongs or a large spoon—this isn’t just mixing; it’s about creating a beautiful harmony of textures and flavors! Don’t rush this step; take your time to ensure that each piece of pasta is enveloped in that utterly intoxicating vinaigrette.
Now comes the fun part: folding in all those colorful veggies and cheeses! Add the cherry tomatoes, turkey pepperoni (or any alternative protein you choose), diced red onion, green bell pepper, cubes of mozzarella cheese, grated parmesan cheese, and sliced olives into the bowl with the pasta. As you mix everything together, notice how vibrant and inviting this dish becomes—it’s like a celebration on a plate! Make sure everything is evenly distributed; you want each serving to have bits of all those scrumptious ingredients. This is crucial because having a variety of textures and tastes in each bite elevates your classic pasta salad from simple side dish status to something truly memorable.
Step 7: The Chilling Transformation
Once everything is beautifully mixed and looking delectable in your bowl (seriously, take a moment to admire it!), it’s time for one last crucial step before serving: chilling. Cover your bowl tightly with plastic wrap or transfer your pasta salad into an airtight container—this allows all those flavors to mingle and deepen while cooling down in the refrigerator. I promise you; patience here pays off! Allowing your classic pasta salad to chill for at least one hour (or even longer if you can wait) transforms it from simply good to absolutely extraordinary.
During this chilling period, you’ll notice that the vinaigrette penetrates into every nook and cranny of the pasta and veggies while ensuring they stay crisp and fresh—a process called marinating! The cold temperature enhances not only texture but also flavor intensity; think about how much more pronounced those vibrant notes will become after soaking up all that tangy goodness. If you’ve made this ahead for an event or gathering, try letting it chill overnight for an even deeper infusion of flavors; just be sure to give it another gentle toss before serving so everything stays beautifully combined.
Step 8: Final Touches Before Serving
Finally, after your pasta salad has chilled beautifully (and trust me when I say it’ll be hard not to sneak bites during this waiting period), it’s almost time for that first tantalizing scoop! However, there’s one last important detail we need to address—temperature adjustment just before serving. If your classic pasta salad has been chilling in the refrigerator for several hours or overnight and feels quite cold when you’re ready to enjoy it, let it sit at room temperature for about 20-30 minutes before serving. This brief period allows the flavors to awaken fully again—they can become dulled when overly cold.
After allowing it some time at room temperature, give it another gentle toss with tongs or a large spoon—not only does this redistribute any settled dressing but also reintroduces air into those lovely ingredients, making them pop with freshness when served! As you’re preparing for serving day or entertaining friends around your table, consider garnishing with some extra grated parmesan cheese or fresh herbs like basil if you’re feeling fancy—the little things can add such an extra touch of elegance!
Celebrate Your Classic Pasta Salad Creation!
And there you have it—your classic pasta salad is ready for its debut! With its vibrant colors and delightful crunches paired with creamy cheese bites enveloped in rich vinaigrette goodness, it’s truly going to be a showstopper at any gathering. Whether you’re bringing joy at summer barbecues or serving as an elegant side dish at holiday feasts—or simply enjoying it during meal prep throughout the week—you’ve created something special here.
So gather around friends and family—because what better way to celebrate than sharing delicious food? Remember always: cooking is about love and connection as much as it is about flavor—enjoy every moment spent savoring this delightful creation!
Storage and Enjoyment Tips for Your Classic Pasta Salad
Ah, the moment has finally arrived! You’ve poured your heart and soul into creating this Classic Pasta Salad, and now it’s time to revel in its delightful flavors. But before you dive in, let me share some essential tips on how to store this vibrant dish so that it stays fresh and delicious for as long as possible. Trust me, knowing how to preserve your pasta salad can elevate your meal prep game to a whole new level, ensuring that each bite remains as tantalizing as when you first made it.
Storing Leftover Classic Pasta Salad
When it comes to storing your leftover Classic Pasta Salad, the right container makes all the difference. I recommend using an airtight glass or plastic container because they seal in freshness while preventing any unwanted odors from mingling with your salad. Just pop on the lid and place it in the refrigerator, where it will keep for about 3-5 days. If you want to maintain that delightful crunch of vegetables and the creamy texture of cheese, consider adding a slice of bread into the container; it helps absorb excess moisture while keeping everything else perfectly crisp. Now, I know what you’re thinking: how does the flavor hold up after storage? I promise you, this pasta salad only gets better over time! The vinaigrette seeps deeper into the ingredients, marrying those flavors beautifully—it’s like letting a fine wine breathe! When you’re ready to serve, just take it out for about 20-30 minutes to allow it to come back to room temperature; give it a gentle toss before serving for that freshly dressed experience.
Freezing Classic Pasta Salad for Later
Now, if you’re looking to extend the life of your beloved Classic Pasta Salad, freezing is a fantastic option! To do this properly, transfer individual portions into freezer-safe bags or containers, ensuring all air is squeezed out before sealing—this is key to preventing freezer burn. It can be stored like this for up to three months! When you’re ready to enjoy it again, simply thaw overnight in the refrigerator or at room temperature for a few hours. This method not only preserves its savory charm but also gives you the convenience of having an easy meal on hand during busy days. Imagine pulling out a frozen bag of pasta salad after a long day; just toss it with fresh veggies or a drizzle of dressing, and voilà—dinner is served! Embracing these storage techniques allows you to savor every bite of your delicious creation whenever the craving strikes.
Classic Pasta Salad
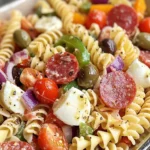
Classic Pasta Salad is a vibrant and refreshing dish that’s perfect for summer gatherings or any occasion where you want to impress your guests. This recipe features colorful tri-color rotini, juicy cherry tomatoes, crunchy bell peppers, and creamy mozzarella cheese all tossed in a zesty homemade vinaigrette. It’s not just a salad; it’s a flavorful celebration that brings people together. Each bite bursts with freshness, making it an irresistible addition to barbecues, potlucks, or family dinners. Plus, it’s easy to prepare and can be made ahead of time, allowing the flavors to meld beautifully. Dive into this delightful pasta salad that promises to become a staple in your culinary repertoire!
- Prep Time: 20 minutes
- Cook Time: 10 minutes
- Total Time: 30 minutes
- Yield: Approximately 8 servings 1x
- Category: Salad
- Method: Chilled
- Cuisine: Italian
Ingredients
- 24 ounces tri-color rotini pasta (uncooked)
- 1 pint cherry tomatoes (halved)
- 12 ounces sliced turkey pepperoni
- 1 red onion (diced)
- 1 green bell pepper (diced)
- 16 ounces mozzarella cheese (cubed)
- 1 cup grated parmesan cheese
- 8 ounces olives (sliced)
- 1 1/2 cups olive oil
- 1/2 cup apple cider vinegar
- 2 tablespoons Italian seasoning
- 2 teaspoons garlic powder
- 1 1/2 teaspoons salt
- 1 teaspoon pepper
- 1/2 teaspoon red pepper flakes (optional)
Instructions
- In a large pot of salted boiling water, cook the tri-color rotini according to package instructions until al dente. Drain and rinse under cold water.
- In a large mixing bowl, combine the cooled pasta with cherry tomatoes, turkey pepperoni, red onion, green bell pepper, mozzarella cheese, parmesan cheese, and olives.
- In a separate bowl, whisk together olive oil, apple cider vinegar, Italian seasoning, garlic powder, salt, and pepper until well combined.
- Pour the vinaigrette over the pasta mixture and toss gently until everything is evenly coated.
- Cover and refrigerate for at least one hour before serving to allow flavors to meld.
Nutrition
- Serving Size: 1 cup (250g)
- Calories: 460
- Sugar: 3g
- Sodium: 650mg
- Fat: 30g
- Saturated Fat: 10g
- Unsaturated Fat: 18g
- Trans Fat: 0g
- Carbohydrates: 38g
- Fiber: 3g
- Protein: 15g
- Cholesterol: 50mg