Easy 3 Ingredient PB Fit Easter Eggs with Applesauce
There’s something truly magical about creating treats that come with the warmth of nostalgia and the excitement of new flavors, don’t you think? Today, I’m thrilled to share a delightful recipe that embodies just that: Easy 3 Ingredient PB Fit Easter Eggs with Applesauce. Just imagine for a moment—gathering around the table with family and friends, laughter filling the air as you unveil these beautifully coated peanut butter eggs. The rich aroma of chocolate mingling with the sweet nuttiness of peanut butter creates an experience that’s not just enjoyable; it’s a celebration of flavors and memories. Trust me when I say, these little gems are more than just dessert—they’re pure joy in every bite.
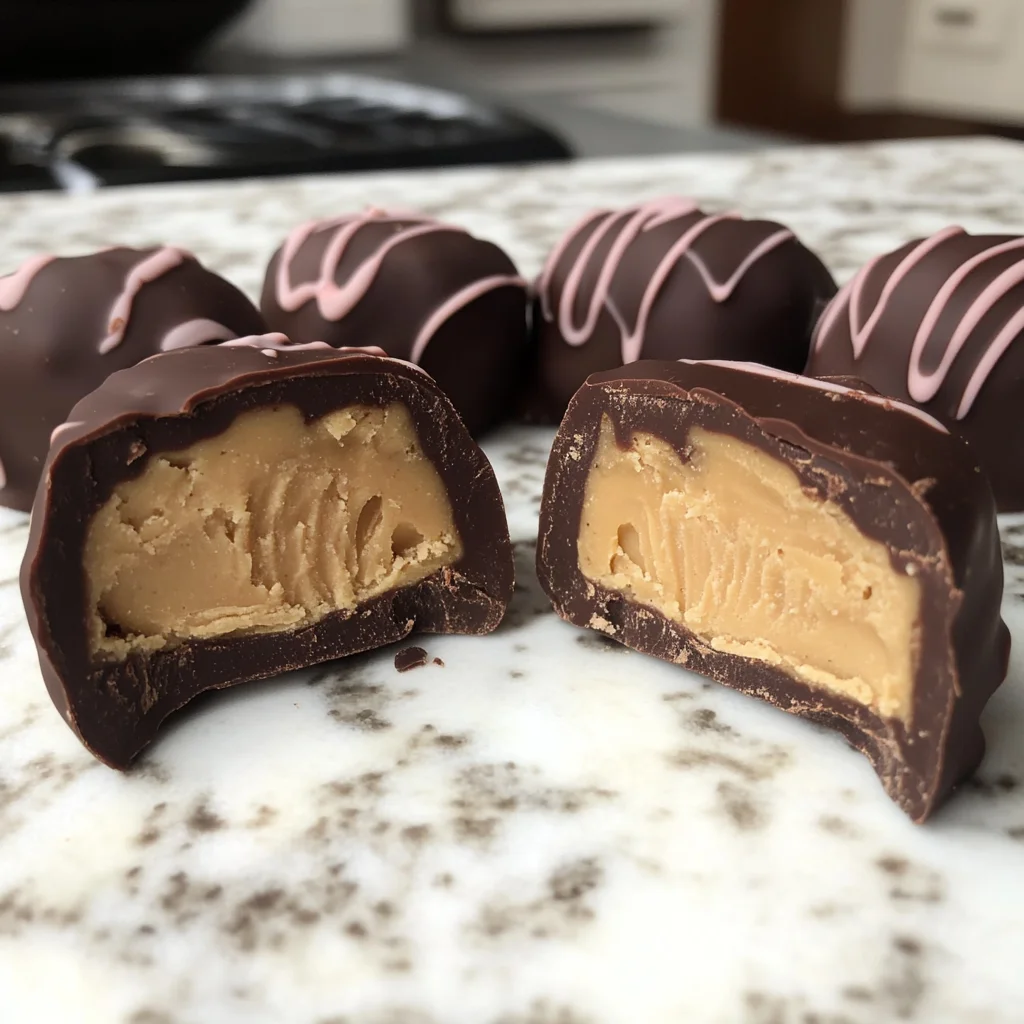
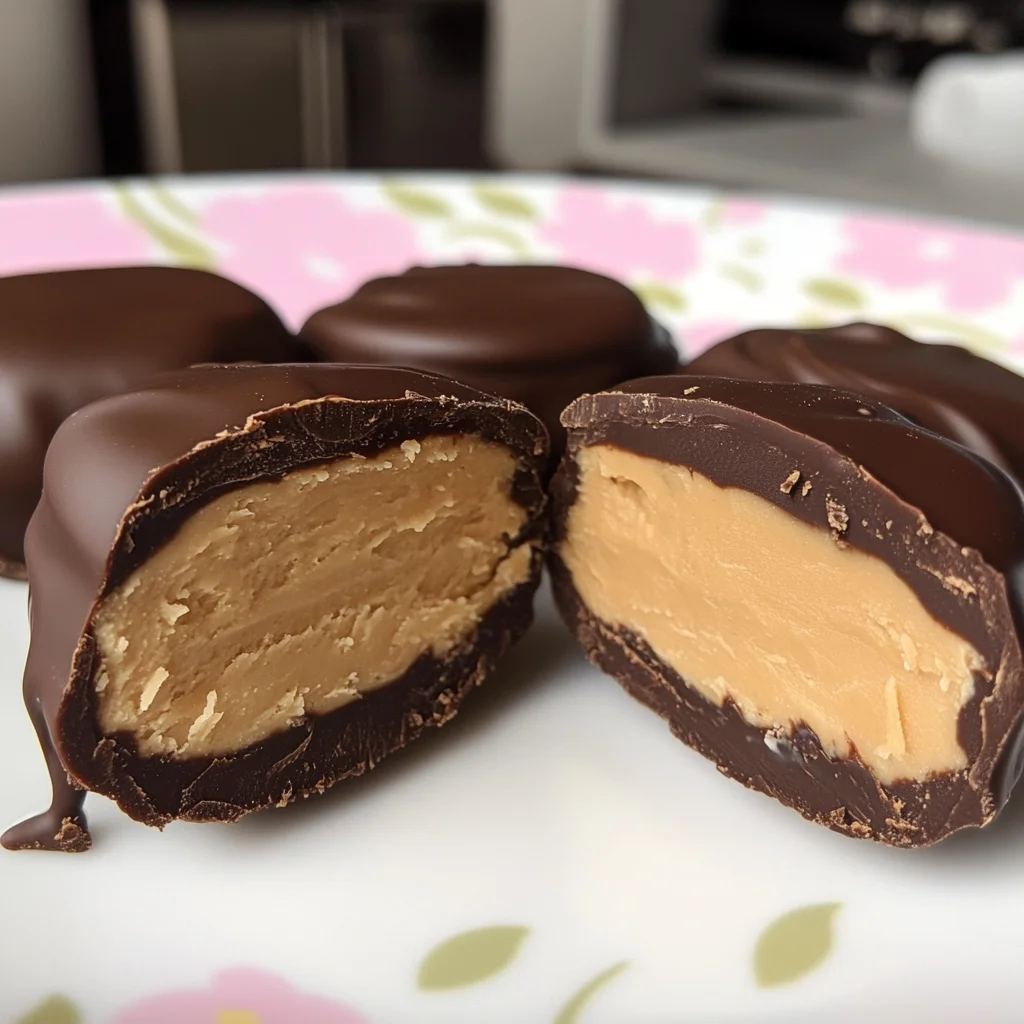
As we dive into this recipe, it’s essential to consider how this simple combination of ingredients transforms into something extraordinary. The heart of these Easter eggs lies in the contrast of textures—the fudgy peanut butter center paired with a silky chocolate exterior is simply irresistible. What makes these treats even more special is their health-conscious twist, thanks to powdered peanut butter and applesauce. They’re perfect for indulging without the guilt! So grab your mixing bowl, and let’s embark on this culinary adventure together!
Easy 3 Ingredient PB Fit Easter Eggs with Applesauce: A Sweet Indulgence Made Simple
This recipe is not only easy but also incredibly rewarding. With just three key ingredients, you’ll be amazed at how effortlessly these luscious Easter eggs come together. Whether you’re looking for a fun project to do with kids or simply want to whip up something sweet for yourself or loved ones, this recipe checks all the boxes. Plus, they make for fantastic homemade gifts wrapped up in pretty packaging—everyone will love receiving such thoughtful treats!
Ingredients:
As we embark on this culinary journey together, let’s take a moment to appreciate each ingredient that plays a crucial role in our Easy 3 Ingredient PB Fit Easter Eggs with Applesauce. Each one brings its own unique character to the table, contributing not only flavor but also texture and satisfaction.
- 1 1/2 cups powdered peanut butter (such as PB Fit or PB2). This ingredient is absolutely paramount because it provides that classic peanut buttery goodness without the excess calories and fat found in traditional peanut butter. When mixed with water or applesauce, it rehydrates beautifully and creates a creamy texture that melts in your mouth. Look for brands like PB Fit or PB2 which use high-quality peanuts; they offer a deliciously nutty flavor while keeping things light and healthy. If you need a substitute due to allergies or preferences, sunflower seed powder can work wonders too!
- 1/3 cup unsweetened applesauce (or 4 oz applesauce). Using applesauce instead of sugar adds natural sweetness while keeping our treats moist and tender—it’s nature’s way of bringing us flavor without guilt! Not only does it help bind our eggs together beautifully, but it also introduces a hint of fruitiness that perfectly complements the rich peanut butter flavor. When selecting applesauce, opt for organic varieties if possible; they tend to have a fresher taste and minimal additives. If you’re feeling adventurous, you could even use cinnamon-flavored applesauce for an extra layer of warmth.
- 3/4 cup chocolate chips. Ahh, chocolate—the crowning glory of our Easter eggs! The choice of chocolate chips can greatly influence your final product; I recommend going for high-quality semi-sweet or dark chocolate chips to achieve that decadent coating we all crave. Melting them down transforms our mixture into pure liquid gold that envelops those peanut butter centers in an utterly intoxicating embrace. If you’re looking for alternatives due to dietary restrictions or preferences, there are plenty of dairy-free options available today that melt beautifully.
Equipment You’ll Need:
Now that we’ve gathered our ingredients, let’s talk about the trusty tools you’ll need along the way! Having the right equipment makes all the difference in ensuring your baking experience is smooth and enjoyable.
- Mixing Bowl – A good-sized mixing bowl is essential here; it allows enough room for all your ingredients to come together harmoniously without spilling over! Opt for glass or stainless steel as they are sturdy and won’t retain odors from previous recipes.
- Spatula – This handy tool will help ensure you scrape every last bit of deliciousness from your bowl—no wasted goodness here! A silicone spatula is particularly useful as it bends easily and can reach every corner.
- Measuring Cups – Accurate measurements are crucial in baking; they guarantee consistency every time you make these delightful treats! Invest in clear measuring cups marked with measurements so you can see exactly how much you’re using.
- Baking Sheet – A flat baking sheet lined with parchment paper serves as a perfect surface for cooling your shaped Easter eggs before coating them in chocolate.
- Microwave-Safe Bowl – For melting those yummy chocolate chips, having a microwave-safe bowl is non-negotiable—it ensures safety while allowing easy melting without burning!
Now that we have everything prepped and ready to go let’s dive into preparing these delightful Easy 3 Ingredient PB Fit Easter Eggs with Applesauce!
Step 1: Create Your Peanut Butter Mixture
First things first—let’s mix things up! In your mixing bowl, combine 1 1/4 cups of powdered peanut butter with all 1/3 cup of unsweetened applesauce until fully blended. This step is so important because it sets the foundation for both flavor and texture; you’re creating that rich filling we’ll later shape into beautiful eggs! As you stir everything together, take note of how creamy it becomes; it should resemble thick cookie dough when done correctly. If at any point you feel like it’s too soft (maybe your applesauce was particularly moist), don’t rush—add that remaining 1/4 cup of powdered peanut butter gradually until you achieve your desired consistency.
Step 2: Shape Your Peanut Butter Eggs
Once you’ve reached that ideal consistency—oh boy—you’re ready to form some magic! Take your mixture and divide it into eight pieces (this gives us those perfectly portioned Easter eggs). Roll each piece into balls before gently flattening them slightly so they take on an egg-like shape—think rounded on top yet flat on the bottom! If you’re struggling because it’s too soft—don’t worry! A quick chill in the fridge will help firm things up nicely so shaping becomes easier (and trust me—it’ll save some frustration!).
Step 3: Chilling Time
Ahh… patience is key here! After shaping each egg, place them carefully on your prepared baking sheet and pop them into either the fridge or freezer until they firm up significantly—about 30 minutes should do the trick! Why chill? Well, this process helps solidify those lovely shapes you’ve created; you’ll thank yourself later when it comes time to coat them in luscious melted chocolate without making a mess!
Step 4: Melt Your Chocolate Chips
While those adorable little eggs are chilling away—and believe me, I know it’s hard not to sneak one early—we’ll turn our attention to melting those heavenly chocolate chips! Grab your microwave-safe bowl again (a glass one works great), adding in 3/4 cup of chocolate chips before microwaving them gently at intervals of twenty seconds at a time. Be sure to stir between bursts until they’re silky smooth—a textural transformation akin to watching caterpillars become butterflies! You want that luxurious liquid gold consistency before moving onto coating those beautiful creations.
Stay tuned as we continue making these scrumptious Easy 3 Ingredient PB Fit Easter Eggs with Applesauce—I promise you won’t want to miss out on what’s next!
Step 5: Melting the Chocolate – The Heart of the Treat
Now, let’s dive into one of the most magical steps: melting the chocolate chips. This process is where we elevate our peanut butter eggs from delightful to utterly divine. You’ll want to take your chocolate chips—three-quarters of a cup should do it—and place them in a microwave-safe bowl. Then, set your microwave to medium power and heat the chocolate in short, controlled bursts of 20 seconds. This method is crucial because it prevents overheating, which can turn your silky chocolate into a grainy mess if you’re not careful. After each burst, give the chocolate a gentle stir; this allows residual heat to melt any stubborn chunks that might linger. You’re looking for a smooth, glossy finish that resembles liquid gold; it should flow effortlessly when stirred.
Trust me on this: patience is key! Your chocolate will transform during those 20-second intervals, and you’ll feel like a magician watching it morph into something rich and luscious. If you notice that it’s still clumpy after three rounds, don’t panic! Give it another gentle stir before deciding to add more heat. The goal here is to achieve that perfect dipping consistency—one that will coat your Easter eggs beautifully without being too thick or too thin. A good rule of thumb is to let the chocolate cool slightly before dipping—this ensures it adheres well to your chilled peanut butter eggs without melting them away.
Step 6: Coating Each Egg – A Luxurious Blanket of Chocolate
Now comes the fun part—coating those beautifully shaped peanut butter eggs in the melted chocolate! Take each egg from the refrigerator (or freezer) and gently dip it into the warm chocolate using two forks or a slotted spoon for easy handling. Make sure each piece is fully submerged in that velvety goodness so every bite will be an explosion of flavor and texture. This step isn’t just about aesthetics; it’s fundamentally important for creating that satisfying crunch as you bite through the crisp outer layer into the creamy peanut butter interior.
After you’ve coated all eight eggs, allow any excess chocolate to drip off back into the bowl—it’s tempting to want to pile on more, but less is often more in this case! You want just enough of that luscious layer to create contrast without overwhelming the delicate balance of flavors you’ve crafted earlier. Once they’re all coated, place each egg back onto a lined baking sheet or plate and let them sit for a moment while you prepare for an optional yet delightful finishing touch.
Step 7: The Drizzle – A Touch of Elegance
To elevate these treats even further, let’s talk about drizzling some extra melted chocolate on top of your coated eggs—a step that adds both visual appeal and an extra punch of flavor. Using any remaining melted chocolate from earlier (or by melting just a tad more), grab a fork or piping bag if you have one handy. If you’re using a fork, simply dip it into the chocolate and quickly flick your wrist over the eggs to create beautiful zig-zag patterns on top. If using a piping bag, snip off just a tiny corner; this gives you control over how much chocolate you drizzle and where it goes.
Why go through this delightful effort? Not only does this drizzling add elegance and charm to your Easter eggs, but it also enhances the overall flavor experience with those little bursts of additional chocolate as you bite in. Allow your drizzled creations some time at room temperature—or pop them back in the fridge—for about 10-15 minutes until everything sets nicely together. Watching them come together is like witnessing art unfold before your eyes; I promise you’ll be amazed at how gorgeous they look!
Step 8: Setting – The Final Countdown
Finally, we arrive at one of the most rewarding moments: waiting for everything to set perfectly! Once you’ve drizzled those adorable patterns atop each egg, it’s absolutely paramount that they cool completely before indulging—this ensures that first bite has all its textures intact, with that satisfying crack when you break through the shell of chocolate. Pop them back into your fridge or freezer for about 30 minutes if you’re eager or around an hour if you’re feeling patient; I always recommend leaning towards patience because this allows all those flavors to meld together beautifully.
As they chill out in their cool abode, take note of how they transform during this time—the once soft filling becomes firmer and easier to bite into while maintaining its creaminess inside; trust me on this transformation! Once they’ve set sufficiently (you’ll know they’re ready when you can touch them without leaving fingerprints), it’s time for the moment you’ve been waiting for—you can finally enjoy these heavenly Easy 3 Ingredient PB Fit Easter Eggs with Applesauce!
Conclusion:
As we wrap up this delightful culinary journey of creating Easy 3 Ingredient PB Fit Easter Eggs with Applesauce together, I hope you feel just as excited about this recipe as I do! It has such a beautiful simplicity yet delivers profound satisfaction through its delightful combination of creamy peanut butter flavor and smooth chocolate coating. The way the sweetness of applesauce perfectly balances the savory nuttiness truly elevates this treat into something extraordinary—not just an ordinary dessert but rather an experience that brings joy and happiness.
This recipe is an absolute must-try not only because of how delicious it is but also due to the sheer joy of crafting it yourself! Picture this: gathering around with friends or family during festive occasions like Easter or spring celebrations, sharing laughter while enjoying these delectable treats together. They’re versatile enough for any gathering but special enough to make any day feel like a celebration. Just imagine pulling these out of the fridge or freezer, watching everyone’s eyes light up at the sight of your homemade creations!
For serving suggestions that pair beautifully with your Easy 3 Ingredient PB Fit Easter Eggs with Applesauce, imagine savoring one alongside a cup of hot coffee or tea—what an indulgent afternoon pick-me-up! Or perhaps enjoy one after a light lunch as a sweet finish that doesn’t weigh you down. For truly decadent experiences, why not serve them alongside fresh strawberries or banana slices? The contrast between those fruity notes and rich chocolate is simply divine!
Feeling adventurous? This recipe is wonderfully adaptable; try swapping out some applesauce for mashed bananas or even pureed dates for different flavor profiles that still maintain that delightful texture we love so much. You could also mix in some chopped nuts or seeds for added crunch—just think about how that would enhance each bite! So go ahead, dive into this fun culinary adventure and share your creations with loved ones—I’d love to hear about your experiences making these delicious treats!
Easy 3 Ingredient PB Fit Easter Eggs with Applesauce
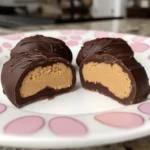
Indulge in the delightful nostalgia of Easter with these Easy 3 Ingredient PB Fit Easter Eggs with Applesauce. This simple yet scrumptious recipe combines the rich flavors of powdered peanut butter and applesauce, enveloped in a luscious chocolate coating. Perfect for gatherings or as a sweet treat to enjoy at home, these peanut butter eggs are not just delicious but also guilt-free! Made without any pork products, alcohol, or animal-derived gelatin, they cater to various dietary preferences and offer a nutritious twist on traditional sweets. With only three ingredients, making these treats is a fun activity for everyone—especially kids! Gather your loved ones around the table and create joyful memories while savoring these creamy, chocolate-covered delights.
- Prep Time: 20 minutes
- Cook Time: 0 minutes
- Total Time: 20 minutes
- Yield: Makes 8 servings 1x
- Category: Dessert
- Method: No-Bake
- Cuisine: American
Ingredients
- 1 1/2 cups powdered peanut butter
- 1/3 cup unsweetened applesauce
- 3/4 cup chocolate chips
Instructions
- In a mixing bowl, combine 1 1/4 cups of powdered peanut butter with 1/3 cup of unsweetened applesauce until well blended. Adjust the consistency by adding the remaining powdered peanut butter if needed.
- Shape the mixture into eight egg-like pieces and place them on a lined baking sheet.
- Chill in the fridge for about 30 minutes until firm.
- Melt 3/4 cup of chocolate chips in a microwave-safe bowl using short bursts of heat, stirring until smooth.
- Dip each chilled egg into the melted chocolate, ensuring full coverage. Allow excess chocolate to drip off.
- Place back on the baking sheet and chill again until set.
Nutrition
- Serving Size: 1 serving
- Calories: 100
- Sugar: 5g
- Sodium: 35mg
- Fat: 5g
- Saturated Fat: 2g
- Unsaturated Fat: 3g
- Trans Fat: 0g
- Carbohydrates: 10g
- Fiber: 2g
- Protein: 4g
- Cholesterol: 0mg