Canning Strawberry Lemonade Concentrate
There’s something truly magical about transforming fresh, ripe strawberries into a delightful canning strawberry lemonade concentrate. It’s not just about concocting a simple drink; it’s about capturing the essence of summer in a jar, holding onto those fleeting moments when the sun warms your skin and laughter echoes among friends. Picture yourself on a sun-drenched patio, sipping this vibrant elixir as it dances on your tongue—a harmonious blend of sweet strawberries and zesty lemon. This experience transcends mere refreshment; it becomes a cherished ritual, an embodiment of joy that you can revisit any time you crave that nostalgic taste of summer. This canning strawberry lemonade concentrate is your ticket to reliving those carefree days, no matter the season.
As you embark on this culinary journey, you’ll find that creating this concentrate is surprisingly simple but profoundly satisfying. The beauty of this recipe lies in its ability to be both easy for beginners and rewarding for seasoned canners alike—truly a bridge between tradition and innovation. Imagine gifting your friends and family jars of this liquid gold, inviting them to share in the experience that inspired you. It’s perfect for warm gatherings, picnics in the park, or cozy evenings at home when you want to feel connected to nature’s bounty without having to step outside. So roll up your sleeves, gather your ingredients, and let’s dive into the art of canning strawberry lemonade concentrate together!
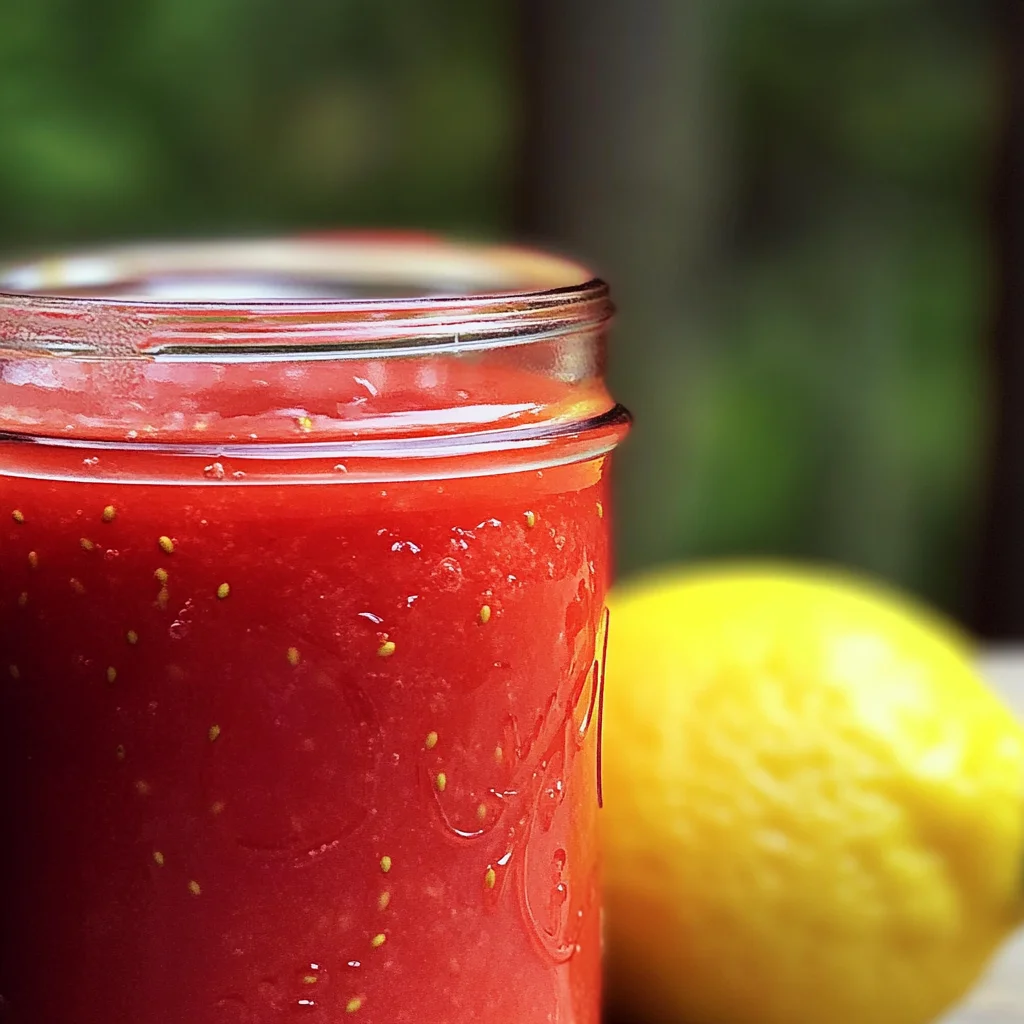
Canning Strawberry Lemonade Concentrate: A Refreshing Summer Staple
This canning strawberry lemonade concentrate is not just a drink; it’s an invitation to savor every moment. With its bright flavors and refreshing qualities, it will bring a burst of sunshine into your day.
Ingredients:
As we step into the heart of this recipe, let’s take a moment to appreciate each ingredient that plays a vital role in our creation. Every element contributes not just flavor but also character and depth.
- 6 cups hulled strawberries. Fresh strawberries are the star of our show! When selecting strawberries, aim for those that are plump, firm, and fragrant—this is crucial because their natural sweetness and vibrant color will elevate your concentrate from good to extraordinary. Rinse them gently before hulling; this ensures you’re not washing away any of that delicious flavor. If you’re feeling adventurous or if fresh strawberries aren’t available, frozen berries can also work beautifully—they often retain their sweetness even after freezing.
- 4 cups fresh lemon juice (from 16 to 20 lemons). The tartness from fresh lemon juice adds an invigorating zing that balances the sweetness of the strawberries perfectly. Trust me on this—using fresh lemons instead of bottled juice makes all the difference! The aroma alone is uplifting as you zest and juice these beauties. Look for lemons that are heavy for their size with smooth skin; they’ll have more juice than drier ones. If you want to make it easier on yourself while still achieving great flavor, consider juicing extra lemons ahead of time and freezing the juice in ice cube trays for future batches.
- 6 cups sugar. While sugar might seem like just a sweetener here, it plays multiple roles—it enhances flavors, acts as a preservative during canning, and contributes to the syrupy texture that makes our concentrate so irresistible when mixed with water later on. You could experiment with alternatives like agave nectar or honey if you’re looking for something different or slightly healthier; however, keep in mind that sugar helps ensure proper preservation during canning.
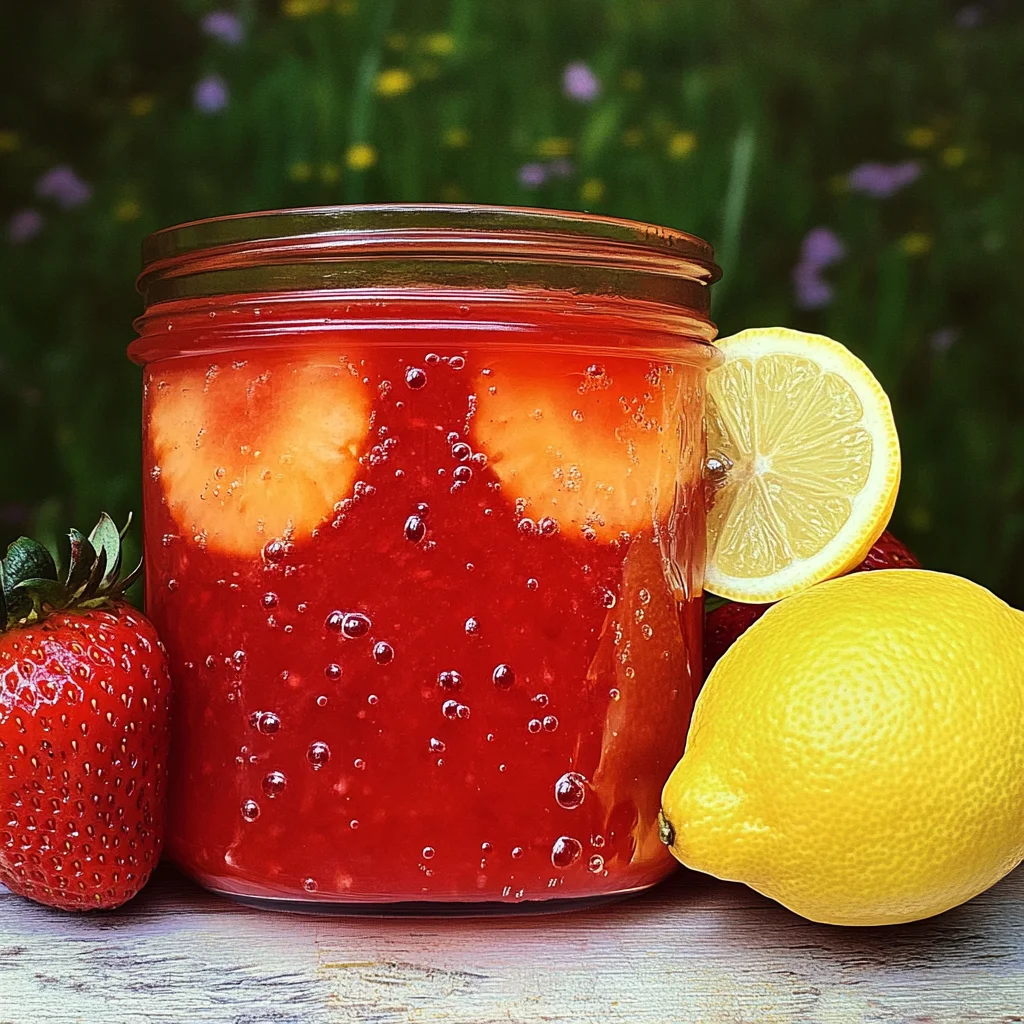
Equipment You’ll Need:
Having the right tools is essential for ensuring your canning journey goes smoothly and joyfully! These pieces of equipment will support you in creating something wonderful and memorable.
- Water bath canner – This pot is designed specifically for preserving fruits and veggies through boiling water processing—a necessary step to ensure safety by eliminating harmful bacteria and sealing jars properly. If you don’t have one yet or just want an alternative method during busy days, any large stockpot will do; just ensure it’s deep enough to cover your jars by at least an inch of water.
- Canning jars (5 pint jars) – Glass canning jars provide an airtight seal once processed correctly; they’re essential for keeping our concentrated goodness safe from spoilage over time. When choosing jars, I recommend opting for wide-mouth varieties as they’re much easier to fill—and who doesn’t love easy cleanup? Before using them, give them all a good wash in warm soapy water or run them through the dishwasher.
- Canning lids and rings – These little guys are non-negotiable! The lids create a seal while processing so your delicious strawberry lemonade concentrate stays preserved until you’re ready to enjoy it later on. Always check that they’re free from dents or rust before use—any imperfections could compromise your seal.
- Canning jar lifter – This tool makes transferring hot jars from boiling water safe and easy—a must-have! Trying to lift hot jars with regular tongs or fingers is risky business; trust me—you’ll thank yourself later when you’re not burning your hands!
Preparing the Canning Strawberry Lemonade Concentrate
Step 1: Gather Your Tools
Before diving into making our strawberry lemonade concentrate, it’s important to prepare everything first—it’s like setting the stage before a grand performance! Start by assembling all your equipment: set up your water bath canner filled with water (at least enough to cover the height of your jars), wash your jars thoroughly with soap and hot water or run them through the dishwasher on high heat for sanitation purposes. Preheat your canner so it’s ready when we finish cooking our mixture—this keeps everything flowing smoothly without unnecessary delays.
Step 2: Juice Those Lemons
Juicing lemons may seem straightforward at first glance but take time with this step! Begin by rolling each lemon firmly against a countertop before cutting them in half—this helps release more juice! Use either a manual juicer or squeeze by hand (remember those muscles!). Once you’ve extracted every drop possible from each lemon half, strain out any pulp or seeds using a fine-mesh sieve or cheesecloth; we want pure juice here since we’re aiming for clarity in flavor without unwanted bits floating around later.
Step 3: Hull & Puree Strawberries
Now comes my favorite part—transforming those beautiful strawberries into pure bliss! Start by hulling each berry carefully; remove only the green tops without sacrificing too much fruit flesh below (it’s all about maximizing flavor!). Next, toss them into a blender or food processor until they’re smooth as silk—what you’re creating here is essentially liquid sunshine ready to mingle with our lemon juice!
Step 4: Combine Ingredients
In a large saucepan over medium heat (don’t rush this step!), combine pureed strawberries with strained lemon juice followed by sugar—this mix will become our aromatic concoction soon enough! Keep stirring gently until everything melds beautifully together; it should smell heavenly as sugar dissolves while warming up…trust me on this one! You’re aiming for around 190 degrees F—just shy of boiling since we don’t want any unwanted caramelization happening here which could alter taste drastically!
Now that you’ve made it through these initial steps together filled with excitement—the next stages involve ladling into jars while ensuring proper processing times so we preserve all this delightful goodness safely inside those pint-sized treasures!
Stay tuned as we continue crafting our beloved canning strawberry lemonade concentrate magic together—I promise you won’t regret taking these simple steps towards creating something truly extraordinary!
Step 5: Gently Heating the Mixture to Perfection
Now that you have your vibrant strawberry puree and fresh lemon juice ready, it’s time to create that liquid gold of flavor by mixing it with the sugar. In a large saucepan, combine the hulled and pureed strawberries, the freshly strained lemon juice, and your sugar. As you stir these ingredients together, take a moment to appreciate the intoxicating aroma wafting up from the mixture; it’s a sign that you’re on the right path to something truly extraordinary. Trust me on this—this step is absolutely paramount because it ensures that all those delightful flavors meld beautifully together.
Once everything is mixed, turn your burner on low to medium heat. It’s crucial at this point not to rush things; gently heat the mixture until it reaches about 190 degrees Fahrenheit. You want to see some small bubbles form around the edges of your saucepan, but don’t let it come to a full boil. Why? Boiling can break down the delicate flavor of your strawberries and lemons, which would be a travesty! Instead, just let it warm through slowly so that all those sweet strawberry notes marry with the tangy lemon essence while dissolving the sugar seamlessly into this enticing concoction. Stir often and keep an eye on it; you’ll know when it’s ready because it will transform into a beautifully glossy sauce that sings of summer.
Step 6: Ladling into Jars Like a Pro
Once your strawberry lemonade concentrate is heated just right, it’s time for one of my favorite steps: ladling this beautiful mixture into jars! But before diving in, ensure you have your prepared jars handy; they should be clean and hot from being prepped in your water bath canner. This is crucial because pouring hot liquid into cold jars can cause them to crack—definitely something we want to avoid! Using a ladle or a measuring cup with a spout makes this task easier and cleaner.
As you fill each jar, leave about ¼ inch of headspace at the top. This space is non-negotiable as it allows for proper sealing during processing. You’ll notice how thick and rich the concentrate looks as you fill each jar—it’s like capturing sunshine in glass! After filling them up, wipe any residue from the rims of the jars with a clean cloth or paper towel; this step ensures a perfect seal later on when you apply your canning lids. Once done, place two-part canning lids on top—you want that satisfying “pop” sound when they seal later!
Step 7: Processing for Long-Lasting Flavor
Now comes the moment where science meets culinary art: processing your jars in the water bath canner! Carefully place each filled jar back into your preheated water bath canner using tongs or a jar lifter—safety first! Make sure they are completely submerged in boiling water by about an inch. Processing these jars for 15 minutes is essential because it eliminates any bacteria present while also creating that perfect vacuum seal needed for long-term storage.
But here’s where altitude matters! If you live at higher elevations (above 1,000 feet), you’ll want to adjust your processing time slightly longer—consult reliable sources for altitude adjustments. During this time, keep an eye on the pot; you’re looking for gentle rolling bubbles around each jar but not aggressive boiling which could splatter everywhere. It’s normal to feel excited (and maybe even anxious) during this stage—just remember that patience pays off here; what may seem like just a few minutes will reward you with countless refreshing drinks later!
Step 8: Cooling Down and Sealing The Goodness
Once your timer dings after those 15 minutes (you did set it, right?), turn off the heat but resist removing those precious jars immediately! Leave them resting in that bubbling sanctuary for another five minutes—this little resting period helps ease them out of their hot environment without experiencing shock from cooler air exposure which could affect their seals. You might wonder why this matters so much; well, allowing them to cool gradually helps ensure that ideal vacuum seal forms as they cool down.
Now grab those trusty jar lifters again and carefully remove each jar from the canner one by one, placing them upright on a clean kitchen towel laid out on your counter—a lovely sight indeed! As they cool down further over the next few hours, listen closely for those delightful “pops” indicating successful seals forming over time. Keep an eye out for any signs of unsealed jars (like unsteady lids); if any do arise, simply pop them into the fridge for immediate enjoyment instead of disaster!
Completing Your Canning Strawberry Lemonade Concentrate Journey
With all steps behind us and our kitchen filled with scents reminiscent of summer picnics past, we’re almost at the finish line!
Step 9: Checking Seals and Storing
After waiting patiently for about 12 to 24 hours (I know—this part feels like an eternity!), it’s time for one last check: inspecting those seals. Gently press down in the center of each lid; if it pops back up, then sadly you’ve got an unsealed jar—which means it’s destined for immediate consumption rather than long-term storage. Don’t fret though—you’ll love having fresh homemade strawberry lemonade concentrate ready in your fridge!
For those perfectly sealed jars—the ones whose lids remain firm under pressure—you can proudly store them in your pantry where they will await their moment to shine throughout busy summer days or cozy winter nights alike! Remember though: once opened, they need refrigeration and should be enjoyed within two weeks because freshness is key here.
And there you have it—the journey of making Canning Strawberry Lemonade Concentrate has come full circle! I hope you’ll find immense joy in sipping on this sweet yet tangy delight as much as I do whenever I pop open a jar—a taste of sunshine captured perfectly just waiting to delight your senses every time! Enjoy every refreshing sip knowing you’ve created something special from scratch—and don’t hesitate to share this recipe with friends who need a little summer magic in their lives too!
Storage and Enjoyment Tips for Your Canning Strawberry Lemonade Concentrate
Now that you’ve created this vibrant and utterly delightful Canning Strawberry Lemonade Concentrate, it’s time to bask in the joy of what you’ve accomplished! This recipe is not just about making a sweet treat; it’s about crafting a refreshing experience that can be enjoyed at any moment. Whether you’re sipping it on a warm summer day or serving it at a cheerful gathering with friends, I can promise you that every drop will take you back to the joys of sunny afternoons and laughter-filled moments. But wait, let’s talk about how to store your lovely creation so that it stays as fresh as the day you made it!
Storing Leftover Canning Strawberry Lemonade Concentrate
To ensure your Canning Strawberry Lemonade Concentrate retains its vibrant flavor and beautiful color, proper storage is essential. Once your jars are sealed and cooled, place them in a cool, dark pantry or cupboard. Glass jars are ideal for storage because they keep the concentrate safe from light and air exposure, which can diminish flavor over time. When stored correctly, this concentrate can last up to a year—yes, a whole year of delicious strawberry lemonade waiting for you! To maintain its quality even longer, I recommend using the “bread slice” trick: placing a slice of bread in the jar before sealing helps absorb any moisture that might sneak in. Trust me when I say that after some time in storage, the concentrate develops an even deeper flavor profile—like a fine wine getting better with age! When you’re ready to enjoy it again, simply mix one part concentrate with three parts cold water for an instant refreshment that sings of summer.
Freezing Canning Strawberry Lemonade Concentrate for Later
If you’re looking for an alternative way to preserve your delicious creation, consider freezing some of your Canning Strawberry Lemonade Concentrate! Freezing is incredibly straightforward—just pour your prepared mixture into ice cube trays or freezer-safe containers. Make sure to leave some space at the top because liquids expand when frozen. This method allows you to enjoy strawberry lemonade anytime without needing to thaw an entire jar! You can keep it frozen for up to six months without compromising on taste or quality. When you’re ready for a quick treat, simply pop out the cubes and blend them with water or use them as ice cubes in other beverages—it’s like having summer in your freezer all year round! The convenience factor here is simply delightful; imagine reaching into your freezer on a chilly winter day and pulling out those vibrant cubes—pure sunshine on demand!
Canning Strawberry Lemonade Concentrate
Experience the joy of summer all year round with this delightful Canning Strawberry Lemonade Concentrate. This vibrant blend captures the sweet essence of fresh strawberries and zesty lemons, allowing you to create refreshing drinks anytime you wish. Perfect for picnics, gatherings, or cozy evenings at home, this concentrate is not just a beverage; it’s a nostalgic ritual that brings smiles and laughter to every sip. Simple to make yet incredibly rewarding, it’s an excellent way to share the flavors of summer with friends and family. Dive into this enjoyable canning adventure, and savor the taste of sunshine in every jar!
- Prep Time: 30 minutes
- Cook Time: 30 minutes
- Total Time: 1 hour
- Yield: Approximately 10 servings (based on recipe yielding about 5 pints) 1x
- Category: Beverage
- Method: Canning
- Cuisine: American
Ingredients
- 6 cups hulled strawberries
- 4 cups fresh lemon juice (from 16 to 20 lemons)
- 6 cups sugar
Instructions
- Gather your canning equipment: water bath canner, pint jars, lids, and a jar lifter.
- Juice the lemons using a manual juicer or by hand, straining out pulp and seeds.
- Hull the strawberries and puree them in a blender or food processor until smooth.
- In a large saucepan over medium heat, combine strawberry puree, lemon juice, and sugar. Stir gently until dissolved.
- Heat the mixture slowly until it reaches 190°F without boiling.
- Ladle the hot mixture into prepared jars, leaving ¼ inch headspace at the top.
- Wipe jar rims clean, apply lids, and process in a water bath canner for 15 minutes.
- Allow jars to cool undisturbed for at least 12 hours before checking seals.
Nutrition
- Serving Size: 2 tablespoons (30g)
- Calories: 58
- Sugar: 14g
- Sodium: 0mg
- Fat: 0g
- Saturated Fat: 0g
- Unsaturated Fat: 0g
- Trans Fat: 0g
- Carbohydrates: 15g
- Fiber: 0g
- Protein: 0g
- Cholesterol: 0mg