White Chocolate Raspberry Cheesecake Balls
There’s something truly magical about desserts that transport us back to cherished moments, isn’t there? I always think of those warm summer evenings spent with friends and family, sharing stories and laughter over a plate of sweet treats. One such delightful creation that embodies this spirit is the White Chocolate Raspberry Cheesecake Balls. These little bites are not just a dessert; they are a testament to the beauty of combining rich flavors and textures—a creamy, dreamy cheesecake wrapped in luscious white chocolate, with bursts of tart raspberry dancing through each bite. This recipe is a bridge between tradition and innovation, marrying classic cheesecake elements with the playful nature of bite-sized delights. Each morsel encapsulates the joy of indulgence and the warmth of togetherness, making it perfect for any gathering or simply a treat for yourself after a long day.
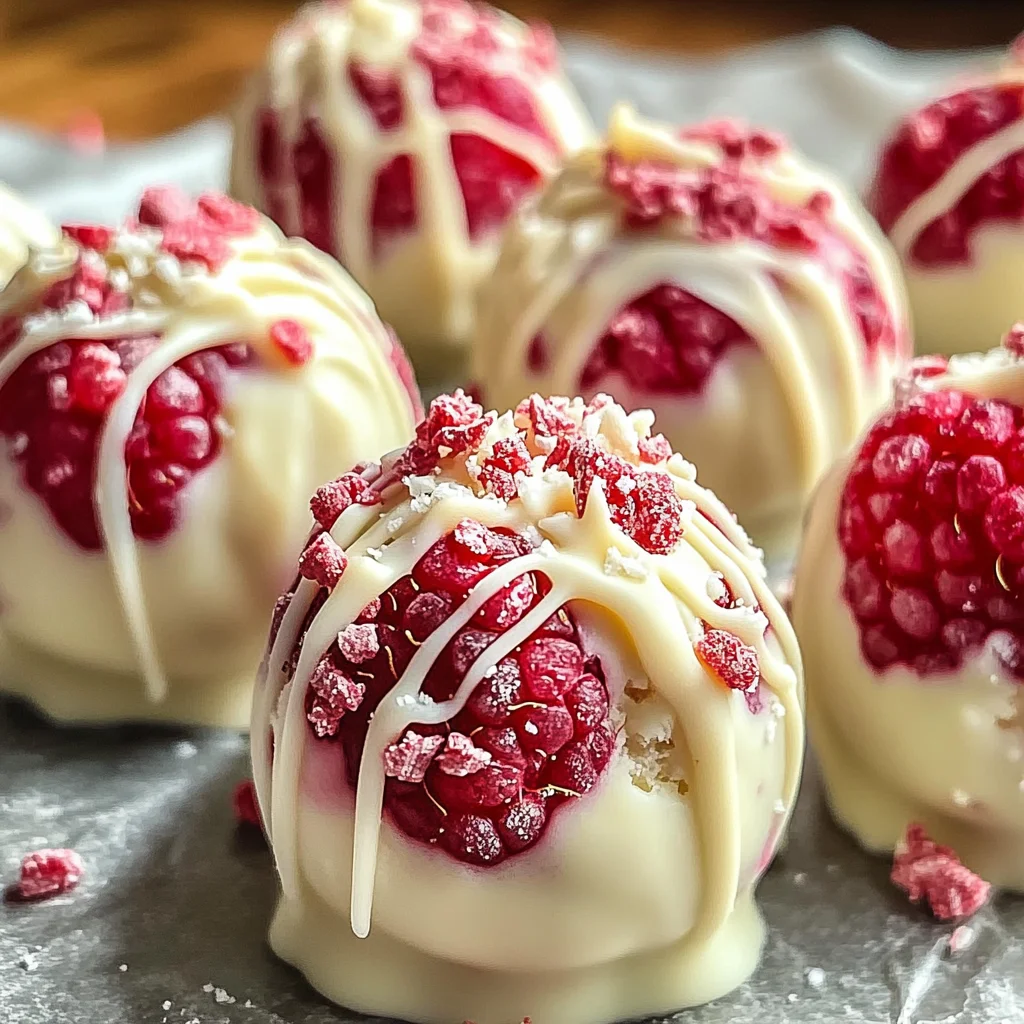
As you embark on this culinary journey, trust me when I say that these cheesecake balls will not only satisfy your sweet tooth but also bring an element of elegance to your dessert table. The vibrant color of the raspberry contrasts beautifully with the creamy white chocolate coating, creating a visual feast that is almost too beautiful to eat—almost! But here’s where the real magic happens: the balance between silky cream cheese and tart raspberry puree creates an explosion of flavor that’s utterly intoxicating. And what’s even better? They’re surprisingly easy to make! With just a handful of ingredients and some simple steps, you’ll be on your way to impressing everyone with these decadent bites.
White Chocolate Raspberry Cheesecake Balls: A Bitesize Bliss
These White Chocolate Raspberry Cheesecake Balls are not only an exquisite treat but also a fun way to enjoy cheesecake in a new form—a perfect conversation starter at any gathering or a delightful surprise for your family at home. Prepare for smiles all around as you take them on this delicious adventure!
Ingredients:
Before we dive into making these delightful cheesecake balls, let’s take a moment to appreciate each ingredient that makes this recipe come alive. Each component plays its part in creating that symphony of flavors we’re aiming for.
- 1 cup graham cracker crumbs. The foundation for our cheesecake balls begins here. Graham cracker crumbs add not just flavor but also texture—think crunchy yet tender little bites that contrast beautifully with the creamy filling. When buying graham crackers, look for those made from whole grains if you’re feeling health-conscious! Crushing them yourself can be therapeutic; just pop them into a zip-top bag and use a rolling pin. It gives you fresher crumbs and ensures they’re just the right size for mixing.
- 8 oz cream cheese, softened. This is absolutely paramount for achieving that luscious, creamy filling we crave in cheesecake. Softening the cream cheese allows it to blend effortlessly with other ingredients, creating that smooth texture we desire. Always opt for full-fat cream cheese—trust me on this one! It contributes richness and depth to our cheesecake balls that’s simply unmatched by low-fat alternatives.
- 0.5 cup powdered sugar. This ingredient serves two purposes: it sweetens our mixture while also giving it that velvety texture we expect from good cheesecake. Using powdered sugar instead of granulated sugar ensures immediate sweetness without any gritty residue—a non-negotiable in desserts where smoothness is key!
- 1 tsp vanilla extract. Ahh, vanilla—the unsung hero of many desserts! This liquid gold elevates all other flavors in our cheesecake balls by adding depth and warmth to every bite. Always choose pure vanilla extract over imitation; you’ll appreciate the difference instantly when it comes to flavor complexity.
- 1 cup fresh raspberries, pureed (plus extra for garnish). Here comes the burst of flavor! Raspberries bring a vibrant zing that cuts through the richness of white chocolate and cream cheese beautifully—imagine biting into one and experiencing both tartness and sweetness simultaneously! When selecting raspberries, go for those plump ones with no signs of mushiness—freshness is key here!
- 1.5 cups white chocolate chips. The crowning glory of our dessert! White chocolate adds sweetness and creaminess while providing an alluringly smooth coating for our cheesecake balls; plus, who can resist that glossy finish? Look for high-quality white chocolate chips—those made from cocoa butter rather than vegetable oils will ensure that lovely melt-in-your-mouth texture.
- 1 tbsp coconut oil (optional). If you want your melted white chocolate to have an extra smooth consistency, coconut oil is your best friend here! It helps thin out the chocolate without compromising its flavor while providing additional richness. However, if you prefer not to use it or don’t have any on hand, feel free to skip this step!
- 1 pinch salt. While it may seem small, salt enhances all other flavors in our cheesecakes—think about how it brings out sweetness in desserts! Just a pinch can elevate your creation from good to unforgettable.
- Fresh raspberries and white chocolate shavings for garnish. What makes these bites so special isn’t just their taste but also their presentation! Adding fresh raspberries on top not only looks stunning but also provides an additional layer of flavor when served. White chocolate shavings add elegance; they catch the light beautifully and make each ball even more irresistible!
Equipment You’ll Need:
Having the right tools at hand makes every cooking experience smoother—and let’s face it: it’s much more enjoyable when everything runs seamlessly! While these items aren’t ingredients per se, they play essential roles as partners in bringing our dessert vision to life.
- Mixing bowl – A sturdy mixing bowl is crucial because you’ll want ample space for mixing all those lovely ingredients together without worrying about spills or messes!
- Rubber spatula – A rubber spatula is perfect for folding ingredients gently; its flexibility allows you to incorporate delicate mixtures like raspberry puree without losing airiness.
- Cookie scoop or tablespoon – Using either will help portion out consistent size balls—this keeps baking time uniform so every piece has that perfect bite!
- Microwave-safe bowl – Essential for melting your white chocolate smoothly without scorching it; glass works wonderfully here as it retains heat evenly.
- Parchment paper or baking mat – Lining your baking sheet prevents sticking which saves cleanup time while ensuring your magnificent creations hold their shape during chilling!
Now that we have everything prepared let’s move on to crafting these magical White Chocolate Raspberry Cheesecake Balls together!
Preparing the White Chocolate Raspberry Cheesecake Balls
Step 1: The Creamy Foundation
To kick things off beautifully, start by combining softened cream cheese with powdered sugar and vanilla extract in your mixing bowl using either an electric mixer or simply by hand if you’re up for some arm workout! This process known as creaming is vital because it aerates the mixture slightly while dissolving sugar thoroughly into each luscious bite—creating that smooth texture we adore so much in cheesecakes. Take care not rush this step; aim until it’s completely smooth without any lumps left behind—that’s what will give us those wonderfully creamy results later on!
Step 2: Raspberry Fusion
Next up is where things get colorful: gently fold in your pureed raspberries using your rubber spatula until fully incorporated—but don’t overdo it! You want specks of raspberry throughout rather than blending everything into oblivion—it’ll keep those beautiful flecks intact which adds both visual appeal and delicious tart pops when you bite into them later on! This balance between sweet creaminess from cream cheese/powdered sugar combo against tangy raspberry goodness creates such profound satisfaction—trust me when I say it’ll leave taste buds dancing!
Step 3: Crust Meets Cream
Now it’s time for graham cracker crumbs—the backbone supporting our glorious dessert structure! Gradually add them into your mixture while continuing to gently mix until everything combines harmoniously—you’re looking for consistency similar enough dough-like but still soft enough so you can easily roll them later into cute little balls! Don’t rush this step either; proper incorporation ensures flavors meld together brilliantly rather than tasting like separate components when eaten later!
Step 4: Chill Time
Once mixed thoroughly as mentioned before let’s pop this heavenly mixture into fridge (for about 30 minutes) so it firms up nicely before shaping into those irresistible balls you’ve been dreaming about creating since starting today’s adventure—it truly does make rolling easier AND helps maintain shape throughout process ahead too…so resist temptation—it’ll be worth wait!!
Stay tuned as we continue crafting these delectable treats together—can’t wait till you see how gorgeous they turn out once dipped perfectly coated white chocolate…
Step 5: Melt the White Chocolate to Perfection
Now comes one of my favorite parts of this process—the melting of the white chocolate, which is truly a transformative moment in our recipe journey. You’ll want to begin by placing your white chocolate chips into a microwave-safe bowl. If you choose to elevate your chocolate experience (and I highly recommend you do), add that tablespoon of coconut oil. This isn’t just an optional step; it plays a crucial role in achieving a silky smooth consistency that will beautifully envelop our cheesecake balls later on.
As you microwave the chocolate, do so in intervals of 30 seconds—this is absolutely paramount for avoiding burnt chocolate, which can happen quicker than you might think! After each interval, give the bowl a gentle stir. You’re looking for that magical moment when the chips begin to soften and melt, combining into luscious liquid gold. The texture should be smooth and glossy, free from any lumps. If it looks gritty or clumpy, it’s a sign you’ve overheated it—a quick rescue can be achieved by adding a few more pieces of chocolate and stirring vigorously until melted. Patience is key here; trust me on this! Melting at a lower temperature prevents seizing and yields that decadent finish we all adore.
Step 6: Forming Your Cheesecake Balls
With your cheesecake mixture chilled to perfection—firm yet pliable—it’s time to transform it into those delightful bite-sized balls that will soon be coated in white chocolate bliss. Using either a small cookie scoop or your hands (if you’re feeling adventurous), begin portioning out about one-inch rounds of the cheesecake mixture. As you roll these little gems in your palms, take care not to rush this step; the warmth from your hands should gently mold them without causing them to lose their coolness.
This tactile part of the process is so satisfying! You should feel the creaminess of the mixture come together with each roll, and if you notice that it’s slightly sticky, don’t fret—that’s perfectly normal! Just keep your hands clean or dust them with a light sprinkle of graham cracker crumbs for ease. Make sure each ball is uniform so they look gorgeous on display later; this attention to detail reflects not just in appearance but also ensures even coating when we dip them into our melted white chocolate.
Step 7: Dipping Each Ball in Heavenly Chocolate
Here comes the fun part—dipping each cheesecake ball into that heavenly melted white chocolate! With your beautifully formed balls ready and waiting, grab one and gently drop it into the warm embrace of the melted chocolate, using two forks or even a skewer for easy handling. This technique allows for an even coating without getting too messy—which I must say is essential when you want these treats to shine! Don’t rush this step; take your time allowing any excess chocolate to drip off before placing them onto your parchment-lined baking sheet.
As you dip each ball, you’ll notice how they transform—first, they’re just simple cheesecake bites, but as they become enveloped in creamy white chocolate, they morph into something utterly extraordinary. The contrast between the rich white chocolate coating and the tart raspberry-infused filling creates an exquisite dance of flavors that will delight anyone lucky enough to have one (or more!). Keep an eye on how thickly you’re coating them; too thin may leave some cheesecake exposed while too thick could become overwhelming. Trust me—aim for just enough that you can still see hints of raspberry peeking through!
Step 8: Garnishing with Love
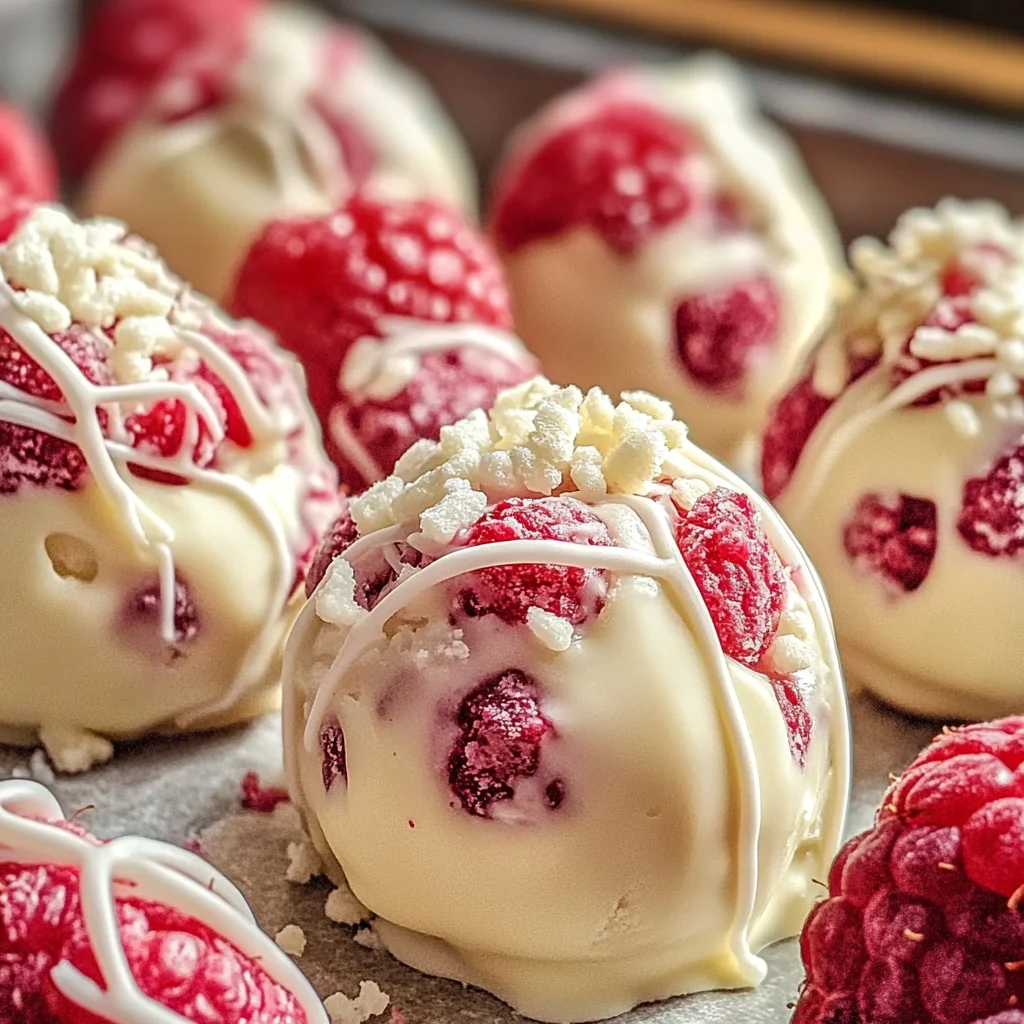
Before our delightful bites transition from mere cheesecake balls into masterpieces worthy of any dessert table, we need to add those beautiful finishing touches! While the white chocolate is still wet—this is crucial—garnish each ball with a small piece of fresh raspberry and sprinkle with delicate white chocolate shavings if you desire that extra flair. This step isn’t just about decoration; it brings layers of flavor and visual appeal that make these treats enticing right from first glance.
You’ll want to act quickly here as we don’t want our precious toppings sliding off once the chocolate hardens! A gentle press will help secure each raspberry piece on top—make sure not to squish them too much; we still want those vibrant colors shining through! By decorating while everything is still warm and melty, you’re ensuring everything stays put when chilled. Once garnished to perfection, place your baking sheet filled with these beauties into the refrigerator for about 15-20 minutes until the white chocolate has fully hardened. This chilling time allows all those flavors to meld together beautifully while giving us that satisfying snap when bitten into!
Conclusion:
As we wrap up this delightful journey through making White Chocolate Raspberry Cheesecake Balls, I can’t help but feel an overwhelming sense of excitement! It’s been such joy sharing this special recipe with you—a recipe that has become a cherished favorite among my friends and family. The way the creamy white chocolate envelops each ball, combined with the tartness of fresh raspberries, creates a symphony of flavors that is truly extraordinary. Each bite transports you to dessert heaven; how can something so simple bring such profound satisfaction?
These cheesecake balls are not just snacks; they’re memories waiting to be made! Imagine serving them at gatherings or enjoying them during cozy nights in while watching your favorite movie. They shine at birthday parties as much as they do at casual get-togethers or holiday celebrations—their versatility knows no bounds. Plus, the joy of crafting these treats is half the fun; there’s something incredibly rewarding about bringing such joy to those around you.
When it comes to serving suggestions, think about pairing these indulgent bites with a cup of steaming tea or coffee for an afternoon pick-me-up that feels utterly luxurious. Picture yourself savoring one alongside a scoop of fresh vanilla ice cream on a warm summer evening or perhaps even as part of an elaborate dessert platter adorned with seasonal fruits and nuts for added flair. The creamy texture coupled with bursts of raspberry flavor makes each moment unforgettable.
Feeling adventurous? This recipe is wonderfully adaptable—you could swap out raspberries for other berries like strawberries or blueberries if you’re feeling bold! Or perhaps roll some in crushed nuts instead of graham cracker crumbs for added crunch—a variation that will surely impress anyone lucky enough to taste it. The possibilities are endless when you embrace your creativity in the kitchen! So gather your ingredients soon and whip up these remarkable White Chocolate Raspberry Cheesecake Balls; I can’t wait to hear how much you love sharing—and indulging—in them!
White Chocolate Raspberry Cheesecake Balls

Indulge in the delightful world of White Chocolate Raspberry Cheesecake Balls, where creamy cheesecake meets luscious white chocolate and vibrant raspberry flavors. These bite-sized treats are not only visually stunning but also incredibly easy to make, making them a perfect dessert for any gathering or a sweet indulgence for yourself. With just a handful of ingredients and straightforward steps, you’ll create a symphony of taste that captures the essence of summer gatherings and joyful moments with loved ones. Each ball is a harmonious blend of tartness from fresh raspberries and sweetness from white chocolate, offering a burst of flavor in every bite. Perfect as a conversation starter at parties or a delightful surprise for family, these cheesecake balls promise smiles all around!
- Prep Time: 40 minutes
- Cook Time: 0 minutes
- Total Time: 40 minutes
- Yield: Approximately 24 servings 1x
- Category: Dessert
- Method: No-bake
- Cuisine: American
Ingredients
- 1 cup graham cracker crumbs
- 8 oz cream cheese, softened
- 0.5 cup powdered sugar
- 1 tsp vanilla extract
- 1 cup fresh raspberries, pureed
- 1.5 cups white chocolate chips
- 1 tbsp coconut oil (optional)
- Pinch of salt
Instructions
- In a mixing bowl, combine softened cream cheese, powdered sugar, and vanilla extract until smooth.
- Gently fold in pureed raspberries until incorporated.
- Gradually add graham cracker crumbs and mix until the mixture is dough-like yet soft.
- Refrigerate the mixture for 30 minutes to firm up.
- Melt white chocolate (and coconut oil if using) in intervals in the microwave until smooth.
- Roll chilled cheesecake mixture into one-inch balls.
- Dip each ball into melted white chocolate, allowing excess to drip off before placing on parchment paper.
- Garnish with fresh raspberries or white chocolate shavings while still warm and allow to cool in the fridge for about 20 minutes.
Nutrition
- Serving Size: 1 serving
- Calories: 110
- Sugar: 9g
- Sodium: 50mg
- Fat: 7g
- Saturated Fat: 4g
- Unsaturated Fat: 3g
- Trans Fat: 0g
- Carbohydrates: 10g
- Fiber: <1g
- Protein: 2g
- Cholesterol: 15mg