Blue Ribbon Apple Pie
There’s an undeniable magic that unfolds in the kitchen when you bake a pie, isn’t there? The scent of warm apples mingling with cinnamon dances through the air, wrapping around you like a comforting hug. It’s more than just a dessert; it’s an experience steeped in nostalgia and love. This Blue Ribbon Apple Pie is not merely a recipe—it’s a cherished tradition, a symphony of flavors that sings of home and hearth. Each slice reveals tender apples cloaked in a flaky crust, golden and inviting, promising warmth and joy with every bite. Picture yourself gathering with family or friends, their faces lighting up as they take that first taste—this pie is the kind of culinary hug that makes memories linger long after the last crumb has been devoured.
I’ve always been captivated by the art of pie-making. There’s something profoundly satisfying about transforming simple ingredients into something so extraordinary. This particular recipe marries tart Granny Smith apples with sweet Honeycrisp ones, creating a balance that is nothing short of heavenly. Trust me, the interplay between those two varieties elevates this pie to new heights! Whether it’s a chilly autumn evening or a summer gathering, this Blue Ribbon Apple Pie has become my go-to dessert for any occasion. It’s perfect for holidays or simply to enjoy during a cozy night in. I promise you—it will become your new favorite too.
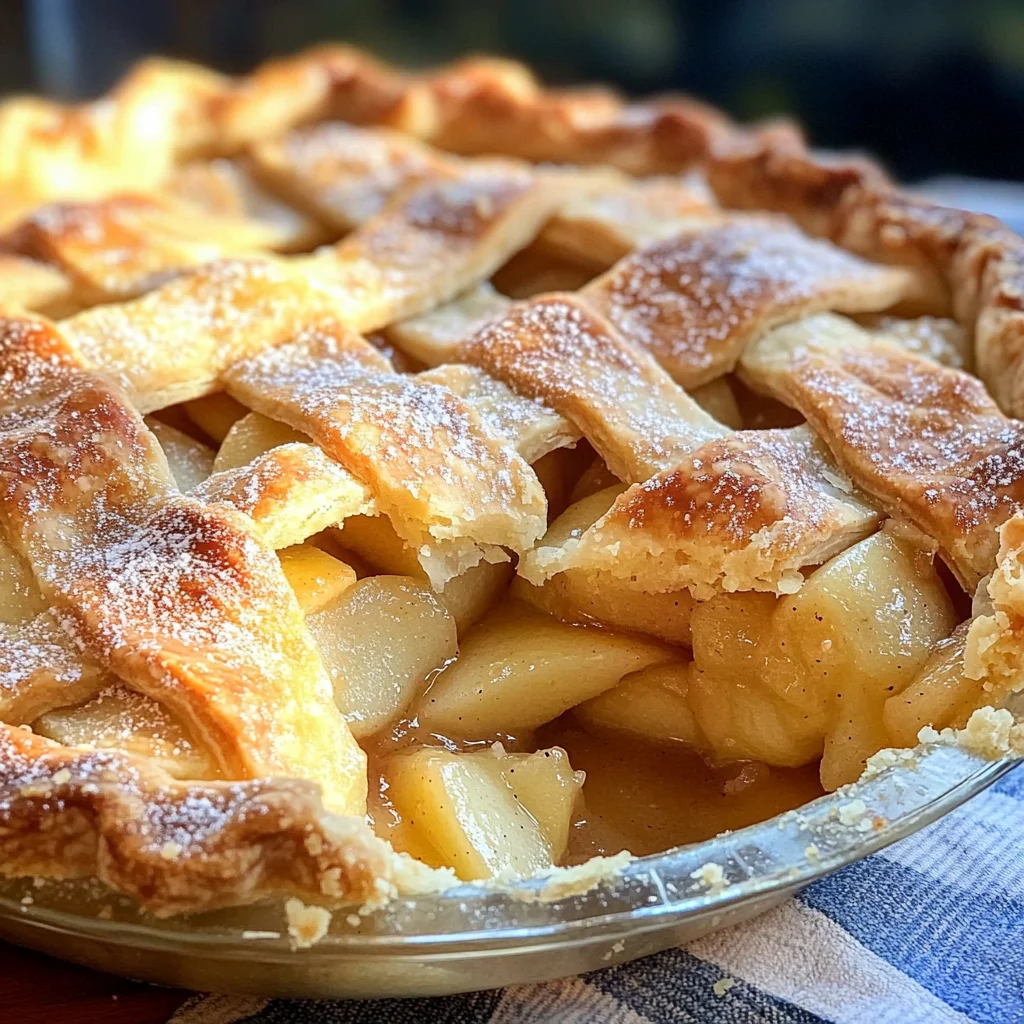
Blue Ribbon Apple Pie: A Slice of Home
Welcome to the delightful journey of making my beloved Blue Ribbon Apple Pie! This recipe is designed to walk you through each step with love and care, ensuring your pie turns out perfectly every time. Let’s embark on this culinary adventure together!
Ingredients:
As we gather our ingredients, let’s take a moment to appreciate each one’s role in creating our beautiful pie. Baking is as much about understanding what goes into your dish as it is about following the instructions.
- 1 recipe double-crust pie dough. The foundation of any great pie lies in its crust—flaky and buttery yet sturdy enough to hold all that luscious filling inside. Making your own double-crust dough allows you to control the texture and flavor; it’s where the magic begins! If you’re short on time or feeling less adventurous, feel free to use store-bought dough—just ensure it’s high quality for the best results.
- 2 1/2 pounds (about 5) firm tart apples, peeled, cored, and sliced 1/4-inch thick (I use Granny Smith). Tart apples are non-negotiable here! Granny Smith apples bring that delightful tanginess that cuts through the sweetness of the sugars we’ll be using later. Their firm flesh holds up beautifully during baking without turning mushy—exactly what we want for our filling! When selecting these beauties at the market, look for apples that are vibrant green without bruising; they should feel firm in your hand.
- 2 1/2 pounds (about 5) firm sweet apples, peeled, cored, and sliced 1/4-inch thick (I use Honeycrisp). Now let’s balance out those tart flavors with some sweetness! Honeycrisp apples are my go-to because they offer incredible juiciness combined with just the right level of sweetness alongside a satisfying crunch. They add depth and complexity to our filling while caramelizing beautifully as they bake.
- 1/2 cup plus 1 tablespoon granulated sugar. Sugar plays several roles in our pie: it sweetens our apple filling, helps create that golden crust color through caramelization, and draws out moisture from our fruit to create a delicious syrup. I recommend using fine granulated sugar so it dissolves easily among the apples; this also contributes to an even distribution of sweetness throughout the filling.
- 1/4 cup packed light brown sugar. This ingredient brings warmth and richness to our pie’s flavor profile—think caramel notes! The molasses present in brown sugar adds complexity and enhances our filling’s gooeyness while helping achieve that tantalizing texture we all crave in a good apple pie.
- 1/2 teaspoon grated fresh lemon zest. Ahh, lemon zest—the secret weapon against dull flavors! Just a hint brightens up our filling by adding freshness and elevating those apple flavors to new heights without overpowering them. Be sure to use fresh lemons here; bottled lemon juice lacks that vibrant aroma we want!
- 1/4 teaspoon salt. It might seem counterintuitive to add salt to something sweet like pie; however, salt enhances all flavors present in your dish – think of it as an essential accent note! It balances sweetness and amplifies those natural apple flavors while keeping everything harmonious.
- 1/8 teaspoon ground cinnamon. Cinnamon is like wrapping your dessert in a cozy blanket! Its warm spice complements both tartness and sweetness perfectly while adding layers of aromatic charm that waft through your kitchen as this beauty bakes away.
- 2 teaspoons fresh lemon juice. Just like zesting lemons earlier brings brightness into play; adding fresh lemon juice prevents browning on our cut apples before baking while providing acidity needed for balancing sugar levels once again!
- 1 egg white (beaten lightly)– This will be brushed over our crust before baking; not only does it help achieve that beautiful golden sheen but also acts as glue for any sugar sprinkled atop before baking!
Equipment You’ll Need:
Before we dive into making this delicious Blue Ribbon Apple Pie together, let’s gather some essential tools that will make this process smoother and enjoyable! Having the right equipment not only helps things flow seamlessly but also ensures you’ll get fantastic results without any unnecessary frustration.
- 9-inch pie plate – A classic choice for most pies; its depth ensures ample room for filling while providing just enough surface area for crust coverage without overflow issues during baking!
- Rolling pin – An indispensable tool when working with doughs; it helps evenly flatten out your pastry so you achieve consistent thickness throughout which is key for even baking later!
- Sharp paring knife – A must-have when peeling/cutting fruits like apples—its precision allows control over slices ensuring uniformity which translates directly into even cooking/baking results later!
- Large pot or Dutch oven – Perfect for sautéing those apple slices on medium heat until tender—it distributes heat evenly allowing us to cook down fruit gently without risk of burning them!
- Colander – After cooking down fruit mixture we’ll need somewhere safe & convenient where juices can drain thoroughly before transferring mixture back into prepared crust—this is how we avoid soggy bottoms folks!
Preparing the Blue Ribbon Apple Pie
Step 1: Crafting Your Crust
Let’s start by rolling out one half of your chilled double-crust pie dough until it’s about 12 inches wide—this gives us enough space to drape over our 9-inch pie plate with some overhang for crimping later on! Dust your work surface lightly with flour so it doesn’t stick; trust me on this one—it’ll save you so much heartache when transferring it over! Once rolled out uniformly thin (think about ⅛ inch), gently lift it onto your plate using your rolling pin as support—a delicate touch here ensures no tears appear which leads us directly toward success right from step one! Don’t worry if it isn’t perfectly shaped; rustic charm has its place too!
Step 2: Prepping Those Apples
Now comes perhaps my favorite part—the star ingredient: those gorgeous apple slices! Toss together both tart and sweet apple varieties along with half cup granulated sugar, brown sugar, grated lemon zest (ohhh can you smell it?), salt & cinnamon within either large pot/dutch oven over medium heat stirring frequently until softened but still holding shape—around ten minutes should do nicely! Keep an eye on them though—you want tenderness but no mushiness here since they’ll further cook down once baked allowing us full control over final texture achieved later.
Step 3: Cooling Off
Once you’ve cooked down those precious apple slices beautifully glazed by melted sugars & spices blend perfectly balanced… transfer this lovely mixture onto rimmed baking sheet laid flat allowing excess juices drain while cooling off completely at room temperature (about thirty minutes). Patience is key here because adding hot filling directly could lead towards unfortunate soggy bottom syndrome which no one wants when slicing into their masterpiece later on!
Step 4: Preheating Perfection
While waiting patiently—which I know can feel like forever sometimes—you’ll want preheat oven up high at four hundred twenty-five degrees Fahrenheit readying itself transform raw ingredients magical baked good shortly thereafter! Drain cooled apple mix thoroughly using colander now reserving quarter-cup juice separately mixing freshly squeezed lemon juice ensuring bright acidity shines through each bite bringing overall harmony back again sweeter tones brought forth earlier…
Stay tuned because there’s more ahead—we’re just getting started on crafting this ultimate comfort food classic together…and trust me when I say it’s worth every ounce of effort poured into making such delectable delights come alive at home!
Step 5: The Art of Layering Your Apples
Now that your apples have cooled and are bursting with flavor, it’s time to assemble them in the pie crust. This step is where your Blue Ribbon Apple Pie truly begins to take shape, and trust me, it’s a moment you’ll cherish. Gently spread the tender apple mixture into the prepared pie shell, allowing the apples to mound slightly in the center. This little mountain of fruit isn’t just for aesthetics; it ensures that every slice reveals a delightful structure filled with juicy, spiced apples. As you layer them in, be mindful of how they settle; this is crucial because it affects how they bake. A well-mounded filling will help prevent any gaps or shrinkage as the pie cooks.
Next comes the drizzle of that reserved lemon juice mixture over the apples. This isn’t merely a decorative touch; it’s an essential flavor enhancer that brightens and elevates the entire pie! The acidity from the lemon juice cuts through the sweetness of the apples and sugars, creating a beautiful balance that makes each bite profoundly satisfying. I promise you, this step transforms your pie from simply delicious to utterly extraordinary. So go ahead, drench those apples lovingly; every drop counts!
Step 6: The Top Crust – Sealing In All That Goodness
With your apple filling nestled lovingly in its crust, let’s roll out the second piece of dough. Flour your surface generously—this is non-negotiable! We want our dough to glide effortlessly rather than stick stubbornly. Roll it out evenly until it’s about an eighth of an inch thick; you’re looking for a texture that’s smooth yet sturdy enough to hold all those juicy apples inside. Once you’ve got this beauty ready, drape it over your filled pie with confidence—it’s like tucking in a beloved child before bedtime.
Now comes another critical moment: trimming that excess dough! You want about a quarter-inch overhang all around so you can tuck it under itself for a tight seal. This is where your pie’s integrity begins; a well-sealed crust means no messy spills in the oven and ensures those delectable juices stay tucked inside, forming an intoxicating syrup as they bake. Don’t rush this step—patience pays off! Once you’ve tucked and crimped those edges beautifully (a fork or your fingers can work wonders here), take a moment to admire your handiwork before moving on.
Step 7: Creating Vents – Letting Out the Steam
Ah, now we arrive at one of my favorite parts—the venting process! With your pie sealed up tight, we need to allow some steam to escape during baking so we don’t end up with a soggy bottom crust—a true culinary tragedy! Using a sharp paring knife, cut four slashes into the top crust; think of these as little breathing holes for our pie. They don’t need to be fancy—simple lines are perfect—but make sure they’re deep enough to allow steam to escape without tearing through entirely.
Once you’ve made those gashes, it’s time for a little finishing touch—a light brushing of beaten egg white across the crust followed by a sprinkle of sugar. This is not just about looks; oh no! The egg wash creates that gorgeous golden brown finish while also giving you a slight crunch when you bite into it. The sugar? It caramelizes beautifully during baking, adding just enough sweetness and texture contrast that elevates every mouthful from good to spectacular. So brush generously but without drowning it—just enough to shine like liquid gold!
Step 8: Baking Your Perfect Blue Ribbon Apple Pie
Now comes perhaps one of the most exciting parts—the actual baking! Preheat your oven to 425 degrees Fahrenheit because we want that initial blast of heat to set our crust perfectly before we lower the temperature for even cooking later on. Place your beautiful pie on a foil-lined baking sheet (trust me; this will save you from cleaning up any potential drips!) and slide it into the oven with absolute love and anticipation.
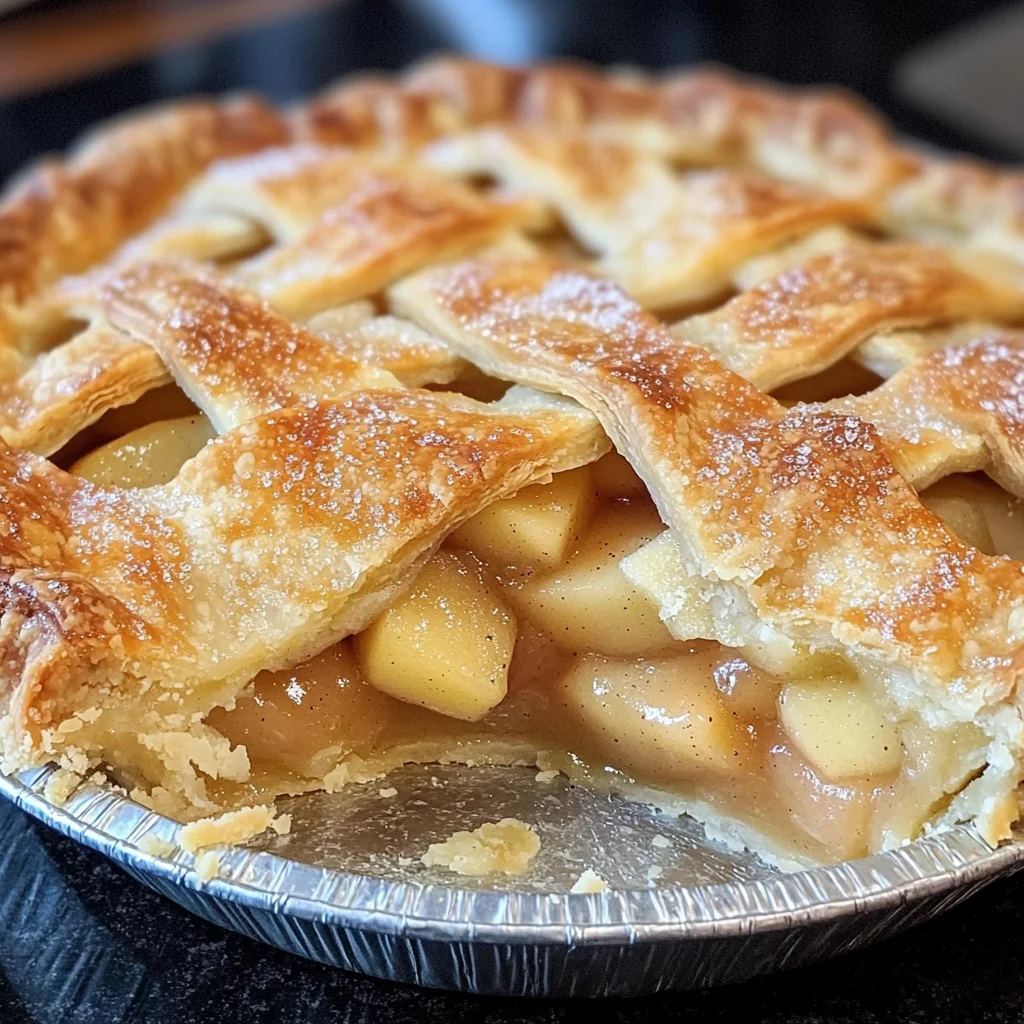
Bake at this high temperature for about 25 minutes until you see that crust turning gloriously golden brown—it should look like something you’d find in an artisanal bakery! After this initial phase, reduce the temperature to 375 degrees Fahrenheit and continue baking for an additional 25-30 minutes. Keep an eye on those bubbling juices peeking through those slashes in your top crust; when they start bubbling fervently, you’ll know you’re on track! The aroma wafting through your kitchen will be nothing short of heavenly—a symphony of warm spices and sweet apples mingling together in perfect harmony.
The Importance of Cooling
But here’s where patience really comes into play—don’t rush to cut into that pie right away! Allowing it to cool on a wire rack for about two hours might feel torturous but believe me when I say it’s absolutely paramount for achieving that ideal filling consistency. Cooling allows all those flavors to meld beautifully while letting the juices thicken up just right so every slice holds together perfectly instead of spilling everywhere like an unrestrained fountain.
So while you’re waiting (and trust me, I know it’s hard!), maybe sip on some herbal tea or gather friends around—after all, what better way to savor anticipation than sharing stories? When it’s finally time to serve slightly warm or at room temperature, I promise you’ll feel like royalty presenting such a beautiful creation!
Conclusion:
As we wrap up this delicious journey through crafting your very own Blue Ribbon Apple Pie, I hope you feel as inspired as I do every time I step into the kitchen! This recipe isn’t just about combining ingredients; it’s about creating memories and sharing love with every buttery layer of flaky crust and every cinnamon-kissed apple slice. The contrast between tart Granny Smith apples and sweet Honeycrisp creates a symphony of flavors that elevates this dessert beyond ordinary desserts—it’s utterly extraordinary!
Why is this Blue Ribbon Apple Pie a must-try? Well, it’s not just because of its mouthwatering taste but also due to the joy found in making it from scratch. Each step invites you into an immersive experience filled with laughter and warmth—whether you’re baking for family gatherings or cozy nights at home. Imagine pulling this beauty from the oven: golden brown crust glistening under soft lighting while everyone gathers around with eager smiles. It’s those moments infused with flavor that become cherished memories.
When it comes to serving suggestions, let your creativity shine! Imagine savoring one warm slice alongside a generous scoop of creamy vanilla ice cream—what a match made in heaven! For an afternoon pick-me-up, pair it with freshly brewed coffee or chai tea; they harmonize beautifully with those spiced notes lingering on your palate. And if you’re feeling more indulgent? Drizzle some caramel sauce over warm pie slices for an extra touch of decadence—oh my goodness!
Feeling adventurous? The beauty of this recipe lies in its adaptability! You could swap out some apples for pears for a different texture or fold in some dried cranberries or chopped walnuts for added depth—each variation brings something new and exciting to the table! As you experiment with flavors and textures that excite you personally, I encourage you to share those experiences! Reach out and connect—I would absolutely love to hear how your Blue Ribbon Apple Pie journey unfolds! Remember: cooking is not only about sustenance; it’s about connection and celebration.
Blue Ribbon Apple Pie
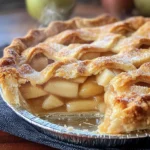
Experience the joy of baking with this Blue Ribbon Apple Pie, a comforting dessert that beautifully combines tart Granny Smith apples and sweet Honeycrisp apples. This pie is more than just a recipe; it’s a cherished tradition that brings families together, filling your kitchen with the warm aroma of spiced apples and flaky crust. Perfect for any season, whether it’s a chilly autumn evening or a summer gathering, this pie promises to create delightful memories with every slice. Each bite reveals juicy apples enveloped in a golden, buttery crust, making it an irresistible treat for any occasion.
- Prep Time: 30 minutes
- Cook Time: 55 minutes
- Total Time: 1 hour 25 minutes
- Yield: Approximately 8 servings 1x
- Category: Dessert
- Method: Baking
- Cuisine: American
Ingredients
- Double-crust pie dough
- 2 1/2 lbs Granny Smith apples, peeled, cored, and sliced 1/4-inch thick
- 2 1/2 lbs Honeycrisp apples, peeled, cored, and sliced 1/4-inch thick
- 1/2 cup + 1 tbsp granulated sugar
- 1/4 cup light brown sugar
- 1/2 tsp grated fresh lemon zest
- 1/4 tsp salt
- 1/8 tsp ground cinnamon
- 2 tsp fresh lemon juice
- 1 egg white (for brushing)
Instructions
- Preheat the oven to 425°F (220°C).
- Roll out half of the double-crust pie dough and place it in a 9-inch pie plate.
- In a large pot over medium heat, combine sliced Granny Smith and Honeycrisp apples with granulated sugar, brown sugar, lemon zest, salt, and cinnamon. Cook until just tender but not mushy (about 10 minutes).
- Allow the apple mixture to cool on a rimmed baking sheet for about 30 minutes.
- Pour the cooled apple filling into the prepared crust. Drizzle with reserved lemon juice.
- Roll out the second half of the dough and place it over the apple filling. Trim excess dough and crimp edges to seal.
- Cut slits in the top crust for steam to escape and brush with beaten egg white.
- Bake for 25 minutes at 425°F (220°C), then reduce temperature to 375°F (190°C) and bake for an additional 25-30 minutes until golden brown.
Nutrition
- Serving Size: 1 slice (150g)
- Calories: 270
- Sugar: 22g
- Sodium: 100mg
- Fat: 10g
- Saturated Fat: 3g
- Unsaturated Fat: 6g
- Trans Fat: 0g
- Carbohydrates: 42g
- Fiber: 3g
- Protein: 2g
- Cholesterol: 0mg