Sprinkle Sugar Cookies
There’s something truly magical about the scent of freshly baked cookies wafting through the house, isn’t there? It’s more than just a delightful aroma; it’s a warm embrace that lingers in the air, wrapping you in memories of laughter, joy, and the comforting presence of family and friends. Today, I want to share with you a recipe that embodies this warmth and nostalgia: Sprinkle Sugar Cookies! This is not just any cookie; it’s a canvas for vibrant sprinkles that remind us of childhood, celebration, and all things joyful. These cookies are effortlessly easy to make—no rolling required—which means you can whip them up on a whim or prepare them for festive gatherings without feeling overwhelmed.
As we dive into this Sprinkle Sugar Cookie adventure, let me assure you that every step is infused with love and intention. Each ingredient plays a crucial role in creating that soft, chewy texture paired with just the right amount of sweetness. I promise you: once these cookies are out of the oven, golden-edged and adorned with colorful sprinkles, they’ll be hard to resist! Whether you’re baking for a holiday party or simply because it’s Tuesday, these cookies will bring smiles to everyone who has the pleasure of tasting them.
Sprinkle Sugar Cookies: A Joyous Celebration in Every Bite
These Sprinkle Sugar Cookies are not only beautiful but also a delightful treat that celebrates simplicity and flavor. With no need for rolling dough or fancy shapes, they capture the essence of holiday baking while inviting spontaneity into your kitchen. When you take that first bite, you’ll experience a symphony of buttery sweetness and crunchy sprinkles—a truly extraordinary blend that captures both tradition and innovation in one delicious bite.
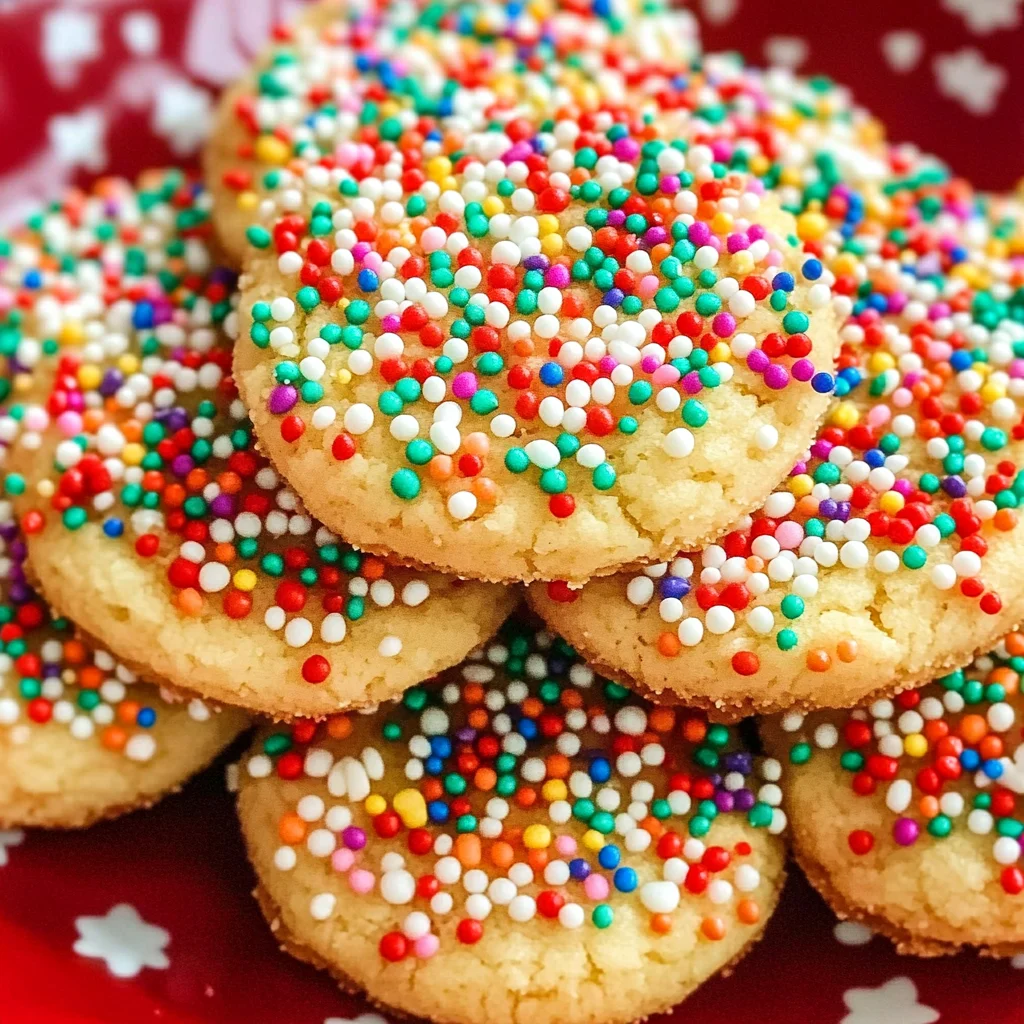
Ingredients:
As we embark on this delightful culinary journey together, let’s gather our ingredients. Each one contributes uniquely to the magic of our Sprinkle Sugar Cookies.
- 1/2 cup butter (room temperature). Using room temperature butter is crucial for achieving that light and airy texture we’re aiming for in our cookies. When butter is softened properly, it creams beautifully with sugar, creating tiny air pockets that help the cookies rise perfectly during baking. Look for high-quality unsalted butter; it allows you to control the saltiness of your dough better than salted varieties.
- 1/2 cup oil. Adding oil to our cookie dough introduces moisture without weighing it down. It ensures that each cookie remains soft and tender even after cooling. I recommend using a neutral oil like canola or vegetable oil—this way, you won’t interfere with the buttery flavor we’re cultivating here.
- 1/2 cup granulated sugar. This sugar isn’t just for sweetness; it plays an essential role in texture as well! Granulated sugar helps create crisp edges while providing the perfect balance against the softer middle of each cookie. It also contributes to browning as they bake—creating those lovely golden edges we all adore.
- 1/2 cup confectioners’ sugar. Also known as powdered sugar, this ingredient adds an extra layer of sweetness while contributing to a delicate texture that melts in your mouth. The fine consistency helps create an ultra-smooth dough that’s pure bliss when baked!
- 1 large egg. Eggs act as a binding agent—bringing all our delicious ingredients together harmoniously. They add moisture as well as structure to our cookies. Make sure your egg is at room temperature; this helps it incorporate seamlessly into your batter.
- 2 teaspoons vanilla extract. Ahh, vanilla—the secret weapon in many dessert recipes! Its aromatic profile elevates our cookies from delightful to utterly intoxicating. Always opt for pure vanilla extract if possible; imitation extracts can lack depth and richness.
- 2 1/4 cups all-purpose flour. Flour provides structure to our cookies while absorbing moisture from other ingredients—allowing us to achieve that perfect chewiness we crave! Be sure to spoon and level your flour rather than scooping straight from the bag; otherwise, you might end up with too much flour which could lead to dry cookies!
- 1/2 teaspoon baking soda. This leavening agent ensures our cookies rise beautifully without becoming too dense or cakey. Just remember—a little goes a long way! Mixing it into your dry ingredients evenly will help distribute its power throughout the batch.
- 1 teaspoon cream of tartar. Cream of tartar stabilizes our cookie dough while enhancing its chewiness—especially since we’re not using baking powder here! It also adds a subtle tanginess which balances out the sweetness perfectly.
- 1 cup sprinkles (and more for decoration!). Sprinkles are what make these cookies festive and fun! They add color and crunch but also bring back nostalgic memories from childhood birthdays and celebrations around every corner—who doesn’t love sprinkles? Opt for nonpareils or jimmies—they hold their shape beautifully during baking!
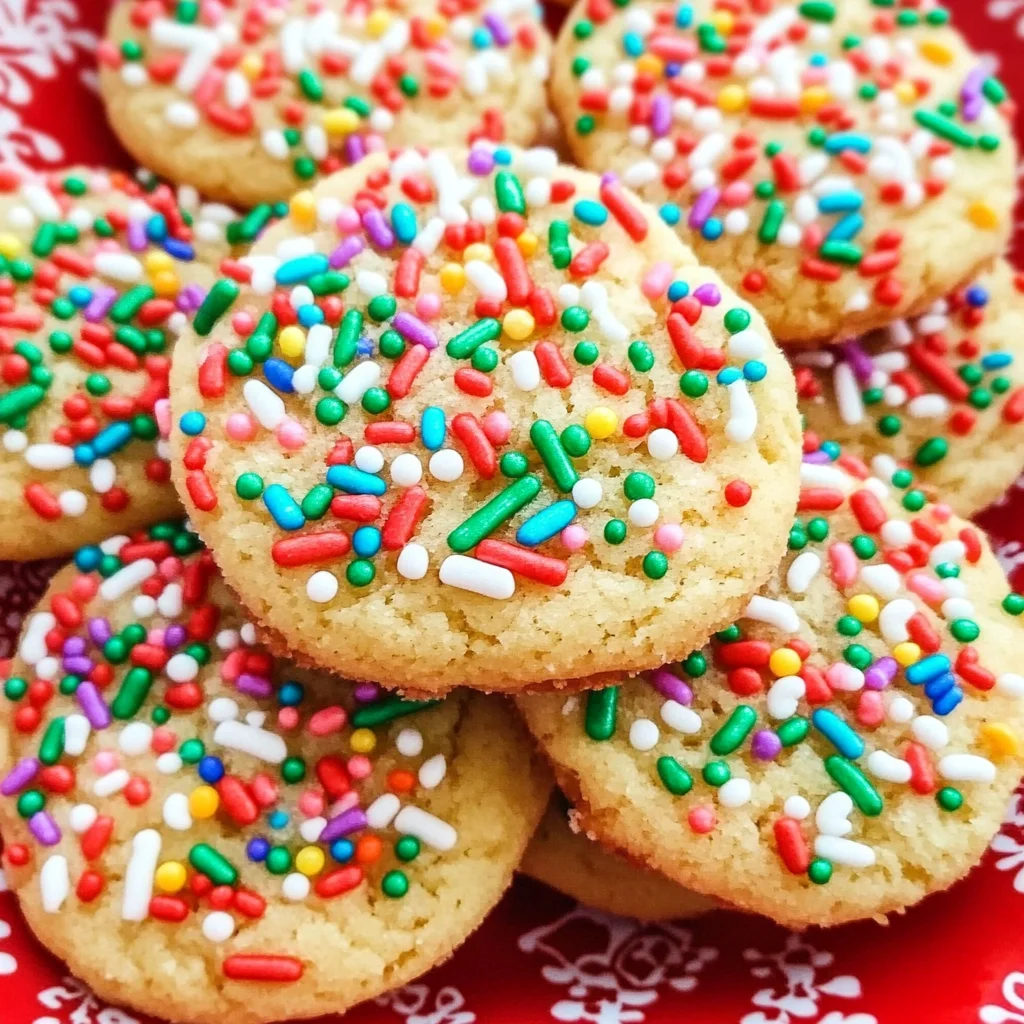
Equipment You’ll Need:
Having the right tools makes all the difference in creating something wonderful—and trust me when I say these essentials will ensure your Sprinkle Sugar Cookies turn out perfectly!
- Electric mixer (handheld or stand). An electric mixer is vital for creaming butter and sugars together effectively—this process creates air pockets essential for fluffy cookies! If you don’t have one handy, don’t worry; mixing by hand will work too but may require some elbow grease!
- Mixing bowls (large & medium). A large bowl is necessary for combining wet ingredients while a medium bowl works well for whisking together dry components separately—a key step that helps prevent clumping!
- Measuring cups & spoons. Accurate measurements lead directly to consistent results! Invest in good quality measuring cups designed specifically for dry versus liquid ingredients so there’s no guesswork involved during prep time.
- Rubber spatula or wooden spoon. These tools help scrape down sides while mixing—ensuring every bit gets incorporated into your dough evenly without leaving any behind!
- Parchment paper or silicone baking mats. These liners prevent sticking issues during baking while ensuring easy cleanup post-baking—a win-win situation if you ask me!
Now that we’ve gathered everything we need let’s dive into preparing these delightful Sprinkle Sugar Cookies!
Step 1: Creaming Together Butter and Sugars
Start by placing softened butter along with granulated and confectioners’ sugars into your mixing bowl—this process is known as creaming! Using an electric mixer fitted with paddle attachments (or beaters), mix at medium speed until this mixture turns fluffy and pale yellow—that’s when you’re hitting gold! This step is absolutely paramount because it incorporates air into your dough which ultimately contributes to lighter textured cookies once baked—you want them soft yet chewy on every bite! Take your time here—about 2–3 minutes should do—as rushing could result in denser cookies than intended.
Step 2: Incorporating Egg & Vanilla Extract
Once you’ve achieved that luscious creamed mixture, it’s time to add in your egg along with those fragrant splashes of vanilla extract! Mix again at low speed until everything combines smoothly into one cohesive batter—it should feel like liquid gold flowing through your fingers! Why incorporate these liquids after creaming? Well, adding them gradually allows each component plenty of room to meld together harmoniously without overworking gluten—the protein responsible for chewiness—instead yielding tender results instead!
Step 3: Whisking Dry Ingredients
In a separate medium-sized bowl (don’t forget about those trusty mixing bowls!), combine flour with baking soda and cream of tartar using either a whisk or fork until everything appears evenly mixed throughout—this should only take moments but trust me—it’s crucial! By doing so now rather than later prevents clumps from forming within your cookie dough later on which could lead unevenly baked treats later down line…yikes!
Step 4: Combining Wet & Dry Ingredients
Now comes my favorite part: slowly adding those whisked dry ingredients into our glorious wet mixture whilst stirring gently with rubber spatula until just combined—you want everything blended perfectly but not overmixed here folks; less is more when it comes down achieving perfection! Keep an eye out during this phase—the dough will start coming together beautifully yet remain slightly sticky—that’s exactly what we want before moving onto chilling time…
I can’t wait for you to experience how wonderful these Sprinkle Sugar Cookies are going to be once they’re fresh outta’ oven—I promise you’ll find yourself reaching back again…and again…so let’s keep going because we’re almost there!
Step 5: Chill, Baby, Chill!
Now that your dough is beautifully mixed and ready to go, it’s time for a little patience—yes, I know, we’re all fans of instant gratification in the kitchen, but bear with me. Cover that wonderful, creamy dough in plastic wrap and pop it into the refrigerator for at least an hour. Trust me on this one; letting the dough chill is absolutely paramount to your cookie success! Why? Chilling helps to solidify the fats in the dough, which ultimately leads to cookies that hold their shape beautifully while baking. It prevents them from spreading too much in the oven, ensuring that your sprinkle sugar cookies maintain those lovely round edges we all adore.
If you can manage it, let your dough rest overnight; it not only makes for a firmer texture but also enhances the flavors as they meld together during this downtime. Imagine how all those sweet notes become even more harmonious! When you pull that chilled dough out of the fridge, it should feel slightly firmer yet still pliable—this is the perfect consistency to work with. If you’ve been good and patient, you’ll be rewarded with a cookie that has a tender crumb and delightful flavor.
Step 6: Prepping Your Baking Environment
While your dough is chilling like a superstar, let’s prepare our baking environment. Preheat your oven to 350°F (175°C). This step is crucial because having a hot oven when you bake ensures that your cookies cook evenly and achieve that golden-brown exterior while staying soft and chewy inside. The moment those cookies hit the hot air in the oven, they will start to rise and set almost immediately, locking in all those delicious flavors and textures we’ve worked so hard on.
Next up, grab two cookie sheets and line them with parchment paper or baking mats. This non-stick layer is essential; it prevents your delicious creations from sticking and allows for easy cleanup afterward—who doesn’t love that? Make sure each sheet has enough room for about 18 cookies (you want to give them space to breathe); if they touch during baking, they’ll lose their delightful individuality. While you’re at it, gather some sprinkles on a small plate or shallow bowl—you’ll want these at arm’s reach when it’s time to roll those cookie balls!
Step 7: Roll With It!
Now comes the fun part—let’s roll some cookies! Take about two tablespoons of chilled dough (don’t be afraid to use a cookie scoop if you have one; it makes life easier!) and roll it into a nice ball between your palms. Visualize this step as crafting little edible treasures! Once you’ve formed these delightful spheres, gently roll each one in your vibrant sprinkles until they are completely coated. The sprinkles don’t just add color; they bring an element of texture and flavor that complements the sweetness of the cookie beautifully.
As you place each sprinkle-covered ball onto your prepared baking sheets, be sure to leave about one inch between each cookie. This space allows them room to expand without merging together—nobody wants a cookie blob! Watch how those pretty colors come alive against the pale dough; it’s a joyful sight that promises fun times ahead. And oh my goodness—just wait until they start baking!
Step 8: Bake Until Golden Bliss
It’s time for our sprinkle sugar cookies to take their turn in the spotlight! Slide those trays into your preheated oven and set a timer for 8-10 minutes. Keep an eye on them as they bake—the magical transformation begins as they puff up ever so slightly before settling down again into golden perfection. You’ll know they’re ready when you see just a hint of golden brown around the edges but still soft in the middle; this delicate balance between chewy and crispy is what makes these cookies utterly intoxicating.
Don’t rush this step! If you’ve baked them long enough that they look like they could win awards for their golden hue but are still soft when touched lightly in the center—that’s exactly what you’re aiming for! Remember: ovens can vary greatly in temperature due to age or calibration issues. So if yours tends to run hot or cool, keep an eye on those lovely morsels during their last minute of baking; adjusting accordingly will help ensure every batch turns out perfectly divine.
Next Major Phase – Cooling Your Cookie Treasures
Once out of the oven—and oh my goodness, can you smell that heavenly aroma wafting through your kitchen?—let’s allow our sprinkle sugar cookies some time to cool down before we indulge ourselves completely. Gently let them rest on their baking sheets for about 2 minutes; this brief pause allows them to firm up just enough so that when you transfer them onto a wire rack or plate, they won’t crumble apart like dreams unfulfilled.
After those two minutes have passed (though I promise you it’ll feel like eternity!), carefully move each cookie onto a wire cooling rack using a spatula. This part is important because allowing air circulation around each cookie ensures even cooling throughout—no soggy bottoms here! As they cool completely, take a moment (or several) to appreciate these beautiful creations you’ve made with love and care. They’re not just cookies; they’re little pieces of joy waiting to be shared with family and friends during festive gatherings or quiet moments at home.
As we finish our journey creating sprinkle sugar cookies together, remember: sharing food creates connections and memories that last forever. These delightful treats are perfect for holiday celebrations or simply as an everyday treat when you’re craving something sweet! So go ahead—pack them up as gifts or indulge yourself… after all this hard work—you deserve every single bite!
Storage and Enjoyment Tips for Your Sprinkle Sugar Cookies
Now that your sprinkle sugar cookies have baked to golden perfection and filled your kitchen with the most delightful aroma, it’s time to think about how to store these sweet treasures for future enjoyment. Trust me, you’ll want to savor these bright, cheerful cookies long after they come out of the oven! The beauty of this recipe is not just in the making; it’s also in the enjoying, time and again. So let’s talk about how you can preserve their scrumptiousness while keeping that sprinkle-covered joy intact!
Storing Leftover Sprinkle Sugar Cookies
To ensure your sprinkle sugar cookies remain as delightful as the day they were baked, placing them in an airtight container is absolutely paramount. Choose a container that seals well—this keeps out moisture and air, which can lead to undesired texture changes. Ideally, store them in a cool, dry place like your pantry or a cupboard. These cookies will keep beautifully for up to a week! If you really want to maintain that soft chewiness everyone loves, consider slipping a slice of fresh bread into the container with them; it works wonders by imparting just the right amount of moisture! After storage, you’ll find that they taste just as delicious as before—perhaps even better as the sprinkles have time to meld into the cookie dough, creating an utterly intoxicating flavor experience. When you’re ready to indulge again, simply let them sit at room temperature for a few minutes or give them a quick pop in the microwave for about 5-10 seconds for that warm cookie feel.
Freezing Your Sprinkle Sugar Cookies for Later
If you’ve got a big batch or want to save some for another occasion (because who doesn’t love freshly baked cookies on demand?), freezing is an excellent option! To freeze your delightful sprinkle sugar cookies properly, allow them to cool completely first. Then, lay them flat on a baking sheet lined with parchment paper and freeze until solid—this prevents them from sticking together. Once frozen, transfer them into a freezer-safe zip-top bag or container; make sure to squeeze out as much air as possible before sealing it tight! They can stay happily frozen for up to three months without losing their delicious spirit. When you’re craving something sweet, simply take out what you need and let them thaw at room temperature or pop them directly into the oven at 350°F for about 5-7 minutes. Imagine pulling open your freezer only to discover little pockets of joy waiting for you—it’s such a wonderful feeling!
Sprinkle Sugar Cookies

Discover easy Sprinkle Sugar Cookies that are colorful and delicious! Bake some today and bring joy to your loved ones!
- Prep Time: 30 minutes
- Cook Time: 10 minutes
- Total Time: 40 minutes
- Yield: Approximately 24 cookies 1x
- Category: Dessert
- Method: Baking
- Cuisine: American
Ingredients
- 1/2 cup room temperature butter
- 1/2 cup oil (canola or vegetable)
- 1/2 cup granulated sugar
- 1/2 cup confectioners' sugar
- 1 large egg
- 2 teaspoons vanilla extract
- 2 1/4 cups all-purpose flour
- 1/2 teaspoon baking soda
- 1 teaspoon cream of tartar
- 1 cup sprinkles (plus more for decoration)
Instructions
- Preheat oven to 350°F (175°C) and line baking sheets with parchment paper.
- In a mixing bowl, cream together the butter, granulated sugar, and confectioners' sugar until fluffy.
- Add the egg and vanilla extract; mix until combined.
- In another bowl, whisk together flour, baking soda, and cream of tartar.
- Gradually add dry ingredients to the wet mixture, stirring until just combined.
- Chill dough in the refrigerator for at least one hour.
- Roll chilled dough into balls and coat in sprinkles before placing on prepared baking sheets with space between each cookie.
- Bake for 8-10 minutes until golden around the edges but soft in the center. Allow to cool for a few minutes on the baking sheet before transferring to a wire rack.
Nutrition
- Serving Size: 1 serving
- Calories: 150
- Sugar: 9g
- Sodium: 45mg
- Fat: 7g
- Saturated Fat: 2g
- Unsaturated Fat: 5g
- Trans Fat: 0g
- Carbohydrates: 20g
- Fiber: 0g
- Protein: 1g
- Cholesterol: 15mg