Peaches and Cream Crumble Bars
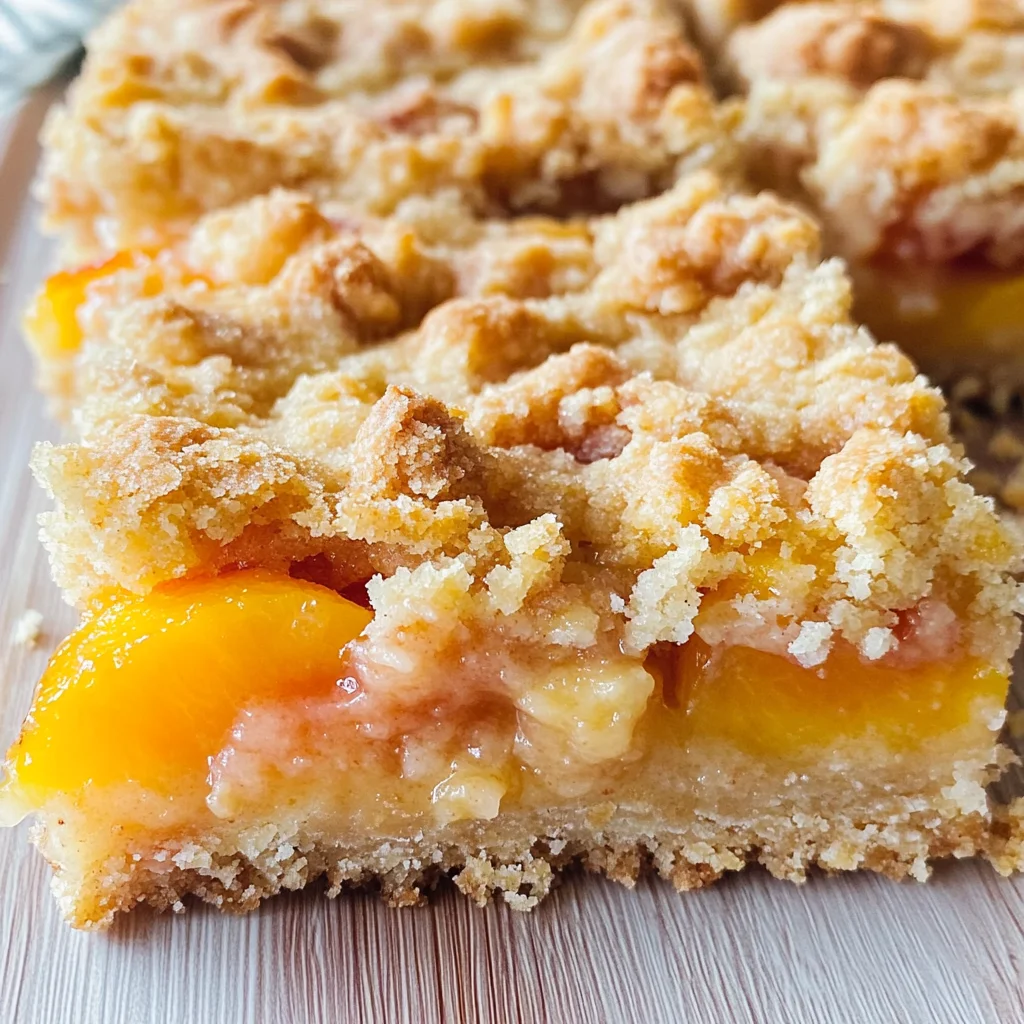
There’s something utterly enchanting about biting into a warm, homemade dessert that encapsulates the essence of summer. The delightful combination of sweet peaches, creamy goodness, and a crumbly topping in these Peaches and Cream Crumble Bars is more than just a treat; it’s a celebration of the season. As I mix the buttery crumbs and inhale the intoxicating aroma of baked peaches wafting through my kitchen, I’m reminded that food is so much more than sustenance—it’s an experience we share with loved ones, a bridge between generations, and a canvas for our creativity. Picture this: golden peaches mingling with rich creaminess while nestled beneath a crunchy streusel that practically sings with each bite. I promise you, these bars will become your go-to dessert—perfect for picnics, gatherings, or simply indulging yourself after a long day.
And let me tell you, there’s something so satisfying about creating a dish that feels both comforting and sophisticated. This recipe allows you to take humble ingredients and transform them into a dish worthy of any occasion. The beauty of these Peaches and Cream Crumble Bars lies in their versatility: they can be served warm with a scoop of vanilla ice cream or enjoyed chilled right out of the fridge. They evoke memories of sun-drenched afternoons spent picking peaches at local farms or gathering around the dining table with family as laughter fills the air. Each bar tells its own story—a symphony of flavors that invites you to savor every moment.
Ingredients:
As we embark on this delicious culinary journey together, let’s gather our ingredients thoughtfully, each one playing an essential role in crafting these heavenly bars. When we choose quality ingredients, we elevate our cooking experience and ensure that every bite bursts with flavor.
- 2 1/2 cups (350 g/12.5 oz) all-purpose flour: This flour is the backbone of our crumble bars, providing structure without being too dense. When selecting flour, look for all-purpose varieties that are finely milled to ensure a smooth texture in your crust and topping. It’s amazing how this simple ingredient can absorb moisture and create that perfect balance between crunchy and tender in your bars.
- 2/3 cup (140 g/5 oz) granulated sugar: Granulated sugar adds sweetness but also contributes to the texture by helping to create a tender crumb in the crust. Trust me when I say it’s crucial not to skimp here; it balances the natural tartness of our peaches beautifully. If you want to experiment further, consider using coconut sugar for a deeper flavor profile.
- 1/2 teaspoon salt: Salt is often overlooked but is absolutely paramount in baking! It enhances all other flavors present in your dish—think of it as the secret handshake among ingredients. A pinch will elevate both the sweetness of your filling and the richness of your butter.
- 1 1/4 cups (280 g/10 oz) cold unsalted butter, cut into small cubes: Cold butter is key to achieving that flaky texture we’re aiming for in our crumbly crust and topping. When it’s cold, it creates pockets of steam during baking which leads to those beautiful layers everyone loves! Always choose unsalted butter so you can control the salt level throughout your recipe.
- 1/4 cup (50 g/1.7 oz) brown sugar, preferably dark: Dark brown sugar brings not just sweetness but an additional layer of rich molasses flavor that complements the peaches superbly. I love how it adds depth to our crumbles while also helping them retain moisture during baking so they don’t dry out.
- 1 cup (200g/7 oz) granulated sugar: In this recipe, we use granulated sugar again—this time for sweetening our peach filling. It dissolves easily into juices from the fruit as they cook down and caramelize slightly during baking. More sweetness means more joy!
- 1/4 cup (35 g/1.3 oz) all-purpose flour: This little bit serves as a thickening agent for our peach filling; it absorbs excess moisture released by those juicy fruits as they bake down into luscious goodness while ensuring everything holds together beautifully.
- 1/2 teaspoon ground cinnamon: Ahh, cinnamon—the spice that transports us back to cozy kitchens filled with warmth! Its aroma blends harmoniously with our sweet peaches and gives them an irresistible warmth that makes your heart sing with every bite.
- 1/4 teaspoon salt: Like before, this salt will enhance flavors across our sweet mixture—so don’t skip this step! It will bring out every nuance in both your crust and peach filling.
- 5 cups pitted (, peeled, and chopped peaches (about 7-8 peaches/2.5 pounds): Fresh peaches are truly the star ingredient here! The juicy bites release their nectar as they bake—a magical transformation occurs when their natural sugars caramelize under heat. Be sure to choose ripe yet slightly firm peaches for optimal flavor; they should yield just slightly when pressed gently.
- 6 tablespoons (90 ml) heavy cream: Heavy cream adds richness to our filling which melds perfectly with those gorgeous baked peaches—creating an utterly intoxicating creamy texture worth dreaming about! If you’re looking for alternatives due to dietary preferences or restrictions, coconut cream could be an exciting option here.
- 1/2 teaspoon vanilla extract (, optional): While optional, I highly recommend adding vanilla extract! It infuses everything with warmth and complexity—almost like wrapping your taste buds in a cozy blanket on a chilly evening.
Equipment You’ll Need:
Before we dive into creating these delectable bars together, let’s make sure we have all our trusty tools at hand! Having the right equipment not only simplifies our process but also elevates our baking game tremendously—it’s like having good friends by your side cheering you on!
- 9×13-inch pan: This pan size is essential for baking these crumble bars evenly; its shape allows for uniform cooking while also providing enough space for luscious layers without overflowing. If you don’t have one on hand, feel free to use two smaller pans instead—just keep an eye on baking times!
- Food processor or pastry cutter: A food processor makes mixing your crust ingredients effortlessly quick—saving time means more moments spent enjoying delicious food later! However, if you prefer old-school methods or don’t have one available, using a pastry cutter works wonders too; just take your time crumbling everything together until you achieve that sandy texture.
- Mixing bowls: You’ll need various sizes throughout this process—from mixing dry ingredients to combining peach filling—having multiple bowls handy ensures smooth sailing without interruptions!
- Wire rack: Allowing your baked bars to cool completely on a wire rack helps prevent sogginess underneath as steam escapes from below; trust me—you’ll want every mouthful to be crisp yet soft at once!
Now we’re ready! With all these wonderful ingredients gathered together alongside essential tools waiting eagerly on your counter—we’re set up perfectly for success as we prepare something truly extraordinary!
Step 1: Preparing Your Base
Preheat your oven to 350°F (180°C), bringing warmth into your kitchen just like sunshine streaming through open windows on a summer day! Grease your trusty 9×13-inch pan or line it with parchment paper—this step is non-negotiable because it ensures easy removal after baking while preserving those beautiful edges intact! Now comes one of my favorite parts—the crust preparation! In either your food processor or mixing bowl using a pastry cutter methodically combine flour, granulated sugar, and salt until blended seamlessly together—this only takes mere seconds if using an electric device but relish each moment if doing it by hand; it’s almost meditative!
Once combined thoroughly comes perhaps one of my most treasured secrets—the addition of cold unsalted butter cut into small cubes. Pulsing until everything resembles coarse crumbs takes patience but trust me—it’s worth every second spent waiting for those crumbly morsels begging for attention! Set aside about 1½ cups from this mixture onto another plate; we’ll use it later as our streusel topping while firmly pressing remaining crumbs into prepared pan below—they should hold like old friends embracing tightly before heading off into blissful baking together!
Step 2: Baking Until Just Golden
With everything pressed firmly down creates such satisfaction knowing how delicious things will soon become—we’ll place this lovely base into preheated oven set aside its golden fate awaiting us patiently somewhere between fifteen minutes where edges turn lightly browned but not overdone—we want them slightly undercooked still since we’ll pour sweet peachy goodness right over top once finished baking away nicely too! While waiting excitedly check off items like preparing streusel topping next because delightful surprises await us soon enough—a perfect match made from leftover crumbs mixed magnificently alongside dark brown sugar combining fantastically until large clumps appear magically forming almost like doughy clouds overhead ready soon take flight atop shimmering peach filling below!
Step 3: Creating Peachy Magic
While crust bakes away blissfully let’s turn attention now towards luscious peach filling coming alive by mixing granulated sugar seamlessly alongside flour along with cinnamon plus pinch salt together within large bowl first ensuring each ingredient harmonizes perfectly before introducing freshly chopped juicy peaches themselves bursting forth begging lovingly join party happening inside bowl next door! Toss gently until coated well throughout mixture becoming savory symphony slowly building anticipation already stirring hearts everywhere who can resist such offerings?
Next up comes adding heavy cream blended optionally infused via splash vanilla extract if chosen enhancing overall experience even further elevating flavors soaring high above ordinary realms reaching greatness previously unknown simply calling out urging everyone partake joyfully engage souls hungry hearts alike yearning discover new delights awaiting within humble arrangement laid carefully before us now ready transform lives forevermore!
Step 4: Bringing It All Together
When timer rings indicating crust has reached glorious state remove immediately allowing cooling slightly before pouring fragrant peach mixture generously over warm base spreading evenly across surface below whilst sprinkling reserved streusel topping evenly distributed across entire landscape inviting magic happen next inside oven itself where aromas mingle intoxicating senses drawing everyone closer longing catch glimpse savor promises held tight within warm embrace forthcoming moments shared around tables laden memories created unfolding adventures ahead—all thanks beautiful Peaches & Cream Crumble Bars made possible through simple acts love infused every step taken along way leading us here today making history forever sealed within hearts forevermore…
Stay tuned because there’s much more coming up next as we finish off these magnificent treats together soon enough bringing sweet joy lives everywhere!
Step 5: Crafting the Irresistible Peach Filling
Now we’re diving into the heart of these Peaches and Cream Crumble Bars—the peach filling. This step is where we take those luscious peaches, with their sun-kissed sweetness and juicy goodness, and transform them into a vibrant filling that will sing in harmony with our buttery crust. Start by grabbing a large mixing bowl; you want enough space to really work the ingredients together. In this bowl, combine 1 cup (200g/7 oz) of granulated sugar, 1/4 cup (35 g/1.3 oz) of all-purpose flour, 1/2 teaspoon of ground cinnamon, and 1/4 teaspoon of salt. Mixing these dry ingredients first is crucial because it ensures even distribution throughout the peaches, preventing any clumps that could disrupt the sublime texture we’re aiming for.
Once you’ve got that lovely mixture combined, it’s time to add your star players: 5 cups of pitted, peeled, and chopped peaches—about 7-8 peaches or so! It’s important here to gently toss the peaches with the dry mix until they’re well coated; this not only allows the flavors to meld beautifully but also helps thicken the filling as it bakes. Now, in a separate small bowl, whisk together 6 tablespoons (90 ml) of heavy cream and 1/2 teaspoon of vanilla extract (if using). This creamy addition is non-negotiable; it adds an utterly intoxicating richness to the filling that complements the freshness of the peaches. Gently stir this cream mixture into your peach concoction until everything is beautifully combined. Pour this luscious peach mixture over your warm crust, allowing those juices to soak in just a bit; this step is key because pouring it over a warm crust helps create that delightful melding of flavors right from the start.
Step 6: The Magic of Topping with Streusel
With our heavenly peach filling layered over that warm crust, it’s time to bring on the streusel topping—a truly special touch that elevates these bars into something extraordinary! Take that reserved crumb mixture (the 1½ cups you set aside earlier) and sprinkle in 1/4 cup (50 g) of brown sugar. Use your fingers to gently combine them until large clumps begin to form; don’t be afraid to get your hands in there! This process is essential because it creates those beautiful, crunchy bits that will contrast beautifully against the soft filling below. The brown sugar adds depth and complexity with its caramel undertones—trust me when I say it’s worth every bit of effort.
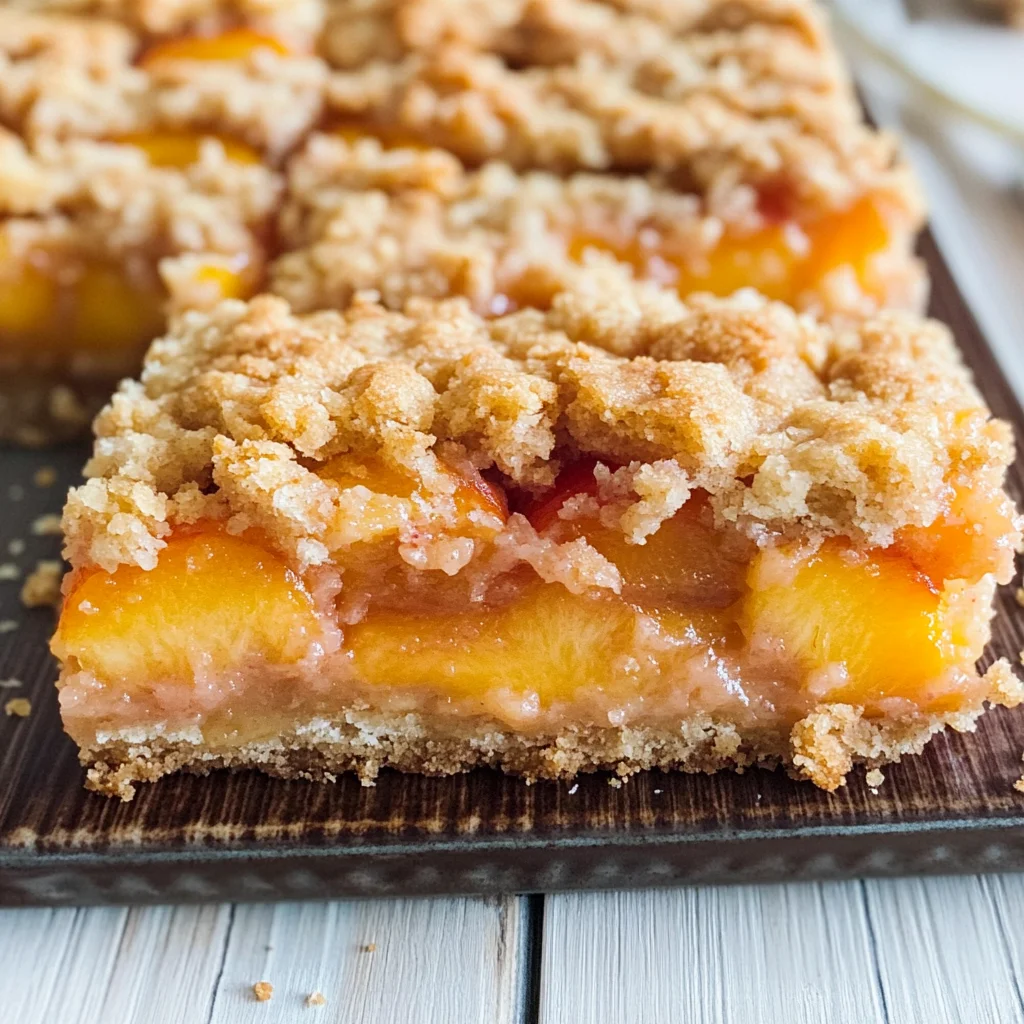
Now it’s time for the fun part: sprinkling this streusel topping evenly across your peach filling! Take a moment to appreciate how gorgeous it looks—the golden-brown crumbles resting atop those vibrant orange peaches create a visual feast all on their own. This layer not only provides texture but also helps capture all those juicy flavors during baking—I promise you won’t regret taking care at this stage! Be sure to cover as much surface area as possible; no one wants an uncovered peach patch peeking through! Once that’s done, gently press down on the streusel just a tad—it will help it hold together beautifully while baking.
Step 7: Baking Your Peaches and Cream Crumble Bars
Now comes one of my favorite parts—the baking! Preheat your oven if you haven’t already. You’re looking for 350°F (180°C)—a perfect temperature for coaxing out all those wonderful flavors without burning anything. Slide your pan into the oven and set a timer for about 45 minutes, but don’t wander off just yet! This part requires a little watchful eye because we want those juices bubbling up around the edges while our streusel topping transforms into a golden-brown crown atop our creation. As you bake, keep an ear out for any lovely bubbling sounds from within—this means your fruit is releasing its natural juices and melding beautifully with all that sugar and spice.
You’ll know they’re ready when you see that magnificent golden color on top and spot some bubbling juice around the edges—this is where magic happens! If you find yourself tempted to open the oven door too early—resist! Patience is key here; every minute spent baking contributes to building layers of flavor that are profoundly satisfying once you take that first bite.
Step 8: Letting Them Rest & Chill
Ahh, here lies perhaps one of the most crucial steps in making truly spectacular Peaches and Cream Crumble Bars—cooling! Once they have baked to perfection, remove them from the oven and let them cool completely on a wire rack. I know waiting can feel torturous (especially with those tantalizing smells wafting through your kitchen), but trust me on this: allowing them to rest not only lets them firm up nicely for cutting but also gives time for those glorious flavors to settle together harmoniously.
After cooling at room temperature for about an hour or so, transfer them into your refrigerator for at least 2 hours before slicing into squares. Yes, I hear you saying “But why chill?” Well, chilling solidifies everything inside—it’s like letting all those beautiful layers become best friends while they cozy up together in their cool space! When you finally cut into these bars after their chill session, you’ll be rewarded with perfectly clean lines instead of messy blobs. The filling will have set beautifully thanks to this patience!
Next Major Phase – Final Touches
Step 9: Slicing & Serving Your Masterpiece
At long last, it’s time to slice into these glorious Peaches and Cream Crumble Bars! After patiently waiting through cooling and chilling periods (I know it felt like an eternity), grab a sharp knife or a bench scraper if you have one handy—it offers such clean cuts—and begin slicing through those layers of sweet peach goodness topped with crispy streusel glory. Aim for generous squares—it’s hard not to share these beauties once they’re revealed in all their splendor!
As you serve them up, consider pairing each square with a dollop of whipped cream or perhaps even some dairy-free ice cream if you want an extra indulgent treat—imagine how delightful that would be against all those fruity notes! These bars are perfect for gatherings or simply enjoying alongside your favorite book on a sunny afternoon—they truly embody comfort food at its finest.
And there you have it—the joyfully delightful journey of making Peaches and Cream Crumble Bars comes full circle! Each bite carries whispers from warm ovens and sunlit kitchens filled with laughter—a taste so profound it’ll leave lasting memories long after they disappear from your plate. Enjoy every crumb—you’ve earned it!
Storage and Enjoyment Tips for Your Peaches and Cream Crumble Bars
Now that you’ve created these delightful Peaches and Cream Crumble Bars, let’s talk about how to savor them even longer! Whether you plan to indulge immediately or save some for later, knowing how to store and enjoy your creation is essential for maximizing flavor and freshness. I can already imagine the smiles on everyone’s faces as they take that first bite, so let’s ensure you can keep that joy alive for as long as possible!
Storing Leftover Peaches and Cream Crumble Bars
To ensure your Peaches and Cream Crumble Bars remain as divine as the moment they came out of the oven, I recommend storing them in an airtight container. This is crucial because it protects the bars from absorbing any unwanted odors from your fridge while maintaining their fabulous texture. They’ll stay fresh for about three days when kept in the refrigerator, but trust me—these bars are so delicious, they may not last that long! For a little extra tip, consider placing a slice of bread in the container; this keeps things moist without making the crumble soggy. And if you’re lucky enough to have leftovers after a few days, you’ll find that the flavors meld beautifully together, creating an even more profound taste experience. If you’re feeling nostalgic for that warm out-of-the-oven goodness, simply pop a bar in the microwave for 10-15 seconds before serving—it’s like wrapping yourself in a cozy blanket of flavors again!
Freezing Peaches and Cream Crumble Bars for Later
If you’re like me and love having sweet treats on hand for unexpected guests or just a late-night craving, freezing these Peaches and Cream Crumble Bars is an absolute game-changer! To freeze them properly, make sure they’re completely cooled first—this step cannot be rushed. Once cooled, cut them into squares and layer them between sheets of parchment paper in an airtight container or freeze-friendly bag. They’ll keep well in the freezer for up to three months! Isn’t it wonderful to know you can whip out a taste of summer anytime? When you’re ready to enjoy some frozen bars, simply take them out and let them thaw at room temperature or heat them gently in the oven until warmed through. The convenience of having these sweet treats available makes life just a little sweeter!
Peaches and Cream Crumble Bars

Indulge in the delightful experience of Peaches and Cream Crumble Bars, where the sweetness of fresh peaches meets a rich, creamy filling and a buttery, crumbly topping. These bars are more than just a dessert—they evoke memories of sunlit days and joyous gatherings. Perfect for any occasion, whether served warm with a scoop of ice cream or chilled straight from the fridge, they offer a comforting treat that everyone will love. Prepare to savor each bite as you transform simple ingredients into an extraordinary summer dessert!
- Prep Time: 20 minutes
- Cook Time: 45 minutes
- Total Time: 1 hour 5 minutes
- Yield: Approximately 12 servings 1x
- Category: Dessert
- Method: Baking
- Cuisine: American
Ingredients
- 2 1/2 cups all-purpose flour
- 2/3 cup granulated sugar
- 1/2 teaspoon salt
- 1 1/4 cups cold unsalted butter, cubed
- 1/4 cup brown sugar (preferably dark)
- 5 cups pitted, peeled, and chopped peaches (about 7–8 peaches)
- 6 tablespoons heavy cream
- 1/2 teaspoon vanilla extract (optional)
- 1/4 cup all-purpose flour (for thickening peach filling)
- 1/2 teaspoon ground cinnamon
Instructions
- Preheat your oven to 350°F (180°C). Grease a 9×13-inch pan or line it with parchment paper.
- In a mixing bowl or food processor, combine 2 1/2 cups flour, 2/3 cup granulated sugar, and 1/2 teaspoon salt. Add the cold butter and mix until crumbly.
- Reserve about 1½ cups of this mixture for topping. Press the remaining mixture into the bottom of the prepared pan to form the crust.
- Bake for about 15 minutes until lightly golden.
- In another bowl, mix together 1 cup granulated sugar, 1/4 cup flour, cinnamon, and salt. Add the chopped peaches and toss to coat.
- In a small bowl, whisk together heavy cream and vanilla extract (if using), then stir this into the peach mixture.
- Pour the peach filling over the baked crust and sprinkle reserved crumb topping on top.
- Bake for an additional 30 minutes or until the topping is golden brown and juices are bubbling.
- Allow to cool completely on a wire rack before slicing into squares.
Nutrition
- Serving Size: 1 bar (95g)
- Calories: 320
- Sugar: 22g
- Sodium: 150mg
- Fat: 18g
- Saturated Fat: 11g
- Unsaturated Fat: 5g
- Trans Fat: 0g
- Carbohydrates: 36g
- Fiber: 2g
- Protein: 3g
- Cholesterol: 40mg