Apricot Coconut Crumble Bars
The kitchen is a magical place, isn’t it? It’s where simple ingredients transform into something truly extraordinary, where the act of cooking becomes a heartfelt experience that nourishes not just our bodies but also our souls. Today, I want to share with you my cherished recipe for Apricot Coconut Crumble Bars—a delightful fusion of buttery coconut crumble and luscious apricot compote. Each bite is like a warm hug, wrapping you in comfort with its sweet-tart flavors and satisfying textures. Imagine the aroma wafting through your home as these bars bake to golden perfection; it’s an olfactory symphony that beckons everyone to gather around the kitchen table, ready to indulge in something special.
These bars hold a deep personal significance for me. They remind me of sunny afternoons spent baking with my grandmother, her laughter filling the air as we prepared treats that would be shared with family and friends. There’s something profoundly satisfying about creating food that not only tastes good but also evokes memories and brings people together. The combination of sweet apricots and rich coconut is not just delicious; it’s a celebration of simplicity and heartiness that feels quite at home on any dessert table or picnic spread. Whether you’re hosting a gathering or simply treating yourself after a long day, these Apricot Coconut Crumble Bars are sure to impress.
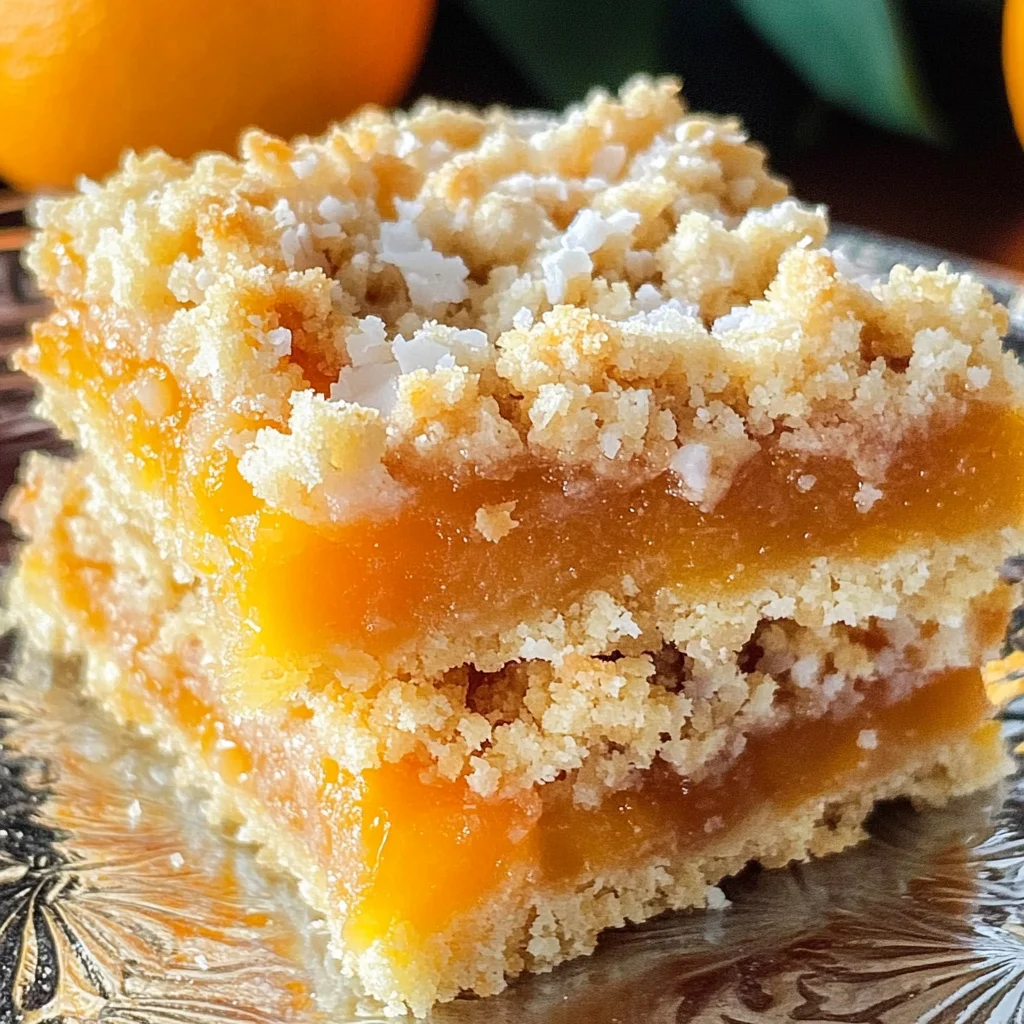
Apricot Coconut Crumble Bars: A Sweet Escape
Let’s embark on this delightful culinary journey together! These bars are incredibly easy to make and offer a perfect balance between crunchy and chewy textures, with each layer adding its own unique flavor profile. You’ll love how the bright sweetness of apricots dances harmoniously with the toasted notes of coconut. So roll up your sleeves, gather your ingredients, and let’s create something wonderful together!
Ingredients:
As we dive into the ingredients for our Apricot Coconut Crumble Bars, I want you to feel the anticipation building! Each ingredient plays a vital role in crafting these sumptuous bars, so let’s explore what makes them enchanting.
- 3 cups chopped dried apricots (finely diced before measuring). Dried apricots are the star of our show! Their natural sweetness brings an alluring depth to our filling while providing that lovely tart contrast we crave in desserts. When chopping them finely before measuring, you ensure even distribution throughout the bars — no one wants a bite without that glorious apricot goodness! Look for moist, plump apricots rather than overly dry ones; they’ll yield a more luscious compote when simmered.
- 1 cup granulated sugar. Sugar is essential for balancing flavors—it enhances the natural sweetness of our apricots while contributing to the beautiful caramelization during baking. I always recommend using fine granulated sugar for this recipe since it dissolves effortlessly into the mixture, ensuring a smooth consistency in both crust and filling.
- 1½ cups boiling water. This step might seem unusual at first glance, but boiling water helps soften our dried apricots quickly, allowing them to transform into a jam-like filling that’s so dreamy! It’s crucial for achieving that melt-in-your-mouth texture we’re aiming for; trust me on this!
- 2 cups all-purpose flour. Flour acts as the backbone of our crumble base; it provides structure while blending seamlessly with butter and sugar to create that tender yet crumbly texture we desire. Opt for unbleached all-purpose flour if possible; it has a more robust flavor profile than its bleached counterpart.
- ¾ cup granulated sugar (again!). Yes, we need more sugar here! This additional amount is specifically blended into our crumble mixture alongside flour and coconut—think of it as creating layers of flavor that enhance every bite while giving us that inviting golden color once baked.
- 1 tsp baking powder. This little powerhouse is non-negotiable! Baking powder helps our crumble rise slightly during baking to achieve that lightness we crave while preventing it from becoming overly dense. Remember: if your baking powder has been sitting around for too long, do a quick freshness test by mixing it with hot water; if it bubbles vigorously, it’s good to go!
- 2 cups medium-cut dried coconut. Coconut brings an irresistible tropical flair to these bars; its chewy texture complements the apricot filling beautifully while adding an extra layer of richness. When selecting your coconut, look for unsweetened varieties if you prefer controlling the sweetness level—this way, you can keep those flavors perfectly balanced.
- A pinch of salt. Salt might seem insignificant amidst all this sweetness but don’t underestimate its power! A dash enhances all other flavors present in your dish—think of it as amplifying those lovely fruity notes from our apricots!
- 1 cup unsalted butter, cut into small pieces. Butter is truly magical when it comes to baking—it imparts richness and moisture while helping bind everything together beautifully into a cohesive mixture. Make sure your butter is cold but pliable; this will help achieve that coveted crumbly texture rather than a greasy one.
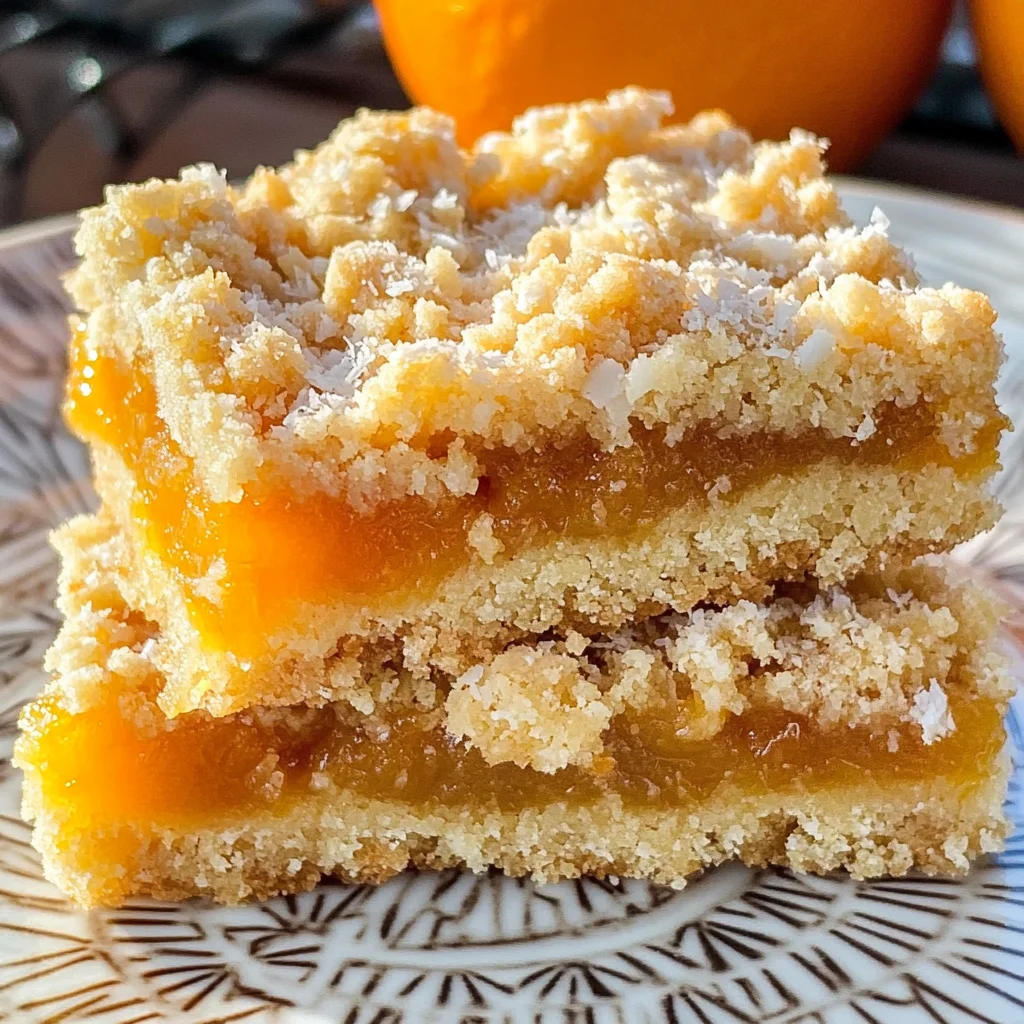
Equipment You’ll Need:
Before we dive into creating these scrumptious bars, let’s talk about some essential tools you’ll want by your side! Having the right equipment can make all the difference in simplifying your process and ensuring consistent results every time.
- 9 x 13-inch baking pan – This size is perfect for baking our crumble bars evenly across their surface area while providing enough depth for delicious layers! If you don’t have one specifically sized like this at home, feel free to use another similarly sized pan—just keep an eye on baking times as they may vary slightly based on dimensions.
- Mixing bowls – Having multiple mixing bowls allows you to prepare various components without any mess or confusion along the way! You’ll want one large bowl for combining dry ingredients and another medium-sized bowl dedicated solely to mixing your wet components—organization makes everything smoother!
- Pastry blender or fork – This handy tool helps break down butter efficiently when cutting into dry ingredients—a crucial step in achieving that crumbly texture we’re aiming for in our crust! If you’re without one at home, don’t worry: using two forks works just fine too!
- Rubber spatula or wooden spoon – Both options are fantastic allies when folding mixtures together smoothly without overworking them—this preserves those tender crumbs we’re after!
Now that we’ve gathered all our ingredients and tools together let’s move on to preparing these divine Apricot Coconut Crumble Bars!
Step 1: Crafting the Perfect Crumble Mixture
Begin by sifting together your flour, sugar (the ¾ cup), baking powder, dried coconut, and salt in a large mixing bowl until well combined—this crucial step ensures even distribution throughout each layer of your final product! As you sift these dry elements together, take note of their distinct aromas dancing through the air; there’s something incredibly satisfying about creating this harmonious blend from scratch.
Next up comes my favorite part: cutting in the cold butter using either your hands or pastry blender until fully incorporated into crumb-like pieces resembling coarse meal—don’t rush this step! It’s important because properly incorporating cold fat gives us those tender layers later on rather than ending up with dense bars instead! Aim for pea-sized pieces nestled within your mixture before moving on—a little bit of patience goes such a long way here.
Step 2: Pressing Down Firmly
Now comes time for assembly: grab half (about two-thirds) of your crumb mixture and press firmly into the bottom of your greased baking pan. Use clean hands or press down with an offset spatula until it’s evenly distributed across every corner—this base layer provides stability as well as acts like cushion against any potential sogginess from our fruit filling above later!
This pressing technique creates structure within each bar once baked; trust me when I say skipping out on forming this foundation could lead us down disappointment lane come cutting time later on—and nobody wants uneven edges ruining those beautiful squares!
Step 3: Spreading That Heavenly Apricot Filling
Now onto one of my favorite parts—the luscious apricot filling itself! Pour that simmered mixture (or high-quality jam if you’ve chosen) directly over pressed crumbs within your pan before gently spreading evenly across its surface using another rubber spatula or wooden spoon until fully covered—just imagine how fragrant those softened apricots smell mingling with sugar right now!
Don’t worry if things aren’t perfect looking at this stage—we’re going rustic here after all—and remember: beauty lies within uniqueness sometimes! Just ensure coverage reaches every edge so each piece holds some sweet goodness once baked through completely.
Step 4: Topping Off With Remaining Crumbs
Finally comes topping off everything else left from previous steps: grab what remains from earlier crumb mixture atop fruit layer generously before pressing down lightly again—that’s right; give those precious crumbs some love too because they’ll bake beautifully golden brown soon enough while locking moisture inside below during cooking process itself!
This final sprinkle creates delightful textural contrast against soft fruit beneath which balances things out perfectly whenever reaching into tray later—no soggy spots allowed here folks (we’re striving perfection after all)! Now slide everything carefully into preheated oven set at 350°F (175°C) where magic happens over next forty-five minutes…
As they bake away developing golden tops filled with intoxicating aromas wafting through surrounding air—you might find yourself daydreaming about future gatherings where sharing becomes inevitable once cooled completely afterward…
I can’t wait for you to experience making these marvelous Apricot Coconut Crumble Bars yourself! Trust me when I say they will become an instant favorite among family members alike—happy baking my friend!
Step 5: The Perfect Layering Technique
Now comes the moment of truth, where we layer our ingredients to create a beautiful symphony of flavors in our Apricot Coconut Crumble Bars. Gently sprinkle the remaining crumb mixture over the luscious apricot filling that you’ve so lovingly prepared. Using your fingers, distribute the crumbs evenly—this isn’t just a haphazard sprinkle; it’s an art form! Press down gently, ensuring that each crumb adheres to the filling beneath it. This step is absolutely paramount because it creates a cohesive texture and prevents the bars from falling apart when you cut them later. You want every bite to be a delightful combination of that buttery coconut crumb and tangy apricot compote.
As you work through this step, remember to take your time—don’t rush! The gentle pressing helps bind everything together without compacting it too much; think of it as giving your bars a warm hug before they head into the oven! You can almost feel the anticipation in the air as you prepare for the next great transformation. The crumbs will bake up beautifully, forming a golden crust that is both crunchy and tender at once. Trust me on this: taking just a moment extra to ensure everything is well-distributed will reward you with perfectly layered treats.
Step 6: The Baking Alchemy
With your baking pan ready, it’s time to let the magic happen in the oven! Preheat your oven to 350 degrees Fahrenheit; this temperature is crucial because it ensures an even bake across all layers of our Apricot Coconut Crumble Bars. Once preheated, slide your pan in and set a timer for 40 to 45 minutes. As they bake, keep an eye on them—this is where patience truly pays off! You’ll want to watch for that lovely light golden-brown color developing across the top layer of crumbs.
What makes this part so special is not just how wonderful they smell as they bake—oh my goodness, the aroma wafting through your kitchen will be utterly intoxicating—but also how each ingredient transforms under heat. The butter melts into the dry ingredients, creating that rich, buttery flavor we crave while allowing the coconut to toast slightly, giving it a delightful crunch. When you see those edges starting to pull away from the pan and hear a gentle bubbling sound from the apricot filling, you’ll know you’re on track for success! If at any point they start browning too quickly, don’t hesitate to cover them loosely with aluminum foil—this will allow them to continue baking without burning.
Step 7: The Cooling Phase
Once those glorious bars have achieved their golden hue, remove them from the oven and place them on a wire rack to cool completely in their pan. I cannot stress enough how vital this step is—patience here is non-negotiable! Allowing them to cool completely means that all those flavors meld beautifully together and ensures that when you cut into them later, they hold their shape instead of crumbling into a messy pile. It’s hard not to dive right in when they look so inviting, but trust me on this: if you can wait about an hour or so, your bars will reward you tenfold.
As they cool, take a moment to revel in this sensory experience—the sight of those golden crumble bars nestled snugly in their baking dish, combined with that sweet apricot scent lingering in your kitchen—it’s pure bliss! Plus, if you’re anything like me and love sharing these treats with friends or family (or savoring every last bite yourself), cutting into warm bars can lead to some serious structural chaos. Letting them chill allows for cleaner cuts later—not only do they look better when served neatly sliced into squares or rectangles but they also provide that satisfying contrast between chewy filling and crumbly topping.
Step 8: The Grand Finale – Cutting and Serving
Now that you’ve shown such patience during cooling time (you deserve an award!), it’s finally time for one of my favorite parts: cutting into these Apricot Coconut Crumble Bars! Using a sharp knife (a serrated edge works wonders here), slice through these golden beauties into squares or rectangles—whatever suits your fancy! As you cut through, notice how there’s a slight resistance from that beautifully baked top layer followed by the soft apricot filling; it feels like slicing through clouds of deliciousness!
When serving these delightful treats, consider garnishing with a light dusting of powdered sugar or perhaps even some fresh mint leaves for color contrast and fresh aroma—these small touches can elevate your presentation from lovely home-baked goods to something truly extraordinary! And let’s not forget about pairing options; serve them alongside a dollop of plant-based yogurt or ice cream for an indulgent treat that balances out all those textures beautifully. I promise you—all these little details create an unforgettable experience not just for your taste buds but also for anyone lucky enough to enjoy these bars with you.
Final Thoughts
And there we have it—the entire journey from start to finish on how to make these scrumptious Apricot Coconut Crumble Bars! Each step was infused with care, patience, and love—and I hope you’ll carry this passion forward as you bake these at home. Remember that cooking isn’t just about following steps; it’s about creating memories and sharing joy through food. So whether you’re whipping these up for yourself or someone special in your life, know that every bite carries warmth and happiness within it.
So go ahead—grab those ingredients one more time and let’s make some delicious memories together with these Apricot Coconut Crumble Bars! Happy baking!
Storage and Enjoyment Tips for Your Apricot Coconut Crumble Bars
Now that your Apricot Coconut Crumble Bars are out of the oven and begging to be devoured, it’s time to think about how to enjoy these delightful treats at their best for days to come. The aroma wafting through your kitchen is just a hint of the joy these bars will bring, and trust me when I say they’ll be a hit whether you’re having them fresh out of the pan or savoring them later on. But to ensure they stay as delicious as the moment they came out, let’s dive into the best storage practices.
Storing Leftover Apricot Coconut Crumble Bars
To keep your wonderfully fragrant Apricot Coconut Crumble Bars fresh and delectable, it’s essential to store them correctly. I recommend using an airtight container, which is absolutely paramount in keeping moisture away from those crumbly tops. Place a piece of parchment paper between layers if you end up stacking them; this little trick will help maintain their lovely texture without any sticky mishaps. When stored properly at room temperature, they’ll stay scrumptious for about a week—if you can resist munching on them sooner! If you find yourself with leftover bars (which is rare, but it happens!), you might even consider adding a slice of bread in the container, as it’ll help keep everything moist and happy. After a few days, the flavors meld beautifully, creating an even more profound satisfaction with each bite. For serving suggestions, simply cut them into squares and enjoy as is, or pop them in the microwave for about 10-15 seconds for that warm, gooey goodness that feels like a hug from the inside.
Freezing Apricot Coconut Crumble Bars for Later
If you want to extend the love of these bars even further, freezing them is an excellent option that maintains their integrity beautifully! To freeze properly, first allow the bars to cool completely before wrapping them tightly in plastic wrap or aluminum foil—this will act as a barrier against freezer burn. Then place them in a freezer-safe container or zip-top bag. They can last up to three months in the freezer without losing any of their charm! When you’re ready to indulge again, simply pull out what you need and let them thaw at room temperature for about 30 minutes or so. For an instant treat, pop one in the microwave for a few seconds—trust me when I say this is a game changer! It’s like having homemade dessert on hand whenever that sweet tooth calls. The convenience factor here cannot be overstated; imagine surprising friends with freshly baked bars straight from your freezer during impromptu gatherings!
Apricot Coconut Crumble Bars
Indulge in the delightful experience of making Apricot Coconut Crumble Bars! These scrumptious bars feature a buttery coconut crumble layered with a luscious apricot filling, creating a harmonious blend of sweet and tangy flavors. The recipe is simple and perfect for bakers of all skill levels, allowing you to craft a treat that not only satisfies your sweet tooth but also brings back warm memories. Whether enjoyed as an afternoon snack or dessert after dinner, these bars are sure to impress family and friends. The inviting aroma that fills your kitchen while they bake is just an added bonus!
- Prep Time: 20 minutes
- Cook Time: 45 minutes
- Total Time: 1 hour 5 minutes
- Yield: Approximately 16 servings 1x
- Category: Dessert
- Method: Baking
- Cuisine: American
Ingredients
- 3 cups chopped dried apricots
- 1 cup granulated sugar
- ¾ cup granulated sugar
- 1½ cups boiling water
- 2 cups all-purpose flour
- 1 tsp baking powder
- 2 cups medium-cut dried coconut
- 1 cup unsalted butter, cut into small pieces
- A pinch of salt
Instructions
- Preheat your oven to 350°F (175°C) and grease a 9 x 13-inch baking pan.
- In a large bowl, mix together the flour, ¾ cup sugar, baking powder, dried coconut, and salt. Cut in the cold butter until crumbly.
- In a medium bowl, combine chopped apricots with boiling water and remaining sugar; let sit until softened.
- Press half of the crumble mixture into the bottom of the prepared pan. Spread the apricot filling over it evenly.
- Top with the remaining crumble mixture, pressing it down lightly.
- Bake for 40-45 minutes until golden brown. Allow to cool completely before slicing.
Nutrition
- Serving Size: 1 square (50g)
- Calories: 210
- Sugar: 12g
- Sodium: 80mg
- Fat: 10g
- Saturated Fat: 6g
- Unsaturated Fat: 4g
- Trans Fat: 0g
- Carbohydrates: 29g
- Fiber: 2g
- Protein: 3g
- Cholesterol: 25mg