Cowboy Pasta Salad
There’s something deeply nostalgic about a hearty pasta salad that reminds us of summer picnics and family barbecues, isn’t there? When I think of Cowboy Pasta Salad, I don’t just see a colorful bowl of ingredients tossed together; I feel the warmth of laughter echoing around the backyard, the tantalizing aroma wafting through the air as friends gather around with plates in hand, eager to dive into this delightful dish. It’s a symphony of flavors—smoky, savory, and just a hint of spice—that captures the essence of carefree days spent enjoying good food and even better company. This Cowboy Pasta Salad is more than just a recipe; it’s an experience that brings people together, making it an absolute must for any gathering.
The beauty of this dish lies in its versatility and ease. Whether you’re hosting a summer barbecue, gearing up for game day, or simply looking for a quick dinner solution that doesn’t skimp on flavor, Cowboy Pasta Salad fits the bill perfectly. Imagine vibrant cherry tomatoes bursting with sweetness mingling with creamy cheese and smoky goodness from the bacon. And let’s not forget that zesty kick from the hot chili sauce—it’s like a party in your mouth! Trust me when I say this dish will be a conversation starter; everyone will be asking for seconds (and maybe even thirds!). So grab your apron and let’s embark on this culinary journey together!
Cowboy Pasta Salad: A Hearty Summer Delight
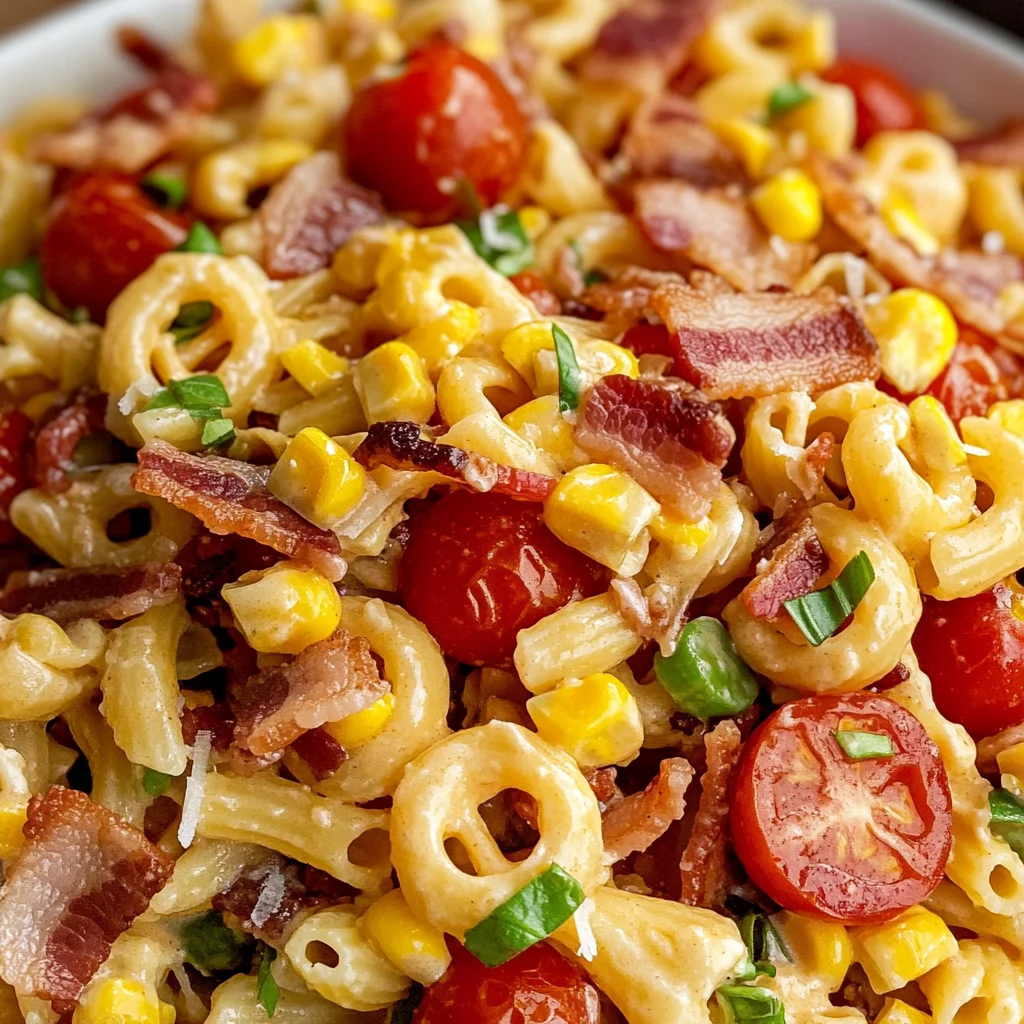
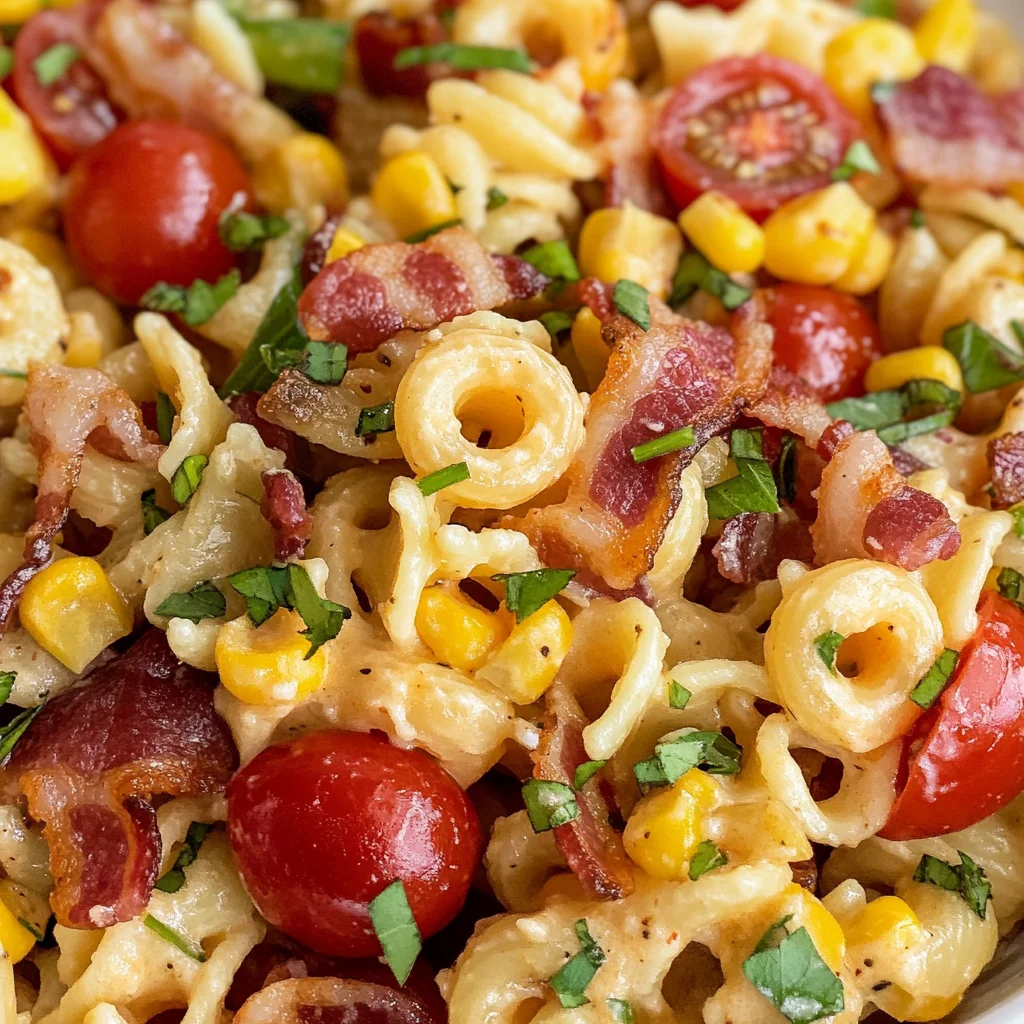
This Cowboy Pasta Salad is not just any ordinary side dish; it’s a crowd-pleaser that combines robust flavors with fresh ingredients. Each bite is packed with textures and tastes that keep you coming back for more. Plus, it’s incredibly simple to whip up! Perfect for potlucks or casual dinners at home, this recipe allows you to showcase your culinary skills without spending hours in the kitchen. The combination of wagon wheel pasta, crispy bacon, seasoned ground beef, and creamy dressing creates a delightful balance that feels both comforting and exciting.
As we dive into the ingredients for this delightful salad, I want you to keep an open mind about how these components work together to create something truly extraordinary. Each ingredient plays its role like musicians in an orchestra—together they produce harmony that sings on your palate.
Ingredients:
Let’s gather our ingredients! As we prepare to create this Cowboy Pasta Salad masterpiece, remember that each element contributes its own unique flair to the dish.
-
1 pound dried wagon wheel pasta. This playful pasta shape isn’t just fun to eat; it also holds onto sauces beautifully thanks to its ridges and curves. When cooked al dente—meaning firm but not crunchy—it provides a satisfying chew that complements the other hearty components in the salad. Look for high-quality pasta made from durum wheat for the best texture and flavor.
-
1 pound hickory smoked bacon, diced. The smokiness of hickory bacon adds depth and richness to our salad that’s simply irreplaceable. It’s essential for creating those crispy bits of goodness that contrast beautifully with creamy elements of the dish. If you’re looking for alternatives due to dietary preferences, consider using turkey bacon or tempeh bacon—both can bring their own unique flavors while keeping that satisfying crunch.
-
3/4 pound lean ground beef (or swap for Italian sausage). Ground beef lends a heartiness that’s hard to resist while providing excellent protein content. If you choose to swap it out for Italian sausage instead, you’ll introduce an array of spices that will elevate your salad even further! Just ensure whichever option you choose is lean enough so it doesn’t render too much fat during cooking.
-
1 teaspoon cumin. This warm spice adds an earthy flavor profile that complements our smoky bacon and meat beautifully. Cumin is non-negotiable here—it ties all those robust flavors together seamlessly. Be sure to use freshly ground cumin if possible; it packs more punch than pre-ground varieties.
-
Pinch red pepper flakes. Just a pinch can heighten those flavors without overwhelming them! Red pepper flakes provide subtle heat which balances out the richness of mayonnaise-based dressings wonderfully.
-
Salt and pepper, to taste. These foundational seasonings enhance every ingredient’s natural flavor while bringing everything together harmoniously.
-
1 cup mayonnaise. This creamy key ingredient binds all components together while adding richness that’s utterly intoxicating! A good quality mayonnaise will make all the difference here—look for one made with simple ingredients like eggs and oil for authenticity.
-
1/4 cup barbecue sauce. Sweet and tangy barbecue sauce brings an irresistible twist that’ll have everyone’s taste buds dancing! It complements both the smoky bacon and spicy mustard beautifully—don’t skimp on quality here!
-
2 tablespoons spicy brown mustard. This condiment adds zing while cutting through richness—a crucial aspect when creating balanced dishes! Its grainy texture also adds character alongside creamy mayo.
-
2 tablespoons Worcestershire sauce. This umami-packed sauce infuses depth into our dressing—a little goes a long way!
-
2 & 1/2 teaspoons hot chili sauce (adjust based on your heat preference). Bring on that heat! Hot chili sauce introduces bright acidity along with spice—it’s what makes this pasta salad sing!
-
15 ounce can whole kernel sweet corn, drained. Sweet corn provides bursts of sweetness throughout each bite while also adding color; it’s like sunshine captured in each kernel!
-
2 cups cherry tomatoes, halved. These juicy gems offer freshness while their vibrant color brightens up our dish visually as well as texturally—their sweetness balances perfectly against savory elements!
-
1 & 1/2 cups shredded sharp cheddar cheese. Sharp cheddar brings boldness alongside creaminess which enhances every bite! Opt for freshly shredded cheese over pre-packaged options whenever possible; it melts better!
-
5 scallions, diced finely. Scallions add freshness with their mild onion flavor—they’re essential for garnishing too!
Equipment You’ll Need:
Before jumping into preparation mode, let’s take stock of our necessary tools! Having the right equipment makes all the difference in ensuring smooth sailing during cooking—and trust me when I say it’ll make clean-up easier too!
-
Large pot – Essential for boiling pasta until al dente without overcrowding it! A sturdy pot retains heat well which helps maintain consistent temperature throughout cooking time.
-
Colander – Perfectly drains excess water after cooking pasta—be gentle when handling hot noodles though!
-
Large nonstick skillet – Ideal for sautéing bacon until crispy without worrying about sticking; it also allows us to cook meat evenly across its surface area.
-
Extra-large mixing bowl – A spacious bowl allows room for tossing all ingredients comfortably so everything gets coated evenly by our luscious dressing!
-
Whisk – Used to mix dressing ingredients thoroughly; ensures smooth consistency which clings beautifully onto pasta later on.
With these tools at hand—and your heart set on creating something delicious—we’re ready to dive into preparing our Cowboy Pasta Salad!
Step 1: Boil Your Wagon Wheel Pasta
Begin by bringing a large pot filled with water seasoned generously with salt to a rolling boil—the salt enhances flavor significantly during cooking time! Once boiling vigorously, add in your dried wagon wheel pasta carefully ensuring not too overcrowd pot (this could lead uneven cooking). Cook according package instructions until al dente—you want them tender yet firm enough they hold shape well once combined with other hearty components later on! After draining carefully using colander rinse under cold water quickly stop cooking process altogether (this keeps them from turning mushy). Drizzle lightly with olive oil preventing sticking then set aside while preparing remaining ingredients ahead—don’t rush this step; proper timing ensures perfect texture throughout final dish!
Step 2: Sauté Bacon Until Crispy
While waiting on pasta, grab your large nonstick skillet heating over medium heat then add diced hickory smoked bacon directly into pan—listen closely as it starts sizzling away bringing aroma filling kitchen instantly making mouths water already! Stir occasionally allowing fat render out completely until pieces turn golden brown crispiness achieved (about 7–10 minutes). Use slotted spoon transferring crispy bits onto paper towel lined plate draining excess grease afterward leaving behind small amount remaining within pan enhancing flavor later when cooking ground beef next step—trust me this technique maximizes taste potential anytime you’re working with meats like these!
Step 3: Cook Ground Beef
Now wipe down skillet gently leaving behind just enough residual grease infusing flavor throughout upcoming layer being added next: lean ground beef (or Italian sausage if desired)! Break apart meat using wooden spoon spreading evenly across bottom allowing brownness develop naturally over moderate heat taking care break clumps down tiny crumbles until fully cooked through no longer pink visibly present inside (approximately 5–7 minutes). While browning sprinkle cumin along red pepper flakes adding depth complexity levels taste wise ultimately creating something truly memorable experience wise too—it’s these small touches transform ordinary salads extraordinary ones worth celebrating every single time they grace table spread open wide ready serve guests hungry bellies awaiting satisfaction momentarily soon thereafter…
Step 4: Whisk Together Dressing
In extra-large mixing bowl whisk together mayonnaise alongside barbecue sauce plus spicy brown mustard Worcestershire sauce finally finishing off hot chili sauce combining thoroughly until smooth consistency achieved throughout mixture forms base dressing ultimately coating entire assembly down line neatly completing transformation process overall appearance visually appealing inviting everyone dig fork deeper plate soon enough where joy awaits inside every morsel enjoyed blissfully moments shared among loved ones gathered round happily savoring memories created forever etched minds hearts alike…
I can’t wait to share more steps with you as we continue crafting this beautiful Cowboy Pasta Salad together! Stay tuned as we layer flavors even further…
Step 5: Creating a Flavorful Dressing
Now that we have our pasta cooked and our meats ready, it’s time to create the dressing that will elevate this Cowboy Pasta Salad into something truly extraordinary. In a large mixing bowl, whisk together 1 cup of mayonnaise, 1/4 cup of barbecue sauce, 2 tablespoons of spicy brown mustard, 2 tablespoons of Worcestershire sauce, and 2 & 1/2 teaspoons of hot chili sauce. This isn’t just any dressing; this is a symphony of flavors that will coat each ingredient in creamy goodness, bringing them together in a way that tantalizes your taste buds. I can already picture you at the kitchen counter, those delicious scents wafting through the air as you mix.
This step is crucial because it sets the foundation for the entire dish. The mayonnaise adds creaminess, while the barbecue sauce introduces a sweet smokiness that perfectly complements the other ingredients. The mustard gives it a delightful tang, and the hot chili sauce provides just enough kick to make each bite exciting. Trust me on this—taking a moment to whisk these ingredients until they are smooth and well-combined is absolutely paramount. You want everything blended beautifully so that every forkful sings with flavor. As you whisk, pay attention to the texture; it should be velvety and inviting, almost like liquid gold waiting to embrace your pasta.
Step 6: Tossing It All Together
With our luscious dressing ready, we can now bring this Cowboy Pasta Salad to life by combining all our glorious ingredients. In that extra-large bowl with your dressing, add in the cooled pasta first, followed by the crispy bacon bits, cooked ground beef, drained corn, halved cherry tomatoes, shredded sharp cheddar cheese, and diced scallions. Take your time with this step—it’s not about rushing but rather about melding flavors and textures in a harmonious way. As you add each ingredient, imagine how they will interact on your plate; the crunch of the bacon against the creamy dressing and tender pasta creates an utterly intoxicating experience.
Now comes the fun part! Gently toss everything together using two large spoons or even your hands if you’re feeling adventurous (just be sure they’re clean!). You want to ensure each piece is coated lovingly with that rich dressing while also allowing for those vibrant pops of color from the tomatoes and green flecks from scallions to shine through. Look for visual cues here; ideally, everything should be evenly distributed without being overly mushy. A successful toss means vibrant colors mingle with creamy goodness without losing individual character—each ingredient plays its role beautifully! Don’t be afraid to get in there; this step transforms simple components into an ensemble cast ready for their big debut!
Step 7: The Resting Step – Patience Is Key
Once you’ve tossed everything together and created what looks like a masterpiece in your mixing bowl, it’s time for one last crucial step before serving: resting! While you might be tempted to dive right in (and trust me, I completely understand), letting your Cowboy Pasta Salad sit for at least 30 minutes at room temperature—or even longer if you can resist—is essential for developing those flavors fully. This period allows all those wonderful ingredients to mingle and marinate in their own juices and dressing.
Why is this resting period so important? Well, think about it: flavors need time to combine and deepen; it’s like giving them a chance to have a conversation! The coolness from the mayo and barbecue sauce will soak into the pasta while all those savory elements infuse their essence throughout each bite. Plus, if you let it chill in the refrigerator for an hour or more after tossing—now we’re talking transformative magic! Not only does chilling enhance flavor fusion dramatically, but it also gives your salad an appealing texture when served cold on a warm day or at gatherings—it’s refreshingly satisfying! So take some deep breaths while resisting temptation; trust me—you’ll be rewarded tenfold!
Step 8: Serving Your Masterpiece
After patiently waiting (I know it’s hard!), it’s finally time to serve up your beautiful Cowboy Pasta Salad! If you’ve let it chill in the fridge during that time, take it out and give it another gentle stir before plating. This redistributes any settled dressing back onto those glorious ingredients and ensures everyone gets a taste of that creamy goodness! Grab your favorite serving bowl—something wide enough to showcase all those vibrant colors—and spoon generous portions into individual plates or bowls.
When presenting your salad, consider garnishing with an extra sprinkle of fresh scallions or even some additional cheese on top for visual appeal—after all, we eat with our eyes first! And as you dig into this delightful dish filled with memories of summer BBQs or family gatherings around the table, relish every bite knowing that you’ve created something not just delicious but profoundly satisfying too. Each forkful brings forth layers of flavor wrapped in nostalgia—the joy of good company paired with mouthwatering food is truly one of life’s greatest pleasures.
Final Touches Before Enjoying
As you’re about to enjoy this Cowboy Pasta Salad masterpiece I’ve guided you through creating together—a dish perfect for any occasion from light lunches to lively dinners—I encourage you always to keep some leftovers if possible! While I adore savoring it fresh right after assembling (and I promise you’ll love it too!), there’s something undeniably gratifying about enjoying chilled leftovers later on…the flavors become even more pronounced as they rest overnight in their comforting embrace!
So go ahead! Share this dish with friends at game day parties or summer picnics; watch as they smile upon tasting each delectable bite brimming with love and care poured into its creation. Remember—the best meals are those shared around laughter-filled tables where recipes become cherished stories passed down through generations—a tradition worth celebrating every single day!
Storage and Enjoyment Tips for Your Cowboy Pasta Salad
Now that your Cowboy Pasta Salad is all mixed together, bursting with vibrant colors and enticing aromas, it’s time to dig in! But before you get too carried away, let’s chat about how to store any delicious leftovers (if there are any!). This salad is not only a fantastic dish to serve right away, but it also shines when you give it a little rest in the fridge. Trust me when I say that the flavors meld beautifully as it chills, making each bite profoundly satisfying.
Storing Leftover Cowboy Pasta Salad
To store your leftover Cowboy Pasta Salad, simply transfer it into an airtight container, ensuring it seals tightly to keep out unwanted air. A glass container works wonders here, as it doesn’t retain odors like some plastic options might. You can pop this beauty in the refrigerator where it will stay fresh for about 3 to 5 days—perfect for meal prepping or enjoying during those busy weeknights! Now, if you want to maintain its creamy texture and avoid any potential dryness, consider placing a slice of bread on top of the pasta salad before sealing the container. This little trick helps absorb moisture and keeps everything tasting fresh! As for flavor after storage? Oh my goodness! I promise you that the taste only gets better as those incredible ingredients mingle overnight. When you’re ready to enjoy it again, no need to reheat; just serve chilled or at room temperature for a refreshing treat.
Freezing Cowboy Pasta Salad for Later
If you find yourself with a generous batch of cowboy pasta salad—or if you’re simply planning ahead—freezing this dish is an excellent option! To do this properly, scoop portions into freezer-safe containers or zip-top bags, leaving a little space for expansion as it freezes. Make sure to label them with dates so you can keep track of freshness; they’ll last in the freezer for about 2-3 months. When you’re ready to indulge again, simply move your portion from the freezer to the fridge and let it thaw overnight. The convenience of having this hearty salad on hand means you can pull together a meal in no time flat—it’s like having your own personal stash of comfort food waiting to be enjoyed! Just imagine pulling out a frozen treasure on a busy day; it’s sure to bring a smile and a comforting warmth back into your home.
Salad
Cowboy Pasta Salad
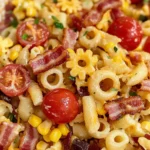
Cowboy Pasta Salad is a vibrant and satisfying dish that brings the essence of summer gatherings right to your table. Bursting with colorful ingredients, this salad combines the smokiness of turkey bacon and savory ground beef with the sweetness of cherry tomatoes and corn. A creamy dressing, infused with barbecue sauce and a hint of spice, ties everything together beautifully. Whether you’re serving it at a picnic, potluck, or as a quick family dinner, this pasta salad is sure to be a crowd-pleaser that will have everyone asking for the recipe. Easy to prepare and even easier to enjoy, let’s dive into this delightful dish!
- Prep Time: 20 minutes
- Cook Time: 15 minutes
- Total Time: 35 minutes
- Yield: Serves 8 people 1x
- Category: Salad
- Method: Stovetop
- Cuisine: American
Ingredients
- 1 pound dried wagon wheel pasta
- 1 pound turkey bacon, diced
- 3/4 pound lean ground beef
- 1 cup mayonnaise
- 1/4 cup barbecue sauce
- 2 cups cherry tomatoes, halved
- 15-ounce can sweet corn, drained
- 1 & 1/2 cups shredded sharp cheddar cheese
- 5 scallions, diced
Instructions
- Cook the wagon wheel pasta in salted boiling water according to package instructions until al dente. Drain and rinse under cold water; set aside.
- In a large skillet over medium heat, cook the diced turkey bacon until crispy. Transfer to a paper towel-lined plate.
- In the same skillet, add the ground beef and cook until browned. Drain excess fat.
- In a large mixing bowl, whisk together mayonnaise, barbecue sauce, and hot chili sauce.
- Add cooled pasta, cooked turkey bacon, ground beef, corn, cherry tomatoes, cheddar cheese, and scallions to the bowl. Gently toss everything together until well combined.
- Cover and let rest for at least 30 minutes before serving for flavors to meld.
Nutrition
- Serving Size: 1 cup (215g)
- Calories: 380
- Sugar: 4g
- Sodium: 830mg
- Fat: 25g
- Saturated Fat: 6g
- Unsaturated Fat: 17g
- Trans Fat: 0g
- Carbohydrates: 30g
- Fiber: 3g
- Protein: 16g
- Cholesterol: 40mg