Stuffed Biscoff Butter Lava Cookies
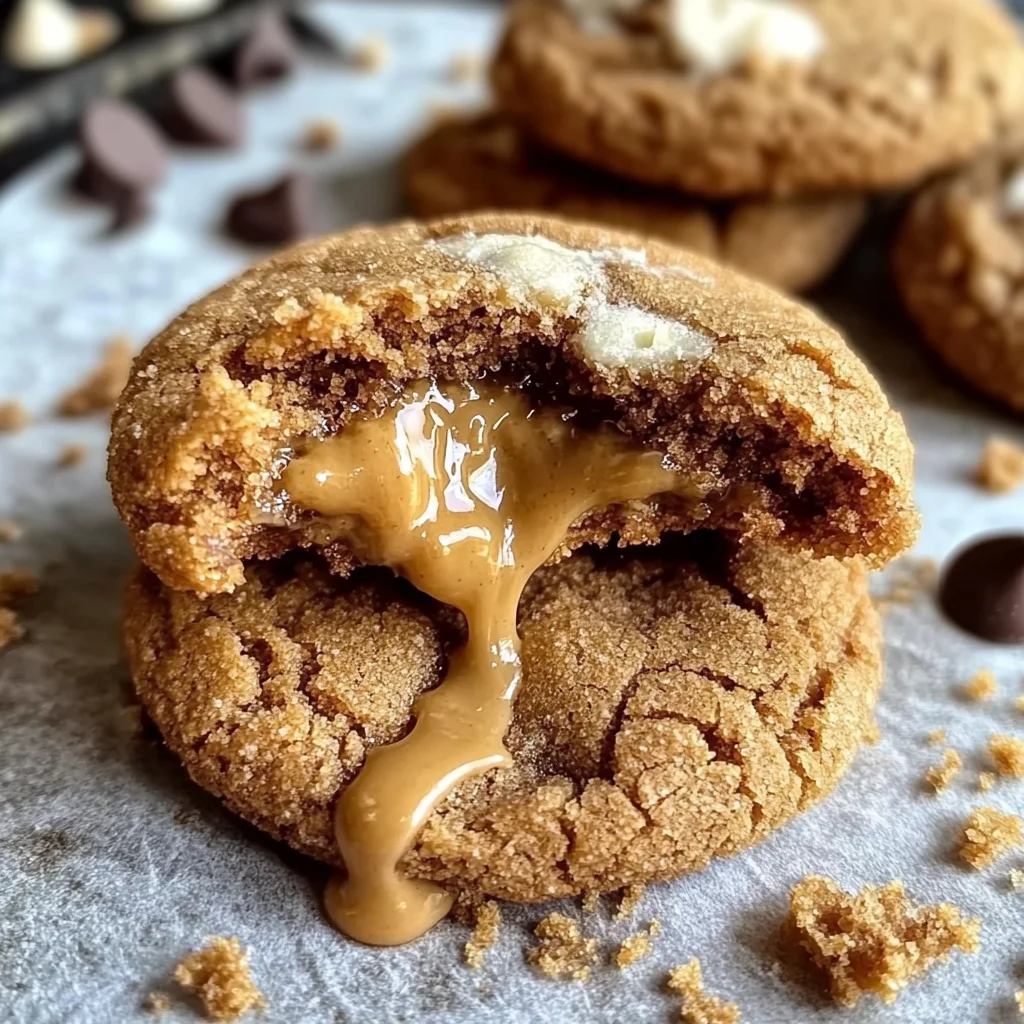
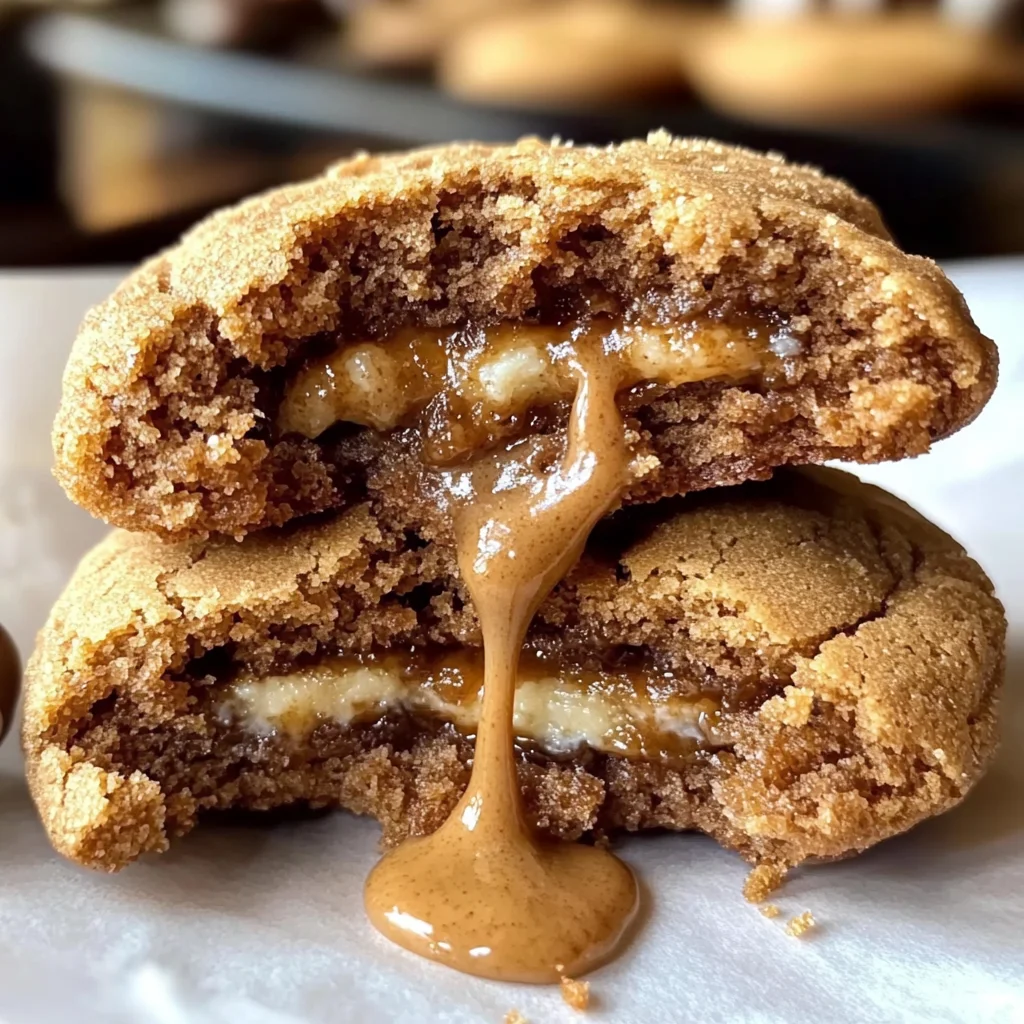
Few desserts spark joy quite like a warm cookie fresh from the oven. Now imagine breaking into one only to discover a molten core of creamy Biscoff cookie butter flowing out like golden caramel. That’s the magic of Stuffed Biscoff Butter Lava Cookies—a heavenly treat that combines the chewy comfort of homemade cookies with the indulgent surprise of a gooey center. The moment you bite into one, it’s as if time stands still; the flavors dance on your palate, wrapping you in a warm embrace of nostalgia and delight. These cookies are not just a dessert; they are an experience, a bridge between the comforting simplicity of childhood treats and the sophisticated flavors we crave as adults.
Biscoff has a unique charm: its caramelized, spiced flavor feels nostalgic yet sophisticated, making it a favorite in both everyday baking and special-occasion desserts. This recipe elevates that classic taste by incorporating a lava-like filling that transforms each bite into pure indulgence. When you serve these cookies warm, they become an irresistible centerpiece at any gathering—whether it’s a cozy family night or a festive holiday celebration. I can promise you that every person who takes a bite will be captivated by that molten center, and you’ll find yourself basking in their admiration. So grab your apron and let’s embark on this delicious adventure together—your kitchen is about to become the heart of the celebration!
Stuffed Biscoff Butter Lava Cookies: A Warm Hug in Cookie Form
Welcome to my favorite cookie experience! These Stuffed Biscoff Butter Lava Cookies are not just any cookies; they are little pockets of joy filled with creamy Biscoff cookie butter that flows like liquid gold when bitten into. They embody everything I love about baking—simple ingredients transformed into something extraordinary. You’ll feel like a master baker as you watch your friends and family enjoy these delightful treats, their eyes lighting up with each gooey-filled bite. Let’s dive right into this delicious journey!
Ingredients:
As we embark on this culinary journey together, let’s take a moment to appreciate the ingredients that will bring our Stuffed Biscoff Butter Lava Cookies to life. Each component plays an essential role in crafting these delightful cookies, so let’s get familiar with them.
- 1 cup (2 sticks or 226g) unsalted butter, softened: This is crucial for creaming properly and creating that light, airy texture we’re aiming for in our cookies. If your butter is too cold, it won’t cream effectively; if it’s melted, your cookies will spread too much during baking. I always recommend using high-quality butter because it contributes so much to the overall flavor of your baked goods—European-style butter with higher fat content will give you even richer results.
- 1 cup brown sugar: Brown sugar adds moisture and depth to our cookie dough thanks to its molasses content, which provides those lovely caramel notes we all adore. It also helps create that chewy texture we’re after while keeping our cookies soft inside. Always check for clumps when measuring; breaking them up ensures even distribution throughout the dough.
- ½ cup granulated sugar: While brown sugar brings moisture and flavor, granulated sugar helps achieve the perfect balance of sweetness and crispness on the edges of our cookies. It also aids in creating that beautiful golden-brown color as they bake! If you’re ever wondering what happens if you skip this step—trust me—you’ll miss out on that delightful contrast between chewy centers and slightly crispy edges.
- 2 large eggs: These are essential for binding our ingredients together and adding moisture to the dough. Eggs also help with leavening; they contribute to the overall structure while ensuring our cookies rise perfectly in the oven.
- 2 tsp vanilla extract: Ah, vanilla—the magic ingredient! It enhances all other flavors present in your baked goods and contributes an inviting aroma that fills your kitchen as they bake. Don’t skimp on quality here; pure vanilla extract is worth every extra penny and truly makes a difference in taste.
- 2 ¾ cups all-purpose flour: Flour gives our cookies structure by providing gluten development when mixed with wet ingredients. The right amount is non-negotiable—it ensures our cookies hold their shape without becoming too dry or crumbly.
- 1 tsp baking soda: This leavening agent is vital for creating those delightful puffs in our cookies as they bake. Baking soda reacts with acidic ingredients (like brown sugar) to produce carbon dioxide bubbles which help raise our dough! Remember—too much can lead to overly puffy cookies with an unpleasant taste.
- ½ tsp baking powder: While similar to baking soda, baking powder contains both an acid and base which creates lift regardless of whether there are acidic components in our recipe. Together with baking soda, they’ll ensure our cookies have just the right amount of rise.
- ½ tsp salt: Salt enhances sweetness and balances flavors—it might seem small but trust me when I say it’s absolutely paramount! Without it, your cookies could taste flat or overly sweet instead of complex.
- 1 cup white chocolate chips (optional for sweetness): Adding white chocolate chips is optional but highly recommended for those who enjoy an extra layer of sweetness alongside their cookie butter filling! They melt beautifully during baking and add delightful pockets of creaminess throughout each cookie.
- ½ cup Biscoff cookie butter (slightly chilled): This magical spread is what makes these cookies truly special! Its rich caramelized notes provide an extraordinary filling that flows out beautifully when bitten into. Chilling it slightly before using helps prevent it from melting completely during baking so we can maintain that coveted lava-like center!
Equipment You’ll Need:
Before we dive into preparing these beautiful cookies, let’s talk about some essential tools that will make this process smoother and more enjoyable. While not technically ingredients, having the right equipment can be key to achieving success in any recipe!
- Mixing bowls – A set of sturdy mixing bowls is essential for combining our ingredients effectively without risking spills or messes on your countertop! Ideally, use various sizes so you can easily mix wet ingredients separately from dry ones.
- Electric mixer or whisk – An electric mixer saves time and effort when creaming butter and sugars together but don’t hesitate to use a good old-fashioned whisk if needed! Just remember that whisking by hand requires some elbow grease but can be equally rewarding.
- Measuring cups & spoons – Accurate measurements are vital for successful baking! Invest in both dry measuring cups for flour/sugar as well as liquid measuring cups for eggs/vanilla extract—they’ll ensure consistent results every time!
- Parchment paper – Line your baking sheets with parchment paper before placing down those delicious cookie rounds; this prevents sticking while allowing easy cleanup afterward!
With all these essentials at hand—and armed with knowledge about why each ingredient matters—we’re ready to make some magic happen together!
Preparing the Stuffed Biscoff Butter Lava Cookies
Step 1: Prepare the Filling
Let’s start by preparing what will become the glorious molten heart within our cookies—the Biscoff cookie butter filling! Scoop teaspoons of chilled cookie butter onto a parchment-lined tray—this step cannot be rushed because patience pays off later! Freezing them for at least 30 minutes until firm is absolutely non-negotiable; this ensures that once we envelop them in dough and bake them up beautifully crispy outside yet gooey inside later on… trust me—you won’t want anything less than perfection here!
Step 2: Make the Dough
Now onto making our delightful cookie dough—a process known as creaming where we beat together softened unsalted butter along with both brown sugar and granulated sugar until fluffy! This usually takes around 3–5 minutes using an electric mixer set at medium speed but feel free to whip out those arm muscles if you’re whisking by hand! Creaming properly incorporates air into what will become our base structure—it’s essential for achieving lightness within each bite while ensuring everything blends smoothly together without lumps forming along way either…so don’t rush this step!
Once fluffy perfection has been achieved (you’ll know it’s ready when lightened significantly), add in eggs one at time followed by vanilla extract beating well after each addition until fully combined—this forms another layer within texture spectrum adding richness alongside flavor enhancement after all!
In another bowl whisk flour along with baking soda/baking powder/salt until evenly mixed then gradually introduce dry mixture into wet batter using low speed just until combined—you want everything blended without overmixing which leads tough results instead…yikes! Finally fold-in optional white chocolate chips (for added sweetness) gently—you should see ribbons rather than streaks emerge—that’s how you know success has been achieved here too!
Step 3: Assemble the Cookies
Now comes perhaps my favorite part—the assembly where magic truly begins unfolding before us as we prepare these stuffed delights! First off scoop heaping tablespoonfuls from dough mixture flatten slightly before placing frozen dollops filled previously prepared Biscoff goodness right smack dab center place gently over top pushing edges around filling securely sealing every bit possible around perimeter carefully avoiding leaks occurring during bake time itself…don’t worry if they appear messy initially; once baked golden brown they’ll transform into perfectly shaped wonders instead!
Step 4: Bake
With assembled beauties ready now it’s finally time for them enter preheated oven set at 350°F (175°C)—arranging spaced apart upon parchment-lined sheet allows airflow ensuring crisp edges develop properly without overcrowding leading uneven bakes later down line…bake away anywhere between 10–12 minutes being vigilant watching closely towards end period since ovens vary widely amongst home settings too often leading differing outcomes arising unexpectedly sometimes especially regarding browning levels reached prior pulling out must remain soft centers crucial point here though vital part remains visible learning curve happens naturally once understand nuances involved along way here…
I can’t wait for you to take this journey alongside me through each delectable step until finally reaching goal achieved enjoying freshly baked goodies straight from oven…and believe me—the aroma wafting through kitchen will have everyone asking what’s cooking long before even taking first bites themselves too!!
Step 5: Assemble the Cookies with Love
As we embark on the assembly phase of our Stuffed Biscoff Butter Lava Cookies, take a moment to appreciate the delightful aroma of your dough. This step is where the magic truly begins! Using a standard tablespoon, scoop a generous heaping of your beautifully crafted cookie dough, and place it in the palm of your hand. Gently press it down to flatten it slightly; this gives you a cozy little cradle for that molten treasure waiting to be enveloped.
Now, retrieve those perfectly chilled balls of Biscoff cookie butter from the freezer. You want them to be firm but still pliable enough to nestle into your dough without breaking apart. Place one ball in the center of your flattened dough and wrap the edges around it, sealing it completely. This sealing is absolutely paramount—if you leave any gaps, you might find that delicious filling oozing out during baking instead of staying nestled within its warm cookie embrace. Ensure your cookies are well-formed and smooth; this not only enhances their appearance but also ensures even baking. Remember, patience is key here! Take your time to mold each cookie carefully, as this will guarantee that magnificent lava surprise at the end.
Step 6: Prepping for Baking Bliss
Now that you’ve lovingly assembled your cookies, let’s turn our attention to the oven—a sacred space where our culinary dreams come alive! Preheat your oven to 350°F (175°C). This step isn’t just about warmth; it’s crucial for activating the leavening agents in our cookie dough. The baking soda and baking powder work together in harmony when introduced to heat, creating air pockets that give our cookies a tender texture while allowing them to spread just enough without losing their lovely shape.
While waiting for your oven to reach the perfect temperature, line a baking sheet with parchment paper. This non-stick surface is essential for easy removal post-baking and prevents any unwanted sticking that could ruin your gorgeous creations. As you arrange your cookies on this sheet, make sure to leave about two inches between each one—trust me, they’ll expand as they bake! The last thing we want is for these heavenly treats to merge into one giant cookie blob! Visualize how beautiful they’ll look once baked: golden edges hugging warm centers ready to erupt with that glorious Biscoff goodness.
Step 7: Baking Your Perfect Stuffed Biscoff Butter Lava Cookies
With everything set up and ready, it’s time for the main event: baking! Slide your tray into the preheated oven and allow those cookies to work their magic. Set a timer for 10-12 minutes, but don’t just walk away blindly! This part is all about watching and learning—the edges should turn a gorgeous golden brown while the centers remain soft and slightly underbaked. This contrast is what creates that luscious lava effect when you take a bite!
About halfway through baking, consider rotating your tray if you notice uneven browning; every oven has its quirks! You want an even distribution of heat so every cookie bakes beautifully. Trust me on this: as they bake, you’ll be enveloped by an utterly intoxicating aroma wafting through your kitchen—it’s like being wrapped in a warm hug from an old friend. When you see those golden edges forming but before they’re fully set in the middle, pull them out—the residual heat will continue cooking them just enough without overdoing it.
Step 8: The Sweet Wait
Once your cookies are out of the oven, resist the urge to dive in immediately—even though I know how tempting it can be! Allow them to cool on their baking sheet for about five minutes before transferring them to a wire rack or serving plate. This cooling period allows them to firm up slightly; if you try to move them too early, they may collapse or lose their shape entirely—and we wouldn’t want all that love and effort wasted now, would we?
During this short wait time, you’ll notice how they continue to develop an irresistible sheen—this is due to the residual heat melting those white chocolate chips (if you’ve chosen to include them) into delightful rivers of sweetness throughout each cookie. Plus, if you can manage not munching right away (I promise it’s worth it!), letting them rest means that sensational gooey center will have time to settle into pure perfection before indulgence begins.
Stuffed Biscoff Butter Lava Cookies
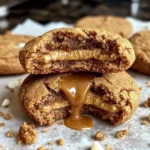
Indulge in the blissful experience of Stuffed Biscoff Butter Lava Cookies, where each bite reveals a molten center of creamy Biscoff cookie butter that flows like golden caramel. These delightful cookies marry the chewy comfort of homemade treats with an indulgent surprise, making them perfect for gatherings or cozy nights in. The rich, spiced flavor of Biscoff evokes nostalgia while satisfying your sophisticated cravings. With simple ingredients and clear steps, you can easily create this heavenly dessert that’s bound to impress your friends and family!
- Prep Time: 20 minutes
- Cook Time: 12 minutes
- Total Time: 32 minutes
- Yield: Approximately 24 cookies 1x
- Category: Dessert
- Method: Baking
- Cuisine: American
Ingredients
- 1 cup unsalted butter, softened
- 1 cup brown sugar
- ½ cup granulated sugar
- 2 large eggs
- 2 tsp vanilla extract
- 2 ¾ cups all-purpose flour
- 1 tsp baking soda
- ½ tsp baking powder
- ½ tsp salt
- ½ cup Biscoff cookie butter (slightly chilled)
- Optional: 1 cup white chocolate chips
Instructions
- Prepare the filling by scooping teaspoons of chilled Biscoff cookie butter onto a parchment-lined tray. Freeze for at least 30 minutes.
- In a mixing bowl, cream together softened butter, brown sugar, and granulated sugar until fluffy. Add eggs one at a time and mix in vanilla extract.
- In another bowl, whisk together flour, baking soda, baking powder, and salt. Gradually combine with wet mixture until just mixed. Fold in optional white chocolate chips.
- Assemble cookies by flattening tablespoons of dough and placing a frozen dollop of Biscoff filling in the center. Seal securely.
- Preheat oven to 350°F (175°C). Arrange cookies on a lined baking sheet and bake for 10-12 minutes or until edges are golden but centers are soft.
- Allow cookies to cool for five minutes before transferring them to a wire rack.
Nutrition
- Serving Size: 1 cookie (40g)
- Calories: 180
- Sugar: 12g
- Sodium: 100mg
- Fat: 9g
- Saturated Fat: 5g
- Unsaturated Fat: 4g
- Trans Fat: 0g
- Carbohydrates: 24g
- Fiber: 1g
- Protein: 2g
- Cholesterol: 30mg