Banana Pudding Cheesecake
Introduction
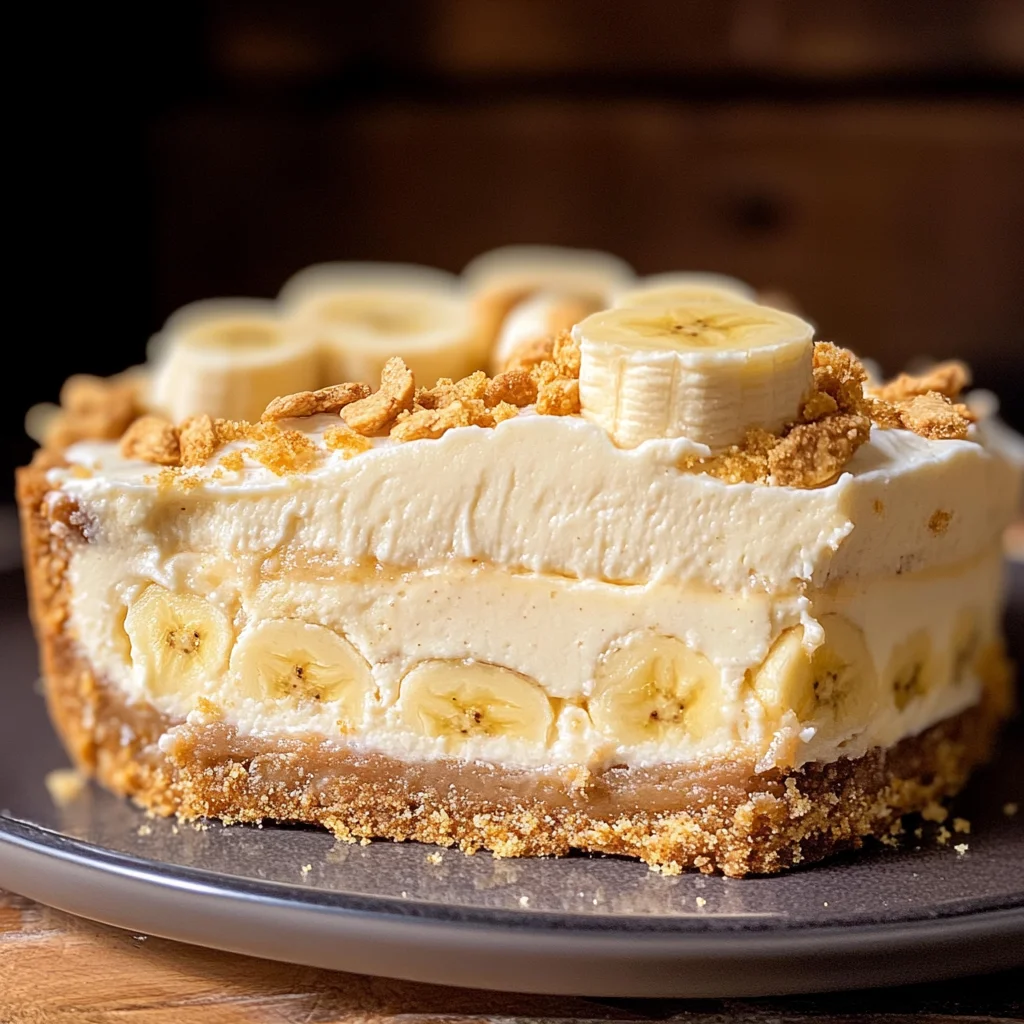
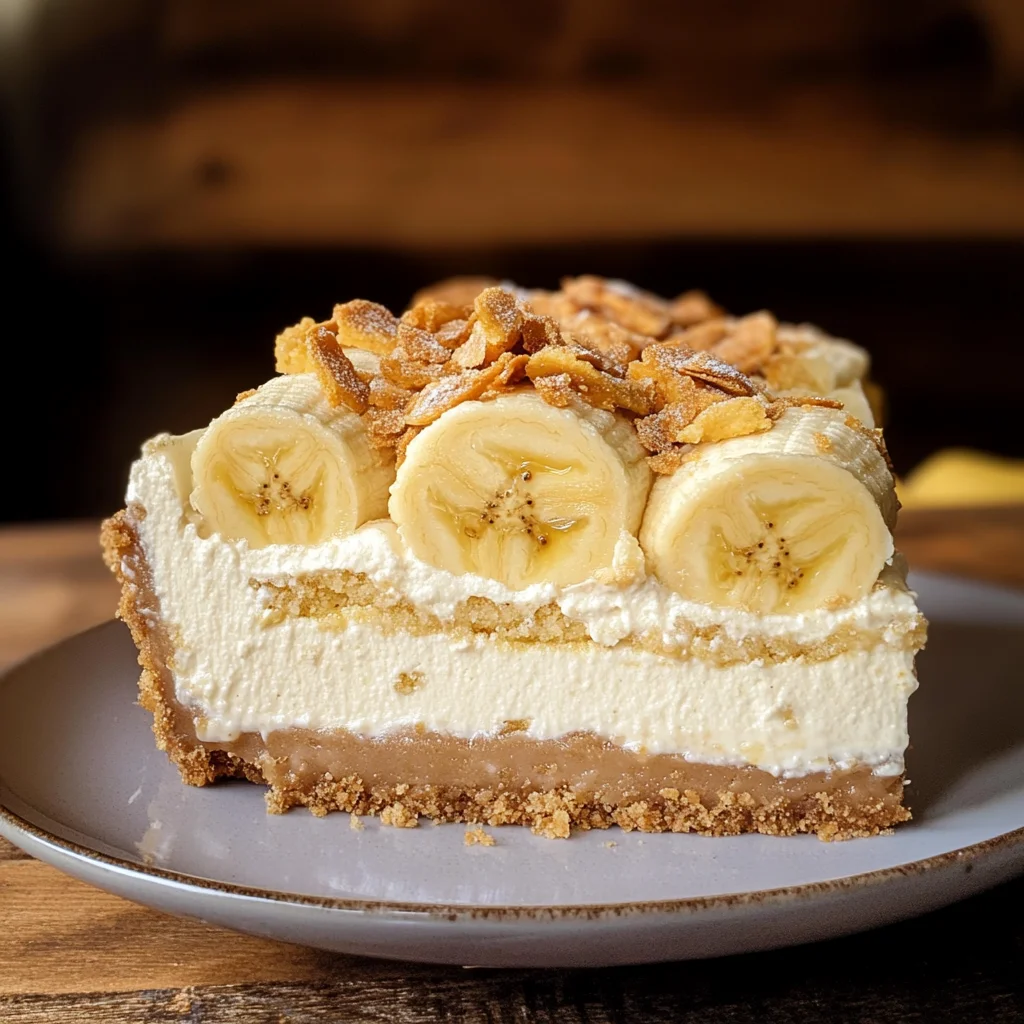
There’s a certain magic that happens in the kitchen, don’t you think? It’s not just about mixing ingredients and following recipes; it’s about crafting memories, sharing love, and creating something that resonates with the soul. When I think of Banana Pudding Cheesecake, I’m reminded of summer picnics, family gatherings, and the laughter that fills the air when we gather around the table. This delightful dessert is more than just food; it’s an experience—an embrace of creamy banana goodness layered with the nostalgic crunch of Nilla Wafers. The moment you take a bite, you’re greeted by a symphony of flavors that dance across your palate, making you feel warm inside. I promise you, this recipe for Banana Pudding Cheesecake is going to become a cherished part of your dessert repertoire.
As you embark on this culinary adventure with me, remember that cooking is as much about intention as it is about technique. This cheesecake captures the essence of classic banana pudding while elevating it to new heights with its rich cream cheese base and heavenly whipped topping. Each layer tells a story—from the buttery crust that crumbles beneath your fork to the velvety smoothness of the cheesecake itself. Trust me on this: once you serve this dessert at your next gathering, you’ll be met with wide eyes and delighted cheers. After all, who can resist a slice of sweet nostalgia brought to life?
Banana Pudding Cheesecake: A Creamy Delight That Whispers Comfort
Welcome to one of my absolute favorite desserts! This Banana Pudding Cheesecake is not just a treat; it’s a heartfelt way to bring joy into any occasion. With its irresistible layers and comforting flavors, this cake is perfect for celebrations or simply treating yourself after a long day. The combination of creamy cheesecake with luscious bananas and airy whipped vanilla pudding creates an unforgettable experience that will leave your guests swooning.
Ingredients:
Let’s dive into our list of ingredients! Each component plays an essential role in building flavor and texture in our Banana Pudding Cheesecake. I want you to understand why these ingredients matter so much as we create this delicious masterpiece together.
- 1 box Nilla Wafers. These iconic cookies are not only responsible for our delightful crust but also add that nostalgic flavor reminiscent of childhood desserts. Their crisp texture holds up beautifully against the creamy filling while contributing a subtle sweetness that’s absolutely divine. You can find them in most grocery stores—just make sure they’re fresh, as their crunchiness is key!
- 2 TBSP Brown sugar (packed light or dark). Adding brown sugar brings a depth of flavor thanks to its molasses content, which adds warmth and caramel notes to our crust. It perfectly complements the vanilla notes in our cheesecake while enhancing the overall sweetness without being overpowering.
- 1/2 cup Unsalted butter (melted). This ingredient is crucial for binding our Nilla Wafer crust together while adding richness and moisture. Be sure your butter is melted but not hot; otherwise, it can affect how the crust sets up when baked.
- 24 oz Cream cheese (room temperature). Softened cream cheese is at the heart of our cheesecake—it provides that luscious texture we crave! Room temperature cream cheese blends smoothly without lumps and creates a creamy filling that’s utterly intoxicating.
- 3/4 cup White granulated sugar. This sugar balances out the richness of the cream cheese beautifully, providing sweetness without overshadowing other flavors. Always taste as you go—this step is paramount in achieving harmony in your cheesecake.
- 1 tsp Pure vanilla extract. A splash of vanilla brings warmth and complexity to our filling; it’s like adding a hug to each bite! Always opt for pure vanilla extract over imitation if possible; it makes all the difference in flavor depth.
- 2 Bananas (mashed). Ripe bananas are essential for infusing our cheesecake with vibrant banana flavor! Look for bananas with lots of freckles—these are perfectly sweet and flavorful for baking.
- 1/2 cup Sour cream (room temperature). Sour cream contributes tanginess that balances out sweetness wonderfully while adding moisture to our filling—a non-negotiable element if we want that creamy consistency!
- 1/4 cup Heavy cream (room temperature). This rich addition enhances the overall creaminess of our cheesecake while providing stability when we fold it into our mixture later on—don’t skip this step!
- 4 Large eggs (room temperature). Eggs act as a binder in cheesecakes and help achieve that perfect custard-like texture when baked properly; bringing them to room temperature allows for even blending into your batter.
- 1 cup Crushed Nilla wafers. We’ll use these beauties both in our filling and for additional texture in between layers—they add crunchiness that contrasts beautifully against the smoothness.
- 2 Bananas (sliced thinly). These lovely slices are layered right into our cheesecake before baking; they contribute bursts of fresh banana flavor throughout every slice—a truly extraordinary touch!
- 1 package Instant vanilla pudding (3.4 oz). This pudding mix helps thicken our whipped topping while also enhancing its creamy texture—it’s going to give us that signature fluffiness we love!
- 1 cup Milk (cold). Cold milk aids in dissolving instant pudding quickly; avoid using warm or room-temperature milk here so we achieve optimal thickness without clumps.
- 1 tsp Pure vanilla extract (for whipped topping). Just like before, quality matters here too—this will elevate your whipped topping from good to absolutely phenomenal!
- 1 cup Heavy cream (cold) for whipping until stiff peaks form—it’s what will make our topping luxuriously fluffy! Ensure it’s cold so it whips up perfectly every time.
- Crushed Nilla Wafers (for decorating) are more than just garnish; they bring back those familiar flavors while adding visual appeal—the final touch on this beautiful creation!
Equipment You’ll Need:
Now that we’ve gathered all these wonderful ingredients, let’s talk tools! Having the right equipment makes all the difference when crafting something special like this Banana Pudding Cheesecake—it smoothens your workflow and ensures success every step along the way.
- 9-inch Springform pan: This pan’s removable sides allow us easy access once our cheesecake has set beautifully—no more struggling to release sticky edges! Ensure it’s tightly closed before pouring in your batter because leaks can lead to messy disasters during baking.
- Mixing bowls: Use large mixing bowls for combining ingredients effortlessly—having different sizes handy will help keep things organized as we move between mixing batters and whipping creams.
- Electric mixer: While hand mixing works too, an electric mixer saves time and energy when creaming butter or incorporating eggs into dense mixtures like ours! It also ensures everything blends uniformly without lumps—trust me on this one!
- Spatula: A sturdy spatula serves multiple purposes—from scraping down bowl sides during mixing sessions to folding delicate whipped toppings into batters without deflating them too much—it’s indispensable!
- Whisk: A whisk is essential when preparing instant pudding—it ensures there are no lumps left behind while creating an airy consistency through vigorous stirring—embrace those muscles!
Now that we have everything ready at hand let’s jump into preparing this magnificent Banana Pudding Cheesecake together!
Preparing the Banana Pudding Cheesecake
Step 1: Crafting Our Nilla Wafer Crust
First things first—let’s create that irresistible crust! Begin by preheating your oven to 325°F (160°C). In a medium bowl, combine your crushed Nilla Wafers with brown sugar and melted unsalted butter until everything resembles wet sand—a beautiful sandy texture means you’re on track! Trust me on this step: it’s crucial because it ensures every bite has that perfect balance between crunchiness from cookies versus smoothness from filling later on! Once mixed thoroughly, press firmly into an even layer across bottom & slightly up sides if desired within springform pan using either fingers or flat-bottomed measuring cup—it should resemble something akin to paradise waiting patiently beneath creamy layers above once baked gently until golden brown—approximately 10 minutes should suffice here before allowing cooling completely while preparing filling next…
Step 2: Blending Up The Creamy Filling
In another large mixing bowl—which should ideally be room temperature so nothing gets lumpy—combine softened cream cheese along with granulated white sugar until light & fluffy—about three minutes should do wonders here! What you’re aiming for is achieving smoothness throughout mixture since lumps can lead us down paths we don’t want during baking… Then mix in mashed bananas followed by sour cream & heavy whipping cream until fully incorporated—all those elements now come together harmoniously creating luscious banana-y goodness just waiting beneath surface like treasure chest filled with delight awaiting unearthing by hungry souls readying forks nearby!! Don’t rush this step; patience pays off tenfold down line when slicing finished cake…
Step 3: Adding Eggs Like A Pro
Gently add eggs one at a time ensuring each incorporates fully before moving onto next egg—that’s important because overmixing can introduce unwanted air bubbles causing cracks later during baking process which none among us desire!! After adding eggs successfully beat mixture gently until well blended but still thick—you’ll notice its transformation magically come alive right before eyes!! Now remember those crushed Nilla wafers? Fold them carefully into batter ensuring even distribution throughout—we want every slice bursting forth delightful textures contrasting against velvety smoothness achieved earlier…
Step 4: Layering Fresh Bananas
Once you’ve got your filling ready it’s time for some fun layering action!! Arrange thinly sliced bananas evenly over cooled crust as if laying foundation bricks paving way towards glorious heights above—and then pour creamy cheesecake batter right atop those slices gently spreading outwards across entire surface ensuring no gaps remain behind… The sight alone will make anyone weak at knees yearning eagerly await indulgence soon arriving!!
Stay tuned as we continue crafting this masterpiece together—I promise you’re going love every moment spent creating memories around dining table filled laughter accompanied by forks diving deep into heavenly dessert awaiting applause from all corners around room!!
Step 5: Mixing the Creamy Cheesecake Filling
Now that your Nilla Wafer crust is cooling and the enticing aroma of melted butter is still wafting through your kitchen, it’s time to bring together the heavenly filling for our Banana Pudding Cheesecake. Begin by grabbing a large mixing bowl and the room-temperature cream cheese, which should be soft and pliable to the touch—this makes all the difference in ensuring your cheesecake turns out creamy rather than lumpy. Using an electric mixer, beat the cream cheese on medium speed until it’s utterly smooth and luscious, about 2-3 minutes. This step is crucial because incorporating air into the cream cheese creates a light texture that balances perfectly with the richness of the other ingredients.
Next, gradually add in the white granulated sugar while continuing to mix. As you do this, you’ll notice how the mixture transforms into an even silkier batter, which is not just pleasing to the eye but also essential for sweetness throughout each bite. Then, introduce that pure vanilla extract—a small measure with a big impact! It’s like a warm hug in this cheesecake; it enhances all the flavors beautifully. Once incorporated, add in your mashed bananas and blend until everything is harmonized into one delightful mixture. The bananas will not only provide flavor but also moisture, which helps keep our cheesecake from drying out during baking. Remember to pause and scrape down the sides of your bowl to ensure every bit of goodness is combined; we want a uniform flavor profile throughout.
Step 6: Incorporating Eggs and Dairy
With your banana-infused cream cheese batter ready to go, it’s time to add in our eggs—four large ones, to be precise! Crack each egg into a separate small bowl first to avoid any shell mishaps; this ensures you can fish out any stray shells easily before they ruin your beautiful mixture. Add them one at a time to your creamy concoction while mixing on low speed. Why one at a time? This allows each egg to be fully integrated before adding another, ensuring that they emulsify properly with the rest of your filling. The emulsion process is vital here—it binds all ingredients together and gives our cheesecake its rich texture that will melt in your mouth.
Next up, we’re adding our room-temperature sour cream and heavy cream. These dairy products are non-negotiable—they contribute to that luxurious creaminess we all crave in a cheesecake. The sour cream adds just the right amount of tanginess that cuts through some of the sweetness while enhancing flavor complexity; trust me on this! Mix until everything is well combined but don’t overmix—just enough until smooth! At this stage, you might want to give it a taste; adjust sweetness or add more banana if you’d like! But remember, too much mixing introduces air bubbles that can lead to cracks during baking—so stir gently.
Step 7: Layering for Maximum Flavor
With our creamy filling complete, let’s move on to layering! Take your cooled crust and sprinkle half of those crushed Nilla Wafers right into it—this adds another textural layer that’s simply divine! Then gently pour half of your banana cheesecake filling over these crumbs. Now comes one of my favorite parts: layering those thinly sliced bananas atop this luscious filling. Make sure they’re evenly distributed so every slice has an equal chance of showcasing those beautiful banana pieces peeking through. The bananas not only add flavor but also infuse moisture into each slice—oh-so-satisfying!
After you’ve arranged those sumptuous slices with care, pour on the remaining half of your cheesecake filling over everything else. This layered approach isn’t just about aesthetics; it’s about creating a symphony of flavors as you dig into each slice later on. Every bite should present you with an orchestra of textures—from the crunchy crust at the bottom to creamy cheesecake interspersed with tender banana slices above—it truly elevates this dessert into something extraordinary!
Step 8: Baking Your Perfect Banana Pudding Cheesecake
Now comes perhaps one of the most essential steps in our journey: baking! Preheat your oven to 325°F (160°C), which is important because a steady temperature promotes even cooking without burning or cracking our delicate dessert. Once preheated, carefully place your assembled cheesecake in the oven and bake for about 85 minutes—or until you see its edges set while still having a slight jiggle in the center when gently shaken.
But why do we bake low and slow? This method prevents overcooking and helps achieve that coveted creamy consistency without risking surface cracks—a common woe for many bakers! You may notice some browning around those edges—that’s perfectly normal! Just keep an eye on it as it approaches that final time marker; ovens can vary in heat distribution. If you’re concerned about browning too fast, consider placing a baking dish filled with water on a lower rack in your oven—the steam created will help keep things moist. Once done, turn off the oven but leave your cheesecake inside for another hour—this gentle cooling period allows it to set up perfectly without sudden temperature changes that could cause cracks.
Final Touches
Step 9: Chilling for Perfection
After patiently waiting for an hour inside that warm oven, remove your Banana Pudding Cheesecake and let it cool completely at room temperature before transferring it to chill in the refrigerator for at least four hours—or overnight if possible! I know waiting can feel unbearable when you’re so close to indulging in this masterpiece—but trust me here—the chilling process is absolutely paramount for achieving that ideal texture.
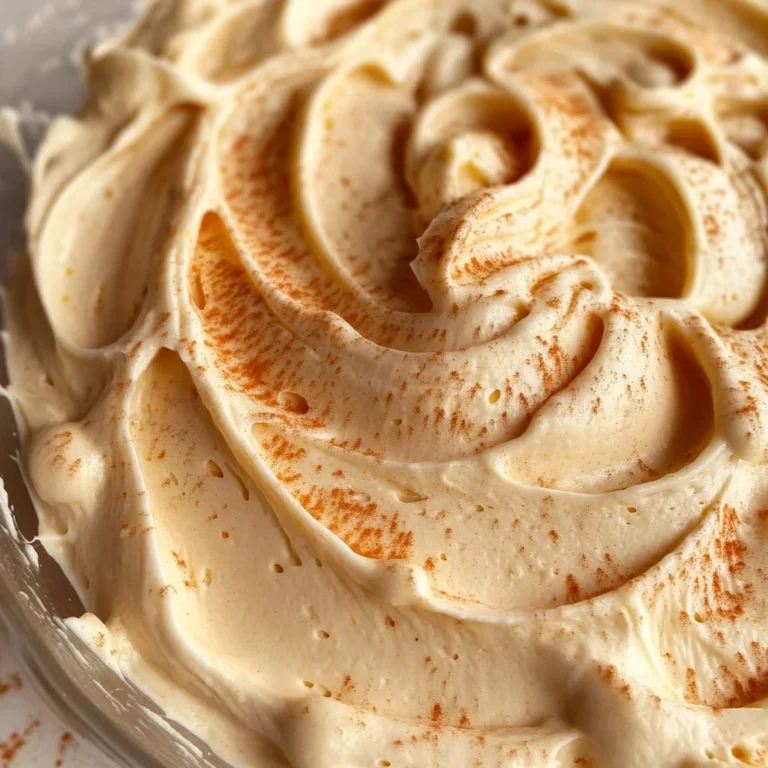
As it cools and firms up in the fridge, all those glorious flavors meld together beautifully; you’ll find that chilling transforms what already tastes fantastic into something utterly intoxicating as every bite becomes more harmonious over time. When you’re finally ready to serve this beauty after all that anticipation (and trust me—you’ll want everyone around when you unveil this!), whip up some heavy cream until fluffy and incorporate vanilla pudding mix according to package directions using milk—this whipped topping is what takes it over-the-top!
Finally, dollop or pipe this airy whipped topping generously over each slice before sprinkling with additional crushed Nilla Wafers for an extra crunch factor—the finishing touch that makes everyone gasp with delight when they take their first bite!
I promise you; watching loved ones savor each forkful will fill you with so much joy—you’ve created something profoundly satisfying here! So gather around friends and family because there’s nothing quite like sharing moments over delicious food—and this Banana Pudding Cheesecake will undoubtedly become a cherished memory shared among all who enjoy its exquisite charm!
Storage and Enjoyment Tips for Your Banana Pudding Cheesecake
Now that your Banana Pudding Cheesecake is beautifully set and ready to dazzle your taste buds, it’s time to think about how to store this delightful creation. Trust me, you’ll want to keep some of this treasure for later! The joy of indulging in a slice the next day (or even a couple of days later) is something truly special. But how do we preserve its lusciousness? Let’s dive into some helpful tips!
Storing Leftover Banana Pudding Cheesecake
To keep your Banana Pudding Cheesecake as fresh as possible, choose an airtight container that fits snugly over the cheesecake without squishing the top – you want to maintain that beautiful whipped pudding layer! Store it in the refrigerator, where it will stay deliciously fresh for up to five days, though I can almost guarantee it won’t last that long because everyone will be reaching for seconds. One of my favorite tricks is to place a slice of bread inside the container; this little gem absorbs excess moisture and helps maintain that creamy texture we all adore. Even after a few days, the flavors meld together beautifully, offering a taste experience that’s even more profound than when it was freshly made. If you’re thinking about serving leftovers, simply pull it from the fridge and slice away; no need to reheat this beauty – it’s meant to be enjoyed chilled!
Freezing Banana Pudding Cheesecake for Later
If you find yourself with more cheesecake than you can handle (which feels like winning the dessert lottery), freezing is a fabulous option! To freeze your Banana Pudding Cheesecake properly, wrap individual slices tightly in plastic wrap or aluminum foil before placing them in a freezer-safe container. This not only prevents freezer burn but also makes it easy for you to grab just one slice at a time whenever those cravings hit! When stored correctly, your cheesecake will stay delightful in the freezer for up to three months. When you’re ready for that sweet bite again, simply transfer a slice to the fridge overnight to thaw slowly – trust me on this one; patience pays off as the flavor develops even further. The convenience of having such an indulgent treat ready and waiting is absolutely unbeatable!
I hope you can feel my excitement as we talk about storing these goodies! Whether it’s just a few slices left in the fridge or a stash tucked away in your freezer, knowing you have this comforting dessert on hand brings such joy.
Banana Pudding Cheesecake
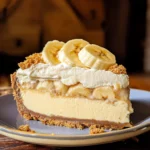
Indulge in creamy layers of banana pudding cheesecake topped with whipped vanilla goodness! Try this easy recipe today for an unforgettable treat.
- Prep Time: 30 minutes
- Cook Time: 85 minutes
- Total Time: 1 hour 55 minutes
- Yield: Approximately 12 servings 1x
- Category: Dessert
- Method: Baking
- Cuisine: American
Ingredients
- 1 box Nilla Wafers
- 2 tbsp brown sugar (packed)
- 1/2 cup unsalted butter (melted)
- 24 oz cream cheese (room temperature)
- 3/4 cup white granulated sugar
- 1 tsp pure vanilla extract
- 2 ripe bananas (mashed)
- 1/2 cup sour cream (room temperature)
- 1/4 cup heavy cream (room temperature)
- 4 large eggs (room temperature)
- 1 package instant vanilla pudding (3.4 oz)
- 1 cup cold milk
- Additional Nilla Wafers for decoration
Instructions
- Preheat the oven to 325°F (160°C). In a bowl, combine crushed Nilla Wafers, brown sugar, and melted butter until crumbly. Press into the bottom of a springform pan.
- In a mixing bowl, beat cream cheese and sugar until smooth. Add mashed bananas, vanilla extract, sour cream, and heavy cream; mix until combined.
- Add eggs one at a time, mixing gently after each addition. Fold in crushed Nilla Wafers.
- Pour half the filling over the crust. Layer with sliced bananas, then add remaining filling on top.
- Bake for about 85 minutes or until edges are set but center jiggles slightly. Turn off the oven and let cool inside for an hour.
- Chill in the refrigerator for at least four hours before serving. Top with whipped cream and crushed Nilla Wafers before enjoying.
Nutrition
- Serving Size: 1 slice (approximately 120g)
- Calories: 390
- Sugar: 25g
- Sodium: 280mg
- Saturated Fat: 15g
- Unsaturated Fat: 10g
- Trans Fat: 0g
- Carbohydrates: 30g
- Fiber: 1g
- Protein: 5g
- Cholesterol: 95mg