Pecan Pie Cheesecake Bars
There’s something profoundly magical about desserts that bring together the warmth of tradition and the excitement of new flavors. When I think of Pecan Pie Cheesecake Bars, I’m transported to cozy family gatherings, where laughter fills the air, and the sweet scent of baked goodies wafts through the kitchen. These bars embody a beautiful fusion of two beloved desserts: the rich, creamy decadence of cheesecake paired with the nutty sweetness of pecan pie. Each layer sings its own unique melody, creating a symphony of flavors that is utterly intoxicating. Trust me when I say that one bite will leave you in blissful reverie! This recipe is not just about making a dessert; it’s about crafting an experience that invites everyone to indulge in something truly extraordinary.
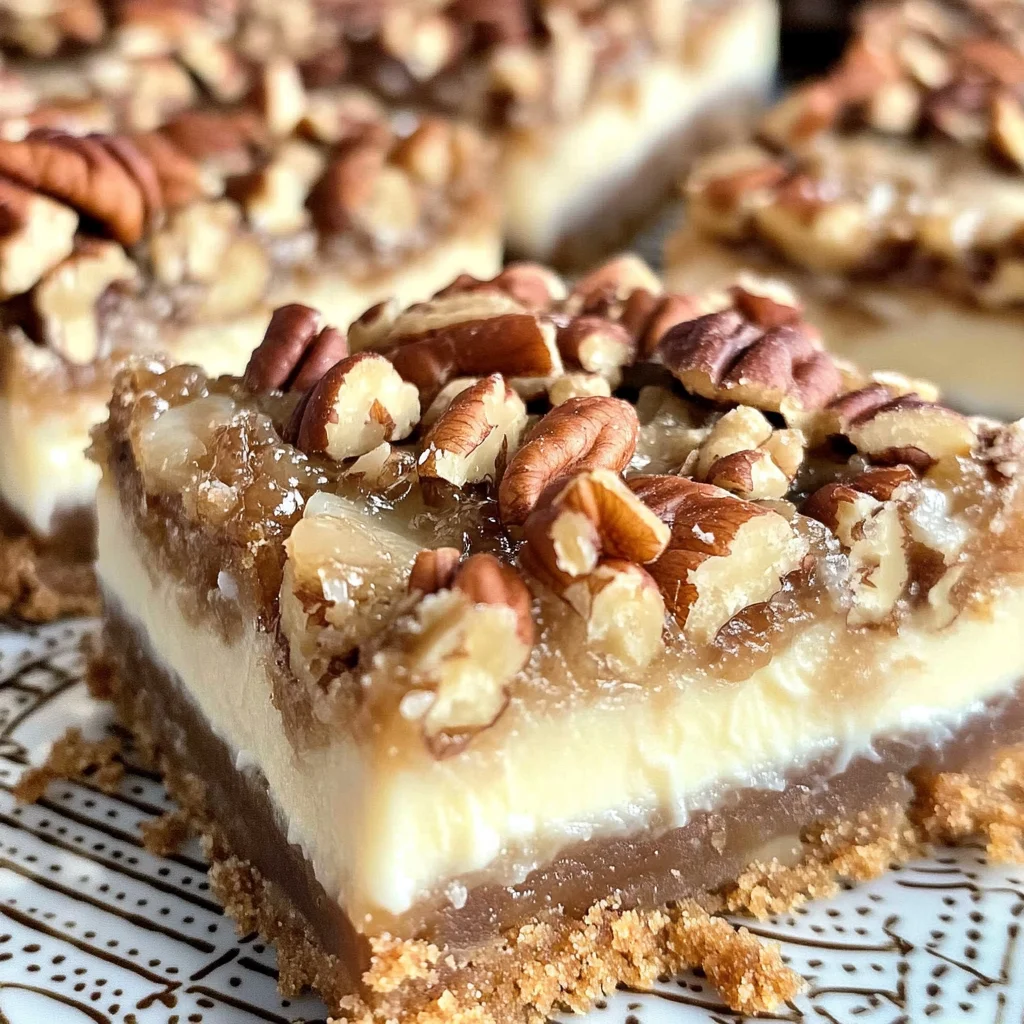
Why do we love combining these two classics? Well, it’s in their contrasts! The crunchy pecans sit atop a smooth cheesecake filling, all resting on a buttery graham cracker crust that crumbles just right with each bite. It’s this delightful interplay between textures and flavors that makes these Pecan Pie Cheesecake Bars so incredibly special. They are perfect for any occasion—be it holiday feasts, casual get-togethers, or simply as a treat to enjoy after a long day. You’ll find that once you’ve made these bars, they become a cherished staple in your recipe repertoire. So roll up your sleeves and let’s dive into this delicious journey together!
Pecan Pie Cheesecake Bars: A Layered Delight for Any Occasion
Hello, fellow food lover! Today, I’m thrilled to share my wonderful recipe for Pecan Pie Cheesecake Bars. This delightful dessert will not only captivate your taste buds but also become the star of any gathering. With its luscious texture and rich flavors, every layer tells its own story—starting from the crunchy crust to the silky cheesecake filling and finishing with the irresistible pecan topping.
Ingredients:
As we embark on this delightful culinary adventure together, let’s gather our essential ingredients. Each component plays a vital role in crafting these bars, so pay close attention to what they contribute!
- 2 1/2 cups graham cracker crumbs (about 18 full-size grahams). The foundation of our dessert starts here! Graham cracker crumbs provide not just flavor but also that necessary crunch which contrasts beautifully against the creaminess above. When you buy graham crackers, choose ones without artificial flavors or preservatives for an authentic taste. If you’re feeling adventurous or want a gluten-free option, crushed nuts or gluten-free cookies can be used as excellent substitutes!
- 1/4 cup granulated sugar. This ingredient is crucial as it enhances sweetness while balancing out the richness of the butter in our crust. It also helps to create a slightly caramelized edge when baked—so don’t skip this step!
- 1/2 cup unsalted butter (melted). Butter is indeed the unsung hero here! The melted butter brings moisture and richness to our crust while binding everything together beautifully. Using unsalted butter allows us to control the salt levels more effectively—this is absolutely paramount for achieving flavor balance.
- 2 packages cream cheese (8 ounces each). Cream cheese is what gives our cheesecake filling its luxurious creaminess and tangy flavor profile. Make sure it’s softened before mixing; if it’s too cold, you’ll end up with lumps instead of that smooth consistency we’re after! You could substitute with vegan cream cheese if you’re looking for non-dairy alternatives—just ensure it’s properly softened.
- 3/4 cup granulated sugar. Just like before, sugar plays a significant role here by sweetening our cheesecake layer while enhancing its velvety texture when whipped together with our cream cheese.
- 2 large eggs. Eggs are essential for structure; they help bind our filling and create a lovely richness that elevates its overall texture and flavor. For egg-free options, consider using flaxseed meal mixed with water as an alternative binder.
- 1 teaspoon vanilla extract. A splash of vanilla adds depth and warmth to our cheesecake filling—it’s like adding a hug in liquid form! Always opt for pure vanilla extract over imitation wherever possible; your taste buds will thank you!
- 1 cup light brown sugar (packed). Light brown sugar brings not only sweetness but also moisture due to its molasses content—a key factor for achieving that gooey pecan topping we all adore.
- 1/2 cup light corn syrup. Corn syrup ensures our pecan topping stays soft and chewy instead of hardening into candy-like brittle after baking—this step is crucial if you want those beautiful layers to shine through!
- 1/2 cup heavy whipping cream. Cream contributes luxurious richness to our pecan topping while helping bind everything together smoothly; trust me on this—it makes all the difference!
- 1/4 cup unsalted butter (for topping). Just like earlier, melted butter gives richness while blending harmoniously with other ingredients to create an irresistible finish.
- 1/2 teaspoon kosher salt. A pinch of salt enhances every flavor in both layers—it’s really amazing how much depth it can add overall!
- 1 teaspoon vanilla extract (for topping). Again? Yes! This repetition reinforces those warm notes bringing harmony across both layers—what’s better than consistency in flavors?
- 2 cups chopped pecans. These beauties are what truly make this dish shine—they add crunchiness alongside their earthy nuttiness! Choose fresh pecans for maximum flavor impact; if you’re allergic or prefer another type of nut, feel free to experiment with walnuts or almonds instead—a delicious twist yet still honoring tradition.
Equipment You’ll Need:
Before we dive into preparing these heavenly bars together, let’s take stock of some essential tools you’ll need by your side in this endeavor! Having the right equipment can truly elevate your baking experience.
- 13×9 inch baking dish – A standard size for many bar recipes; this dish allows even baking throughout while providing ample space for layering all those wonderful components without crowding them too much!
- Parchment paper – Lining your baking dish helps prevent sticking and makes cleanup effortless afterward—you’ll be grateful during slicing when those edges come out perfectly clean without fuss!
- Food processor – This trusty tool will save time when crushing graham crackers into fine crumbs quickly—it’s efficient and ensures uniformity which matters greatly for our crust texture.
- Electric mixer with whisk attachment – An electric mixer does most of the heavy lifting during mixing processes; using the whisk attachment helps achieve airy results especially when beating eggs or creaming together our sugars with cream cheese.
With all your ingredients gathered and equipment at hand, let’s move on to preparing these divine Pecan Pie Cheesecake Bars—the real magic happens next!
Step 1: Preparing Your Base
Let’s begin by lining our baking dish with parchment paper—that way we don’t have any sticky situations later on! Take your time here; it ensures smooth removal once everything is baked and cooled down nicely. Next up is making our graham cracker crust: place those crunchy crackers into your food processor along with ¼ cup granulated sugar until they become fine crumbs resembling sand—you want them well-pulverized but not overdone into dust! Drizzle in melted unsalted butter then pulse again until everything clumps together like wet sand—this binding action creates stability upon pressing into your baking dish later on which keeps each layer intact beautifully post-bake.
Now gently press those crumbly delights firmly into the bottom of prepared dish using either palms or bottom surface area from something flat—aiming for even coverage across corners especially because an uneven base can lead towards some parts being overly dry post-bake while others remain soggy due to being undercooked—a non-negotiable step indeed!
Step 2: Making That Creamy Filling
With our crust set aside patiently awaiting its sweet companions above now comes my favorite part—the cheesecake filling itself! In another bowl equipped with whisk attachment attach yourself comfortably before adding softened cream cheese alongside ¾ cup granulated sugar plus two large eggs plus one teaspoon vanilla extract—let’s beat this mixture until fluffy goodness emerges from within (roughly three-five minutes should suffice). You’re aiming for smoothness here so don’t rush through process; little air pockets help fluffiness enhance overall texture while also providing stability during baking time later on—I promise you’ll thank yourself later when slicing into those bars reveals lovely layers stacked atop one another flawlessly!
Once fully mixed pour this heavenly concoction evenly over prepped graham cracker base then set aside momentarily—we’re not done yet but I can already feel excitement building up inside me knowing what lies ahead next…
Step 3: Crafting Our Exquisite Topping
Now onto what everyone has been eagerly waiting for—the pecan pie topping! In a small saucepan over medium heat combine packed light brown sugar alongside light corn syrup followed by half cup heavy whipping cream plus quarter cup unsalted butter along with half teaspoon kosher salt too—stir frequently until mixture begins bubbling away beautifully underneath surface… Ahh just wait till aroma fills kitchen space—it gets better every second spent stirring away at pot reminded how simple ingredients come together wonderfully transformed into something special right before eyes…
Bring mixture up high enough boiling point then maintain steady stirring motion throughout exactly one minute—that little time frame makes huge difference ensuring proper binding occurs once cooled off slightly thereafter so can incorporate chopped pecans without sinking towards bottom layer below later down line—we want them resting prettily atop surface instead don’t we?! Once cooled pour slowly over cheesecake layer using spoon technique mentioned earlier which allows gentle layering occur seamlessly between various textures present across bars themselves…
Step 4: Baking To Perfection
Now comes one last step before indulging ourselves fully: pop these beauties into oven preheated at 350°F (175°C) allowing them bake away happily approximately thirty-five minutes total until set edges appear golden brown whilst center retains slight jiggle still intact indicating perfect doneness achieved inside oven space…it’s crucial avoiding overbaking otherwise risk dryness setting upon entire experience ruining delicate harmony felt first tasted initially—and who would ever want THAT kind outcome after all effort put forth earlier?
Once removed allow cooling completely outside oven then cover tightly using plastic wrap letting chill out inside refrigerator anywhere between four hours—or overnight if feeling daringly patient enough—to ensure maximum flavor infusion occurs plus easier cutting success later down line too…
And there you have it—your Pecan Pie Cheesecake Bars are almost ready to dazzle friends & family alike when revealed finally served up plated alongside cups steaming brewed coffee afterward… What could possibly be better than savoring such delightful combination enjoyed amongst loved ones? Enjoy every bite knowing it was crafted lovingly from scratch just for you…and remember: sharing joy found within good food always remains best gift anyone could ever offer themselves or others around them too!
Step 5: Bake to Perfection
Once you’ve lovingly layered your cheesecake filling atop that buttery graham cracker crust, it’s time for the pièce de résistance—baking! Preheat your oven to a cozy 350 degrees Fahrenheit, a crucial step to ensure even baking throughout. As you slide those Pecan Pie Cheesecake Bars into the oven, this is where magic happens. The heat transforms the raw ingredients into a creamy, dreamy cheesecake that will make your taste buds sing. You’ll want to set a timer for 35 minutes, but keep an eye on them as they bake. It’s perfectly normal for the edges to puff up slightly while the center remains a tad soft; trust me, this is exactly what you want! The center will continue to firm up as it cools down later.
As they bake, your kitchen will fill with the most intoxicating aroma—a sweet symphony of vanilla and brown sugar mingling together that will have everyone wandering in to see what’s happening. This step is not just about cooking; it’s about transforming simple ingredients into something profoundly satisfying. You’re creating layers of texture and flavor that will delight anyone lucky enough to indulge in these bars. Once the timer goes off, give them a gentle jiggle; if they are set with just a slight wobble in the middle, they are ready to come out. Don’t be tempted to overbake—this can result in a dry texture rather than that luscious creaminess we crave!
Step 6: Cooling Down – A Critical Step
Now comes one of the most important parts of this recipe: cooling down your creation. After you’ve removed your baked bars from the oven, let them sit at room temperature until they’re completely cool—this could take about an hour or so. Yes, I know waiting can be tough when you’re yearning for that first bite! But trust me on this: allowing them to cool properly ensures that all those flavors meld beautifully together while also setting up the structure of your cheesecake bars. If you skip this step and dive right in, you’ll miss out on that perfect slice—and no one wants a messy plate at such a special occasion!
Once cooled, cover them gently with plastic wrap or foil and pop them in the refrigerator for at least four hours; overnight is even better if you have the patience! This chilling phase allows those irresistible flavors to deepen and intensify while allowing each layer to solidify properly—creating that smooth and creamy texture we all adore in cheesecake. Plus, this resting period helps with slicing when you’re ready to serve; trust me—you’ll thank yourself later when you’re cutting into clean, stunning squares instead of a wobbly mess.
Step 7: Slicing Our Sweet Creation
After your Pecan Pie Cheesecake Bars have chilled sufficiently and are ready for their grand debut, it’s time for slicing! Gently lift them from the baking dish using the parchment paper—this is why we line it in the first place; it makes life so much easier! Place them on a cutting board and grab a sharp knife for this task; a serrated knife works beautifully here if you have one handy because it glides through without squishing those delicate layers.
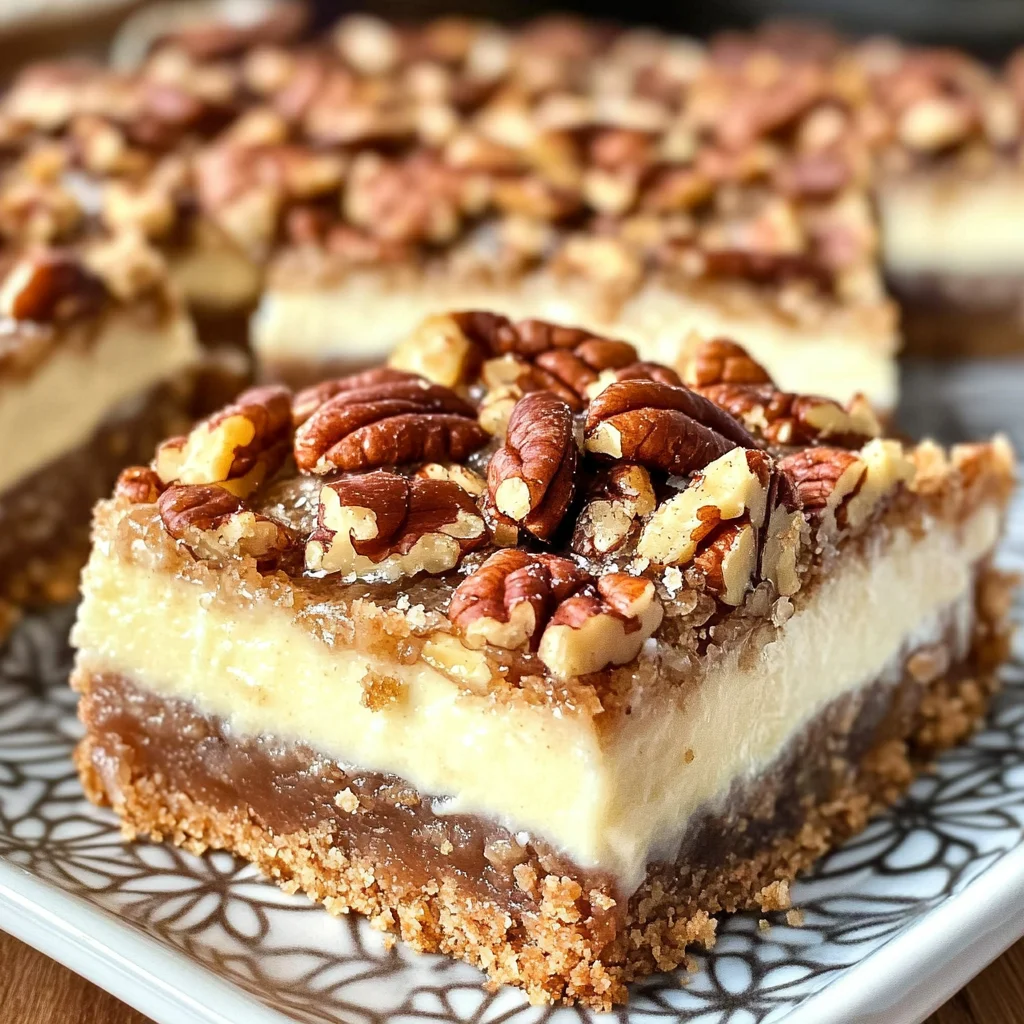
When you’re cutting these beauties into squares—or should I say treasures?—take your time and use smooth downward motions rather than sawing back and forth, which can disturb those lovely layers we’ve worked so hard on achieving. Aim for generous portions; after all, who wouldn’t want more of this heavenly dessert? Each square should reveal those enticing layers—the crumbly crust below giving way to rich creaminess topped with that sticky-sweet pecan topping bursting with flavor.
Step 8: The Grand Reveal – Serving Your Pecan Pie Cheesecake Bars
Now comes one of my favorite moments—the moment of truth when you get to serve these glorious Pecan Pie Cheesecake Bars! Arrange them on a beautiful platter or individual plates if you’re feeling fancy—the presentation adds an extra touch of love. As you do this, don’t forget to drizzle any leftover pecan topping over each slice; it’s like adding liquid gold onto an already stunning dish.
And let’s talk toppings! While these bars are absolutely divine on their own, consider serving them with dollops of whipped coconut cream or even some fresh berries on the side for contrast—there’s something about that burst of tartness from fresh fruit paired with richness that elevates every bite. As you dig in alongside friends and family—or perhaps sneak one away for yourself—take a moment to savor each mouthful. Notice how each layer contributes its unique character; from the crunchy graham cracker base to the velvety cheesecake filling topped by sweet and nutty pecans—it’s truly extraordinary!
Conclusion:
As we wrap up this delightful journey through the creation of Pecan Pie Cheesecake Bars, I can’t help but feel excited about sharing this recipe with you. There’s something truly magical about layering flavors—the buttery graham cracker crust providing a sturdy foundation for the velvety cheesecake filling, topped off with that intoxicating pecan pie layer that dances between crunchy and gooey. Each bite is nothing short of extraordinary! I hope my enthusiasm for these bars has sparked a desire within you to whip up your own batch; trust me when I say they will steal the show at any gathering.
Why is this recipe a must-try? It’s not just about taste—it’s about the experience of making something special that brings joy to both those who create it and those who indulge in it. Picture pulling these golden-brown bars from the oven, letting their warm aroma fill your kitchen as friends gather around, eager anticipation written on their faces. These bars are perfect for holidays, potlucks, or simply as an afternoon pick-me-up while curled up with a good book; every occasion deserves a touch of sweetness!
Imagine savoring one of these luscious bars alongside a freshly brewed cup of coffee—what a divine pairing! Or perhaps enjoying one as part of an indulgent dessert platter at your next gathering; they’ll shine among other treats like brownies or cookies. For an even more decadent experience, why not drizzle some warm caramel sauce over each slice before serving? The possibilities are endless!
Feeling adventurous? This recipe is wonderfully adaptable! You could swap out pecans for walnuts or even add chocolate chips into the cheesecake filling for an unexpected twist that will make your heart sing! You could also experiment with different spices like cinnamon or nutmeg within the filling—these subtle additions can elevate this dessert from amazing to truly unforgettable. So go ahead and play around; I invite you to explore new flavors while keeping true to the essence of these Pecan Pie Cheesecake Bars. Whatever path you choose, please share your experiences—I can’t wait to hear how they turned out!
Pecan Pie Cheesecake Bars
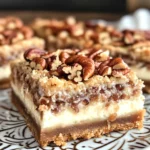
Pecan Pie Cheesecake Bars are a delightful fusion of two beloved desserts that will enchant your taste buds. This indulgent treat features a buttery graham cracker crust layered with creamy cheesecake and topped with a gooey, nutty pecan pie filling. Each bite delivers a perfect balance of textures, from the crunchy pecans to the smooth cheesecake. Ideal for any occasion—whether it’s a festive gathering or a cozy evening at home—these bars are sure to impress. Get ready to create an unforgettable dessert experience that everyone will love!
- Prep Time: 30 minutes
- Cook Time: 35 minutes
- Total Time: 1 hour 5 minutes
- Yield: Serves approximately 16 bars 1x
- Category: Dessert
- Method: Baking
- Cuisine: American
Ingredients
- 2 1/2 cups graham cracker crumbs
- 3/4 cup granulated sugar (divided)
- 1/2 cup unsalted butter (melted, divided)
- 2 packages cream cheese (8 ounces each, softened)
- 2 large eggs
- 1 teaspoon vanilla extract (divided)
- 1 cup light brown sugar (packed)
- 1/2 cup light corn syrup
- 1/2 cup heavy whipping cream
- 2 cups chopped pecans
- 1/4 teaspoon kosher salt
Instructions
- Preheat your oven to 350°F (175°C). Line a 13×9 inch baking dish with parchment paper.
- In a food processor, blend graham cracker crumbs and 1/4 cup sugar until fine. Add in 1/4 cup melted butter and pulse until combined. Press mixture into the bottom of the prepared dish.
- In a bowl, mix softened cream cheese with 3/4 cup sugar, eggs, and 1 teaspoon vanilla until smooth. Pour over the crust.
- For the topping, heat brown sugar, corn syrup, cream, remaining butter, salt, and remaining vanilla in a saucepan until bubbling. Remove from heat and stir in chopped pecans.
- Pour topping over cheesecake layer and bake for about 35 minutes until edges are set but center slightly jiggles.
- Cool at room temperature, then refrigerate for at least four hours before slicing.
Nutrition
- Serving Size: 1 bar (approx. 70g)
- Calories: 240
- Sugar: 18g
- Sodium: 150mg
- Fat: 15g
- Saturated Fat: 7g
- Unsaturated Fat: 7g
- Trans Fat: 0g
- Carbohydrates: 24g
- Fiber: 1g
- Protein: 3g
- Cholesterol: 45mg