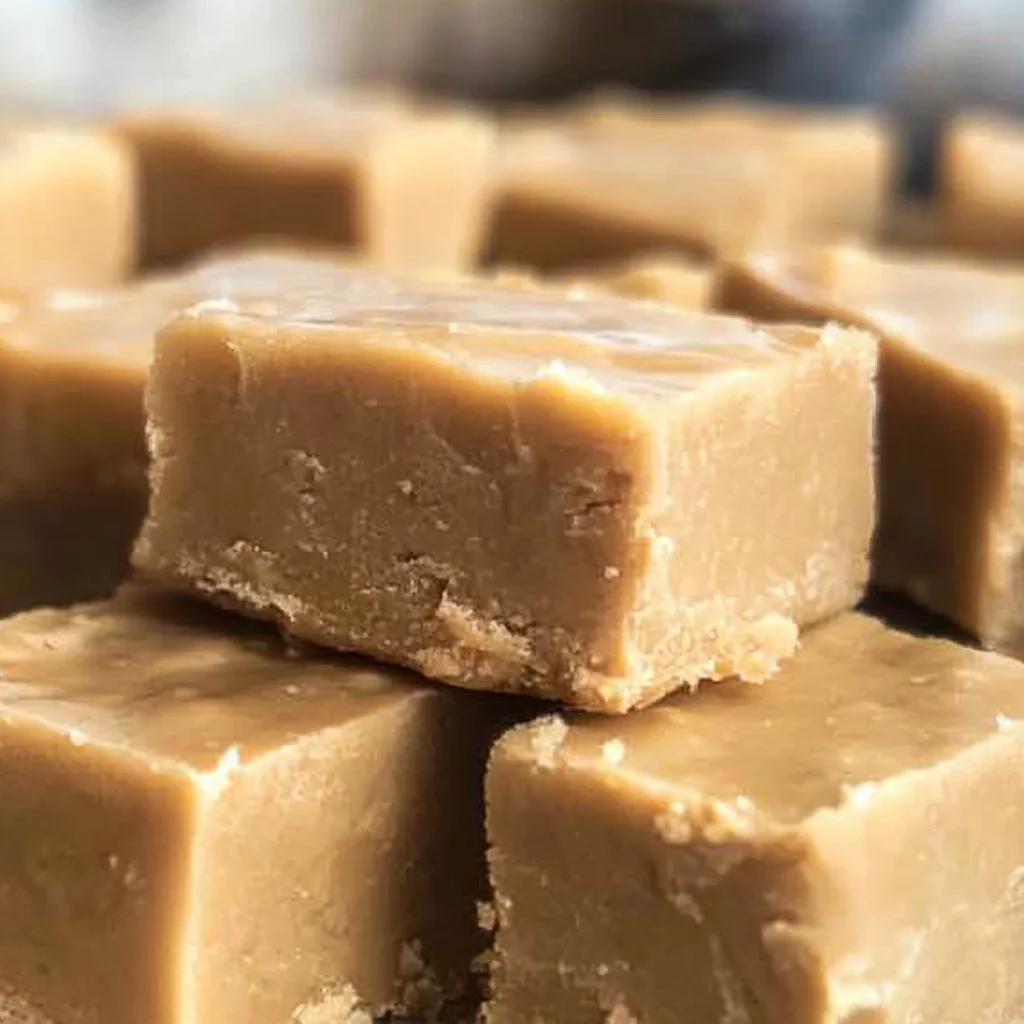
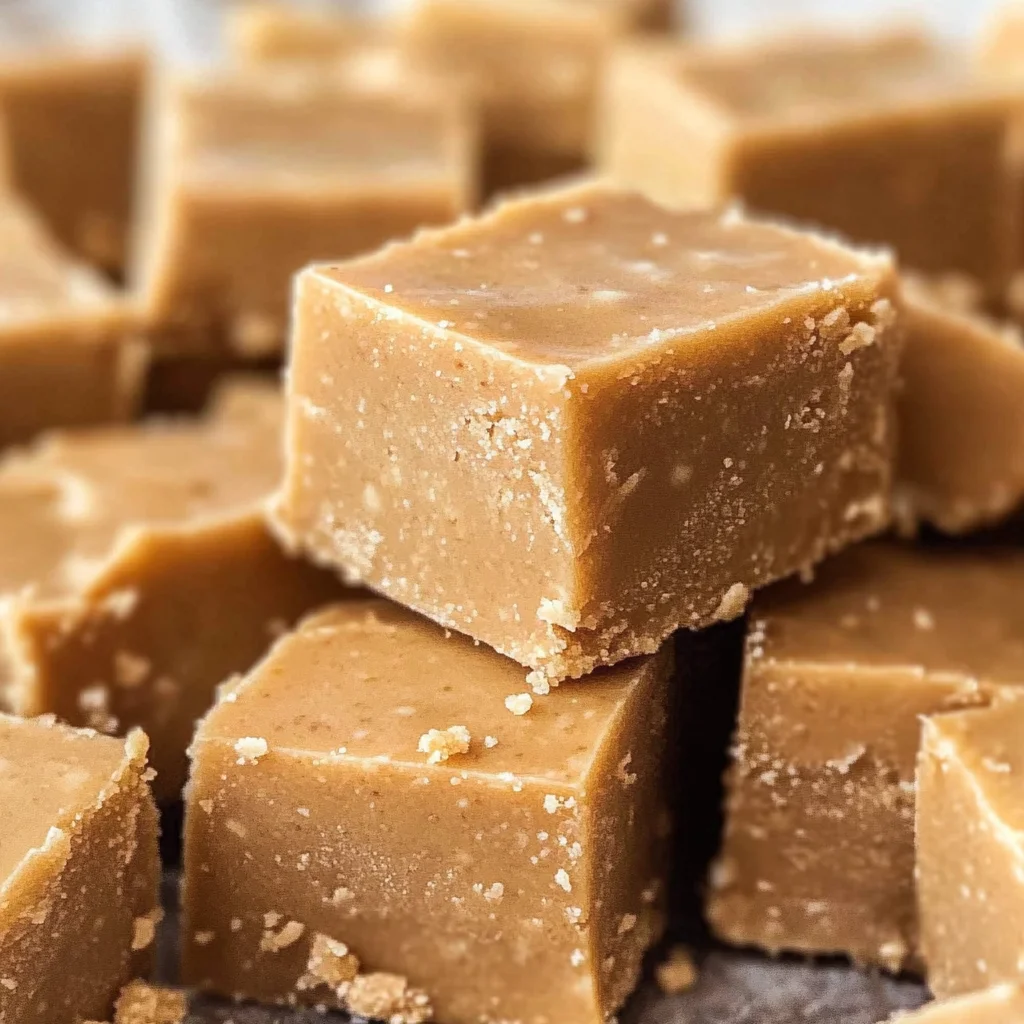
3 Ingredient Peanut Butter Fudge
There’s something truly magical about sharing a recipe that has the power to evoke memories, stir emotions, and create connections. This 3 Ingredient Peanut Butter Fudge is not just another sweet treat; it’s an experience wrapped in nostalgia. The first time I made this fudge, I was sitting in my grandmother’s cozy kitchen, the air thick with the rich, nutty aroma of peanut butter mingling with sweet chocolate. Each bite is like a warm hug — profoundly satisfying and utterly intoxicating. I promise you, with just three simple ingredients, you’re not only making a dessert; you’re crafting a little piece of joy that will delight friends and family alike.
What makes this fudge so special is its simplicity paired with its decadent flavors. Imagine creamy peanut butter melting into silky white chocolate, bound together by the lusciousness of sweetened condensed milk. It’s a symphony of flavors that come together effortlessly, creating a treat that feels indulgent without demanding hours in the kitchen. Trust me when I say that once you take your first bite of this fudge, you’ll understand why it’s become an all-time favorite for gatherings and special occasions alike. Whether it’s for a birthday party, a holiday celebration, or just because you deserve something sweet today, this 3 Ingredient Peanut Butter Fudge will always find its way to your heart.
3 Ingredient Peanut Butter Fudge: A Simple Indulgence
Now that we’ve set the stage for what’s to come, let’s dive into this delightful recipe! The beauty of this fudge lies in its ease — perfect for both novice bakers and seasoned pros looking for something quick yet delectable. With just three ingredients and minimal prep time, you’re going to love how effortlessly you can whip up this treat!
Ingredients:
Let’s embark on this culinary journey together! Here are the essential ingredients you’ll need for your 3 Ingredient Peanut Butter Fudge:
- 12 ounces white chocolate chips. The star of our fudge is undoubtedly the white chocolate chips. They bring sweetness and creaminess to the mix while providing a smooth texture that melts beautifully when heated. When shopping for white chocolate chips, look for high-quality brands that list cocoa butter as one of the top ingredients — this ensures you’ll get that delightful melt-in-your-mouth experience we’re aiming for. Avoid cheaper options with fillers like vegetable oil; they won’t give you the same richness and might leave your fudge feeling less luxurious.
- 1.5 cups creamy peanut butter (do not use natural peanut butter). The choice of peanut butter is absolutely paramount here! We want creamy peanut butter to ensure smooth blending with our other ingredients and maintain that delectable texture we crave in fudge. Natural peanut butters can separate or be too runny because they lack stabilizers which keep them creamy; instead, opt for classic brands known for their consistency (you know the ones!). This ingredient adds not only flavor but also a lovely nuttiness that balances perfectly with the sweetness of the white chocolate.
- 1 can sweetened condensed milk (14 oz.). Oh my goodness, where do I even begin with sweetened condensed milk? This ingredient is pure liquid gold! It acts as both a binder and a natural sweetener in our recipe, ensuring our fudge sets beautifully and has that irresistible chewiness we love so much. Make sure to choose full-fat versions if possible; they provide richness that’s crucial for achieving the ultimate fudgy texture. Sweetened condensed milk is truly non-negotiable here — it works wonders in keeping everything together while enhancing flavor at every level.
Equipment You’ll Need:
Before we jump into making our fabulous fudge, let’s talk about the essential tools you’ll need to make this happen seamlessly! Having the right equipment creates an enjoyable cooking experience and ensures your success.
- 8X8 baking pan – This size is perfect! It allows enough space for our fudge to set properly without being too thick or thin. If you don’t have an 8×8 pan handy, fear not! You can use any similar-sized dish; just adjust your cutting strategy later if needed.
- Parchment paper or wax paper – Lining your pan is crucial because it makes removing your fudge so much easier after it sets! No one wants to wrestle their creation out of the dish—trust me on this one! If using parchment paper, it can also help prevent sticking while allowing for easy cleanup.
- Microwave-safe bowl – Since we’ll be melting our ingredients together seamlessly in the microwave, having a sturdy bowl that won’t warp or stain under heat is key here. Choose glass or ceramic bowls to ensure even heating while avoiding plastic which can warp at high temperatures.
- Spatula or wooden spoon – These are essential tools for mixing everything together once melted! A spatula allows you to scrape down every last bit from the sides of your bowl ensuring nothing goes wasted while giving you an even blend.
Preparing the 3 Ingredient Peanut Butter Fudge
Step 1: Prepping Your Pan
First things first! Let’s prepare our baking pan because creating a solid foundation ensures everything else comes together beautifully. Begin by spraying an 8X8 baking pan generously with cooking spray — trust me; this step is crucial because it prevents any sticky drama later on when you’re ready to cut those luscious pieces of fudge out! Next, line the bottom with waxed paper or parchment paper; this little trick allows easy lifting out once it cools entirely without ruining your masterpiece!
Step 2: Melting Chocolate and Peanut Butter
Now comes one of my favorite parts: melting those heavenly ingredients together! In a large microwave-safe bowl (remember to avoid plastic!), combine your 12 ounces of white chocolate chips along with 1.5 cups of creamy peanut butter. Place them in your microwave and set it on medium power; here’s my secret: heat them in 30-second intervals! After each interval, give everything a good stir — don’t rush this step as stirring helps distribute heat evenly while preventing scorching or uneven melting!
As soon as everything transforms into a luscious mixture that’s smooth and fully combined (it might take around two minutes total), you’ll marvel at how beautiful it looks — almost like liquid gold swirling around before your eyes!
Step 3: Incorporating Sweetened Condensed Milk
Once you’ve achieved peak meltiness from our previous step (and maybe indulged in sneaking a taste), it’s time to add our star player: sweetened condensed milk! Pour one whole can (14 oz.) into your melted concoction and mix gently but thoroughly until fully incorporated—this part is where magic happens as two worlds collide into one utterly divine mixture bursting with flavor!
You’ll notice how rich and delightful it smells as you blend—it should be glossy with no lumps remaining visible—if there are still bits clinging onto anything…keep stirring until smooth as silk! This process creates harmony between all three ingredients bringing out their unique flavors while binding them cohesively.
Step 4: Pouring Into The Pan
Now comes my favorite moment—the transformation from bowl to baking pan! Carefully pour your velvety mixture into the prepared baking dish you’ve set aside earlier (make sure every last drop finds its home). Use a spatula here again—this tool will help spread everything evenly across all corners ensuring no patch remains untouched by fudgy goodness!
Once settled nicely within its new abode, lightly tap on your counter—this helps eliminate air bubbles lurking underneath which could disrupt smoothness later on when cutting into squares after chilling…and oh yes—don’t forget about refrigerating until fully set (about 2-3 hours). Patience pays off big time here because each hour spent chilling results in richer textures waiting eagerly inside these decadent bites!
I can’t wait until we dive deeper into more steps together where we’ll finally unveil those dreamy pieces ready for sharing!
Stay tuned as we continue unraveling more secrets behind creating our beloved 3 Ingredient Peanut Butter Fudge…
Step 5: Pouring the Sweet Symphony into the Pan
Once your luscious peanut butter and white chocolate mixture is harmoniously combined, it’s time to pour this velvety goodness into your prepared baking pan. Grab your trusty spatula, which will be your best friend in this moment, and gently scrape every last bit of that rich, creamy fudge mixture from the bowl. Trust me; you won’t want to leave any behind! This step is where all your hard work pays off, as you create a smooth top layer that will set beautifully in the fridge.
As you pour the mixture into the lined 8X8 baking dish, take a moment to appreciate the aroma wafting through your kitchen; it’s utterly intoxicating! You should see a glossy sheen on top—this means you’ve melted everything just right and achieved that silky texture we all crave in fudge. Using the spatula, gently spread it evenly across the pan so that every bite will be as satisfying as the last. This even distribution ensures that when you cut it later, each piece will have that perfect balance of sweetness and richness, making for an unforgettable treat. Don’t rush this step—allow yourself to savor the anticipation of what’s to come!
Step 6: The Art of Chilling
Now comes one of my favorite parts—the chilling! Why chill? Well, this is absolutely paramount to achieving that firm yet creamy texture that makes peanut butter fudge so irresistible. Once you’ve poured your fudge mixture into the pan, cover it lightly with plastic wrap or aluminum foil, ensuring it doesn’t touch the surface (we don’t want any weird textures). Place it in the refrigerator for about 2-3 hours or until fully set; patience is key here!
During this chilling phase, something magical happens. The fats from the peanut butter and chocolate meld together while cooling, creating a solid structure for our fudge without compromising its incredibly creamy mouthfeel. You might wonder how long is too long? Trust me; I’ve left mine in overnight before! While longer chilling times won’t hurt the fudge per se, they can make cutting a little more challenging if it’s too stiff. So aim for that sweet spot around two to three hours—just enough time for you to reflect on how delicious those little squares will soon be.
Step 7: Cutting Into Perfection
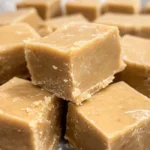
Once you’ve successfully allowed your fudge to chill and set properly—a process well worth every second—it’s time for another exciting moment: cutting into those beautiful squares! Gently lift the fudge out of the pan using the edges of your parchment paper or waxed paper as handles. You should see a lovely shine on top and a thick consistency that feels substantial yet soft to touch—this is exactly what we’re aiming for!
To cut it into pieces, use a sharp knife warmed under hot water; this technique prevents sticking and ensures clean lines between each delectable square. Start by cutting straight down in one motion rather than sawing back and forth; this helps maintain that gorgeous surface finish. As you slice through this confectionery delight, pay attention to how easily the knife glides through; you’re going to be rewarded with perfectly shaped pieces that are not only pleasing to look at but also ready to melt in your mouth with every bite! If you happen to enjoy nibbling on corners or uneven edges (no judgment here), go ahead and indulge—that’s just a little chef privilege I like to take!
Step 8: The Grand Finale – Serving Your Masterpiece
Finally, after all that love and care you’ve poured into making this delightful 3 Ingredient Peanut Butter Fudge, it’s time for its grand unveiling! Arrange those beautifully cut squares onto a lovely serving platter or individual treat bags if you’re feeling generous (or maybe just want to share with friends). They are perfect for parties, casual get-togethers, or simply keeping some handy at home for an afternoon snack when cravings strike.
And let’s talk about presentation—because we eat with our eyes first! Consider drizzling some melted dairy-free chocolate over each piece for an added touch of elegance or sprinkling a hint of sea salt across them before serving; these finishing touches elevate your already extraordinary fudge into something truly special. I promise you—when friends or family take their first bite, their expressions will say it all: pure joy.
So there you have it—a truly extraordinary recipe that’s not only simple but filled with warmth and love from my kitchen to yours. Enjoy sharing these sweet moments with loved ones because nothing brings people together quite like homemade treats made with heart!
Storage and Enjoyment Tips for Your 3 Ingredient Peanut Butter Fudge
Now that you’ve taken this delightful journey and your homemade 3 Ingredient Peanut Butter Fudge is chilling in the fridge, it’s time to talk about how to savor every last morsel! I can already imagine the excitement as you dig into that creamy, dreamy fudge. But let’s face it: sometimes, life happens, and we may not finish the whole batch at once. So, what do we do when we have some delicious leftovers? Fear not! This fudge is incredibly easy to store, ensuring that you can relish its rich flavors for days to come.
Storing Leftover 3 Ingredient Peanut Butter Fudge
To keep your fudge fresh and utterly scrumptious, place it in an airtight container—this is crucial to prevent any unwanted moisture from sneaking in! A glass container works wonderfully, but if you’re short on space in the fridge, a plastic one will do just fine. Make sure to layer parchment paper between pieces if you want to avoid any sticky situations; trust me, this little trick will save you from a gooey mess when it’s time to indulge again. When stored properly, your fudge should remain delectable for up to two weeks, though I doubt it will last that long! The flavors may even deepen slightly over time, creating a richer experience with each bite. If you find yourself feeling adventurous, try placing a slice of bread in the container with your fudge; this simple hack helps maintain its creamy texture while adding a subtle touch of moisture. When you’re ready to enjoy—simply piece off a square or two and let them come to room temperature. You’ll be amazed at how every bite still melts effortlessly in your mouth!
Freezing 3 Ingredient Peanut Butter Fudge for Later
If you’re looking ahead or want to stock up on this treat for future cravings (and trust me—you’ll want to!), freezing is an excellent option! To freeze your fudge, cut it into squares and lay them out on a baking sheet lined with parchment paper. This prevents them from sticking together during the freeze. Once they’re frozen solid (usually after about two hours), transfer those precious pieces into a freezer-safe bag or container. Air is the enemy here; make sure to press out as much as possible before sealing it up tight! Your fudge will keep beautifully in the freezer for up to three months without losing flavor or texture. When those late-night cravings hit or company drops by unexpectedly, simply remove the desired amount of fudge from the freezer and let it thaw at room temperature for about half an hour. This convenience factor makes having homemade treats on hand so delightful—you can always have a taste of home ready when you need it most!
Dessert
3 Ingredient Peanut Butter Fudge
Indulge in the delightful simplicity of 3 Ingredient Peanut Butter Fudge, a treat that not only satisfies your sweet cravings but also brings joy to every gathering. This easy dessert combines creamy peanut butter with rich white chocolate and sweetened condensed milk for a melt-in-your-mouth experience. Perfect for novice bakers and seasoned pros alike, this no-bake fudge can be whipped up in no time, making it an ideal option for last-minute parties or cozy nights at home. With its smooth texture and decadent flavor, each bite will transport you to nostalgic moments filled with warmth and happiness.
- Prep Time: 10 minutes
- Cook Time: None
- Total Time: 0 hours
- Yield: Approximately 16 servings 1x
- Category: Dessert
- Method: No-Bake
- Cuisine: American
Ingredients
- 12 ounces white chocolate chips
- 1.5 cups creamy peanut butter (not natural)
- 1 can (14 oz) sweetened condensed milk
Instructions
- Prepare an 8X8 baking pan by lining it with parchment paper and spraying it lightly with cooking spray.
- In a large microwave-safe bowl, combine the white chocolate chips and creamy peanut butter. Heat in the microwave at medium power in 30-second intervals, stirring after each interval until fully melted and smooth.
- Stir in the sweetened condensed milk until well incorporated.
- Pour the mixture into the prepared baking pan, spreading evenly with a spatula.
- Tap the pan gently on the counter to remove any air bubbles. Refrigerate for 2-3 hours until firm.
- Once set, lift out of the pan using the parchment paper and cut into squares.
Nutrition
- Serving Size: 1 square (approx. 40g)
- Calories: 190
- Sugar: 15g
- Sodium: 50mg
- Fat: 10g
- Saturated Fat: 4g
- Unsaturated Fat: 6g
- Trans Fat: 0g
- Carbohydrates: 22g
- Fiber: 1g
- Protein: 4g
- Cholesterol: 5mg