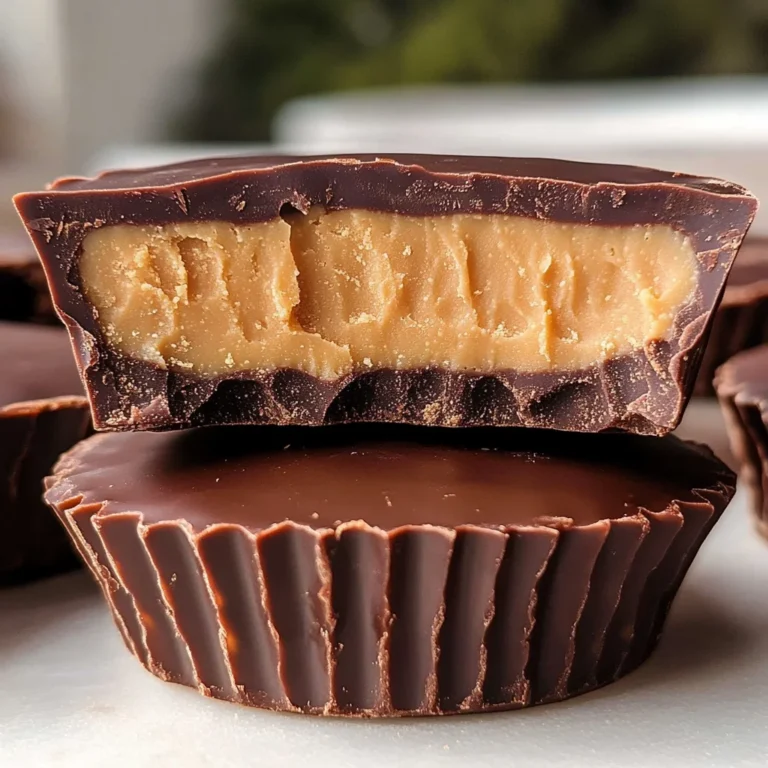
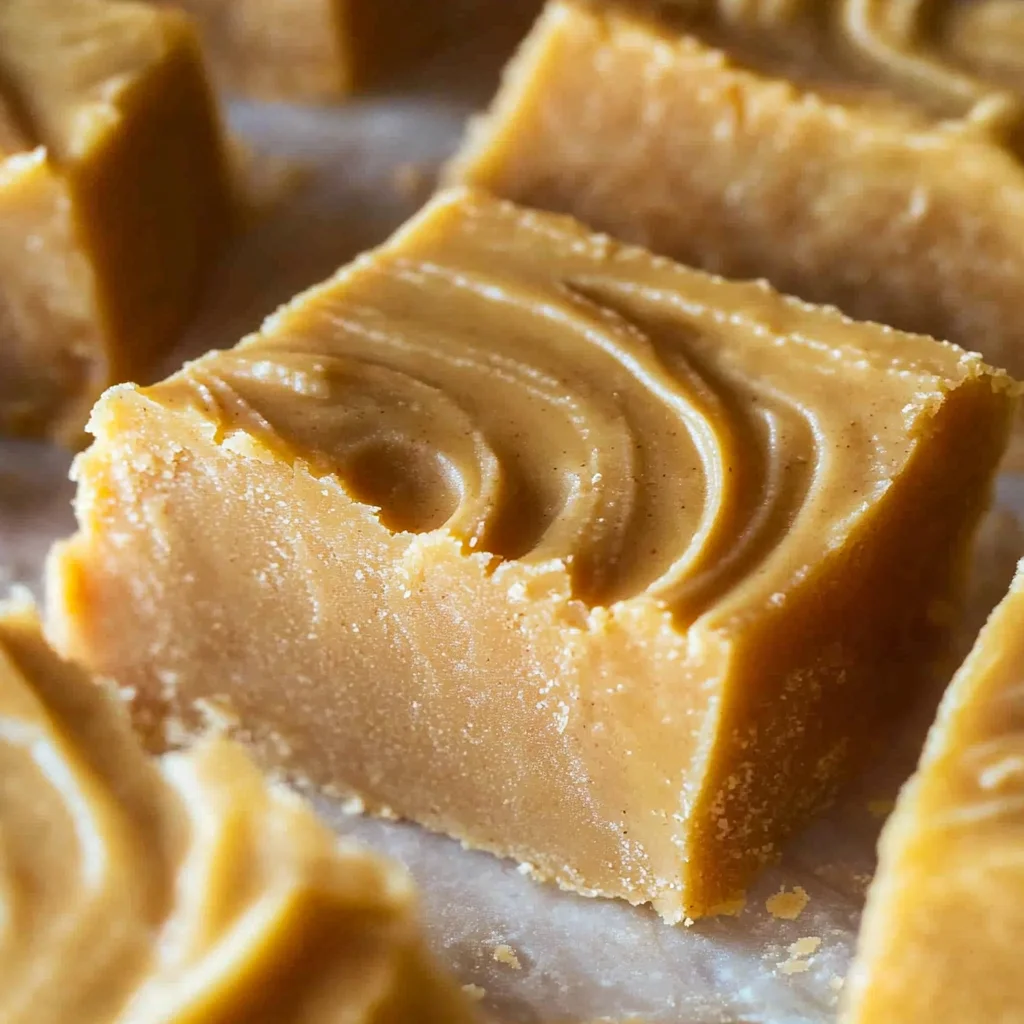
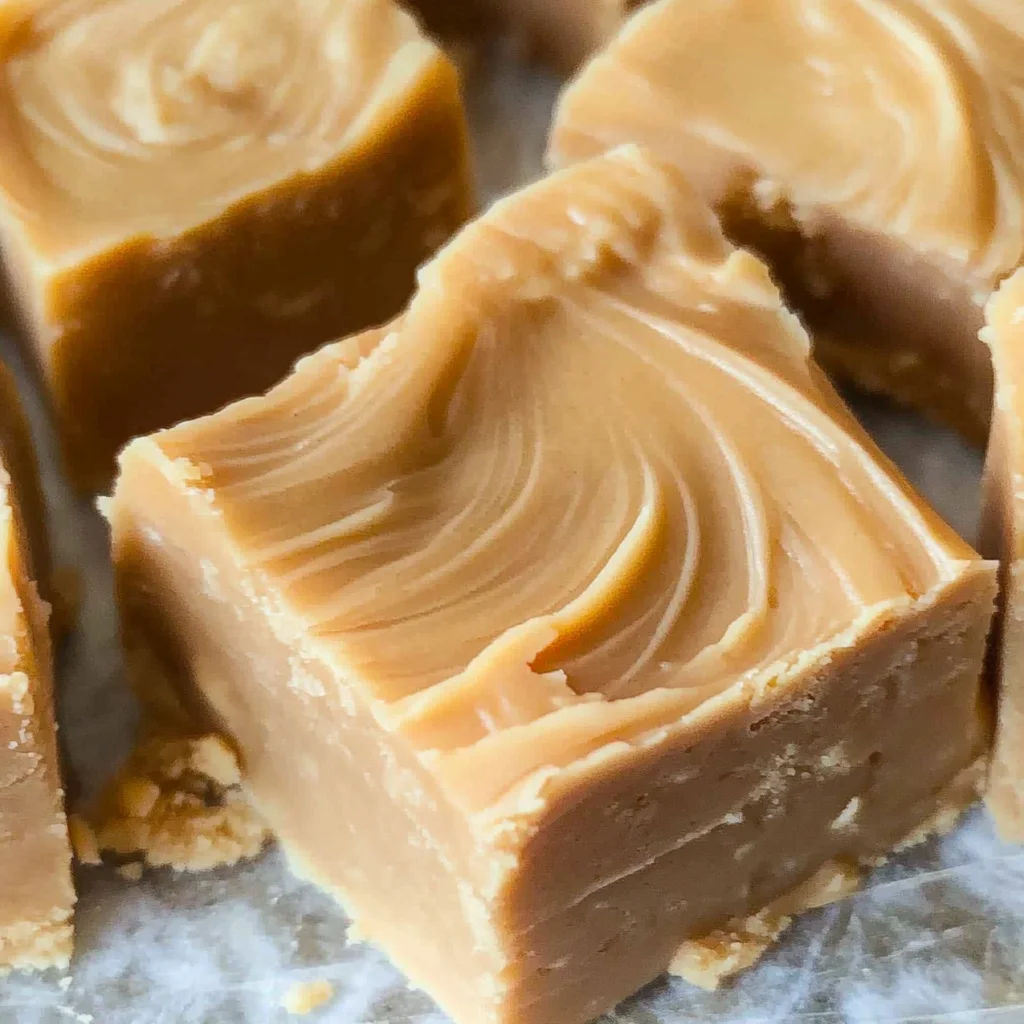
Easy Peanut Butter Fudge
There’s something truly magical about the experience of making fudge, especially when it’s as simple and delightful as this Easy Peanut Butter Fudge. This isn’t just a recipe; it’s an invitation to create something that bridges generations, evoking memories of warm kitchens filled with laughter and sweet aromas. Imagine walking into your home, greeted by the rich scent of melting peanut butter and chocolate, a symphony of flavors coming together in perfect harmony. The simplicity of this three-ingredient treat makes it not only approachable for cooks of any skill level but also deeply satisfying. Trust me when I say that once you take that first bite, you’ll understand why this fudge is a beloved favorite.
This Easy Peanut Butter Fudge is more than just a dessert; it’s a testament to the beauty of uncomplicated cooking. With just vanilla frosting, smooth peanut butter, and Reese’s peanut butter baking chips, you can whip up a batch that will impress anyone lucky enough to sample it. The combination of these ingredients creates an utterly intoxicating dessert that feels both indulgent and familiar. Whether you’re celebrating a special occasion or simply craving something sweet on a cozy afternoon, this fudge is there to elevate your moments. It’s perfect for sharing with friends at gatherings or indulging in after dinner — each piece melts in your mouth, leaving behind a delightful hint of nostalgia.
Easy Peanut Butter Fudge: A Sweet Embrace
Let me share with you the beauty and simplicity of making Easy Peanut Butter Fudge! This recipe feels like wrapping yourself in a warm blanket on a chilly evening — comforting and utterly satisfying. With minimal effort and maximum flavor impact, you’ll find yourself returning to this recipe time and again. Plus, it’s so easy that even the youngest chefs can join in on the fun! So grab your ingredients, and let’s embark on this delicious journey together!
Ingredients:
As we set out on this culinary adventure together, let’s dive into the key components that will make our Easy Peanut Butter Fudge truly special. Each ingredient plays an important role in creating that creamy texture and rich flavor profile we adore.
- 16 oz vanilla frosting. This delightful frosting serves as the backbone of our fudge. It brings sweetness and structure while ensuring our fudge has that wonderfully creamy consistency. When choosing your frosting, look for one that is smooth and free from lumps — this will help ensure a beautifully silky final product. While homemade frosting could be an option for some adventurous souls, I promise you that store-bought provides the convenience we all appreciate without sacrificing taste.
- 3/4 cup smooth peanut butter. Here’s where the magic happens! Smooth peanut butter adds depth and richness to our fudge while giving it that unmistakable nutty flavor we all love. The creamy texture helps bind everything together seamlessly. Make sure to choose natural or regular smooth peanut butter — avoid those labeled crunchy, as they won’t yield the same velvety finish we’re aiming for here. And if you’re feeling particularly adventurous? You can opt for a flavored variety like honey or chocolate peanut butter for an exciting twist!
- 10 oz Reese’s peanut butter baking chips. These little gems are non-negotiable when it comes to capturing that classic Reese’s taste! They melt beautifully into our mixture, enhancing both flavor and texture with their rich chocolatey goodness. When purchasing these chips, check for freshness; they should feel firm yet pliable without any chalky residue—this ensures they’ll melt smoothly into our fudge mix without clumping or seizing up.
Equipment You’ll Need:
Now that we have gathered our ingredients, let’s talk about the essential tools you’ll need to bring this Easy Peanut Butter Fudge to life! Having the right equipment makes all the difference in ensuring everything goes smoothly as we create our delicious treat together.
- 9-inch square baking pan – This trusty pan will be where all the magic happens! Its square shape allows for even distribution of heat while chilling your fudge so it sets perfectly without any uneven edges or inconsistencies in texture.
- Microwave-safe bowl – We’re keeping things simple by using the microwave for melting our ingredients; thus, having a good-quality microwave-safe bowl is crucial! Look for one made from glass or ceramic to withstand high temperatures without warping or leaching harmful chemicals into our fudge.
- Wax paper – A true hero in the world of baking! Lining your pan with wax paper prevents sticking and allows you to lift out your fudge easily once it’s set — no need for wrestling with stubborn pieces stuck in corners here!
- Spatula or spoon – You’ll need something sturdy yet gentle to stir your melted mixture until it’s smooth and luscious. A silicone spatula works wonders because it helps scrape down the sides of your bowl efficiently while being heat resistant during those melting sessions.
Step 1: Preparing Your Pan
Before diving into mixing those delectable ingredients together, let’s take care of lining our baking pan first! Start by grabbing your 9-inch square baking pan and laying down a sheet of wax paper inside it, ensuring that there’s enough paper hanging over the edges to act as handles later when you’re ready to lift out your finished fudge. This step is absolutely paramount because it guarantees easy removal once your fudge has chilled completely—no one wants crumbled pieces stuck at the bottom of their pan! Ensure it’s pressed down gently against all corners so there are no air pockets lurking beneath; trust me on this one — it makes all the difference.
Step 2: Combining Ingredients
Now comes one of my favorite parts: combining those luscious ingredients! In a microwave-safe bowl (your trusty partner), dump in your entire 16 oz container of vanilla frosting alongside 3/4 cup smooth peanut butter and 10 oz Reese’s peanut butter baking chips. I promise you’ll feel like you’ve just created liquid gold as these elements begin their transformation together. Microwave everything on High for just one minute initially—don’t rush this step! The goal here is to allow each component time to soften so they can meld seamlessly when stirred together afterward.
Step 3: Melting Magic
After that magical minute passes (and oh boy does time seem slow when you’re anticipating sweetness!), carefully remove your bowl from the microwave—it might be hot depending on how powerful yours is! Using a spatula or spoon, start stirring vigorously until everything combines beautifully into one cohesive mixture; you’ll want every last chip melted down completely into creamy perfection! If you notice any stubborn bits still resisting their fate after stirring well (which happens sometimes), don’t hesitate to pop it back into the microwave for another 20 seconds before trying again; it’s crucial not only for aesthetics but also ensures every bite captures that signature taste we crave!
Step 4: Pouring Into Your Pan
Once you’ve achieved that heavenly smooth texture—oh my goodness—isn’t it glorious? Now it’s time for pouring this concoction into our prepared pan! Gently transfer every bit from your mixing bowl using your spatula—savoring each moment because you’re so close now—and spread out evenly until it fills every nook within its confines like thick velvet draping delicately over furniture (I know I’m getting poetic here—bear with me!). Be sure there are no air bubbles left hiding underneath; give it a slight shake if needed so everything settles nicely before placing this masterpiece into refrigeration mode!
And there you have it—the first few steps toward creating something truly extraordinary with such minimal effort required from us both! I can already imagine how wonderful it’ll taste once fully chilled—a perfect blend between sweet indulgence and comforting nostalgia wrapped up neatly within each bite awaits us ahead… Stay tuned as we continue unfolding more secrets behind making this Easy Peanut Butter Fudge come alive!
Making Your Easy Peanut Butter Fudge
Step 5: Microwave Magic
Now, let’s dive into the microwave magic that will transform our ingredients into a luscious Easy Peanut Butter Fudge. In your microwave-safe bowl, combine the fluffy, sweet vanilla frosting, the silky smooth peanut butter, and the rich Reese’s peanut butter baking chips. As you do this, take a moment to appreciate the harmony of textures and aromas that are about to meld together. The frosting is like a cloud waiting to embrace the nutty goodness of the peanut butter and those delightful chocolatey chips.
Microwave this combination on High for just 1 minute. Trust me when I say that this step is crucial—microwaving allows the heat to gently soften these ingredients, making them easier to stir into a creamy delight. After that first minute, you’ll want to whisk it all together vigorously. It might take a bit of elbow grease, but you’ll know you’re on the right track when everything starts to blend smoothly without any lumps. If you notice that some of the baking chips haven’t melted completely, don’t panic! Simply pop it back in the microwave for an additional 20 seconds and stir again until it reaches that beautifully silky consistency we’re aiming for. This process is not only straightforward; it’s utterly intoxicating as those smells waft through your kitchen.
Step 6: The Art of Pouring
Once everything is beautifully blended and smooth, it’s time to pour this divine concoction into your prepared pan lined with wax paper. The wax paper isn’t just a convenience; it’s an essential non-stick layer that ensures your fudge pops out effortlessly later on. Gently pour the mixture into your lined 9-inch square baking pan, allowing gravity to help guide it down rather than scraping every last bit from the bowl—that’s where all those luscious flavors are concentrated! Use a spatula or even just the back of a spoon to spread it out evenly across the pan; this creates a uniform thickness which is paramount for even slicing later.
As you spread, don’t rush—each swirl should be intentional and loving because each piece deserves to be perfect! You’ll notice how incredibly glossy and inviting this fudge looks as you work with it; take a moment to appreciate what you’ve created thus far. This step not only shapes your fudge but also sets you up for success when it comes time to chill and slice—it’s all about creating that perfect foundation!
Step 7: Chilling Out
Now comes one of my favorite parts—the chilling phase! This step might require a dash of patience, but I promise you it’s absolutely worth it. Pop your pan into the refrigerator for at least an hour—this is where the magic really happens! As your fudge chills, it transforms from a warm gooey mixture into a firm yet creamy treat that melts in your mouth with every bite.
Why is chilling so important? When chilled properly, the flavors deepen and meld together beautifully while achieving that perfect texture—smooth yet sturdy enough to hold its shape when cut into squares. You might feel tempted to sneak a taste before it’s fully set (and who could blame you?), but trust me on this one: letting it rest will elevate your fudge from good to truly extraordinary! If you’re anything like me, you’ll keep checking in on it every few minutes, watching as its transformation unfolds right before your eyes!
Step 8: Slicing Perfection
After you’ve exercised some well-deserved patience and waited for at least an hour (or longer if you’re feeling particularly indulgent), it’s finally time for one of my favorite moments—slicing up your Easy Peanut Butter Fudge! Carefully use the wax paper edges to lift the entire block out of the pan; this little trick makes transferring so much easier without risking any breakage or crumbling.
Now place it on a cutting board and grab a sharp knife—it’s non-negotiable here because we want clean cuts! With each slice, aim for about 36 pieces; they can be small squares or larger bites depending on how indulgent you’re feeling (I won’t judge!). Take care as you slice through—you should feel that satisfying firmness contrasted with creaminess as your knife glides through each piece. And here’s my pro tip: wiping down your knife after every few cuts helps maintain those beautiful edges so they remain pristine!
Once you’ve sliced them all up, prepare yourself for that first magical bite—a symphony of flavors dancing on your palate awaits! The combination of sweet vanilla frosting and rich peanut butter enveloped by velvety chocolatey goodness will make each piece profoundly satisfying.
Final Touches
Now that we’ve perfectly sliced our Easy Peanut Butter Fudge into delectable squares, let’s talk about storage options because trust me—you’re going to want these delights around!
Step 9: Storing Your Sweet Treats
To keep these treasures fresh and delicious for days (if they last that long!), store them in an airtight container in the refrigerator. They’ll stay good for about two weeks—though I doubt they’ll stick around nearly that long once family or friends discover they’re available! You can even freeze leftover fudge if you find yourself with more than you can eat; simply layer pieces between sheets of parchment paper in an airtight container before sealing tightly.
Every time you reach for one of these Easy Peanut Butter Fudge squares, remember all those special moments we shared in creating them—from gathering ingredients to savoring their delightful taste—and don’t hesitate to share them with loved ones too! Each bite is not only about flavor but also about connection—the love infused into every step will shine through in each morsel.
So there you have it—a simple yet utterly intoxicating recipe that’s sure to bring joy whether you’re treating yourself or sharing with others. Enjoy every single piece because you’ve earned this moment of pure delight!
Storage and Enjoyment Tips for Your Easy Peanut Butter Fudge
Now that your Easy Peanut Butter Fudge has set into a delightful block of creamy, nutty goodness, the excitement doesn’t have to end there! With just a little care, you can savor this delectable treat long after it’s made. The joy of indulging in your homemade fudge isn’t just about the immediate satisfaction; it’s also about preserving that rich, velvety flavor for another day. Trust me when I say, there’s nothing quite like reaching into your fridge or freezer to find a stash of this blissful fudge waiting just for you!
Storing Leftover Easy Peanut Butter Fudge
To keep your Easy Peanut Butter Fudge as fresh and delicious as the moment you made it, store it in an airtight container at room temperature for up to a week. However, if you’re anything like me and want to ensure that each bite remains as creamy and luscious as the first, I recommend popping it in the refrigerator where it can last up to two weeks without losing its charm. For an extra tip that has worked wonders in my own kitchen, consider placing a slice of bread in the container alongside your fudge. This non-negotiable trick works like magic by keeping the air moisture levels balanced, ensuring every piece stays soft and enjoyable! After storage, you’ll find that the flavors deepen beautifully—each bite is still utterly intoxicating with that ideal balance of sweet and salty. And if you find yourself craving a warm treat? Simply microwave a piece for just 10-15 seconds to bring back its melt-in-your-mouth quality!
Freezing Easy Peanut Butter Fudge for Later
If you’re thinking about preparing ahead or simply want to save some for those days when you need an instant pick-me-up, freezing your Easy Peanut Butter Fudge is an absolutely fantastic option! To do this properly, cut your fudge into squares (you can even wrap them individually in plastic wrap or wax paper) before placing them in a labeled freezer-safe bag or container. When stored this way, they’ll maintain their scrumptious flavor for up to three months! Whenever you’re ready to enjoy one (or several!), simply take them out and let them thaw at room temperature for about 30 minutes—trust me on this; you’ll be rewarded with that same delightful texture. The convenience of having these bites of happiness waiting for you is so empowering; you’ll feel like a culinary superhero every time you reach into your freezer!
Easy Peanut Butter Fudge
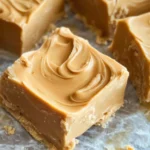
Indulge in the delightful world of Easy Peanut Butter Fudge, a sweet treat that captures the essence of comfort with just three simple ingredients. This no-bake dessert combines creamy vanilla frosting, smooth peanut butter, and rich peanut butter baking chips to create a fudge experience that’s both satisfying and nostalgic. Perfect for sharing at gatherings or enjoying on lazy afternoons, this fudge is not only quick to prepare but also accessible to cooks of all ages. Just melt, mix, and chill for a creamy delight that melts in your mouth. Whether you’re a novice or an experienced chef, this Easy Peanut Butter Fudge will undoubtedly become a cherished recipe in your kitchen.
- Prep Time: 10 minutes
- Cook Time: 1 minute
- Total Time: 11 minutes
- Yield: Approximately 36 servings 1x
- Category: Dessert
- Method: No-Bake
- Cuisine: American
Ingredients
- 16 oz vanilla frosting
- 3/4 cup smooth peanut butter
- 10 oz Reese's peanut butter baking chips
Instructions
- Prepare a 9-inch square baking pan by lining it with wax paper.
- In a microwave-safe bowl, combine the vanilla frosting, peanut butter, and peanut butter baking chips.
- Microwave on High for 1 minute. Stir until smooth; if needed, microwave for an additional 20 seconds.
- Pour the mixture into the lined pan and spread evenly.
- Chill in the refrigerator for at least 1 hour until set.
- Lift from the pan using wax paper and slice into squares.
Nutrition
- Serving Size: 1 serving
- Calories: 140
- Sugar: 14g
- Sodium: 60mg
- Fat: 7g
- Saturated Fat: 2g
- Unsaturated Fat: 5g
- Trans Fat: 0g
- Carbohydrates: 17g
- Fiber: 0g
- Protein: 3g
- Cholesterol: 0mg