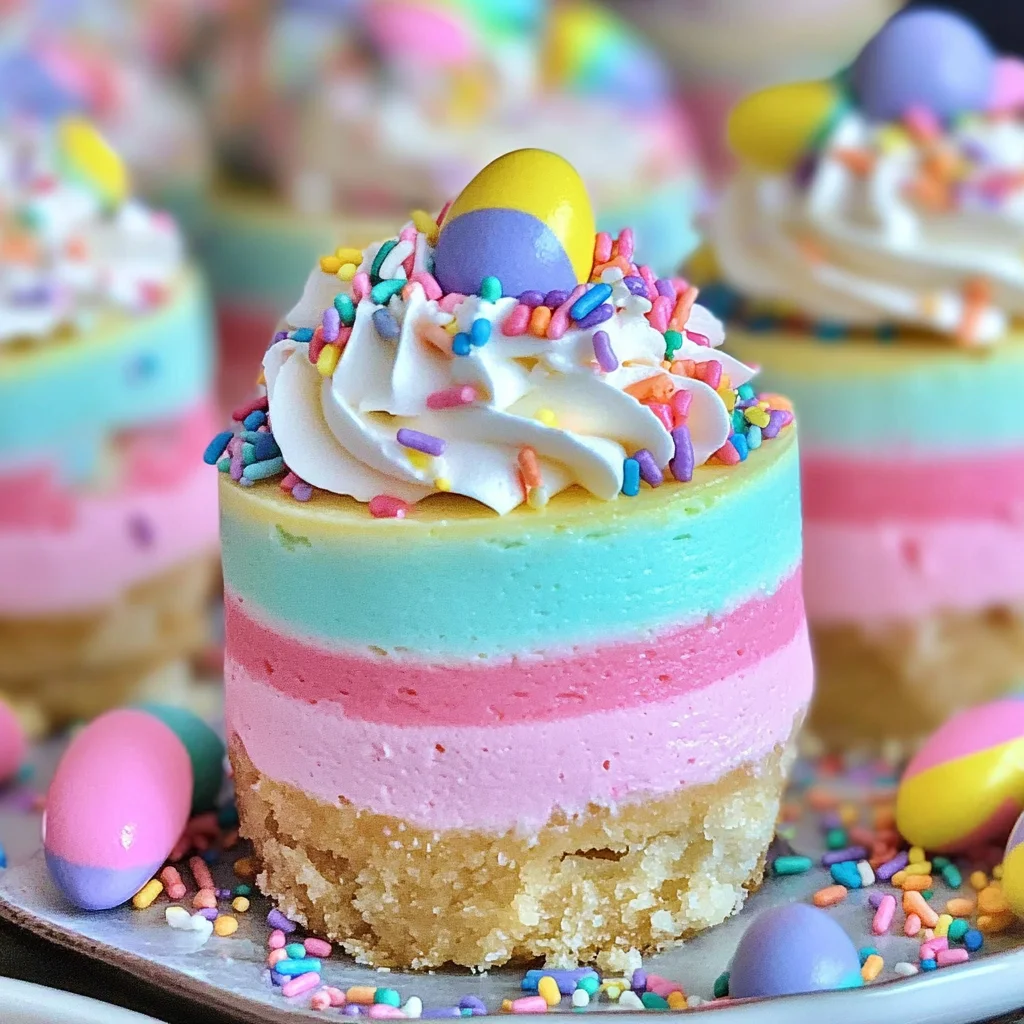
Easter No-Bake Mini Cheesecakes
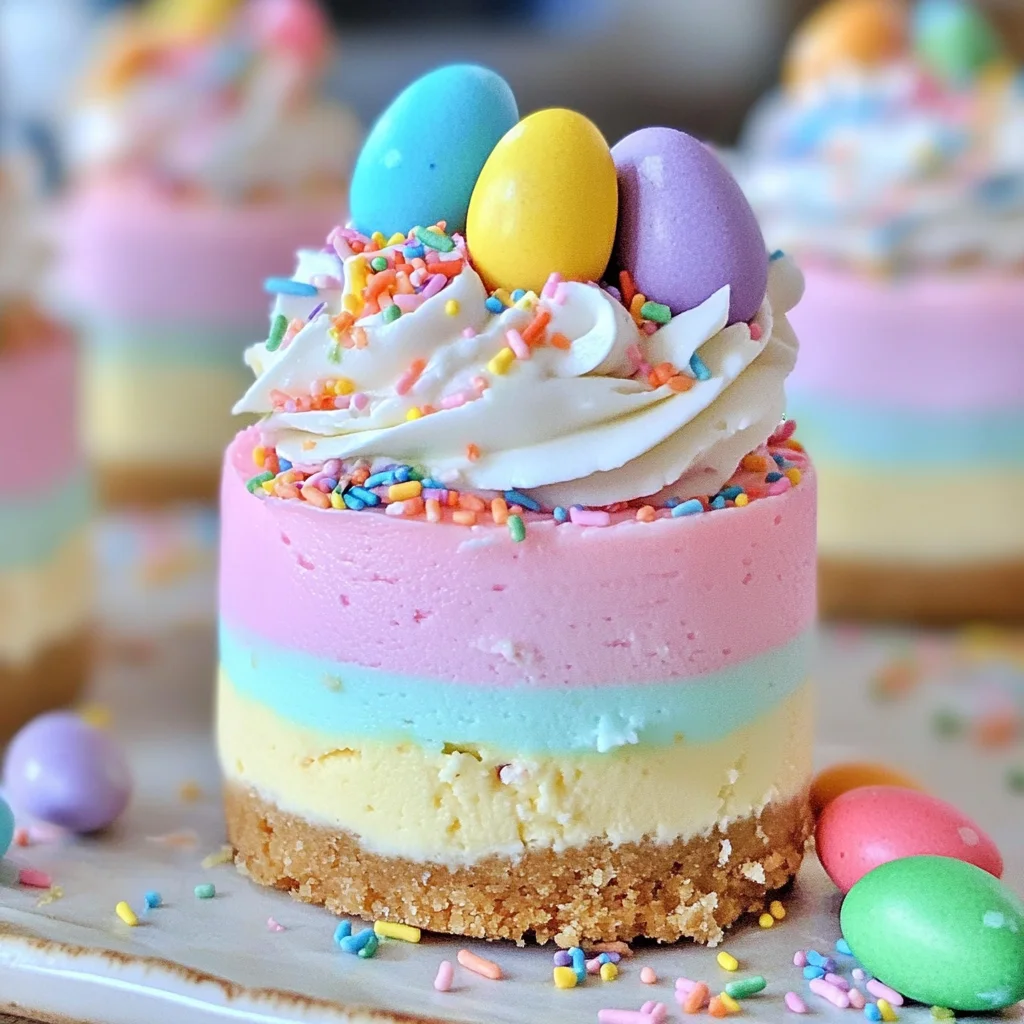
There’s something truly magical about the arrival of spring, isn’t there? It’s that time of year when the world seems to awaken from its winter slumber, blooming into a kaleidoscope of colors and fragrant blossoms. Easter, in particular, holds a special place in my heart as it brings families together to celebrate renewal, hope, and joy. And what better way to embrace this festive spirit than with a dessert that embodies all things cheerful and delightful? These Easter No-Bake Mini Cheesecakes are not just any dessert; they are a vibrant celebration on your plate! With their pastel striped layers and luscious creamy texture, they promise to bring smiles and happy memories to your gathering. I assure you, these beauties will be the star of your Easter feast!
As I think back on my own Easter celebrations, I can almost hear the laughter echoing around the table as loved ones gather to share stories over mouthwatering treats. This recipe for mini cheesecakes is an easy yet impressive way to capture that magic without spending hours in the kitchen. They require no baking—yes, you read that right!—and can be whipped up in no time at all. The vibrant hues remind us of spring flowers, while the smooth creaminess offers a comforting indulgence that’s simply irresistible. Trust me when I say that once you take your first bite, you’ll understand why these cheesecakes have quickly become a cherished staple in my holiday repertoire.
Easter No-Bake Mini Cheesecakes: A Sweet Spring Delight
Let’s dive into creating these adorable little treats! Not only are they visually stunning with their layered pastel colors, but they also boast a rich, creamy filling that melts beautifully in your mouth. The best part? You can customize them with your favorite decorations—think candy eggs and sprinkles—that make each cheesecake feel like a little gift from you to your guests. So gather your ingredients and let’s embark on this delightful culinary adventure together!
Ingredients:
Before we get our hands dirty, let’s talk about the ingredients that will transform simple components into extraordinary little bites of happiness. Each one plays a crucial role in achieving that perfect flavor and texture balance.
- 6 oz shortbread cookies (approx. 12 round cookies): This is the base of our mini cheesecakes—think of it as the sturdy foundation upon which we build our masterpiece! Shortbread cookies lend a buttery richness and just the right amount of sweetness to complement the creamy filling. When selecting cookies, look for high-quality options with minimal additives for the best flavor. If you’re feeling adventurous or want to cater to specific tastes, graham crackers or even chocolate cookies could work beautifully here as alternatives.
- 0.5 oz unsalted butter (1 TBSP), melted: Butter is what binds our cookie crust together into a cohesive layer that’s both firm yet tender when bitten into. Unsalted butter allows us full control over the saltiness of our dessert since we’ll be adding our own pinch later on. Melting it ensures easy mixing with the cookie crumbs without leaving lumps—it’s truly non-negotiable for achieving that ideal crust texture!
- 2 TBSP cold water: This might seem like an odd ingredient at first glance, but it’s essential for hydrating our vegan gelatin later on. Cold water helps activate it properly so it can do its magic in giving our cheesecake structure without compromising its luscious creaminess.
- 1 packet unflavored powdered vegan gelatin (1/4 oz or 2.5 tsp): Here’s where we introduce our secret weapon! Vegan gelatin provides stability while keeping everything delightfully plant-based—no animal-derived products here! It’s important for helping our cheesecake set without turning rubbery or overly firm. When buying gelatin, ensure you select a reputable brand; quality makes all the difference in achieving that creamy consistency.
- 1 lb cream cheese (full-fat, at room temperature): Cream cheese is undoubtedly the star player in this recipe! Its rich texture creates that classic cheesecake mouthfeel we all adore while balancing perfectly with sweetness and acidity from other ingredients like lemon juice. Make sure it’s at room temperature before starting; this helps it blend smoothly without lumps—a silky filling is absolutely paramount!
- 3.5 oz granulated sugar (½ cup): Sugar isn’t just about sweetness here; it enhances flavors and contributes to overall mouthfeel as well. Granulated sugar dissolves easily into our cream cheese mixture, ensuring an even distribution throughout every layer so each bite is blissfully balanced.
- ½ tsp lemon juice: A splash of lemon juice adds brightness and acidity—a simple yet powerful way to elevate flavors in desserts! It cuts through richness while enhancing other sweet elements; plus, who doesn’t love that zesty contrast?
- 1 tsp vanilla bean paste (can substitute vanilla extract): Vanilla brings warmth and depth to desserts; it’s like a comforting hug for your taste buds! Vanilla bean paste gives us those gorgeous specks of vanilla seeds which add both flavor and visual appeal—if using extract instead, opt for high-quality pure extract for best results.
- Pinch of salt: Salt is like magic dust—it enhances sweetness while balancing flavors beautifully! Never overlook this humble ingredient; just a pinch will do wonders by bringing out all those lovely notes we’ve built up in our filling.
- 1 cup heavy cream (at room temperature): Heavy cream adds luxuriousness and lightness at the same time—this duality is what makes your cheesecake velvety smooth yet stable enough to hold its shape when sliced. Ensure it’s at room temperature; cold cream may not whip properly or incorporate seamlessly into our mixture.
- Assorted gel food coloring (4 colors recommended): This is where we unleash creativity! Gel food coloring allows us to achieve those stunning pastel hues without altering any textures or flavors—a little goes an incredibly long way here!
- ½ cup whipped cream (to decorate): A dollop of whipped cream adds an extra touch of elegance alongside deliciousness! Whipping your own cream ensures freshness—you can customize sweetness levels too!
- Candy eggs & sprinkles (to decorate): These playful toppings not only enhance aesthetics but also bring joy that resonates with Easter celebrations! Use colorful candy eggs atop each mini cheesecake for festive flair while sprinkles add delightful crunch!
Now that we’ve gathered everything needed for our culinary creation let’s take a moment to appreciate how these components work together symphonically—each one playing its unique role leading toward sheer bliss!
Equipment You’ll Need:
Having the right tools makes creating these Easter No-Bake Mini Cheesecakes not only easier but also much more enjoyable! Think of them as essential partners on this flavorful journey—we want everything running smoothly so we can focus solely on crafting something wonderful.
- Jumbo silicone muffin pan: This pan is crucial for forming our mini cheesecakes into perfectly shaped delights without sticking issues when unmolding later on. Silicone pans are flexible yet sturdy enough to keep their shape during freezing while allowing easy release once set—truly non-negotiable if you’re looking for beautiful presentation!
- Food processor or rolling pin & plastic bag: A food processor makes quick work out of turning shortbread cookies into fine crumbs for our crust; however, if you don’t have one handy don’t fret! A rolling pin paired with a sturdy plastic bag does just as well—it requires some elbow grease but results are equally satisfying!
- Mixing bowls: Having various sizes ensures proper organization throughout preparation stages—from mixing crust ingredients together to combining cheesecake filling—all contribute toward reducing clutter during cooking!
- Whisk & spatula: These trusty tools aid tremendously during mixing processes; use whisking for hydrating gelatin effectively while spatulas help scrape down sides ensuring no precious ingredients go unnoticed throughout blending stages!
Now that we’ve covered both ingredients and equipment essentials let’s move forward onto preparing those exquisite mini cheesecakes themselves—the highlight awaits!
Step 1: Crafting Your Cookie Crust
First things first—let’s create that delectable crust which serves as the foundation for our mini cheesecakes! Begin by placing your jumbo silicone muffin pan onto a baking sheet; this adds stability making transferring much easier later on during freezing phases too! Next step involves blitzing those shortbread cookies until they reach fine crumb consistency—a food processor works wonders here but if you’re feeling nostalgic grab a rolling pin along with some plastic bags instead—the satisfying crunch sounds will transport you back home instantly! Once crumbs form beautifully mix them together with melted butter until fully combined—the result should remind you of damp sand ready to mold perfectly into shapes.
With crust mixture ready divide evenly among six cavities within muffin pan pressing down firmly using either fingers or back end of spoon ensuring solid structure forms underneath—it provides stability necessary when assembling layers above later down road trust me on this one! Afterward allow crusts slight cooling before moving onto next glorious steps where creamy goodness awaits us…
Step 2: Hydrating Our Vegan Gelatin
While those crusts cool off slightly take this opportunity focus attention towards hydrating vegan gelatin needed shortly thereafter within creamy filling stage ahead—we want it prepared properly so nothing interrupts progress later down line after all! In small bowl pour cold water followed by sprinkling unflavored powdered vegan gelatin atop surface gently whisking them together until dissolved completely—let mix sit undisturbed five minutes allowing gelatin absorb moisture effectively transforming into usable state before proceeding further along recipe path ahead where lusciousness truly begins unfolding…
Step 3: Beating Cream Cheese Into Submission
Now comes one of my favorite moments—transforming room temperature cream cheese into silky smooth perfection that’ll serve as backbone behind entire cheesecake experience itself! In large stand mixer fitted paddle attachment beat softened cream cheese until free from lumps resembling dreamy cloud-like consistency—we’re aiming for ultra-creamy texture reminiscent gentle whispers floating through air surrounding us during preparation process itself…it really does make such difference against grainy counterparts which would disrupt overall enjoyment factor immensely trust me here folks!
Step 4: Incorporating Sweetness & Flavor
Once you’ve reached desired level of smoothness it’s time introduce sugar along with lemon juice vanilla bean paste pinch salt—all key players contributing balanced harmony between sweet tart elements harmonizing beautifully alongside richness found within cream cheese itself…mix thoroughly scraping bottom sides down occasionally ensuring uniform blending occurs throughout entire batch whilst maintaining gentle power setting—this allows flavors meld seamlessly resulting heavenly experience awaiting us come serving time ahead…
As we begin venturing deeper into preparation stages excitement builds up knowing soon enough delightful treats await showcasing artistry captured through layering vibrant colored fillings inside now-prepared cookie crusts…stay tuned because we’re not quite done yet—the best parts still lie ahead await discovery soon enough!
Step 5: Beat the Creamy Dream
Now that we’ve got our base ready with the crust, it’s time to dive into the star of our show—the cheesecake filling! In a large mixing bowl or the bowl of your stand mixer fitted with a paddle attachment, add that glorious room temperature cream cheese. Trust me when I say, this step is crucial. Using cream cheese at room temperature ensures that it blends seamlessly into a smooth and luscious mixture without any lumps. You want this filling to be like a velvety cloud of happiness! Beat it on medium speed until it’s creamy and utterly free of lumps—this should take about 2 to 3 minutes. Feel free to scrape down the sides and bottom of the bowl every so often to make sure everything is incorporated evenly.
Once you have that perfectly whipped cream cheese, it’s time to add in our sugar, lemon juice, vanilla bean paste, and a pinch of salt. The sugar will not only sweeten our cheesecake but also provide that necessary balance against the tanginess of the cream cheese. Lemon juice enhances flavor and adds brightness, while vanilla gives us that beautiful aromatic quality—it’s like a warm hug for your senses! Mix these ingredients well, ensuring they are fully combined before slowly adding the heavy cream. Don’t rush this step; blending on low speed allows for better incorporation without splattering everywhere. You’re looking for a silky consistency here; it should feel like pure indulgence as you mix!
Step 6: Hydrate the Vegan Gelatin
Now let’s tackle that vegan gelatin! This ingredient is what keeps our mini cheesecakes from falling apart and gives them that delightful firmness we all love. In a small bowl, sprinkle the vegan gelatin over cold water and whisk it together gently. This step is known as “blooming,” where the gelatin absorbs water and swells up—a little science magic happening right in your kitchen! After about five minutes, you’ll notice that it has transformed into a thick gel-like texture; this is exactly what we want.
Next comes an important moment: heating this mixture. Pop your bloomed vegan gelatin in the microwave for about 10-15 seconds until it’s just melted and warm—but not hot! If it gets too hot, it can create issues with your cheesecake filling setting properly later on. Remember, you’re aiming for uniformity; stir well with a small whisk or spoon to ensure there are no lumps remaining. This step is essential because if your gelatin isn’t well mixed into the filling while it’s still warm, you might end up with unappetizing clumps in your cheesecakes! So take your time—patience is key here.
Step 7: Color Your Cheesecake Layers
With our creamy filling perfected and our gelatin ready to go, we’re going to divide this luscious mixture into four different portions—each just shy of 7 ounces—and let creativity reign supreme! Grab some gel food coloring; I recommend using Americolor brand for its vibrant hues which will pop beautifully in these Easter No-Bake Mini Cheesecakes. Add just a drop of your chosen color to each portion and mix gently until you achieve an even color throughout each batch.
Why do we take this extra step? Because layering colors not only makes these cheesecakes visually stunning but also creates a symphony of flavors as they meld together in each bite! It’s like creating edible art—each layer tells its own delicious story while harmonizing beautifully with its neighbors. Don’t be shy; if you want more saturation in color, feel free to add another drop until you get just what you’re looking for! Make sure to keep track of which color goes where because those pastel stripes are what make these cheesecakes truly special.
Step 8: Layering Magic
Now comes one of my favorite parts: layering those gorgeous colors into their crusts! Start by taking your first colored layer and dividing it among the six cavities in your muffin pan. Using a cookie scoop is an absolute game changer here—it allows you to place just the right amount without getting messy! If you don’t have one handy, a regular spoon works fine too; just remember to work quickly so that none of your layers start setting too soon.
Spread out each layer smoothly with the back of a spoon or an offset spatula (if you’re feeling fancy!). Each layer should be spread evenly across the base so they look neat and tidy when sliced later on—you want that eye-catching presentation after all! Once you’ve spread out your first layer, it’s time for the next color on top. Continue alternating layers until all four colors have found their way into each cavity—this part is where magic truly happens!
As you’re layering, pay close attention; if any layer begins to feel too firm or difficult to spread (which can happen if you took too long), don’t hesitate to give them a gentle press downwards or even use a bit more pressure while smoothing them out. Working quickly but carefully is key here—too much delay could lead to uneven layers or unsightly clumping!
Conclusion:
As we wrap up our delightful journey crafting these Easter No-Bake Mini Cheesecakes, I hope you’re feeling as excited as I am about making this sweet treat your own. There’s something undeniably captivating about creating layers of creamy goodness that not only look stunning but also taste utterly intoxicating. Each bite offers a symphony of flavors from the rich cream cheese balanced with just the right touch of sweetness and brightness from the lemon juice—a combination that elevates these cheesecakes beyond ordinary desserts into something truly extraordinary.
This recipe is an absolute must-try for anyone looking to bring joy and smiles to their gatherings. It’s more than just preparing a dessert; it’s about creating memories—whether it’s for Easter brunch, celebrating springtime with loved ones, or simply treating yourself after a long week. Imagine pulling out these beauties from the fridge or freezer, each color inviting smiles as they grace your table proudly. It’s an experience worth sharing, and I promise it will light up any occasion.
Picture this: savoring one alongside your afternoon coffee while watching the world go by or sharing bites with friends on a sunny picnic blanket under blossoming trees. For an extra decadent experience, pair these charming mini cheesecakes with fresh berries or serve alongside a luscious fruit coulis that dances across your palate! The possibilities are endless when it comes to enjoying these little bites of heaven—let your creativity shine!
Feeling adventurous? This recipe is wonderfully adaptable; try swapping out the gel food coloring for natural alternatives like beet juice for pinks or matcha powder for greens—imagine how stunning they would look on your table! You could even add crushed cookies into the cheesecake mixture for added texture or swirl in some fruit purees between layers for another flavor dimension. I invite you to dive into this delectable journey—try it out, share your delicious creations with family and friends, and let me know how they turn out! Your culinary adventure awaits!
Easter No-Bake Mini Cheesecakes
Indulge in these enchanting Easter No-Bake Mini Cheesecakes—simple, colorful delights perfect for any celebration. Try this delightful recipe today!
- Prep Time: 20 minutes
- Cook Time: 0 minutes
- Total Time: 20 minutes
- Yield: 6 servings 1x
- Category: Dessert
- Method: No-Bake
- Cuisine: American
Ingredients
- 6 oz shortbread cookies
- 0.5 oz unsalted butter
- 2 TBSP cold water
- 1 packet unflavored powdered vegan gelatin (1/4 oz or 2.5 tsp)
- 1 lb cream cheese (full-fat, at room temperature)
- 3.5 oz granulated sugar (½ cup)
- ½ tsp lemon juice
- 1 tsp vanilla bean paste (can substitute vanilla extract)
- Pinch of salt
- 1 cup heavy cream (at room temperature)
- Assorted gel food coloring (4 colors recommended)
- ½ cup whipped cream (to decorate)
- Candy eggs & sprinkles (to decorate)
Instructions
- Prepare the crust by blending shortbread cookies into fine crumbs and mixing them with melted butter. Press this mixture into the bottom of a jumbo silicone muffin pan.
- In a small bowl, hydrate vegan gelatin with cold water and set aside.
- Beat room temperature cream cheese until smooth, then add sugar, lemon juice, and vanilla; mix well.
- Slowly incorporate heavy cream until combined.
- Warm the hydrated vegan gelatin until melted, then stir it into the cream cheese mixture.
- Divide the mixture into four portions and color each with gel food coloring.
- Layer each colored cheesecake filling into the prepared crusts, freezing after each layer if needed.
- Freeze for at least two hours until set.
- Unmold your cheesecakes and decorate with whipped cream and sprinkles.
Nutrition
- Serving Size: 1 mini cheesecake (60g)
- Calories: 250
- Sugar: 15g
- Sodium: 120mg
- Fat: 18g
- Saturated Fat: 10g
- Unsaturated Fat: 7g
- Trans Fat: 0g
- Carbohydrates: 23g
- Fiber: 0g
- Protein: 3g
- Cholesterol: 40mg