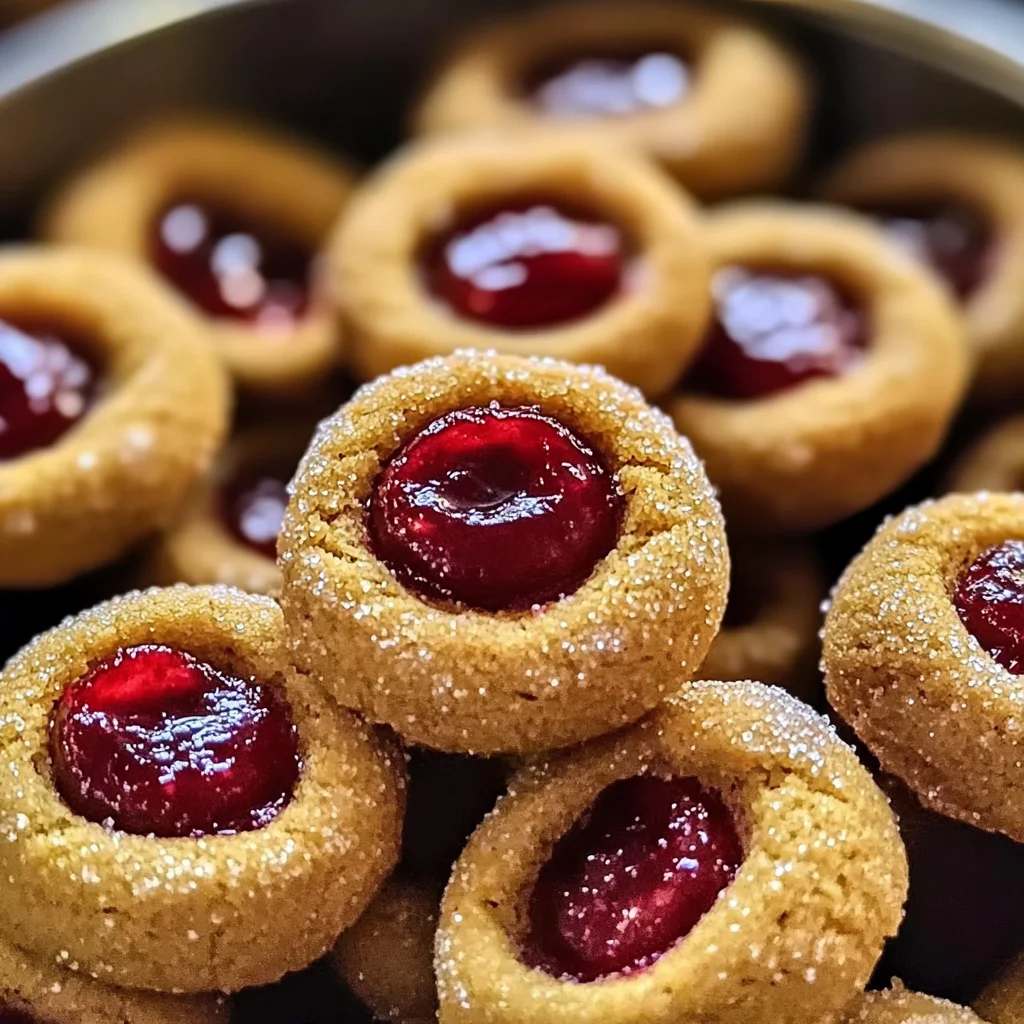
Gingerbread Thumbprint Cookies with Cranberry Jam: An Incredible Ultimate Recipe
Oh, my dear friend, let me take you on a delightful journey with one of my all-time favorite recipes: Gingerbread Thumbprint Cookies with Cranberry Jam. This recipe is not merely a collection of ingredients and steps; it’s an experience steeped in warmth, nostalgia, and the comforting embrace of the holiday season. Imagine the sweet scent of ginger and spices wafting through your home as you bake. Each cookie is like a little hug, a perfect balance between the spiciness of gingerbread and the tart sweetness of cranberry jam. Trust me; these cookies are destined to become a cherished part of your holiday traditions.
As we step into this culinary adventure together, I want you to feel the joy that comes from creating something truly special. The process itself is fun and rewarding, allowing us to connect with the rich tapestry of flavors that define our holidays. There’s something profoundly satisfying about rolling those dough balls in sugar and pressing your thumb into each one to create that inviting little well for the jam. It’s this combination of textures—the crunchy exterior, soft interior, and that luscious filling—that makes these cookies utterly irresistible. So grab your apron; let’s dive into this incredible ultimate recipe for Gingerbread Thumbprint Cookies with Cranberry Jam!
Gingerbread Thumbprint Cookies with Cranberry Jam: An Irresistible Holiday Treat
These delightful cookies are more than just a festive dessert; they’re an invitation to create memories around the table with family and friends. Perfect for holiday gatherings or cozy nights by the fire, they embody everything we love about this time of year—warmth, comfort, and joy. Picture yourself sharing these cookies with loved ones, their eyes lighting up with delight as they savor each bite filled with tart cranberry goodness.
Ingredients:
Now that we’ve set the stage for our sweet adventure, let’s gather our ingredients! Each one plays a crucial role in crafting these delectable cookies that will surely bring smiles all around.
- 2 ¼ cups all-purpose flour. This staple ingredient forms the backbone of our cookies, providing structure and stability. When choosing flour, look for a good-quality brand that promises consistency; it can make all the difference in texture! If you’re feeling adventurous or want to tweak this recipe slightly, you can substitute half of it with whole wheat flour for a nuttier flavor profile.
- 1 teaspoon baking soda. This little powerhouse is essential for leavening our cookies. As it reacts with the molasses in our recipe during baking, it helps produce those lovely puffy shapes we adore in baked goods. Always check that your baking soda is fresh—an expired box won’t give you the lift you need!
- 2 teaspoons ground ginger. Oh, how I love ginger! Its warm, spicy notes are what give these cookies their signature flavor. Freshly ground ginger can elevate your cookies even further if you’re up for it—just be cautious as its potency can surprise you! You’ll find its aromatic qualities dance beautifully when combined with other spices.
- 1 teaspoon ground cinnamon. Cinnamon brings not only sweetness but also depth to our cookie’s flavor profile—it’s like wrapping yourself in a cozy blanket on a chilly day! Opt for Ceylon cinnamon if possible; it has a delicate sweetness compared to Cassia cinnamon.
- ½ teaspoon ground nutmeg. Nutmeg adds that warm undertone which makes every bite feel like a gentle embrace from Grandma’s kitchen. Use it sparingly; its strong flavor can dominate if you’re not careful! A fresh nutmeg grater can bring out its vibrant aroma beautifully.
- ¼ teaspoon ground cloves. Cloves offer an intense warmth that rounds out our spice medley perfectly; just remember that less is more here! A pinch goes a long way in adding complexity without overwhelming other flavors.
- ½ teaspoon salt. Don’t underestimate salt’s role—it enhances all other flavors present in your cookies! A fine sea salt works wonders here because it dissolves easily while providing balanced seasoning throughout each bite.
- ¾ cup unsalted butter, softened at room temperature. This ingredient is crucial as it contributes richness and aids in creating that beautiful tender crumb we crave in baked treats. Make sure it’s softened but not melted—too much heat here means greasy cookies instead of light ones!
- ½ cup granulated sugar. Sweetness plays an important role in balancing flavors while also aiding in browning during baking—the perfect touch for achieving those golden edges so desirable in cookies!
- ½ cup brown sugar, packed tightly into your measuring cup (don’t skip this!). The molasses content enhances moisture while imparting deeper flavors than granulated sugar alone could provide—a true gem for any baker!
- 1/3 cup molasses. What makes these cookies so special? It’s definitely this liquid gold! Molasses brings both moisture and depth; its rich flavor pairs beautifully with spices while also giving our cookies that classic dark color we love so much.
- 1 large egg. Eggs bind ingredients together while contributing tenderness—the glue holding everything together into cookie perfection!
- 1 teaspoon vanilla extract. Vanilla adds warmth and elevates sweetness—it’s essential for rounding out those bold flavors dancing together harmoniously within each cookie!
- Cranberry jam (for filling)—the star performer! The tartness cuts through the sweetness beautifully while providing a lush jewel-like appearance on top—a visual feast as much as a delicious treat!
- Additional granulated sugar (for rolling)—this final touch adds extra sparkle to each cookie before baking—it might seem small but trust me—it’s non-negotiable when seeking those Instagram-worthy treats!
Equipment You’ll Need:
Before we embark on our baking journey, let’s make sure we’ve got all our trusty tools ready to assist us along the way! Having the right equipment not only streamlines the process but also enhances your overall experience—after all, who doesn’t enjoy working efficiently?
- Mixing bowls (both medium-sized and large). These will be essential companions as we combine dry ingredients separately from wet ones before merging them seamlessly together—think of them as your trusty sidekicks helping create magic!
- Whisk or electric mixer—either one will do! Whisks are great for blending dry ingredients quickly while mixers save time on creaming butter and sugars until fluffy perfection occurs—choose according to your comfort level!
- Rubber spatula—they’re perfect for scraping down sides when combining batters ensuring nothing gets left behind—every bit counts toward achieving delicious results!
- Baking sheets lined with parchment paper or silicone mats provide non-stick surfaces while promoting even baking—a must-have to prevent any unwanted sticking disasters mid-bake.
Now that we have gathered our ingredients and equipment let’s move on to preparing these delicious Gingerbread Thumbprint Cookies with Cranberry Jam!
Step 1: Preheat Your Oven
First things first: preheating your oven is an absolute must! Set it to 350°F (175°C) at least ten minutes before you plan on sliding those beauties inside so they start off right from moment one—as soon as they hit hot air magic happens! While waiting patiently (which I know can feel eternal!), line two baking sheets with parchment paper or silicone mats—you want them ready to catch those fresh-out-of-the-oven gems without any sticky situations arising later on.
Step 2: Whisk Together Dry Ingredients
In a medium bowl, whisk together all-purpose flour, baking soda, ground ginger,cinnamon,nutmeg cloves,and salt until evenly blended—you want everything nicely incorporated here so no spice surprises await you later! This step is crucial because combining dry components thoroughly ensures every cookie has consistent flavor throughout—and who wants uneven bites? Once mixed well enough set aside—the next steps are where real excitement begins!
Step 3: Cream Butter & Sugars
In another large mixing bowl beat softened butter along with granulated sugar and brown sugar until creamy & fluffy—it’ll take about two minutes using an electric mixer on medium speed (or longer if doing by hand). This process known as creaming incorporates air into fat which leads us toward light-textured cookies once baked—a dream come true indeed! You’re looking for pale yellow color combined smoothly without lumps remaining visible at end—trust me when I say patience pays off here too since rushing results may yield denser treats instead!
Step 4: Add Molasses & Egg
Once creamed properly mix molasses carefully followed by egg along with vanilla extract until fully combined again scraping down sides frequently—you’ll notice mixture becoming richer darker due its addition now boasting deeper complexities coming forth already shouting “taste me!” Don’t fret about overmixing yet—we just want everything uniformed nicely before introducing those dry elements back into play soon afterward.
Now we’re ready to continue crafting these delightful Gingerbread Thumbprint Cookies with Cranberry Jam—we’ve laid such wonderful groundwork so far! Each step builds upon another bringing forth layers upon layers enriching textures ultimately culminating into something truly extraordinary worth celebrating every single bite taken joyfully shared amongst loved ones gathered near heartwarming moments ahead… Let’s keep going—I promise your efforts will be rewarded beyond measure once complete!
Step 5: Creaming the Butter and Sugars to Perfection
Now, let’s dive into one of the most magical moments in baking—creaming the butter and sugars! In your large mixing bowl, combine your softened unsalted butter, granulated sugar, and brown sugar. The key here is to use room temperature butter; this ensures that it blends seamlessly with the sugars to create a light and airy mixture that will serve as the foundation for our cookies. Using either a hand mixer or stand mixer fitted with a paddle attachment, beat these ingredients together on medium speed for about 3-4 minutes. You’re looking for that perfect creamy texture where the mixture is fluffy and pale—this is crucial because it traps air that will help our cookies rise beautifully in the oven. Trust me on this; if you rush through this step, you might end up with denser cookies that lack that delightful cakey quality we all love.
Once you’ve achieved that luscious creaminess, it’s time to add in the molasses, egg, and vanilla extract. These ingredients contribute not only depth of flavor but also moisture, which is non-negotiable for keeping our cookies soft and chewy. Mix until everything is combined thoroughly, ensuring no streaks of butter remain visible; this step builds a cohesive dough that will yield truly extraordinary results. I always find myself excited at this stage—the aroma of vanilla wafting through my kitchen makes me feel like I’m being wrapped in a warm hug!
Step 6: Bringing It All Together
With your wet ingredients perfectly blended, it’s time to introduce our dry ingredients into the mix! Carefully add your pre-measured flour mixture—made up of all-purpose flour, baking soda, ginger, cinnamon, nutmeg, cloves, and salt—into the bowl with your wet mix. This part requires a gentle touch; using a spatula or wooden spoon, fold in those dry ingredients until just combined. It’s important not to overmix at this stage as doing so can develop the gluten in the flour too much and lead to tough cookies instead of tender ones. Remember: we want to maintain that beautiful balance between soft and chewy.
As you fold everything together, you’ll notice how the dough starts coming together into one cohesive mass. It may feel a bit sticky at first—that’s completely normal! If you’ve done everything right thus far (and I know you have!), you’re well on your way to creating something truly special. Once you see no visible flour remnants left in the bowl and everything appears well-mixed yet still slightly lumpy—that’s your cue to stop! At this point, take a moment to appreciate how each ingredient interacts in harmony; it’s like witnessing a symphony of flavors come alive.
Step 7: The Power of Patience – Chilling Your Dough
Ahh… now comes an essential step many bakers overlook—chilling your dough! After gently mixing everything together into a cohesive mass (I can hear your excitement!), cover your bowl tightly with plastic wrap or transfer it into an airtight container and pop it into the refrigerator for about 15-20 minutes. Now you might be wondering why on earth would we take such a detour? Well, let me tell you: chilling the dough allows it to firm up slightly which makes it easier to handle when rolling into balls later. More importantly, it helps deepen those flavors while preventing them from spreading too much during baking.
During chilling time (which honestly feels like an eternity when you’re eager), I often find myself daydreaming about how incredible those Gingerbread Thumbprint Cookies with Cranberry Jam are going to taste! So resist the urge to skip this step; it’s worth every second as it sets us up for success later on. When you pull out your chilled dough after waiting patiently (you can do this!), give it a light squeeze—it should feel firmer yet still pliable enough for shaping.
Step 8: Rolling Into Sweet Perfection
Now that our dough has chilled beautifully—we’re ready for one of my favorite parts: rolling! Grab tablespoon-sized portions of dough using either a cookie scoop or simply your hands—this is where we get down and personal with our cookie creation! Roll each portion gently between your palms until they form smooth little balls; they should feel soft yet sturdy—a tactile reminder of what’s coming next! To add a delightful crunch and extra sweetness on top of these gems before baking begins, roll each ball in granulated sugar. This not only enhances their sweetness but creates a lovely sugary crust once baked that contrasts beautifully against our spiced gingerbread base.
Once rolled and coated in sugar, place these delightful little spheres onto your prepared baking sheets lined with parchment paper (this keeps things neat and makes cleanup easy!). Be sure to leave ample space between them since they will spread slightly during baking—about 2 inches works perfectly here! Now comes perhaps my favorite part: making those signature thumbprints! Using either your thumb or the back of a measuring spoon—whatever feels more comfortable for you—gently press down into each cookie ball until you’ve created an indentation deep enough to hold our cranberry jam filling. Don’t rush this step; think of it as creating little cozy nooks just waiting for some jammy goodness!
Conclusion:
As we wrap up this delightful journey through making Gingerbread Thumbprint Cookies with Cranberry Jam, I hope you’re feeling as excited as I am about diving into this scrumptious recipe! From the moment you start mixing those aromatic spices to when you take that first bite of warm cookie filled with luscious cranberry jam, every step is utterly intoxicating. The combination of ginger’s warmth mingling with cinnamon’s sweetness and the slight tartness from the jam creates a symphony of flavors that dances across your palate. It’s truly extraordinary how such simple ingredients can deliver such profound satisfaction.
This recipe is not just about taste; it embodies joy and connection. Whether you’re baking for a festive gathering or just because you deserve a treat, these cookies shine in every scenario—from cozy holiday parties to an afternoon pick-me-up during busy weekdays. Imagine pulling these beauties from the oven, their edges lightly golden and enticingly fragrant—it’s an experience that warms your heart as much as it delights your senses!
For serving suggestions, picture savoring one alongside a cup of steaming chai tea or perhaps dipping it into velvety hot cocoa—the combination is pure bliss! Or maybe share them at your next gathering; they make perfect gifts packaged in pretty boxes tied with ribbon. You could even get creative by pairing them with creamy vanilla ice cream or drizzling them with white chocolate for a truly decadent experience.
Feeling adventurous? This recipe is wonderfully adaptable! You can swap out cranberry jam for raspberry or apricot preserves if you’re looking for a twist—each variation brings its own unique flair, elevating these thumbprint cookies while still holding onto that beloved gingerbread essence. So go ahead, try experimenting and discovering new flavor profiles; I can’t wait to hear what delicious combinations you create! Share your experiences with me—I’d love nothing more than to connect over our shared passion for baking.
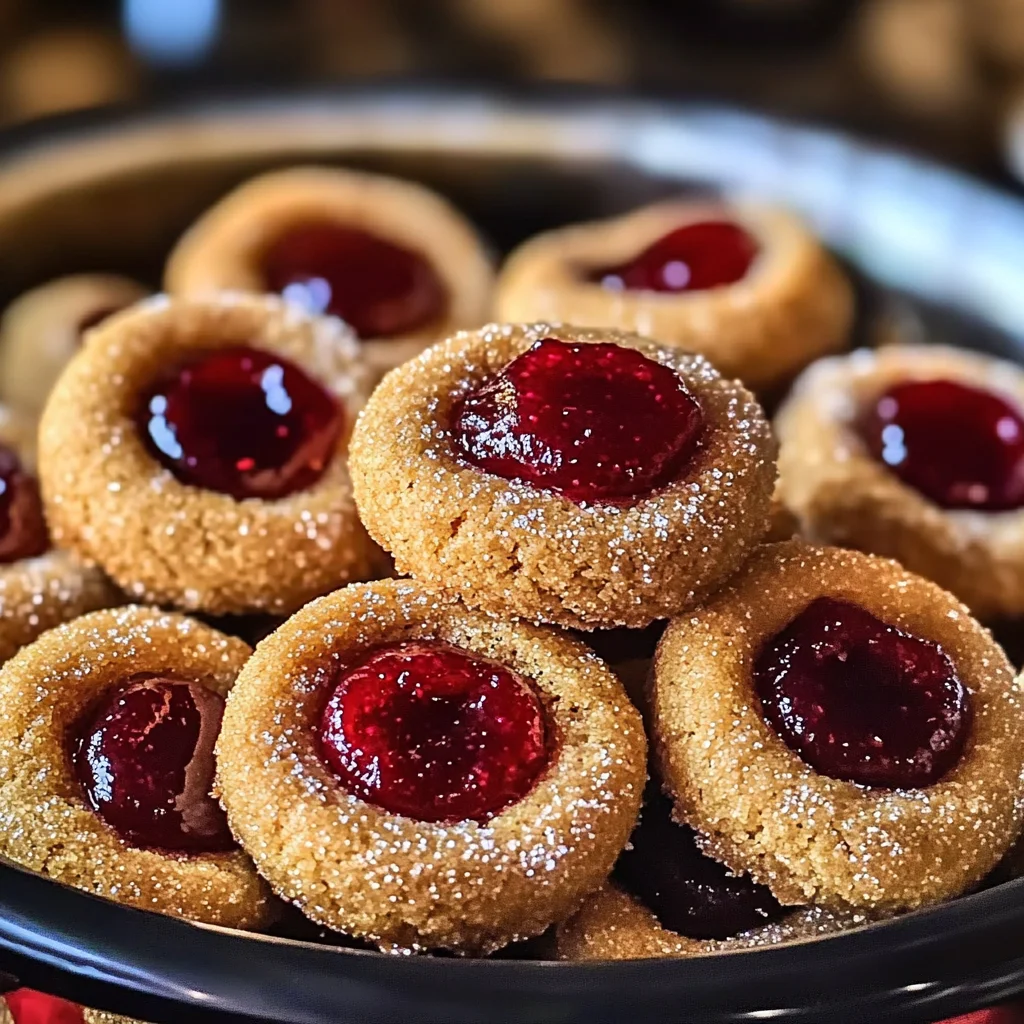
Gingerbread Thumbprint Cookies with Cranberry Jam
Gingerbread Thumbprint Cookies with Cranberry Jam are a delightful holiday treat that combines the warm, aromatic spices of gingerbread with the tart sweetness of cranberry jam. These cookies are not just a dessert; they evoke memories of festive gatherings and cozy evenings spent with loved ones. With their soft, chewy texture and vibrant jam filling, they make for a perfect addition to any holiday spread or as a thoughtful gift. Easy to prepare and irresistibly delicious, these cookies will quickly become a staple in your baking repertoire.
- Prep Time: 20 minutes
- Cook Time: 15 minutes
- Total Time: 35 minutes
- Yield: Makes about 24 cookies 1x
- Category: Dessert
- Method: Baking
- Cuisine: American
Ingredients
- 2 ¼ cups all-purpose flour
- 1 teaspoon baking soda
- 2 teaspoons ground ginger
- 1 teaspoon ground cinnamon
- ½ teaspoon ground nutmeg
- ¼ teaspoon ground cloves
- ½ teaspoon salt
- ¾ cup unsalted butter (softened)
- ½ cup granulated sugar
- ½ cup brown sugar (packed)
- 1/3 cup molasses
- 1 large egg
- 1 teaspoon vanilla extract
- Cranberry jam (for filling)
- Additional granulated sugar (for rolling)
Instructions
- Preheat your oven to 350°F (175°C) and line baking sheets with parchment paper.
- In a medium bowl, whisk together flour, baking soda, ginger, cinnamon, nutmeg, cloves, and salt.
- In a large bowl, cream together the softened butter, granulated sugar, and brown sugar until light and fluffy.
- Mix in molasses, egg, and vanilla extract until fully combined.
- Gradually fold the dry ingredients into the wet mixture until just combined.
- Chill the dough for about 15–20 minutes in the refrigerator.
- Roll tablespoon-sized portions of dough into balls, then coat in granulated sugar.
- Place on prepared baking sheets and create an indentation in each ball using your thumb.
- Fill each indentation with cranberry jam.
- Bake for 12–15 minutes until edges are golden but centers remain soft.
Nutrition
- Serving Size: 1 cookie (30g)
- Calories: 120
- Sugar: 10g
- Sodium: 60mg
- Fat: 5g
- Saturated Fat: 3g
- Unsaturated Fat: 2g
- Trans Fat: 0g
- Carbohydrates: 17g
- Fiber: <1g
- Protein: <1g
- Cholesterol: <10mg