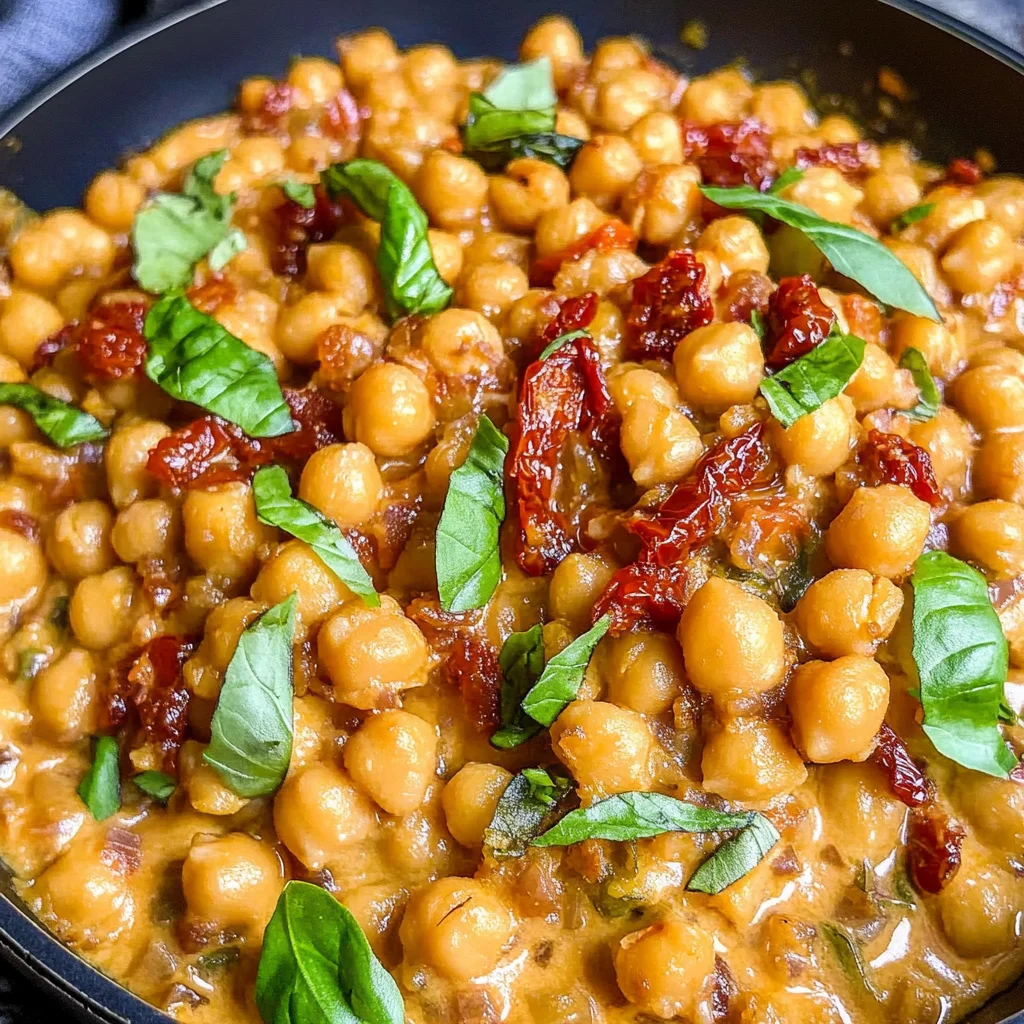
Marry Me Chickpeas
There’s a certain magic that happens in the kitchen when the aroma of sautéed garlic fills the air, mingling with the warmth of olive oil and spices. It’s almost like a warm embrace, wrapping you up in an inviting scent that beckons you to come closer, to taste, to share. This is precisely how it feels when you make Marry Me Chickpeas—a dish that’s not merely about feeding your body but nourishing your soul. Imagine a creamy tomato-based sauce enveloping tender chickpeas, all coming together in a symphony of flavors that could quite literally sweep anyone off their feet. Seriously, I’m not joking when I say you just might get a proposal out of it; it’s that good!
The beauty of this recipe lies not only in its divine taste but also in its beautiful simplicity. With just 20 minutes from start to finish, it’s perfect for those weeknights when time is scarce yet your craving for comfort food is immense. But let me assure you, though quick and easy, there’s nothing lacking in flavor or satisfaction here. The combination of creamy coconut milk and rich tomato paste creates a luscious sauce that perfectly complements the heartiness of chickpeas. Trust me on this one: once you’ve had Marry Me Chickpeas, you’ll find yourself returning to this recipe again and again—not just because it’s easy, but because it’s utterly irresistible.
Ingredients:
As we embark on this culinary journey together, let’s take a moment to appreciate each ingredient’s role in creating our masterpiece. Each component has been carefully chosen to build layers of flavor and texture that will leave your taste buds dancing with joy.
- 2 tablespoons olive oil. This liquid gold is more than just a cooking fat; it serves as the foundational layer for our dish. Olive oil not only imparts a lovely richness but also helps sauté our garlic until fragrant—this step is absolutely paramount as burnt garlic can ruin an entire dish! When shopping for olive oil, look for extra virgin varieties for their superior flavor and health benefits. If you’re out of olive oil, avocado oil can be a great substitute due to its high smoke point and mild taste.
- 2 garlic cloves, crushed. Ah, garlic—the aromatic superstar of many cuisines! Crushing garlic releases its essential oils and juices, enhancing its pungent flavor which infuses beautifully into our dish. The goal here is to sauté it until golden without burning; even a minute too long can lead to bitterness. Fresh garlic makes all the difference; if using pre-minced options, be aware they often contain preservatives that alter the fresh taste we are after.
- 1/2 tablespoon Italian seasoning. This blend typically includes herbs like oregano, basil, thyme, and rosemary—an aromatic quartet that elevates any savory dish! The beauty here lies in its convenience; instead of measuring multiple herbs separately, this mix brings them together harmoniously in one dash. If you don’t have Italian seasoning on hand or prefer customization, feel free to use individual herbs according to your preference!
- 1/2 teaspoon red chili flakes. Spice lovers rejoice! A sprinkle of red chili flakes adds just enough heat to awaken your palate without overpowering the other flavors at play. It’s crucial not to skip this if you’re looking for depth; the little kick from these flakes will make your dish sing! If you’re sensitive to spice or cooking for someone who is, consider adjusting the amount according to your taste.
- 1/4 teaspoon ground black pepper. This humble ingredient might seem insignificant at first glance, but freshly cracked black pepper adds an essential layer of warmth and complexity that enhances every bite. Always opt for whole peppercorns when possible; grinding them fresh releases their robust flavor profile more effectively than pre-ground versions.
- 2 tablespoons tomato paste. Tomato paste brings concentrated sweetness and acidity—a balance that pulls all flavors together beautifully! When added early in the cooking process as we’re doing here, it caramelizes slightly while melding with garlic and spices—creating an utterly intoxicating base for our sauce.
- 1/2 cup (30 g) sun-dried tomatoes, sliced. These little bursts of flavor are packed with sweetness and umami! Sun-dried tomatoes elevate our chickpeas by adding a chewy texture along with rich tomato flavor that complements the fresh ingredients wonderfully. Make sure to soak them if they’re dry-packed or choose those preserved in oil for extra moisture and flavor.
- 1 teaspoon fresh thyme. Fresh herbs bring brightness unlike anything dried can achieve! Thyme’s earthy notes add warmth that beautifully balances out our creamy sauce while also providing some freshness amidst all those hearty ingredients—all important aspects when creating depth within a dish.
- 2 cans (14 oz / 400 g) chickpeas, drained and rinsed. Chickpeas are the star attraction here—they’re hearty enough to stand up against strong flavors while also being incredibly nutritious! By rinsing them well before adding them into our skillet, we wash away excess sodium from canned versions while giving them a clean slate ready to soak up all those delicious sauces.
- 1 cup (200 ml) vegetable stock. A flavorful broth forms the backbone of our sauce without taking center stage away from other ingredients! Using vegetable stock instead of plain water ensures we infuse additional layers of savoriness into every spoonful without any animal-derived products present—making this dish perfect for everyone looking for something comforting yet fulfilling!
- 1 cup (200 ml) coconut milk. This ingredient is truly magical—it adds creaminess that makes our sauce luxurious while imparting subtle sweetness as well! Always go for full-fat coconut milk if you want truly indulgent results; light versions simply don’t deliver quite the same richness! If coconut isn’t your thing or you need an alternative due to allergies or preferences—oat milk or cashew cream could be solid substitutes!
- 6-8 fresh basil leaves, roughly shredded. Fresh basil adds vibrant color along with its signature sweet herbal notes towards the end of cooking—trust me when I say it brightens everything up like nothing else can! Just remember not chop too finely as we want those lovely bits floating throughout our dish rather than vanishing entirely!
- Salt and freshly ground black pepper to taste. Last but certainly not least; seasoning is non-negotiable! Adjusting these elements lets us refine flavors further until everything melds together beautifully on our palates—always remember: tasting as you go will lead toward perfection!
Equipment You’ll Need:
Having the right tools at your disposal makes every cooking experience smoother—and believe me when I say it allows creativity to flow freely without hindrance! While these items may not be ingredients, they serve as essential partners in crafting something wonderful.
- Large skillet – A wide skillet allows plenty of surface area for sautéing ingredients evenly while providing space necessary for simmering once we’ve added liquids later on—look for non-stick options if possible since they help avoid sticking issues especially with creamier sauces!
- Wooden spoon – This trusty tool is ideal for stirring ingredients while they’re sizzling away without risking damage like metal utensils might cause against non-stick surfaces—we want every bit inside there mixed thoroughly so flavors meld perfectly together!
- Measuring spoons/cups – Precision matters! Accurately measuring out each ingredient ensures consistent results every time we recreate this delightful recipe—it may seem tedious but trust me: having exactly what each element calls for keeps things balanced throughout cooking process leading toward delicious outcomes every single time!
Preparing the Marry Me Chickpeas
Step 1: Sautéing Aromatics
To begin crafting our Marry Me Chickpeas masterpiece, heat up your large skillet over medium heat before adding those two glorious tablespoons of olive oil into it—a moment filled with anticipation awaits us as we prepare aromatic foundations upon which everything else will build atop beautifully! As soon as that shimmering liquid hits warmed pan surface—you’ll notice enticing fragrances waft through air almost immediately—this step sets off fireworks within kitchen atmosphere so don’t rush through this part either; patience pays off handsomely here so allow around 1-2 minutes worth time till aromas become utterly intoxicating before proceeding ahead!
Step 2: Infusing Flavors
With garlic now fragrant after sautéing gently till golden brown—we’ll introduce additional seasonings next by stirring in half tablespoon Italian seasoning alongside those fiery red chili flakes plus pinch ground black pepper too—all equally critical components contributing depth alongside balance amongst flavors found here! Allow these spices mingle with previous additions keeping attention focused closely during next minute spent over heat allowing oils release their essence fully into mixture—which leads directly into next exciting phase ahead…
Step 3: Building Up Our Base
Now’s where things truly start heating up (in both senses!) as we’ll incorporate two tablespoons tomato paste directly into skillet mixing everything thoroughly until each spice becomes enveloped within rich reddish hue seen emerging forth from paste itself—it’s crucial at this juncture not just visually captivating but also structurally sound since blending pastes well allows desired caramelization occur later during simmer phase leading towards luscious result awaiting us all shortly thereafter…
Step 4: Adding Chickpeas & Simmering
Next comes one of my favorite parts—the introduction of sun-dried tomatoes paired harmoniously alongside freshly harvested thyme plus two cans drained/rinsed chickpeas promptly following suit alongside vegetable stock—we’re talking about texture galore alongside vibrant colors filling pans now too… So let’s bring everything bubbling away gently beneath covered lid giving ample opportunity allow all these components meld seamlessly together over five minutes’ time period whilst keeping watchful eye ensuring nothing burns down below surface level…
Stay tuned as we continue crafting this delightful experience together where love transcends through flavors transforming ordinary moments into extraordinary memories shared around dinner table…
Step 5: Adding the Creamy Goodness
Now that we’ve let our chickpea medley simmer beautifully, it’s time to introduce a truly transformative element: the coconut milk. This isn’t just an afterthought; it’s the secret potion that turns our dish from simply tasty to utterly irresistible. Carefully pour in one cup (200 ml) of coconut milk, allowing its creamy texture to swirl into the vibrant tomato sauce. As you stir, feel that silky consistency enveloping each chickpea, creating a luxurious sauce that’s both rich and comforting. Trust me on this—coconut milk is absolutely paramount here! Its natural sweetness balances the acidity of the tomatoes and adds a depth of flavor that will leave your taste buds dancing. Allow this luscious mixture to simmer for another minute; during this time, you’ll notice how the flavors meld together, creating an intoxicating aroma that will make your kitchen feel like a warm hug.
As you stir, take a moment to appreciate how the color deepens and how the texture transforms into something velvety and inviting. You might be tempted to dive in right away, but resist that urge for just a little longer! This step is crucial because it allows the coconut milk to fully incorporate with the spices and tomatoes, creating a harmonious blend that is nothing short of extraordinary. Keep an eye out for any bubbles forming at the surface—this is your cue that things are heating up just right!
Step 6: The Fresh Herb Finale
Now comes one of my favorite parts: adding fresh basil! This herb is not just a garnish; it’s the finishing touch that elevates Marry Me Chickpeas to new heights. Take six to eight fresh basil leaves and roughly shred them before tossing them into the skillet. The moment those leaves hit the warm sauce, they release their fragrant oils, infusing your dish with an aromatic burst of freshness that’s simply magical. I’ve always been captivated by how basil has this ability to brighten up any meal—it’s like adding sunshine to your plate!
Stir the basil into the sauce gently but thoroughly, allowing those vibrant green flecks to weave through every bit of chickpea goodness. At this point, don’t forget to taste your creation! Season with salt and freshly ground black pepper according to your preference. The balance of flavors should be profound—sweet from the coconut milk, savory from the garlic and spices, and brightened by that fresh basil. Remember, seasoning is not just about making food taste good; it’s about enhancing all those beautiful layers we’ve built so far.
Step 7: Perfectly Plated Presentation
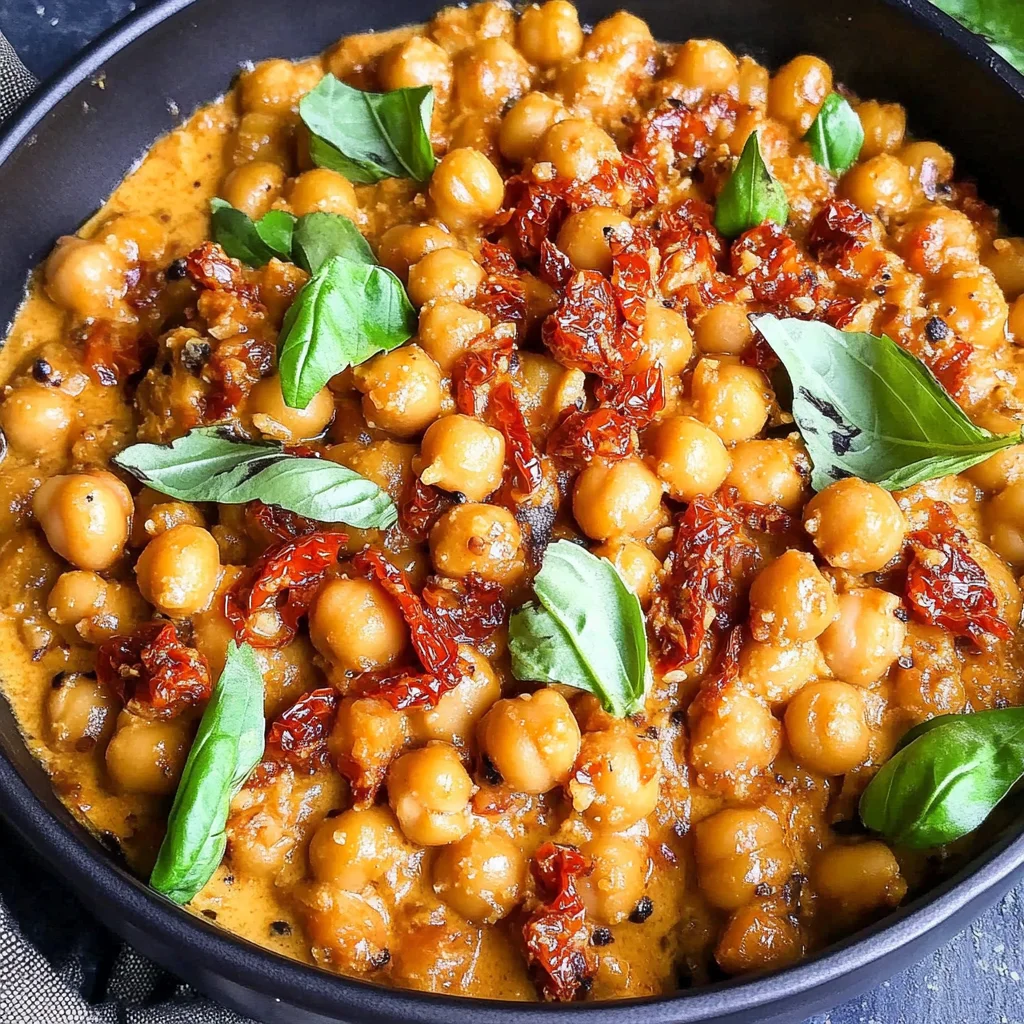
After all this culinary magic in your skillet, it’s time for one last flourish—plating! Scoop generous portions of your Marry Me Chickpeas into bowls or onto plates, taking care not to skimp on the luscious sauce; it’s liquid gold! As you serve this dish, let its colors shine—the reds from tomatoes mingling with golden chickpeas and specks of fresh green basil create a symphony of colors that’s as appealing as it is appetizing.
If you’re feeling particularly fancy (and I encourage you to be!), consider adding a sprinkle of extra fresh basil on top as a lovely garnish or even some toasted pine nuts for an added crunch. The contrast between creamy softness and crunchy texture can take this dish over-the-top in terms of enjoyment. Don’t rush this step! Presentation makes all the difference; food deserves our respect and love at every stage—even at serving time.
Step 8: The Ultimate Taste Test
Before digging in, allow yourself a moment to revel in what you’ve created. This isn’t just food; it’s an experience crafted by your own hands! But let’s not forget about one last essential step: tasting! Take a spoonful and savor everything—the robust flavors mingling together should dance across your palate in perfect harmony. You’ll notice how every single ingredient works together—each chickpea coated in velvety sauce bursting with flavor while hints of garlic linger delightfully on your tongue.
If there’s anything you’d like to adjust—perhaps more seasoning or an extra pinch of chili flakes for heat—now is your chance! Don’t hesitate; trust your instincts because cooking is as much about personal preference as it is about following recipes. If you feel bold enough (and I hope you do), pair this delightful dish with crusty bread or fluffy rice—something substantial enough to soak up all those delicious juices!
Final Touches: Serving Your Marry Me Chickpeas
As you sit down with family or friends—or perhaps even a romantic dinner for two—take pride in knowing that you’ve created something truly special with these Marry Me Chickpeas. With just 20 minutes spent in preparation and cooking, you’ve whipped up a meal that’s not only quick but also deeply satisfying and nourishing.
Don’t forget to share this recipe with loved ones; after all, joy multiplies when shared! Every bite will tell them just how much love went into creating this dish—a heartfelt promise wrapped up in creamy chickpeas bathed in tomato bliss. Enjoy every moment around the table; I promise you’ll be met with smiles all around as everyone savors each delightful mouthful!
Storage and Enjoyment Tips for Your Marry Me Chickpeas
Now that your Marry Me Chickpeas are bubbling away in all their creamy glory, it’s time to talk about how to savor every last bit of this culinary delight! Whether you’re planning to enjoy it right away or save some for later, I promise you’ll want to keep this dish close at hand. The warm, aromatic blend of spices and creamy sauce is just as comforting the next day as it is fresh off the stove. So let’s dive into some practical tips on storing and enjoying your leftover goodness without losing any of that intoxicating flavor.
Storing Leftover Marry Me Chickpeas
To ensure your leftover Marry Me Chickpeas stay as vibrant and delicious as when you first made them, I recommend transferring them into an airtight container. This is crucial because exposure to air can lead to unwanted moisture loss and affect the texture. Store the container in the refrigerator where it can comfortably keep for about 3-4 days. If you’re looking to maintain that rich creaminess, consider placing a slice of bread inside the container; this little trick keeps moisture levels balanced and helps prevent those pesky dried-out bits. When you reheat your chickpeas, they will still taste utterly divine—trust me on this! Gently warming them on the stovetop with a splash of vegetable stock or coconut milk will bring back their silky texture and luscious flavors that might have mellowed during storage.
Freezing Marry Me Chickpeas for Later
If you want to prepare ahead or simply stock up for those busy weeknights, freezing Marry Me Chickpeas is an excellent option! To do this properly, allow your chickpeas to cool completely before transferring them into freezer-safe containers or heavy-duty zip-top bags—be sure to remove as much air as possible before sealing. This way, they can be stored in the freezer for up to three months without sacrificing quality. When you’re ready to enjoy them again, simply thaw overnight in the fridge or heat directly from frozen by adding a little extra vegetable stock or coconut milk while simmering. The convenience of having such a richly flavored dish on hand makes life so much easier and allows you to enjoy that comforting goodness whenever the craving strikes!
Marry Me Chickpeas

Discover the magic of Marry Me Chickpeas—a creamy, tomato-based chickpea dish that’s both comforting and packed with flavor. This recipe combines tender chickpeas with a luscious sauce made from coconut milk, sun-dried tomatoes, and aromatic herbs, making it the perfect quick meal for busy weeknights. Ready in just 20 minutes, this dish is not only easy to prepare but also incredibly satisfying, ensuring you’ll be coming back for seconds (and maybe even a proposal!). Whether served over fluffy rice or alongside crusty bread, Marry Me Chickpeas is destined to become a favorite in your home.
- Prep Time: 10 minutes
- Cook Time: 10 minutes
- Total Time: 20 minutes
- Yield: Serves 4
- Category: Dinner
- Method: Sautéing
- Cuisine: Italian
Ingredients
- 2 tablespoons olive oil
- 2 garlic cloves, crushed
- 1/2 tablespoon Italian seasoning
- 1/2 teaspoon red chili flakes
- 1/4 teaspoon ground black pepper
- 2 tablespoons tomato paste
- 1/2 cup sun-dried tomatoes, sliced
- 1 teaspoon fresh thyme
- 2 cans (14 oz / 400 g) chickpeas, drained and rinsed
- 1 cup vegetable stock
- 1 cup coconut milk
- 6–8 fresh basil leaves, roughly shredded
- Salt to taste
Instructions
- In a large skillet over medium heat, warm the olive oil. Add crushed garlic and sauté until fragrant.
- Stir in Italian seasoning, red chili flakes, and black pepper; cook for another minute.
- Mix in tomato paste, allowing it to caramelize slightly.
- Add sun-dried tomatoes, fresh thyme, chickpeas, and vegetable stock. Simmer for 5 minutes.
- Pour in coconut milk and stir gently. Let simmer for another minute.
- Fold in shredded basil leaves and season with salt to taste.
- Serve hot over rice or with crusty bread.
Nutrition
- Serving Size: 1 cup (240g)
- Calories: 390
- Sugar: 6g
- Sodium: 280mg
- Fat: 20g
- Saturated Fat: 12g
- Unsaturated Fat: 8g
- Trans Fat: 0g
- Carbohydrates: 41g
- Fiber: 11g
- Protein: 11g
- Cholesterol: 0mg